
This is a follow-up to Matt Cooper’s earlier blog post, “Using containerized services in your pipeline“. If you haven’t yet, I encourage you to read that post to understand the new `container` syntax in the pipeline definition.
As a program manager for Azure DevOps, I spend a lot of time speaking with customers about their DevOps practices. In a recent meeting, a development team was excited about Azure Pipelines and our Linux build agents that we manage in Azure, but they needed to build their application on CentOS instead of Ubuntu.
Like text editors, whitespace and the careful placement of curly braces, Linux distributions can be hotly debated among engineers. But one of the great things about Azure Pipelines is that you don’t need to rely on our choice of Linux distribution. You can just bring your own – using containers. It’s easy to create a Docker image that has the exact distribution that you want to run your builds on. Want to build on an older LTS version of Ubuntu like Trusty? No problem. Want to run the very latest RHEL or CentOS? That’s great, too.
Of course, the choice of distribution isn’t just a personal preference: there’s usually a solid technical reason for wanting a CI build on a particular platform. Often you want to perform your build on a system that’s identical — or nearly so — to the system you’re deploying to. And since Azure Pipelines offers a single Linux based platform: Ubuntu 16.04 LTS (the LTS stands for Long-Term Support), this might seem like a problem to you if you wanted to build on a different distribution, like CentOS.
Thankfully, it’s easy to run your build in a CentOS container. And even better than building in a container with the base distribution, you can provide your own container that has the exact version of the dependencies that you want, so there’s no initial step of running apt-get or yum to install your packages.
I’m a maintainer of the libgit2 project and we recently moved over to Azure Pipelines using container builds. The project decided to adopt containers so that we could build on Ubuntu 12.04 (“Trusty”), which is libgit2’s oldest supported platform.
But what if we wanted to build libgit2 on a different distribution? Let’s walk through how to use Azure Pipelines to build this project on the latest CentOS image instead.
Creating an Image
The first thing we need to do is create an image that has our dependencies installed. That begins, of course, with the creation of the Dockerfile.
This description starts with a base Linux distribution image and adds in our dependencies, in much the same way that we used to do on each CI build.
FROM centos:7
RUN yum install -y git cmake gcc make \
    openssl-devel libssh2-devel openssh-server \
    git-daemon java-1.8.0-openjdk-headless
Once the Dockerfile is created, we can build our image:
docker build -t ethomson/libgit2-centos:latest .
And then push it up to Docker Hub:
docker push ethomson/libgit2-centos:latest
Finally, for maintenance and repeatability, we check these Dockerfiles in to a repository once we’ve created them.
Testing that image
One of my favorite things about using containers in my CI build is that I can also use the same containers in my local builds. That way I can make sure that my container is set up exactly how I want it before I push it up to Docker Hub or start my first build with Azure Pipelines.
This keeps the inner loop very tight when you’re preparing your CI system: since everything’s in a container, you can get things working on your local machine without experimenting on the CI system. So there’s no time spent provisioning a VM and no time spent downloading a git repository; it’s all ready to go locally.
The other great thing is that everything’s installed and running within the container. If you have test applications then they stay isolated. In my example, the libgit2 tests will optionally start up a git server and an ssh server. I’m much happier running those in a container than on my actual development box – and I’m lucky enough to work in a company where I’m actually able to start these on my local machine. For developers working in an environment with stricter controls on machine level changes like that, containers provide a fantastic solution.
And with Docker Desktop, you can do this even if you’re using Mac or Windows on your development box and building in a Linux container.
To run our build locally:
docker run \
    -v $(pwd):/src \
    -v $(pwd)/build:/build \
    -e BUILD_SOURCESDIRECTORY=/src \
    -e BUILD_BINARIESDIRECTORY=/build \
    -w /build \
    ethomson/libgit2-centos:latest \
    /src/ci/build.sh
What we’ve done here is mapped the current directory, our git repository, to /src on the container, and a subdirectory called build to the /build directory on the container.
We’ve also set two environment variables, BUILD_SOURCESDIRECTORY and BUILD_BINARIESDIRECTORY. This isn’t strictly necessary, but it’s useful since these are the variables used by the Azure Pipelines build agent. This means you can share your build scripts between a bare metal Azure Pipelines build agent and a container without any changes.
CI/CD in Azure Pipelines
One of the nice features of Azure Pipelines is that you get an actual virtual machine, which means that you can run your own Docker images as part of the CI/CD pipeline.

You can imagine this container as a bit of abstraction over the pipeline. Azure Pipelines will orchestrate multiple container invocations, each picking up where the other left off. Instead of simply invoking the compiler to take your source and build it, you run the compiler inside the container instead. The container is isolated, but since you have your source and binary directories mapped, you capture the output of the build to use in the next stage.
You can do this as coarsely or as fine-grained as you’d like. For libgit2, we have a script that does our build and one that runs our tests. The build script uses cmake within the mapped source directory to discover the container’s environment, configure the build and then run it. The binaries – our library and the tests – will be put in the mapped output directory.
The next step of our build runs the tests, again inside the container. The source and binary directories are mapped just like before, so the test step can pick up where the build step left off. In the example of libgit2, the test script will start some applications that we’ve pre-installed on the container (some network servers that the tests will communicate with) and then run the test applications that we compiled in the build step.
libgit2’s test framework writes a report in JUnit-style XML, which is a common feature in test frameworks, and a feature that Azure Pipelines has native support for. In the next step of the build process, we simply publish that XML so Azure Pipelines can analyze them and display the test results.
Thus, the libgit2 build configuration looks like this:
resources:
  containers:
  - container: centos
    image: ethomson/libgit2-centos:latest

pool:
  vmImage: 'Ubuntu 16.04'

container: centos

steps:
- script: $(Build.SourcesDirectory)/ci/build.sh
  displayName: Build
  workingDirectory: $(Build.BinariesDirectory)
- script: $(Build.SourcesDirectory)/ci/test.sh
  displayName: Test
  workingDirectory: $(Build.BinariesDirectory)
- task: publishtestresults@2
  displayName: Publish Test Results
  condition: succeededOrFailed()
  inputs:
    testResultsFiles: 'results_*.xml'
    mergeTestResults: true
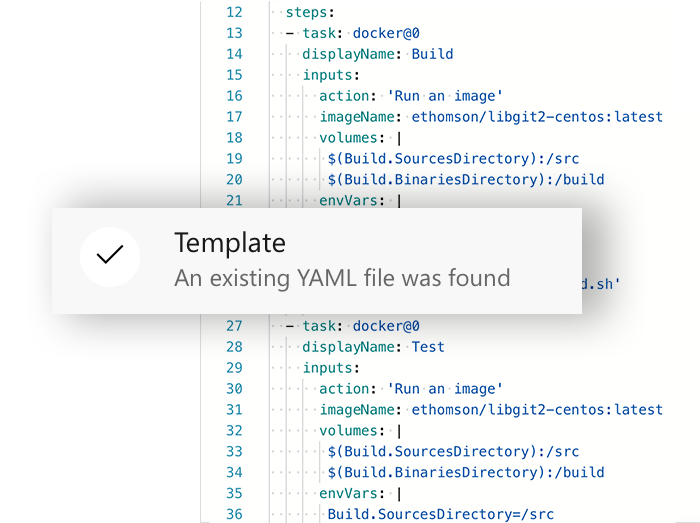
I can check that file right in to my repository – if I name it azure-pipelines.yml and put it at the root of my repo, then Azure Pipelines will detect it during setup and streamline my configuration.
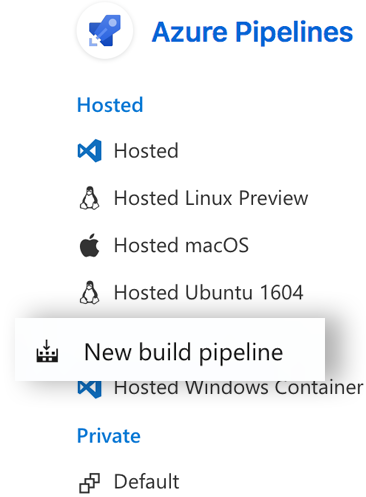
This happens when I set up Azure Pipelines for the first time through the GitHub Marketplace. Or if I’m already an Azure DevOps user, when I set up a new Pipelines Build and select my repository.
Success!…?
I was excited to queue my first build inside a CentOS container but just as quickly dismayed: as soon as it finished, I saw that two of my tests had failed.

But that dismay evaporated quickly and gave way to interest: although nobody wants to see red in their test runs, a failure should be indicative of a problem that needs to be fixed.
Once I started investigating, I realized that these were the SSH tests that were failing. And they were only failing when trying to connect to GitHub. It turns out that the version of the SSH library included in CentOS 7 is – well, it’s a bit old. It’s old enough that it’s only using older ciphers that GitHub has disabled. I’d need to build libgit2 against a newer version of libssh2.
At that point, I updated my Dockerfile to download the newest SSH library, build it and install it:
FROM centos:7
RUN yum install -y git cmake gcc make openssl-devel openssh-server \
    git-daemon java-1.8.0-openjdk-headless
WORKDIR "/tmp"
RUN curl https://www.libssh2.org/download/libssh2-1.8.0.tar.gz \
    -o libssh2-1.8.0.tar.gz
RUN tar xvf libssh2-1.8.0.tar.gz
WORKDIR "/tmp/libssh2-1.8.0"
RUN ./configure
RUN make
RUN make install
ENV PKG_CONFIG_PATH /usr/local/lib/pkgconfig
At this point, I built my new docker image and pushed it up to Docker Hub. Once it was uploaded, I queued my new build. And now all our tests succeed.

This is a wonderful illustration of why it’s so important to my project to build on a variety of systems: not only do we have confidence that we work correctly on many platforms, we also understand the problems that our users might run into and how they can work around those problems.
Success.
Hy, I am trying to create a azure pipeline but i have some issues.
I have docker image on docker hub which i want to run in azure build processes. How can i do this?
This blog or azure tutorials every time build an image from Dockerfile which is taking too much time. Is there any way that i can run my image in build processes without building it?