
// <!–
Create, Connect, and Publish using Visual Studio with Git
–>
By: Andy Lewis and Matthew Mitrik (MS)
In the few days since we announced Visual Studio and Team Foundation Service support for Git, it’s been exciting to see so much interest, along with a lot of great feedback and questions. We will take your feedback to help us guide how we evolve the tools and the service; so please keep it coming. And as for the questions, we hope that you will find in this post some answers to help you make the most of our Git tools in Visual Studio and our Git service in TFS.
Before we begin, let’s recall a key point from Brian Harry:
Both client and server are standard implementations of Git. Our client will work with pretty much any Git repository – local, enterprise, Codeplex, GitHub, BitBucket, …. And TFS will work with pretty much any Git client – existing Git command lines, XCode, Eclipse’s Git support, …. This was a core principle from day 1. This is not about lock in – it’s about providing a good and interoperable Git capability. From Git init VS
In this post we will demonstrate Visual Studio’s flexibility to help you get your work done in the places you need to do it: locally, on TFS, or on a third-party service such as those Brian mentions above.
We’re here today to help you:
- Create new local repositories
- Add an existing local repository
- Clone a remote Git repository to your dev machine
- Publish your local repository
- Manage your connections
- Tell us what you think
Create new local repositories
One of the key advantages of Git is your ability to do more things locally. Visual Studio provides a few convenient ways to create a local repository:
- Create an empty local repository
- Create a new solution under local Git version control
- Put an existing solution under local Git version control
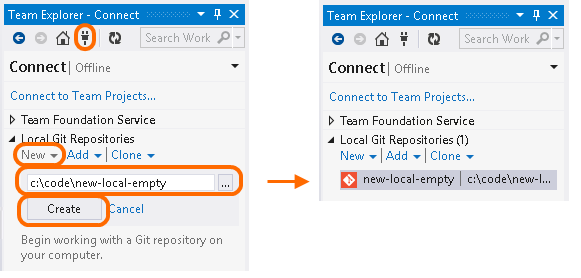
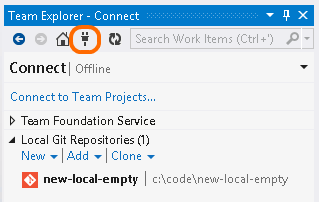
Create an empty local repository
You just want to create an empty local repository. In Visual Studio you can do this in a few seconds.
Go to the Connect page and create the new repository.
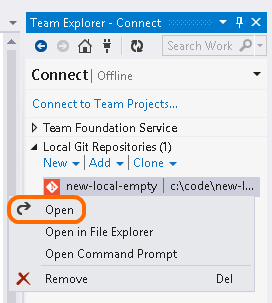
Open the repository. This will set the repo as the active repo in Team Explorer.
Go ahead and commit the default .gitattributes and .gitignore files that Visual Studio created for you. (We’ll talk more about these and other Git settings in a future post).
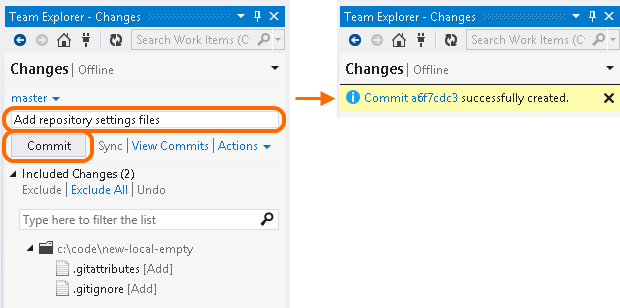
Your new local Git repository is now ready for you to use.
When you are ready, you can publish and share it with your team.
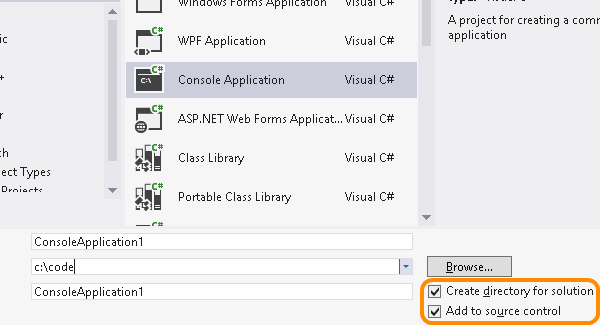
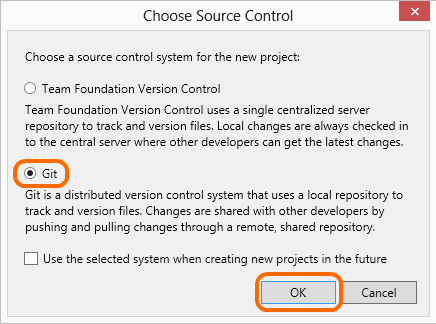
Create a new solution under local Git version control
Whenever you create a new code project, you can put it under local Git version control.
We cover this angle from start to finish in our Welcome Portal tutorial.
Put an existing solution under local Git version control
If you’ve already got a solution in which you’ve been tinkering on your local dev machine, before you tinker any further, why not go ahead and add it to a lightweight local Git version control repository?

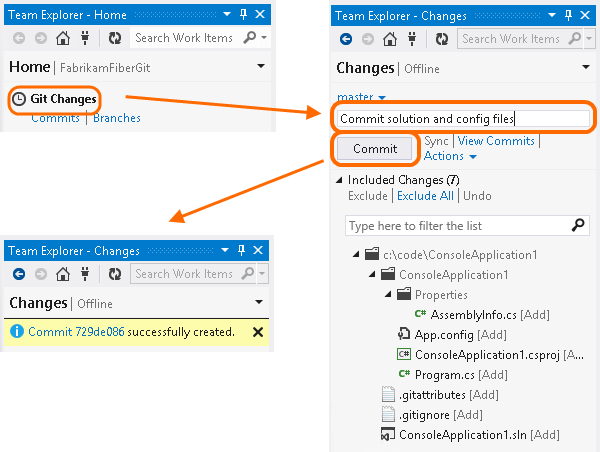
Now that your repository is created, go ahead and commit your files.
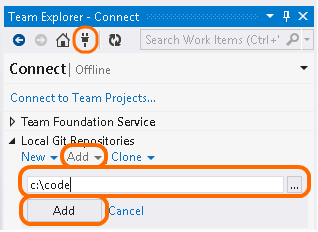
Add an existing local repository
Maybe you’ve got other repositories you’ve been using with other client tools. Regardless of whether the local repo has a remote or not, you can add it and then work with it in Visual Studio. You can add a single repo at a time, or, as we show below, point Visual Studio at a directory that contains multiple repositories and add them all in one shot.
After you add the repository, you can open it and get to work in Visual Studio.
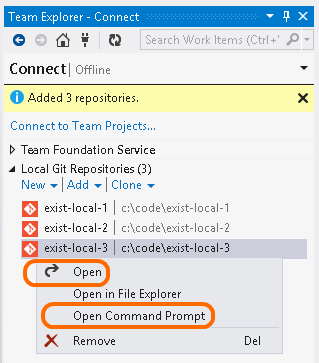
BTW, notice that nifty “Open in Command Prompt” command? Eventually you will likely need it to perform some tasks. If you don’t already have command-line tools installed, you can install some:
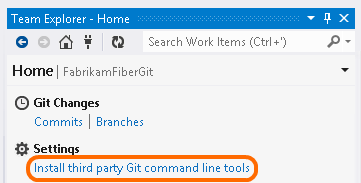
We’ll talk more about common scenarios for using these tools in a future post.
Clone a remote Git repository to your dev machine
Doesn’t matter where your Git repository is hosted: TFS, CodePlex, GitHub, Bitbucket, or somewhere else. You can use Visual Studio to work with it. To begin collaborating with others on code in a remote repository, you clone it to your dev machine.
Clone a TFS Git repository to your dev machine
Whether you are new to a team project or just setting up a new dev machine, to get working in a Git team project, clone it to your dev machine.
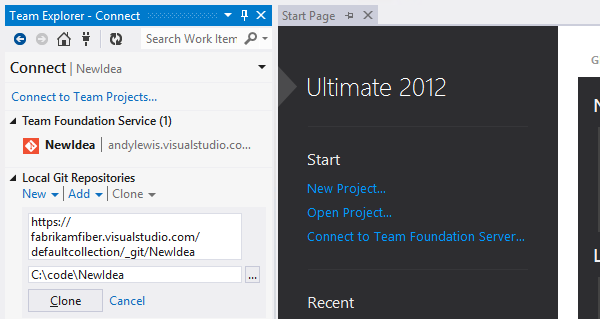
Clone a third-party Git repository to your dev machine
Does your team have some code in GitHub or another service such as CodePlex or Bitbucket? You can clone the code down to your dev machine and get working in Visual Studio.

Publish your local repository
When you are ready to begin sharing some code on your dev machine with others, you publish the branch to the remote repository.
Publish to TFS
You can publish your code into Team Foundation Service.
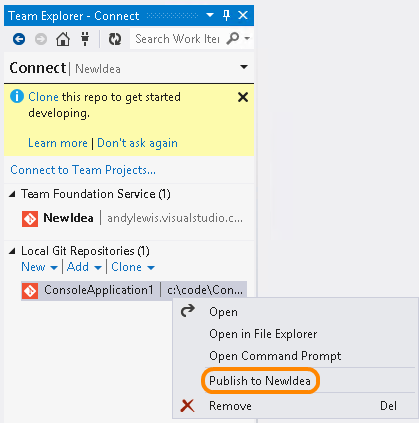
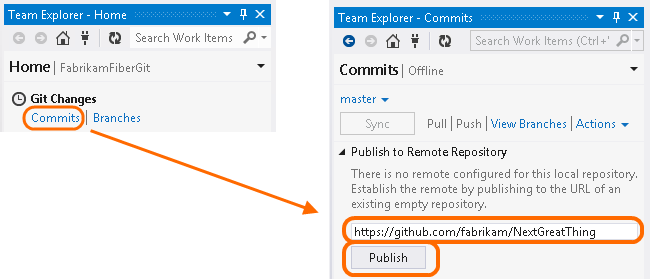
Publish to a third-party service
You can publish your branch to a remote repository hosted on a third-party service such as CodePlex, GitHub, or Bitbucket.
Did you get the “Branch master does not exist” error? Click here.
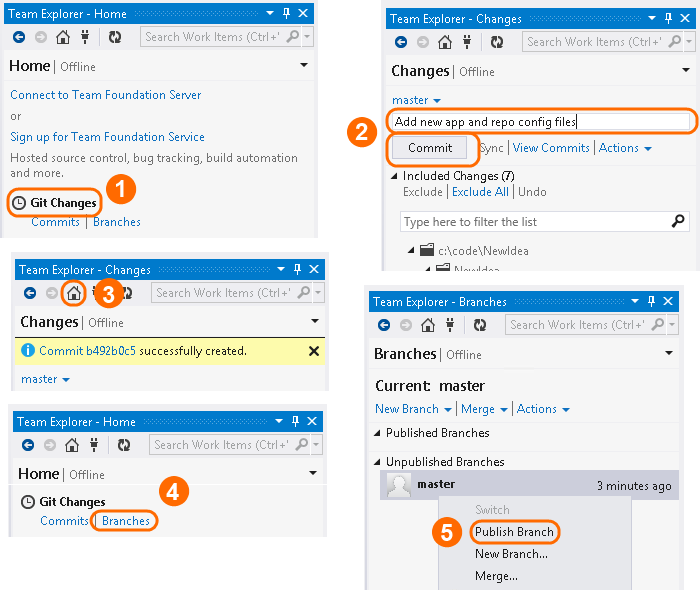
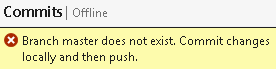 This error occurs when you try to publish a local repository that does not yet have any commits. Getting past this point is no big deal. Just go commit at least one change and then publish the branch.
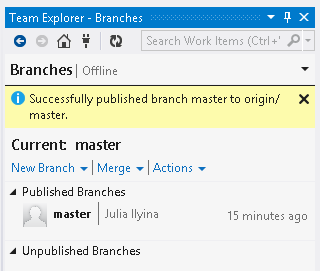
After you publish
Having published your branch, Visual Studio has done two things for you:
- Set the remote of the local repository
- Pushed your active branch (in most cases this is “master”) to the remote repository
After this is done, to collaborate with your team, you can as needed pull their changes and push your changes to the remote repository.
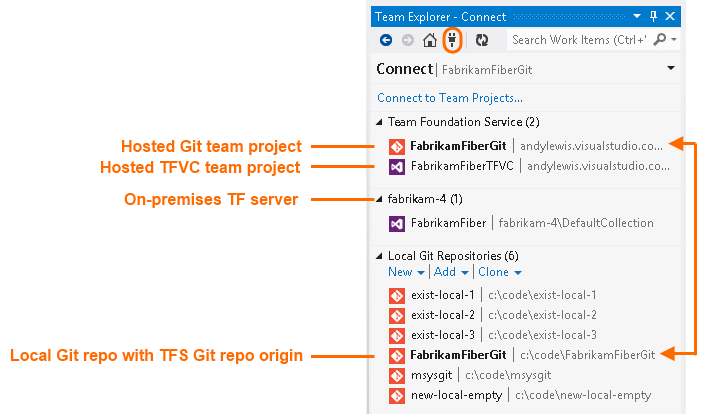
Manage your connections
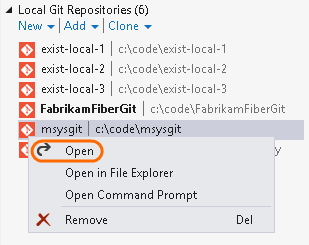
The Connect page is a new feature in Visual Studio 2012 Update 2. From here you can see and manage all the version control repositories you care about.
Just right-click the repository you want to work and then choose Open or another command.
Tell us what you think
We are experimenting with ways to be more agile and effective in delivering guidance to you. We welcome your feedback not only on our new Git capabilities, but also on the content and format of this post. As we noted above, stay tuned for a few more posts coming on topics such as working with command-line tools, and adjusting Git settings. Thanks for your time and for trying out Visual Studio and TFS with Git!
0 comments