
Imagine the following scenario: You created a CI/CD pipeline in Azure DevOps, allowing you to deploy Azure Resources. But instead of just running the deployment, you want to integrate security and compliance validation into the Release pipeline. Some real-life use cases I have seen in the field is temporarily blocking deployments to a specific Azure Region because there are known issues in that region; or your deployment is provisioning infrastructure out of an Infra Stage where you want to validate compliance before running the actual Application Stage deployment.
In this article, I will guide you through making your CI/CD pipeline deployments more intelligent (and powerful) by using Azure DevOps Release Gates (Sometimes called Quality Gates), to only allow a Release to run, when there are no Azure Policy violations getting reported for that deployment.
What you need:
- An Azure Subscription Microsoft Azure: $200 Free Credit
- One or more Azure Policies with specific requirement settings you want to enforce
- An Azure DevOps Release Pipeline
Azure Policy
Azure Policy is a service within Azure, allowing you to define compliance settings to provide governance of your Azure subscriptions. In the example here, I want to block any Azure Resource getting deployed to Azure West Europe region.
If you are not familiar with Azure Policy yet, I would definitely recommend going through the following articles from fellow [Azure Cloud Advocates] [Jay]4 and Steven:
In which they cover Azure Policies extensively, starting from describing what they are, where to find samples, how to write your own and see them in action.
The policy snippet I use for the location setting looks as follows:
"parameters": {
      "listOfAllowedLocations": {
        "type": "Array",
        "metadata": {
          "displayName": "Allowed locations",
          "description": "The list of locations that can be specified when deploying resources.",
          "strongType": "location"
        }
      }
    },
    "policyRule": {
      "if": {
        "allOf": [
          {
            "field": "location",
            "notIn": "[parameters('listOfAllowedLocations')]"
          },
          {
            "field": "location",
            "notEquals": "global"
          },
          {
            "field": "type",
            "notEquals": "Microsoft.AzureActiveDirectory/b2cDirectories"
          }
        ]
      },
      "then": {
        "effect": "deny"
      }
    }
  },
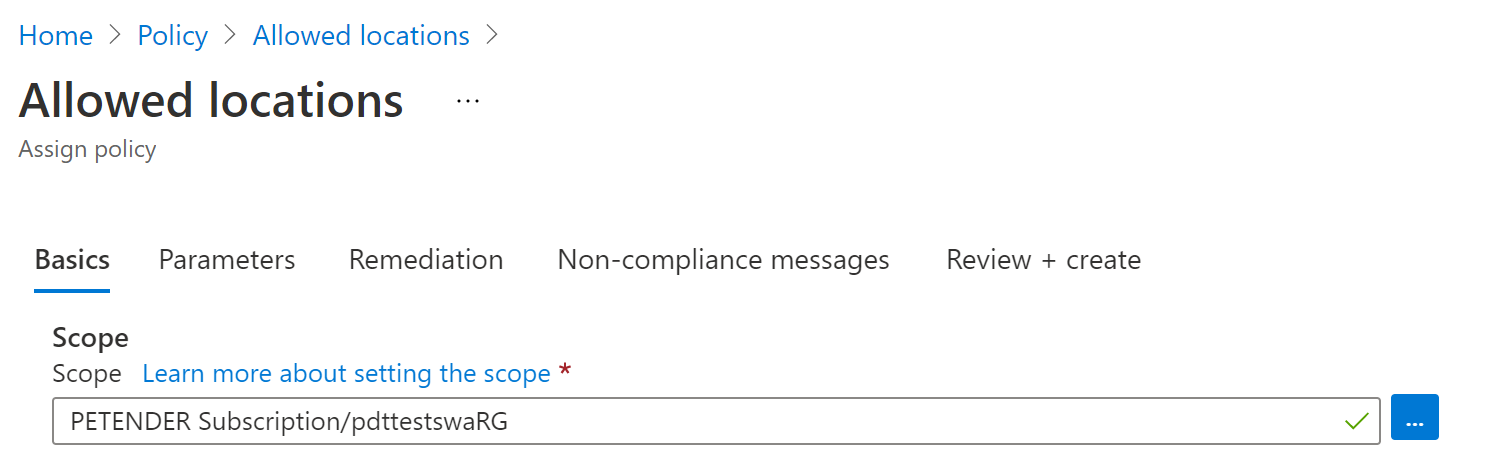
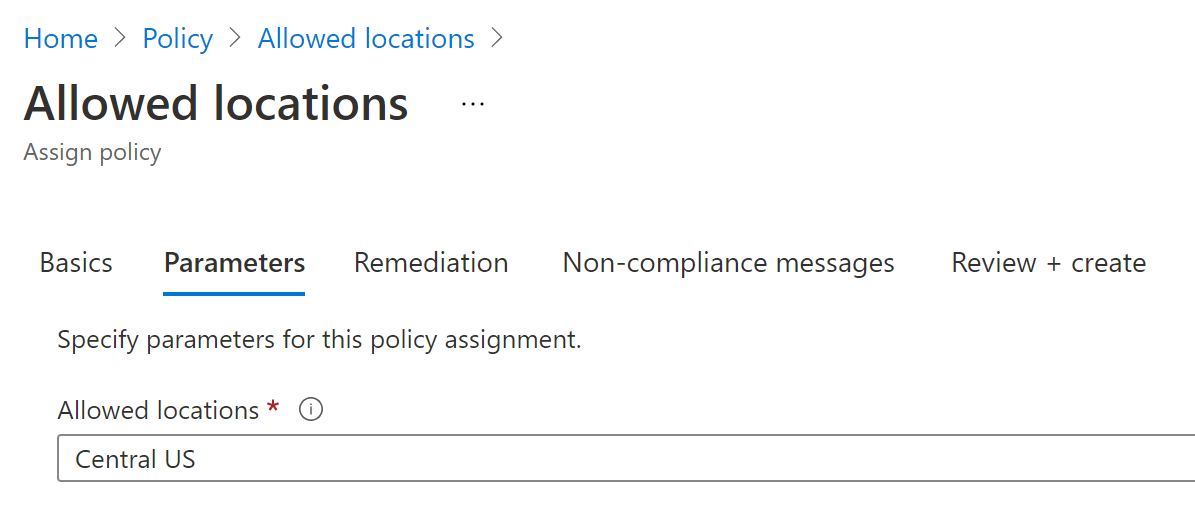
In my example, I created this policy, assigned this to the Resource Group I’m targeting out of the Azure DevOps CI/CD Pipeline, and specified “Central US” as the only allowed region. The configuration in the portal looks like these screenshots:
-
Assigning Azure Policy
-
Specifying the allowed location parameter during assignment
Also note I am using the deny effect here, which means the Azure Policy is blocking any deployment because of compliance violation, but this could also be set to “audit”. (which means Azure Policy is checking compliance, but not bocking anything”.)
Azure DevOps Pipeline
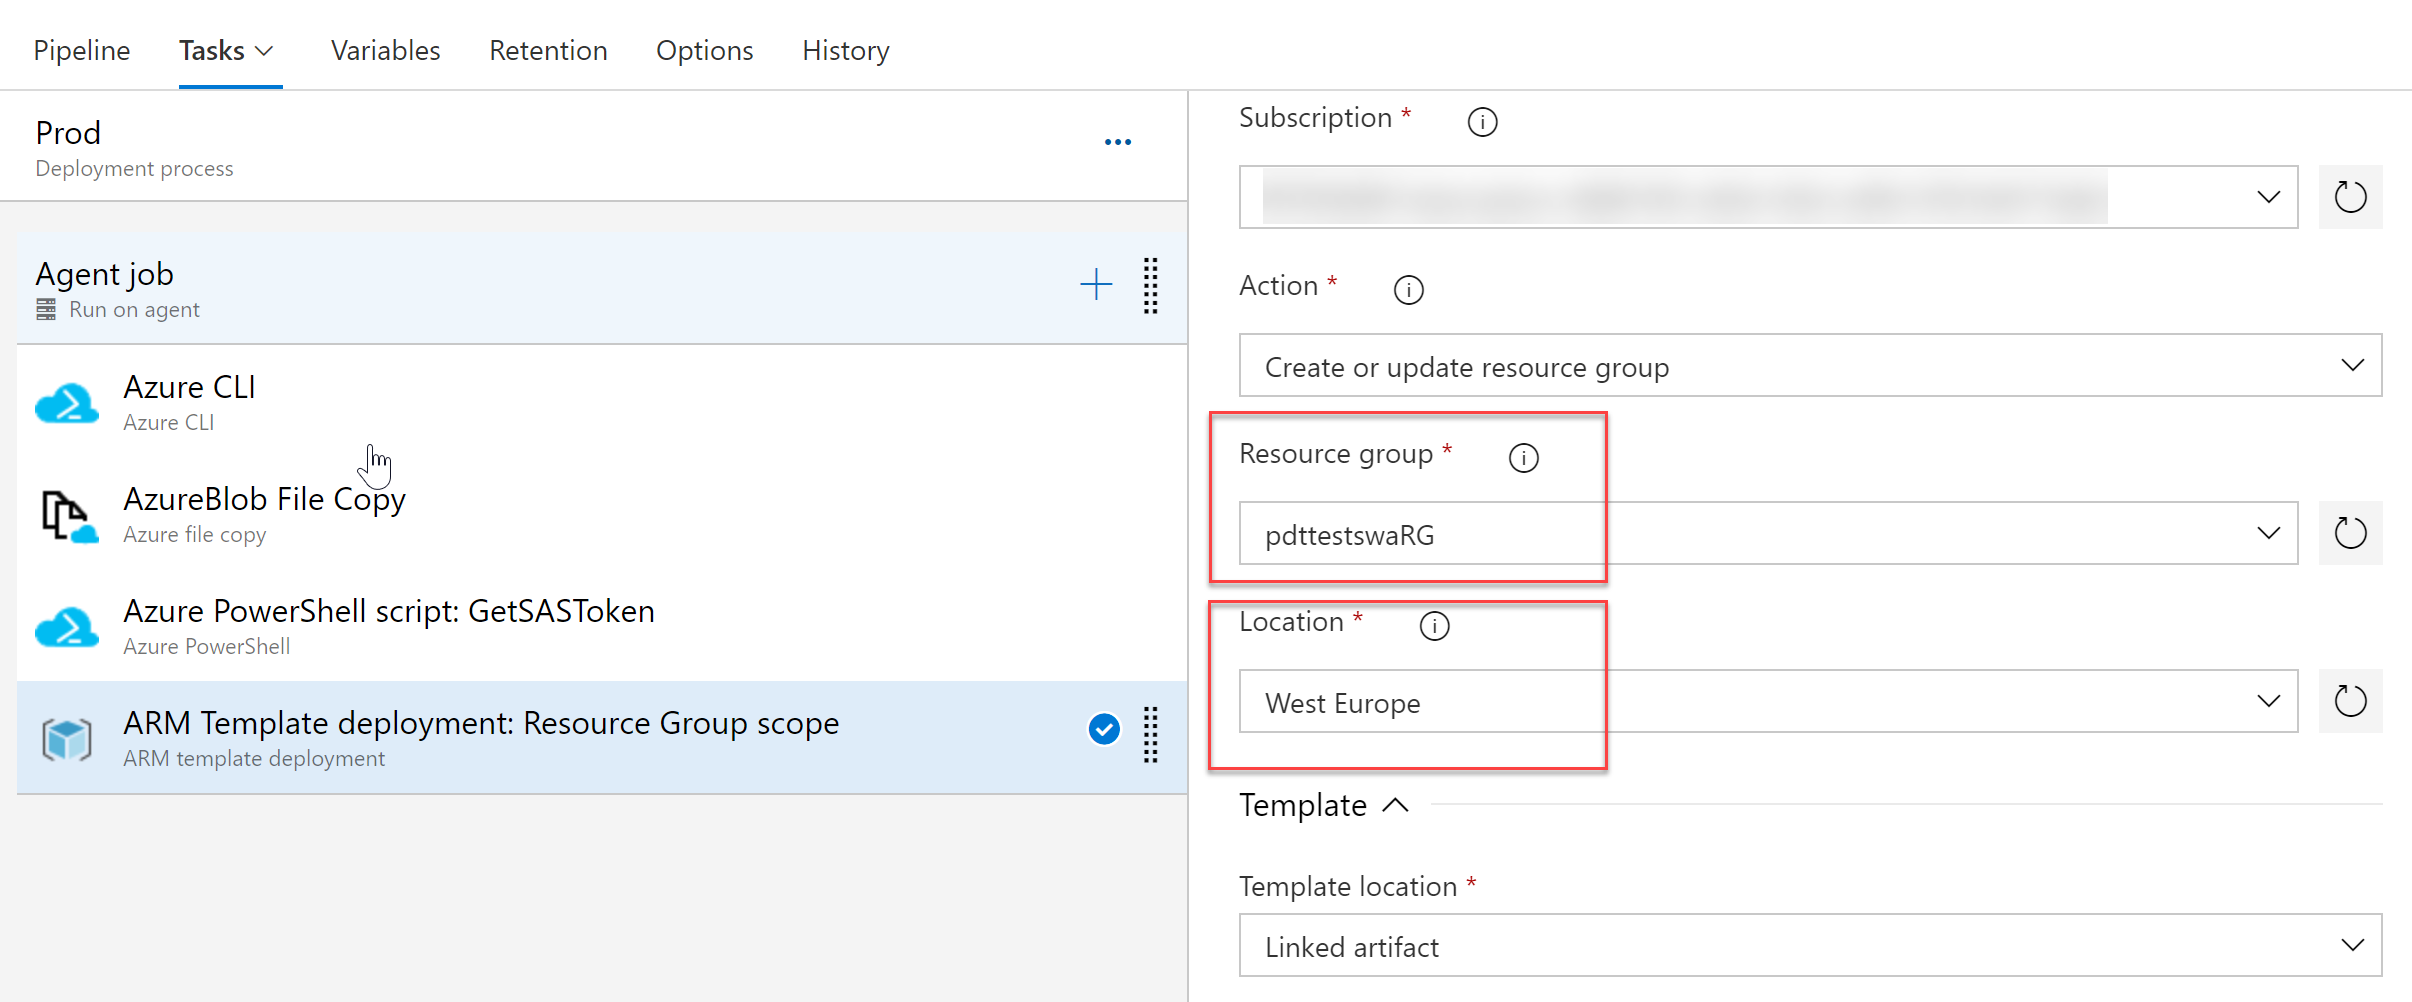
Now we have the policy in place, let’s move on with configuring the Release Gates integration. I’ll be using the Classic Editor for this. From Azure DevOps, select Pipeline / Releases and open your Pipeline in edit mode
As you can see, I’m using an ARM Template deployment: Resource Group scope task, and specified the target Resource Group and Location settings (In production environments, it would be better to store these as pipeline variables, but works for this demo purpose…)
Let’s create a new Release and see what happens by inspecting the detailed logs for this job:
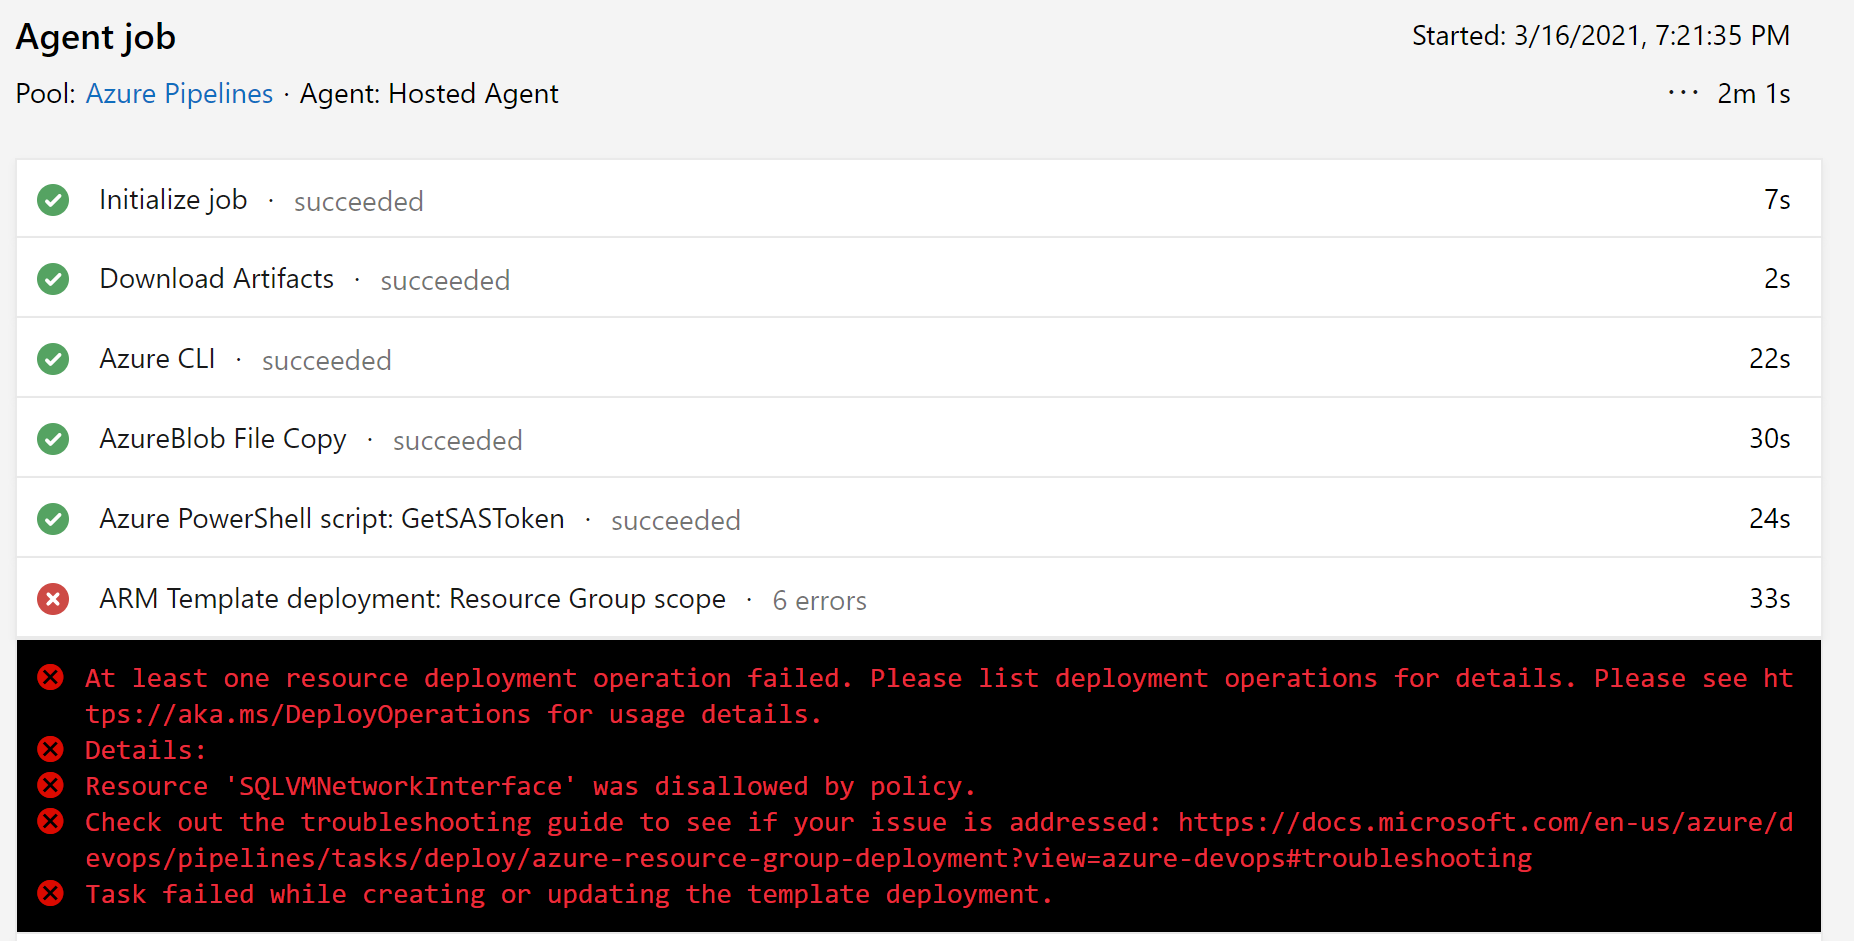
It shouldn’t be a surprise, this deployment is failing. The explanation clearly states Resource ‘XYZ’ disallowed by policy. This is where you would typically start troubleshooting, trying to figure out what happened. Opening Azure Policy (that was a clear hint…) to find out there is indeed a Policy definition assigned which blocks the deployment.
Let’s make this process of having failed Releases a bit more intelligent by configuring Release Gate settings.
Azure DevOps Release Gates configuration
Gates allow for automatic collection of health signals from external services, typically halting the Release deployment, and then allow the Release to be executed when all the signals are successful at the same time or stop the deployment on timeout. Typically, gates are used to interact with incident management, monitoring or governance capabilities.
More details on Azure DevOps Release Gates can be found here
Let’s continue and go ahead with specifying our Gate configuration.
- Open the Pipeline in edit mode, and select the Stage you want to define the gate configuration for.
- Click the pre-deployment condition (the thunderbolt and admin icons to the left of the Stage box)
- This opens the Pre-deployment conditions pane
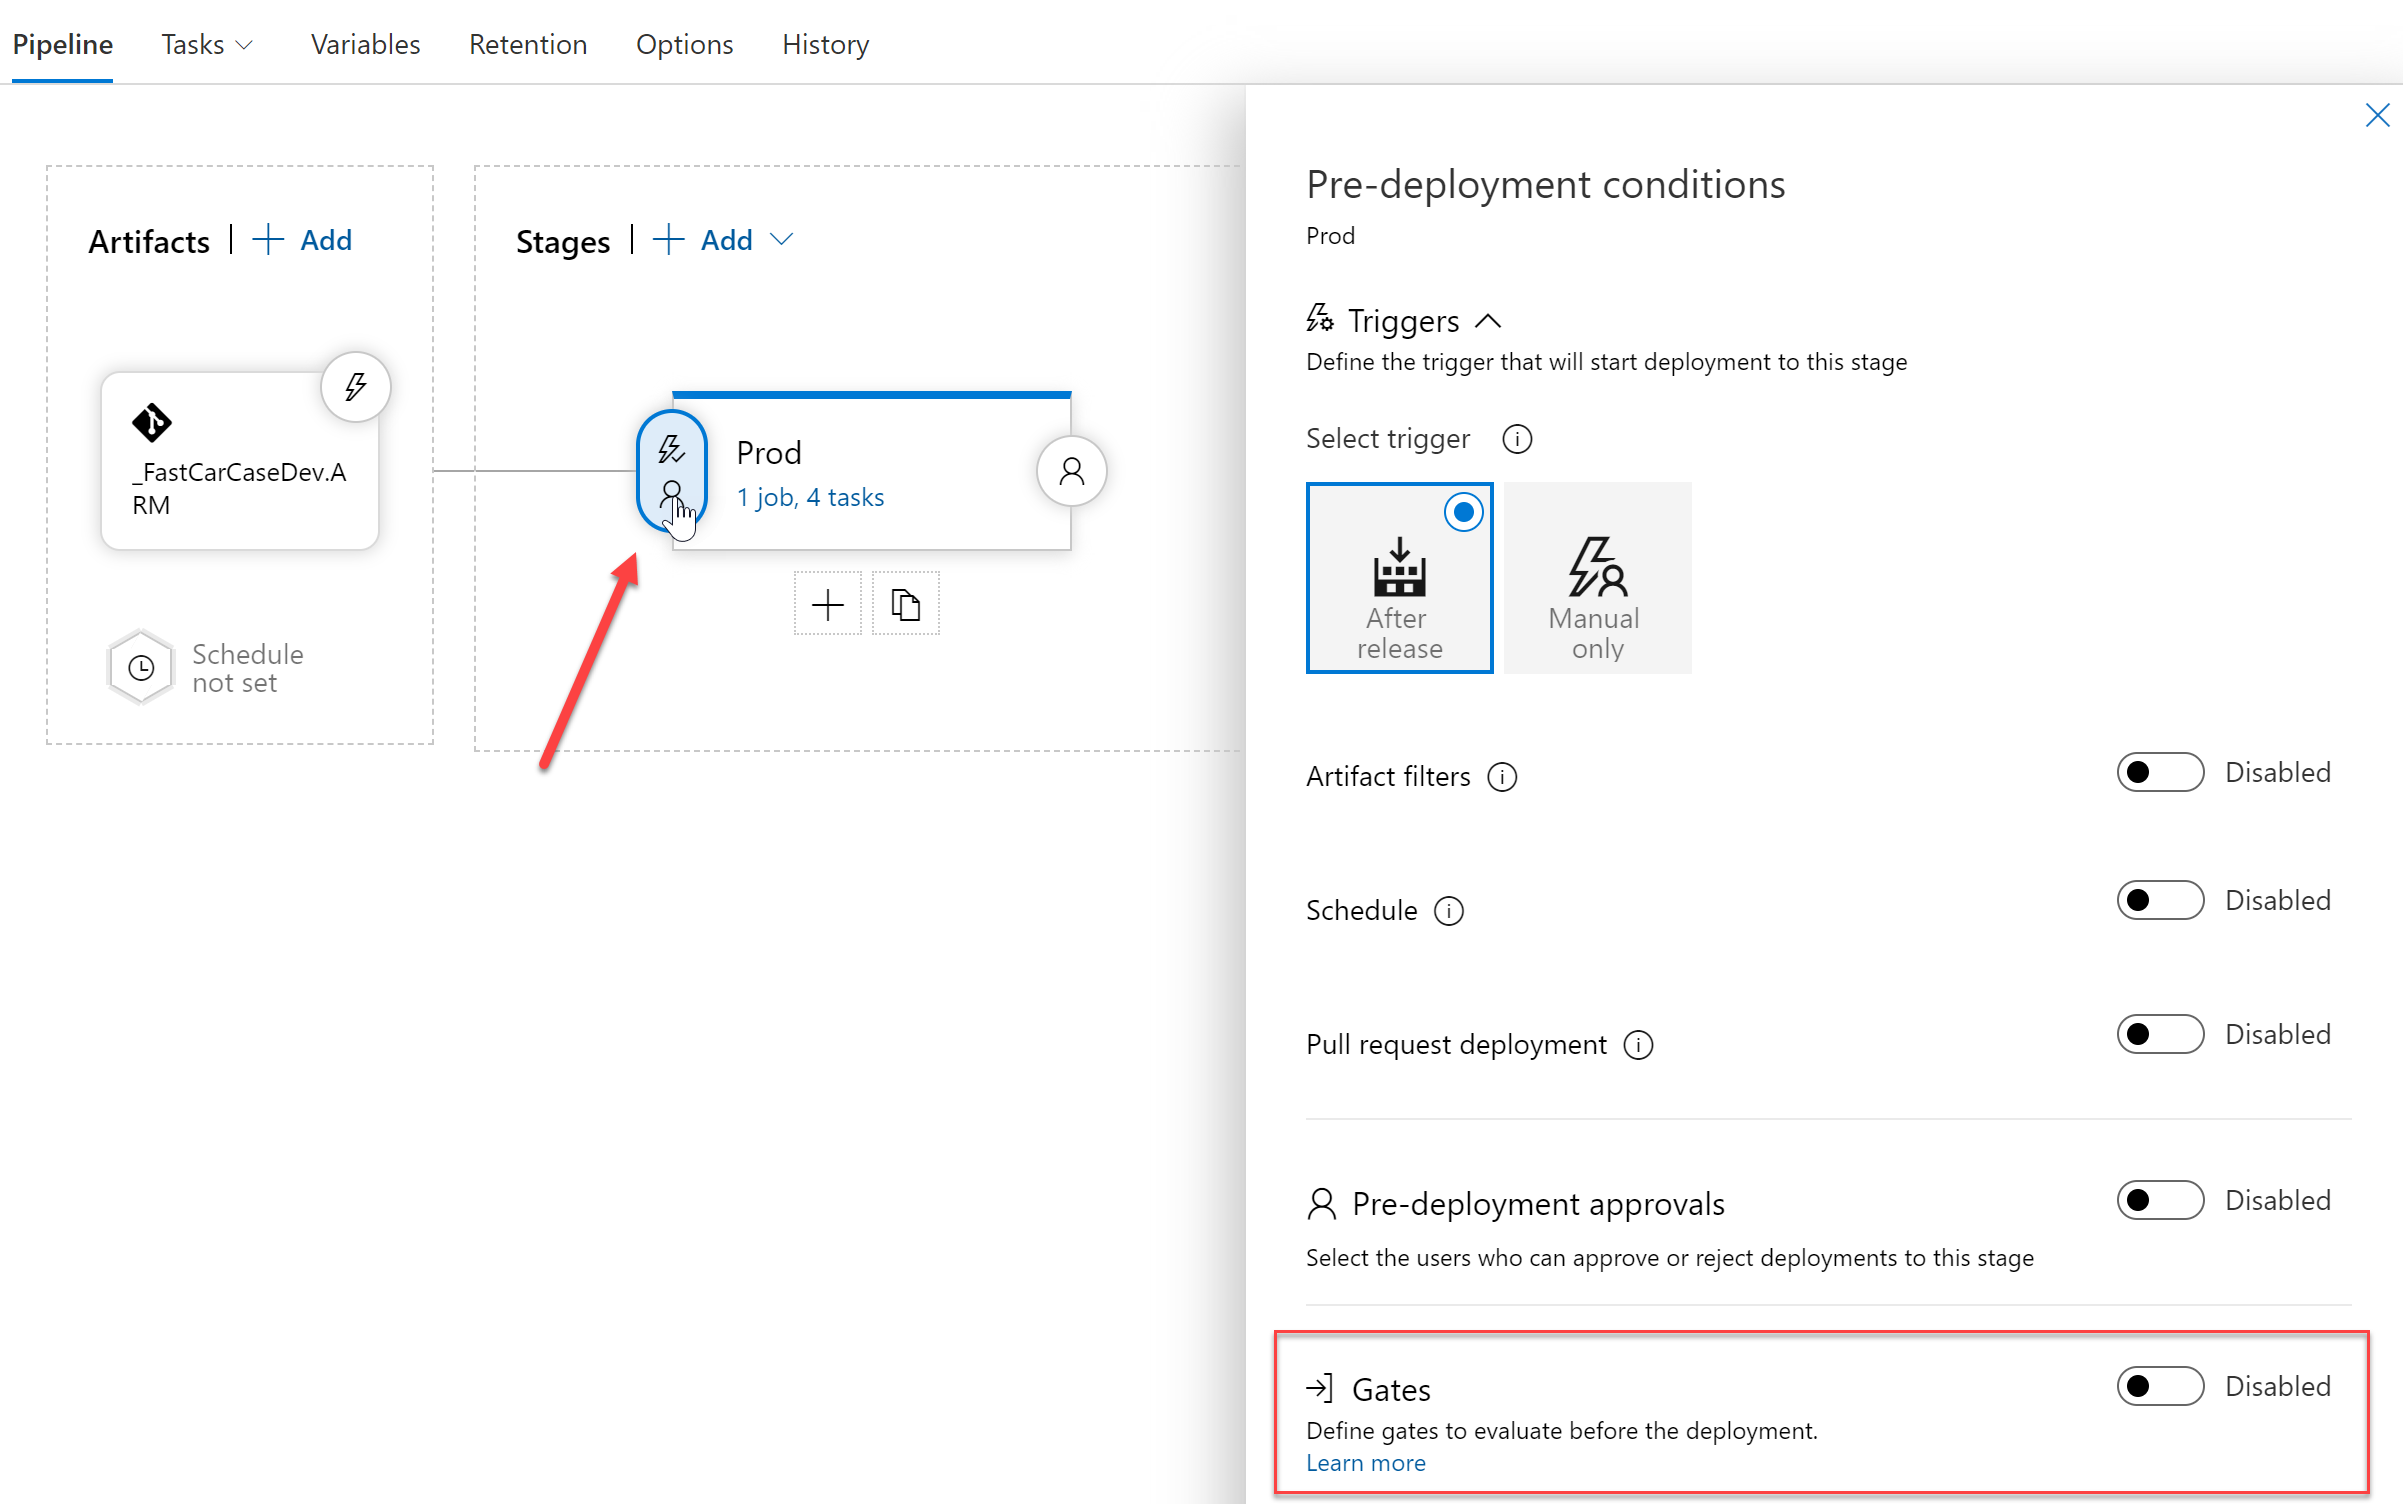
- Here, select Gates by switching the Toggle button to “Enabled”
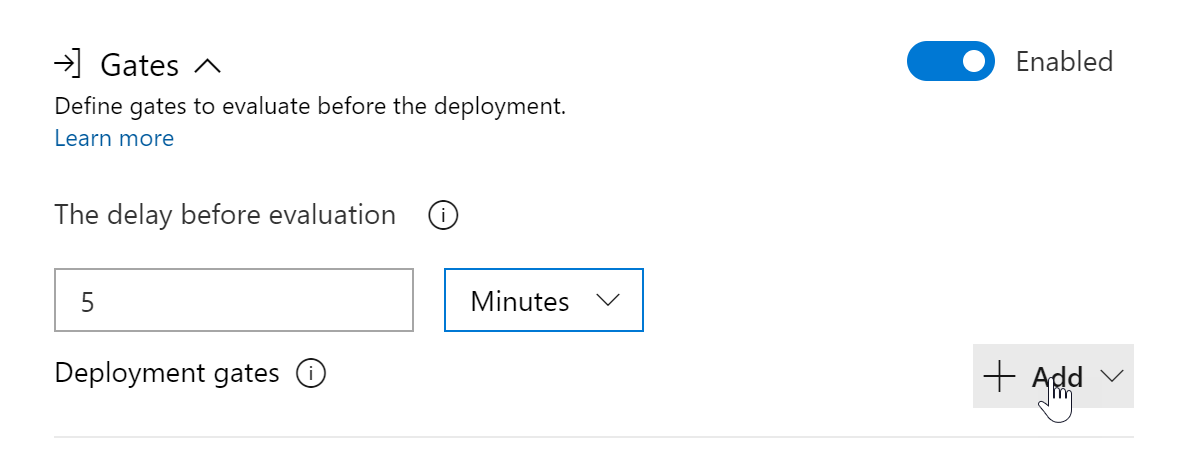
-
Click the “+Add” button to add a new gate configuration; notice how different conditions can be specified here to control how your Releases will run. One could define a dependency on Azure Monitor alerts, checking the health of your platform using REST API calls or Azure Functions and more. Know this list could also show options coming from for example Azure DevOps Marketplace extensions. And reuse feedback from those extensions to govern your Releases.
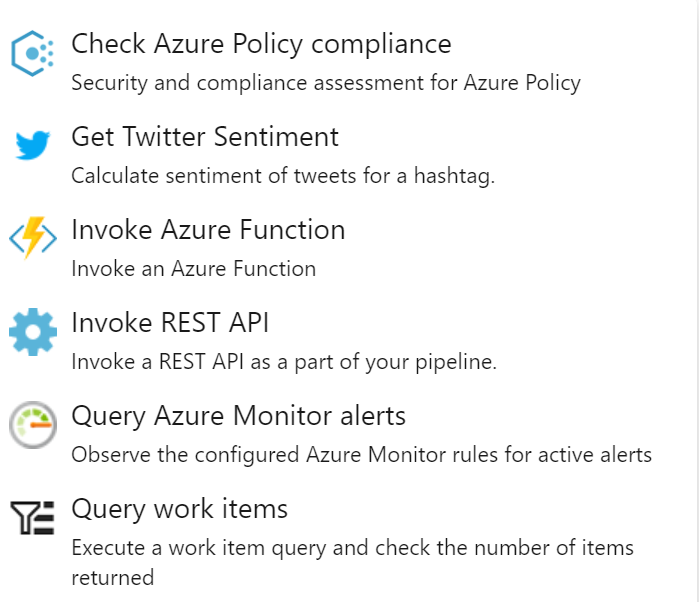
-
For my example, I select Check Policy Compliance
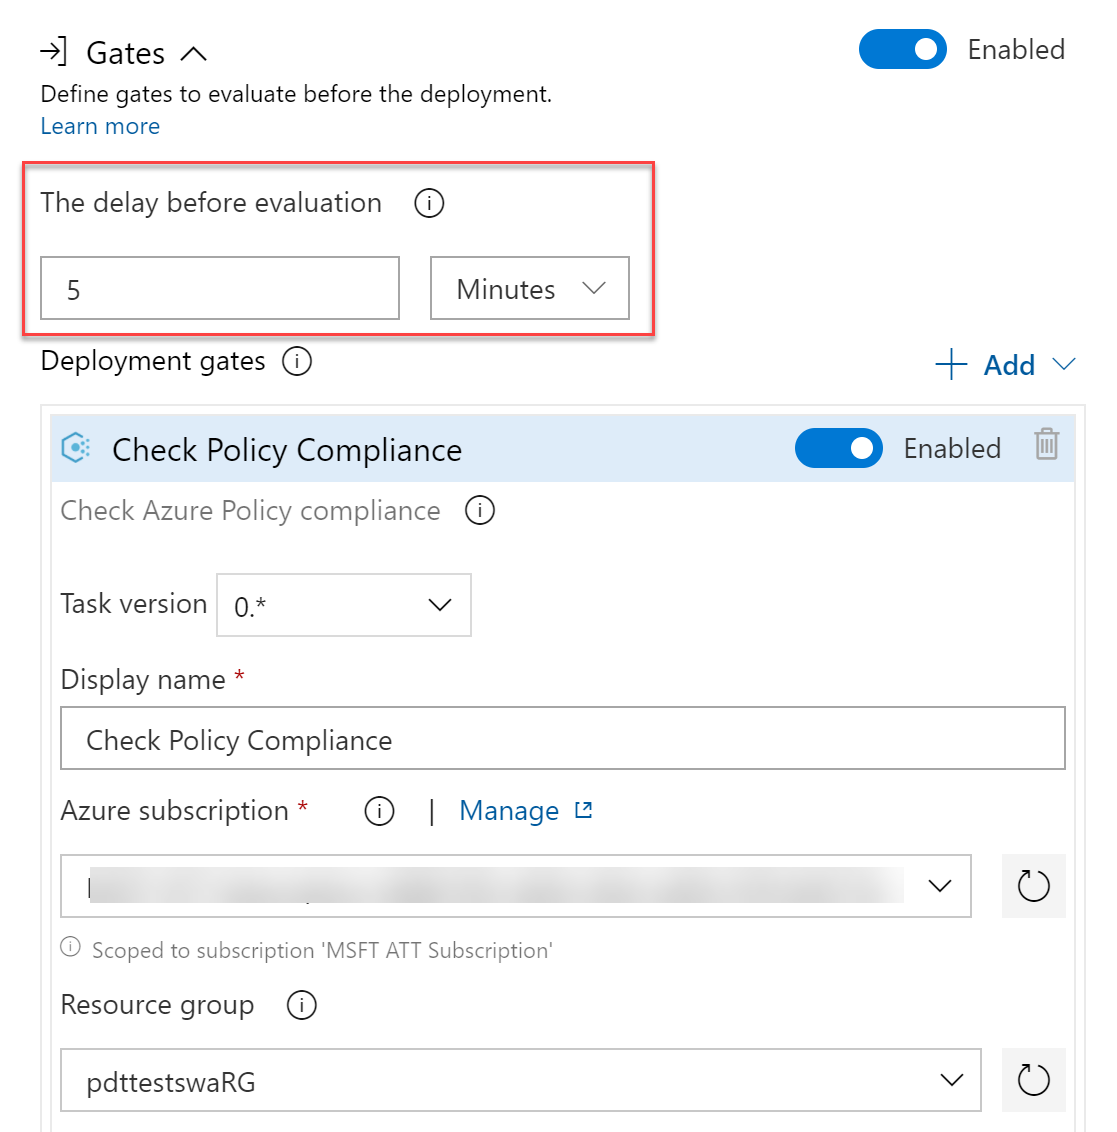
-
The default validation time is every 5 minutes; this is the time it takes to go through the initial validation. From there, the status will be re-evaluated every 15 minutes by default. These settings can be changed as needed.
-
Complete the subscription, Resource Group and (optional) Resource you want to get validated (if you don’t provide any of these details, the full subscription will be scoped)
- Save the changes and create a new Release. Open the Release details to see what’s going on now.
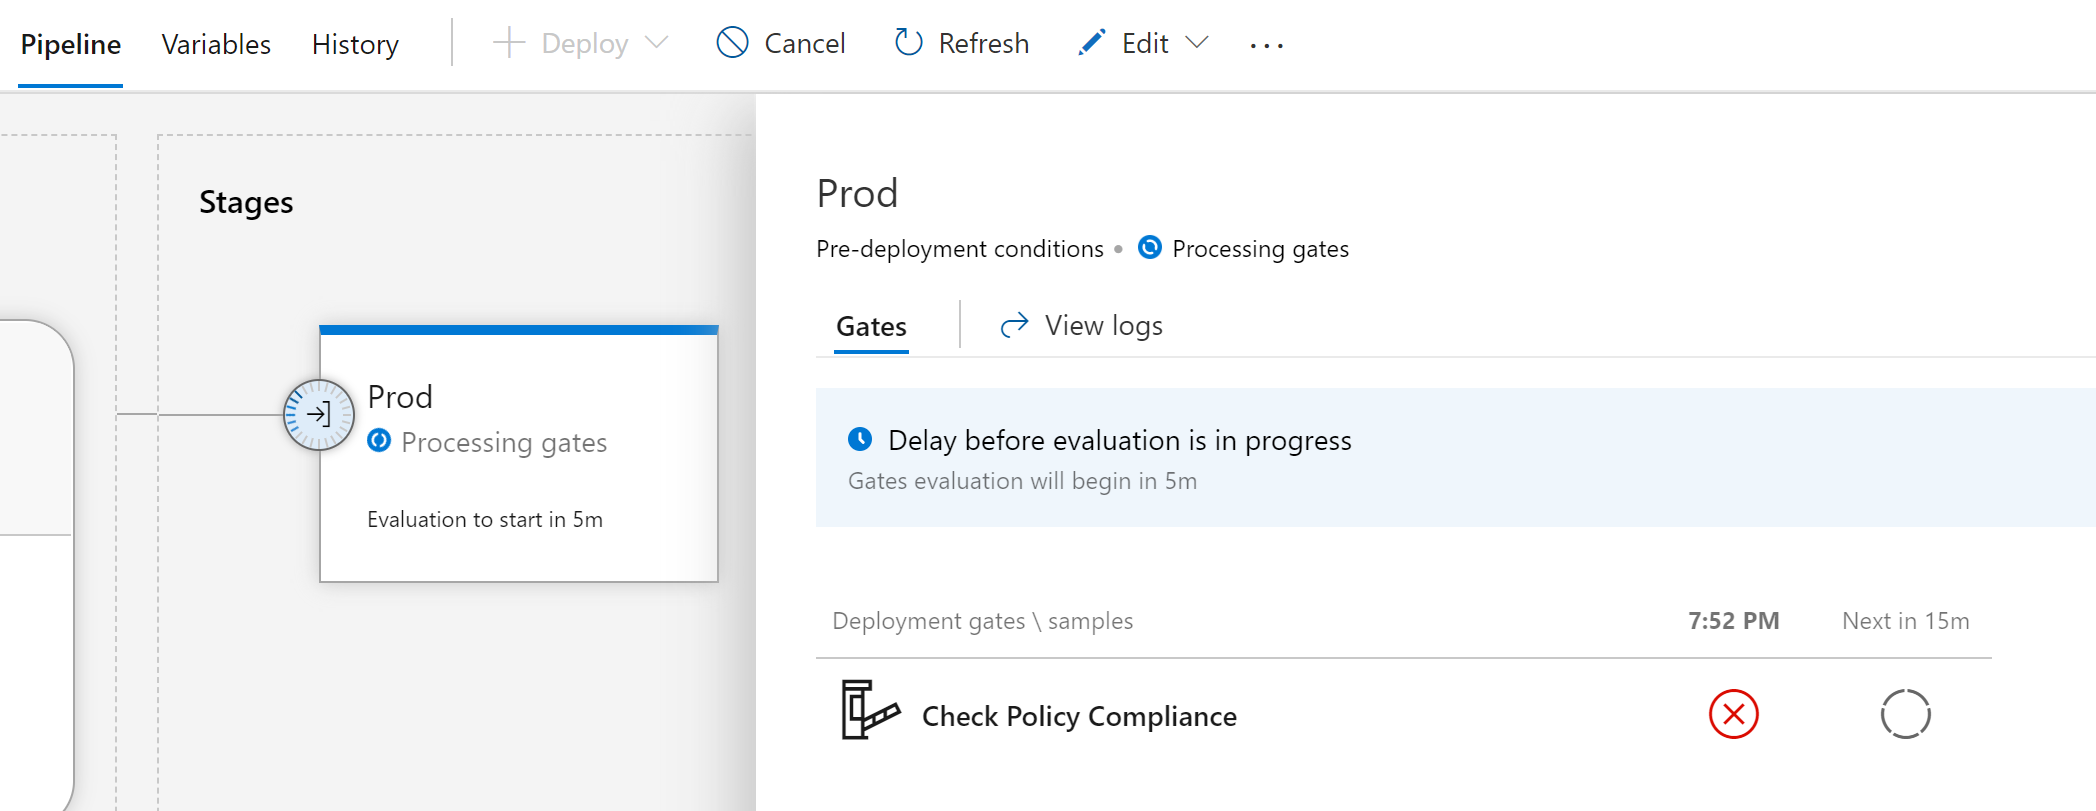
As you can see, the current deployment is in a “Check Policy Compliance Failed” state, as it takes several min to pick it up.
(This is where you could get a coffee or any other refresher, a cookie, say hi to the family, walk the dog,… while waiting…)
- After the time frame passed, we get an update on the status. As expected, it clearly shows a failed state still.
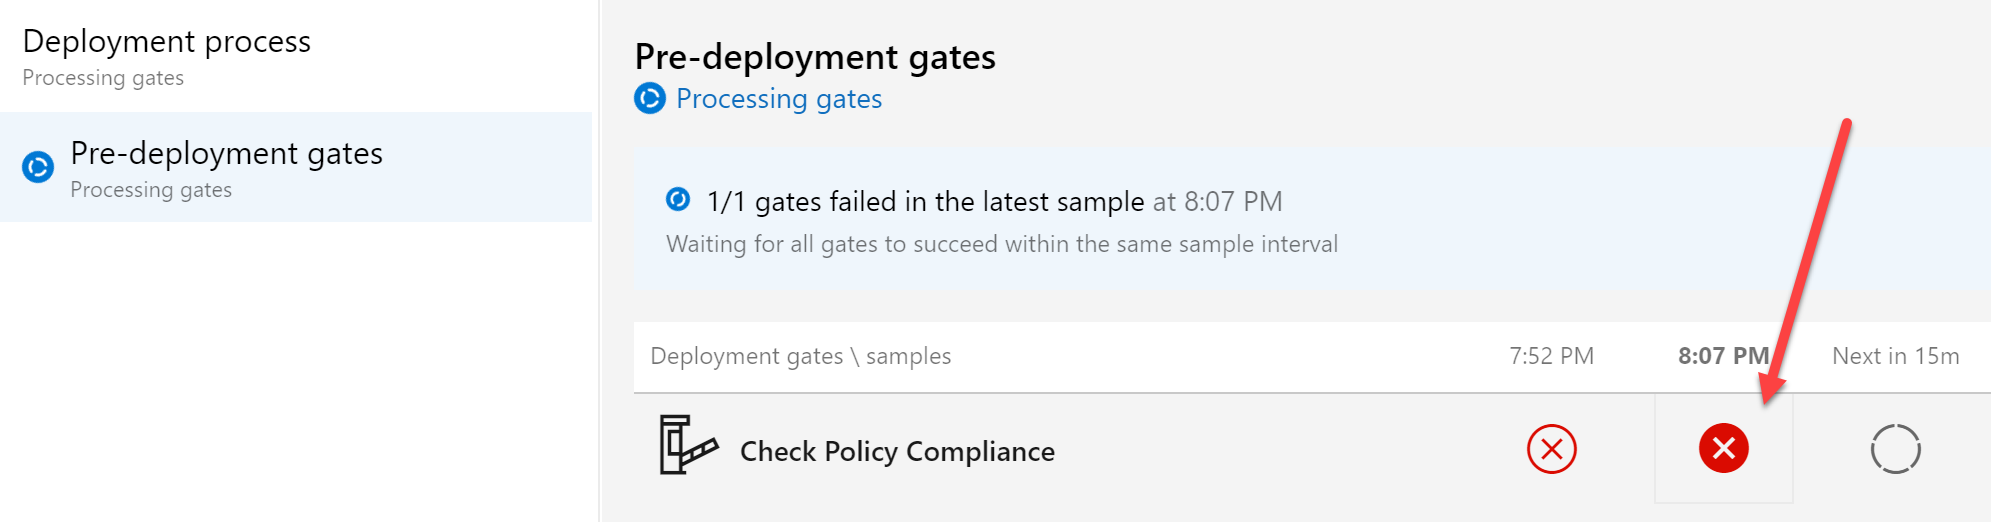
Clicking on the red cross icon (or opening the Job Logs…) shows more details:
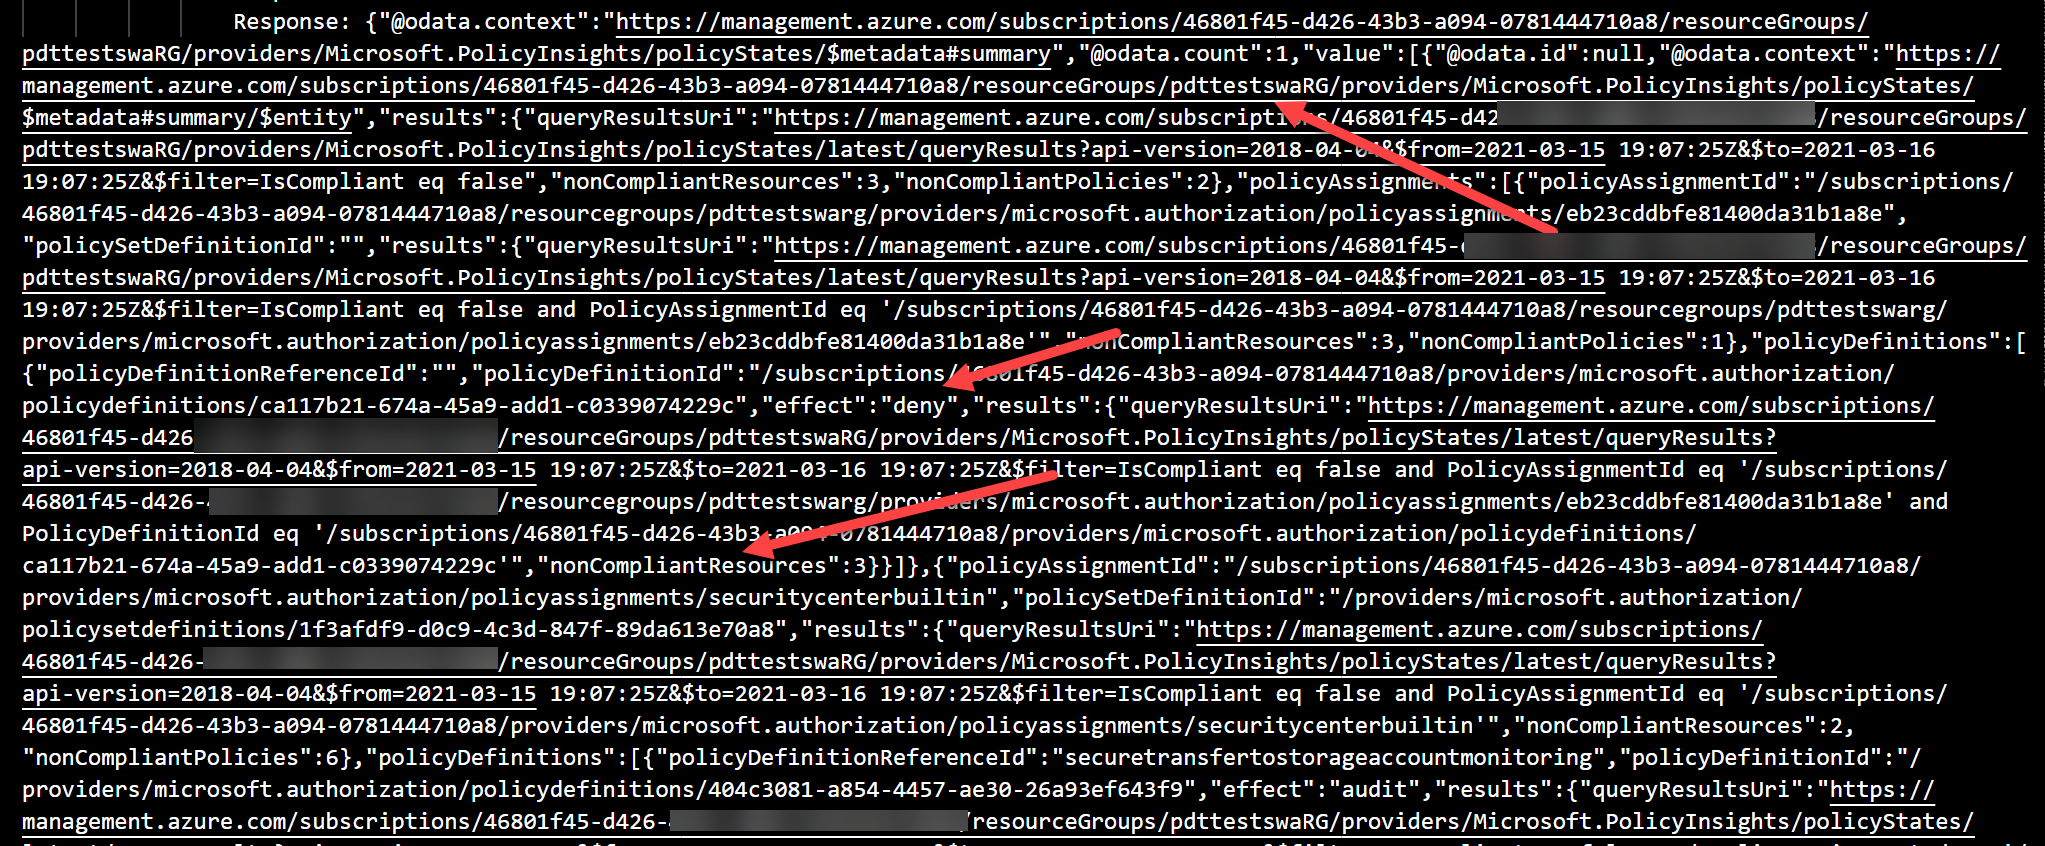
- we can see the details of the target Resource Group (pdttestswarg), the target subscription, how many resources are impacted (3), and the outcome of the policy (deny)
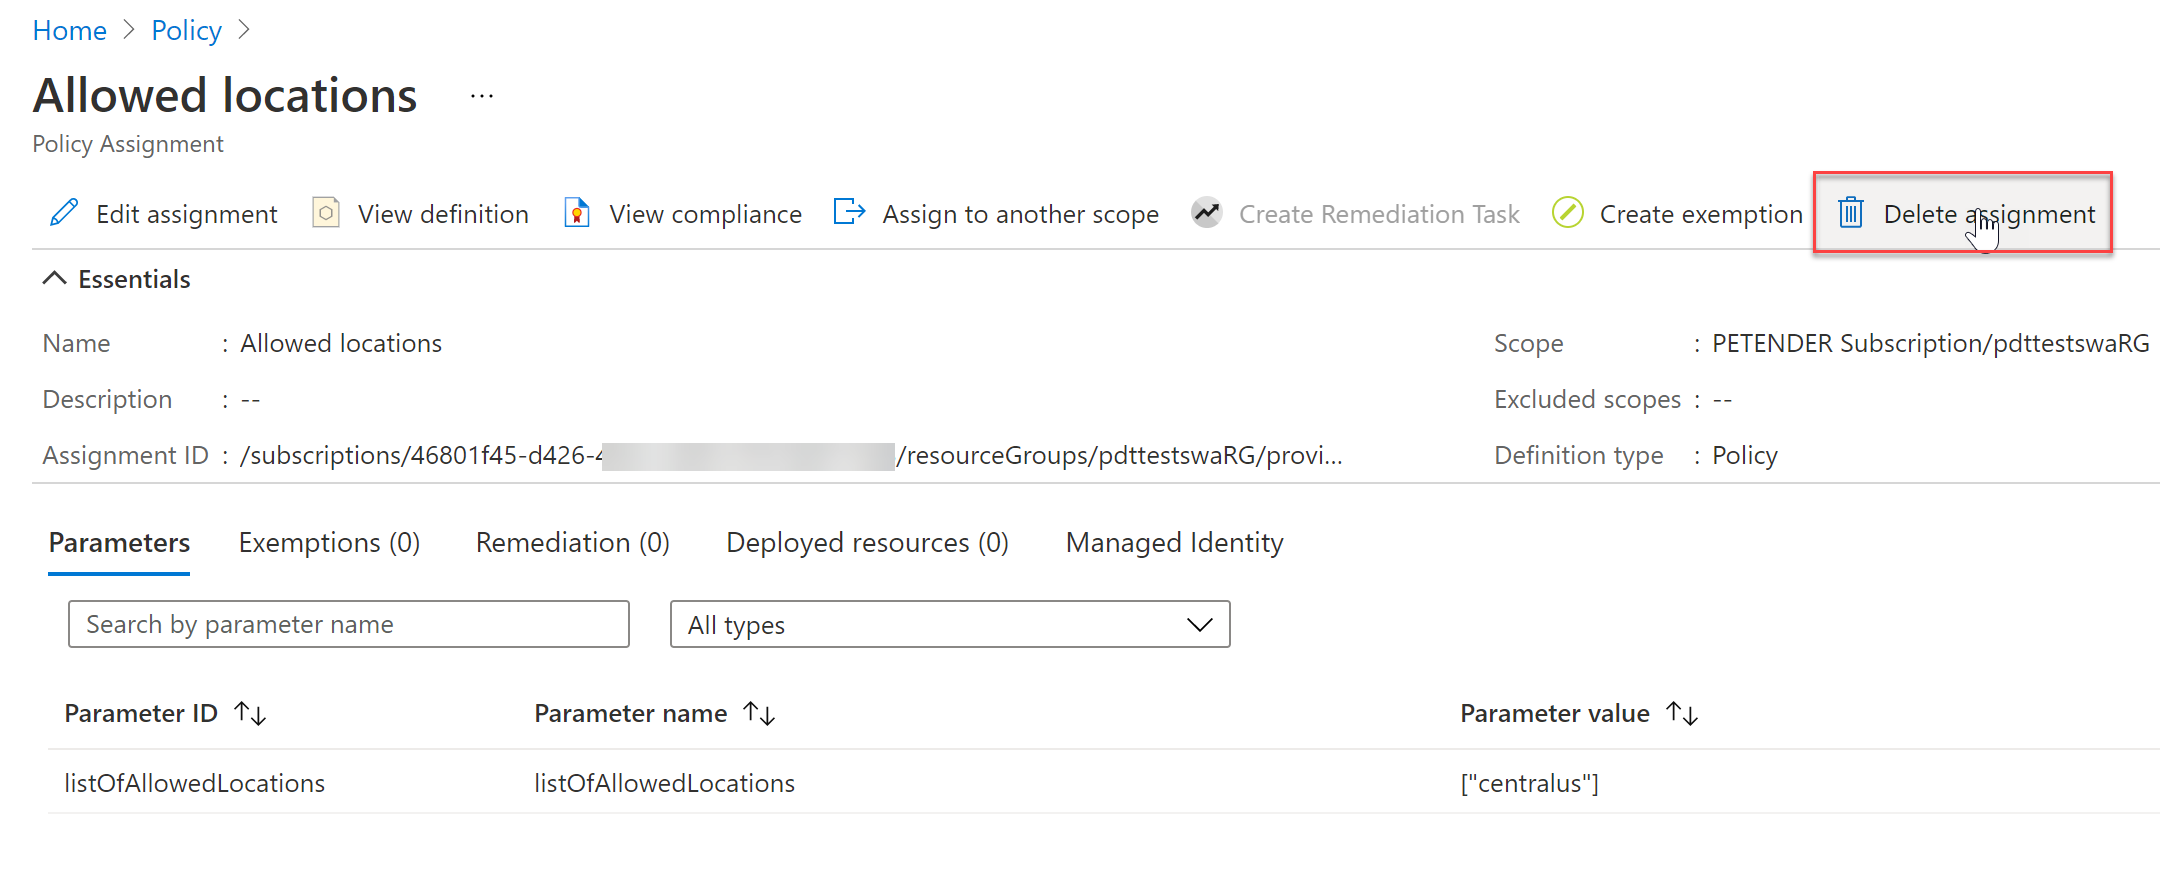
To move to a successful deployment, let’s remove the Azure Policy assignment from our Azure Resource Group. This can be done by opening Azure Policy from the Azure Portal, select assignments, select the policy and click delete
From here, all we need to do is wait for the next Gate Evaluation timeframe to see the outcome.
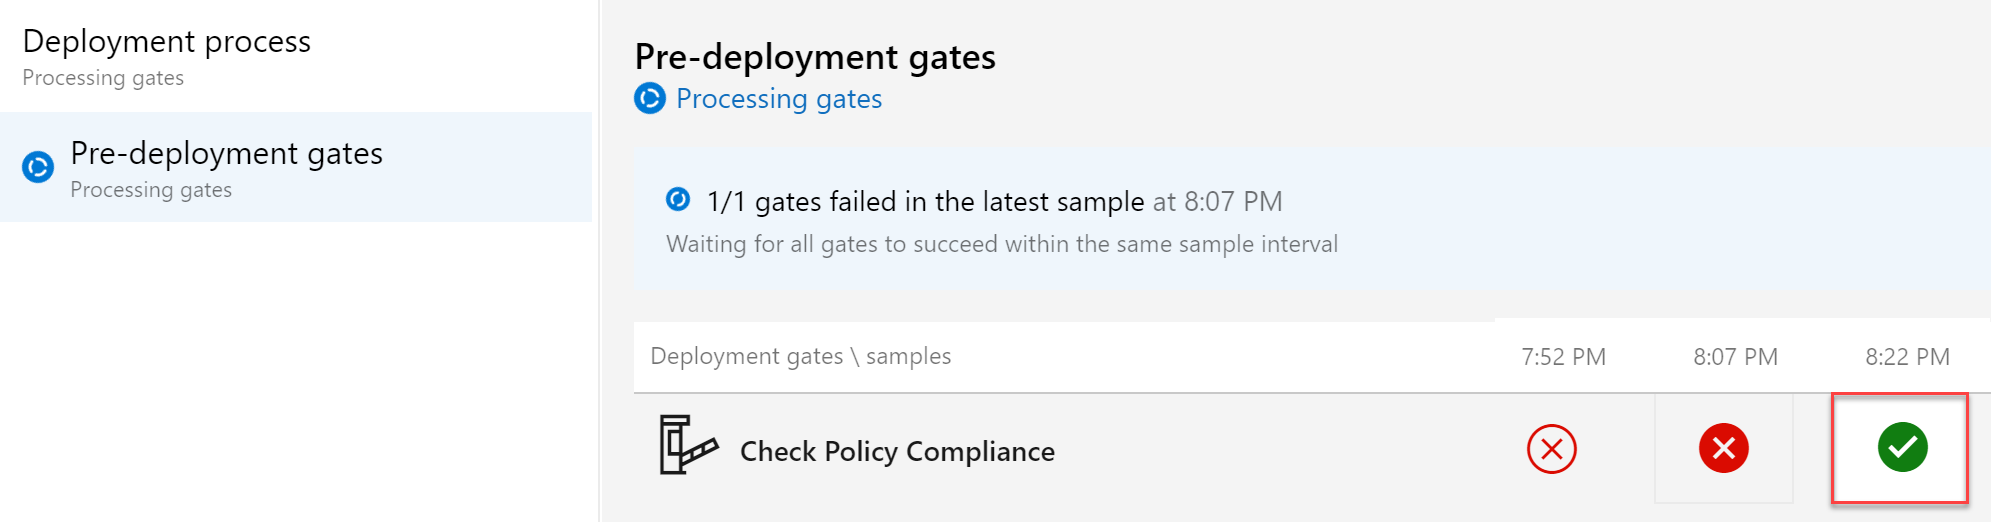
Having a successful (green) state for the validation, resulting in a successful deployment of the Azure Resources. Nice one!!
Summary
In this article, I wanted to introduce you to the powerful capabilities of Release Gates in Azure DevOps. Allowing you to validate the health state of your target environment, to control if/how deployments will run. While I focused on Azure Policy Governance in this article, remember you have other settings as well. Even better, you could actually apply multiple settings to make this feature even more powerful!
That’s it for now!
As always, holler when having any questions using email petender@microsoft.com or @pdtit on Twitter
0 comments