Connect your Azure subscriptions to VSTS in 3 clicks
New improved user experience to setup Azure Resource Manager based service connection in VSTS.
Follow the post below to configure Visual Studio Team Services to communicate with Azure in order to provision or deploy Azure Resource Manager resources such as virtual machines
- To setup Azure Service end point in VSTS, from your Visual Studio Account, navigate to your Team Project and click on gear icon.


- Navigate to Services tab and click on ‘New Service Endpoint’ in the left pane.
- From the drop-down, select ‘Azure Resource Manager’ option.
Now, setting up an Azure Service endpoint is easy, you just need to select the subscription on which to create a service endpoint, and you are ready to deploy to Azure.
 Note:
Note:
A new Azure Service Principal will be created and assigned with the ‘Contributor’ role. The default role assignment will have access to all the resources in the selected subscription. You can modify the Service Principal access from Azure portal > Subscriptions > Users > Roles.
If your subscription is not listed or to specify an existing service principal, click the link in the dialog, which will switch to manual entry mode.
Manual configuration:
Follow the post below to manually configure Visual Studio Team Services
- Download & run this PowerShell script in an Azure Powershell window to generate required data for Service Principal based Azure service connection. Running this script would prompt you for:
- The name of your Azure Subscription name
- A password that you would like to set for the Service Principal that is going to be created
- Note: the script has been tested with Azure PowerShell version 1.0.2.
- Once successful, the script would output the following details for the Azure Service Endpoint.
- Connection Name
- Subscription Id
- Subscription Name
- Service Principal Client Id
- Service Principal key
- Tenant Id
To setup Azure Service end point in VSTS, from your Visual Studio Account, navigate to your Team Project and click on gear icon.

- Click Services tab and click on ‘New Service Endpoint’ in the left pane.

- From the drop-down, select ‘Azure Resource Manager’ option. In the dialog, click the link at end of the text “If your subscription is not listed or to specify an existing service principal, click here”, which will switch to manual entry mode. You can always switch back to “Auto creation of SPN mode” by clicking the link in the manual mode dialog.
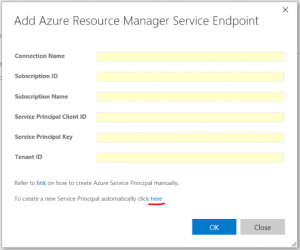
- Enter the input values that you generated from the PowerShell
- Click ‘OK’’. We now have established a connection to Azure from your VSTS account.
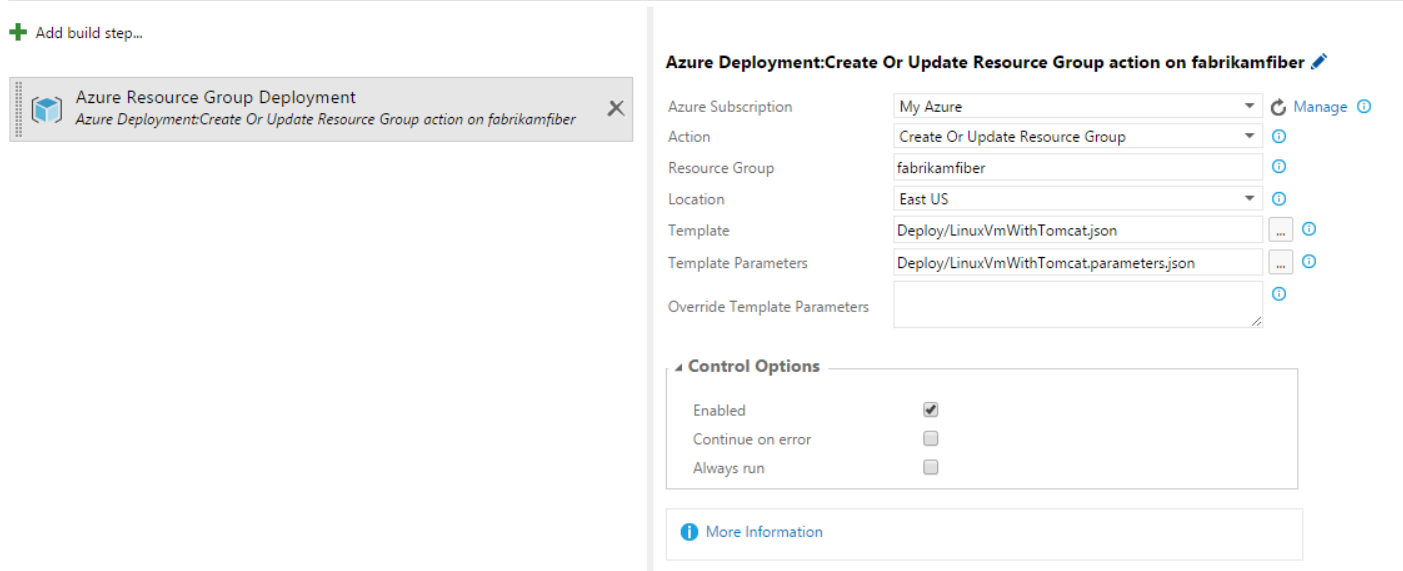
- From Build/Release hub, now you add “Resource Group Deployment Task” (for example) and use the subscription.

Note: the script has been tested with Azure PowerShell version 1.0.2.
The above steps are sufficient for the purpose described. If you would like to rather create the service principal on your own instead of using the above script, then follow these steps below:
- To create an Azure Active Directory application, login to your Azure account through the classic portal.
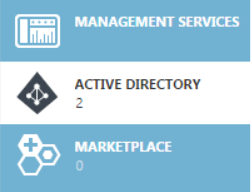
- Select Active Directory from the left pane.

- Select the directory that you want to use for creating the new application.

- To add a new application in your directory, click on Applications and click on Add.

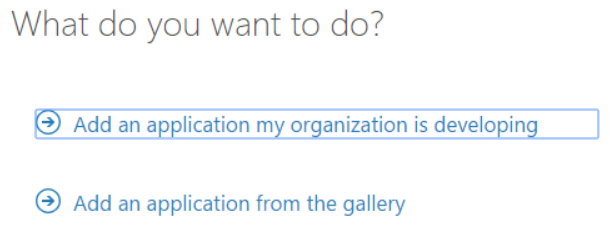
- Choose “Add an application that my organization is developing”.

- Select WEB APPLICATION AND/OR WEB API and click the next button.
 Though we intend to automate Azure Resource Group deployment from VSTS, we will have to create a Web App and use its service principal to authenticate with Azure Resource Manager.
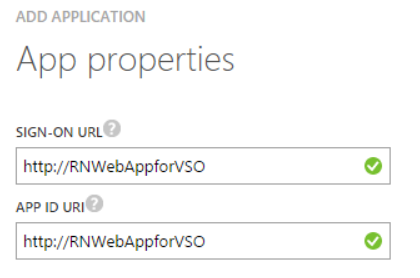
 - Enter a recognizable URL as we will need it later for role assignment.

- The existence of the web-site is not validated. We are registering a web app name-space so that we can create a Service Principal identity for the application.
- Congratulations, you now have an AAD Application. Click on the CONFIGURE tab:

- To create your service principal password, from CONFIGURE tab, find Client ID and copy it. This will be your Service Principal user name.

- From the “keys” section, from the drop-down select 1 or 2 year duration.

- After you hit save at the bottom, it will display your key, which is basically your Service Principal account password. Copy and store the key value. You won’t be able to retrieve it later.
- Retrieve Tenant ID for your Azure account. Click “View End-Points” on the bottom panel.

- Copy any of the URLs displayed in the pop-up dialog, The GUID in there is your tenant ID, which you’ll need later.https://login.microsoftonline.com/72921e51-521b-439d-8412-XXXXXXXXXXXX/federationmetadata/2007-06/federationmetadata.xml
- Now we have Service Principal account username, password and tenant id. Client ID: a63e0985-XXXX-XXXX-XXXX-XXXXXXXXXXXX Key: JjLsHGuoQKnWTqv4/C8Abyg8dQ1eqjXXXXXXXXXXX= Tenant ID: 72921e51-521b-439d-8412-XXXXXXXXXXXX ****
- You have now created a service principal in the directory, but the service does not have any permissions or scope assigned. You will need to explicitly grant the service principal permissions to perform operations at some scope. You will need to use http://azure.microsoft.com/en-us/documentation/articles/install-configure-powershell/. Log in as your Microsoft identity in order to grant roles to your Service Principal identity.
PS C:>Switch-AzureMode -Name AzureResourceManager
PS C:>Add-AzureAccount # This will pop up a login dialog
Assign roles to your Service Principal. For now, giving it access to the whole subscription. You can limit the access by providing the scope parameter. You can use either App ID Uri or Client ID as the value for the -ServicePrincipalName parameter.PS C:>New-AzureRoleAssignment -ServicePrincipalName <a href="http://RNWebAppforVSO">http://RNWebAppforVSO</a> -RoleDefinitionName ContributorIf you run Get-AzureRoleAssignment, you should see the assignment.- Above commands work with older version Azure PS modules. If you are on latest Azure ARM PS modules, you need to use equivalent RM command-lets. For example, Add-AzureRMAccount, New-AzureRMRoleAssignment etc.
- You could also do role assignment to your application from the new Azure portal. Click Browse and select Subscriptions. Select the subscription you are using. Click the Access button.
 Click Add. Select Contributor as the role. Search and select the name of the application you just created. Click OK to grant the service principal access to your subscription.
Resources:
- Create new Azure Service Principal using Azure Portal
- Role-based access control in the Microsoft Azure portal
- Sample Azure deployment templates from GitHub quickstart-templates



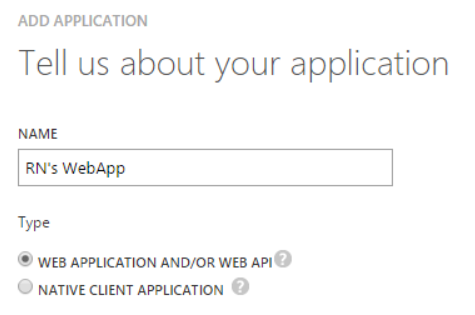 Though we intend to automate Azure Resource Group deployment from VSTS, we will have to create a Web App and use its service principal to authenticate with Azure Resource Manager.


 Click Add. Select Contributor as the role. Search and select the name of the application you just created. Click OK to grant the service principal access to your subscription.
0 comments