

The latest preview version of Visual Studio is now available to download. In this latest release, users wishing to develop cross platform C++ applications for macOS can now make use of Visual Studio’s Linux tools with CMake to target the Mac. There is some setup required on the Mac side to enable the support, but then the Mac is treated just as any other remote (Linux) target by Visual Studio.
Installation
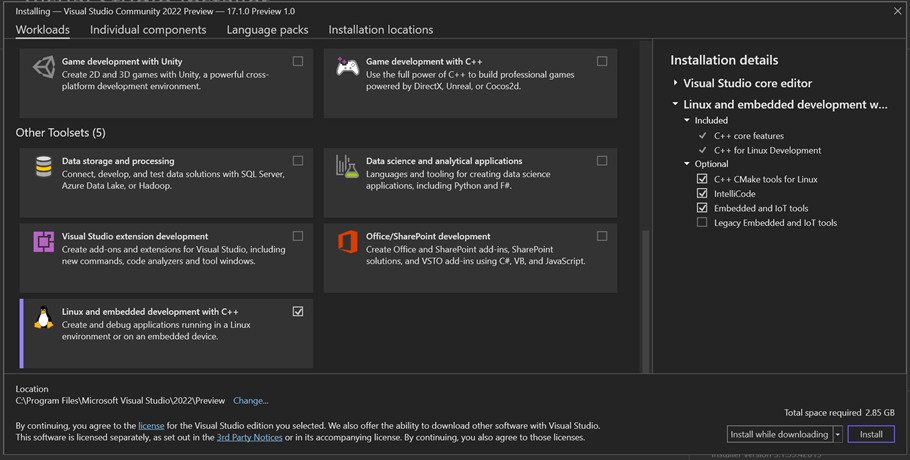
To get started install the latest preview release of Visual Studio 2022 and select the Linux and embedded development with C++ workload. The components you need are selected by default.
Setup on the Mac
Visual Studio requires certain tools to be present on the Mac to enable the remote development experience.
C++ Tools
If you have used your Mac for C++ development before you likely have everything installed that you need. If not, some of these tools should already be present (for example rsync) but some may need to be installed, typically the compiler command line tools, cmake, ninja-build, and lldb-mi. The following step should be performed in a terminal window on the Mac to set up the development environment.
- Make sure you have enabled your Mac for development:
DevToolsSecurity --enable
- Download the latest version of XCode from the App Store (Xcode on the App Store (apple.com)), or an older version through the Apple Developer page. Use xcode-select to install the compiler tools:
xcode-select --install
- Install CMake from cmake.org. Follow the instructions here (Installing | CMake) to copy and install the latest CMake. Make sure to update the PATH variable to include the CMake location. For example when using zsh add the line below to ~/.zshenv; when using bash add the line to ~/.bashrc.
export PATH=/Applications/CMake.app/Contents/bin:$PATH
- Install ninja-build from github or using a package manager such as brew. If installing directly from GitHub use the following commands:
git clone https://github.com/ninja-build/ninja.git

cd ninja

./configure.py --bootstrap

sudo cp ninja /usr/local/bin
- Install lldb-mi, a command line interface to the lldb debugger. Use a browser to download from https://go.microsoft.com/fwlink/?linkid=2189795 for x64 Macs and https://go.microsoft.com/fwlink/?linkid=2189794 for ARM64 Macs. Then copy the binary to /usr/local/bin and set its execute permissions.
sudo cp ~/Downloads/debugAdapters/lldb-mi/bin/lldb-mi /usr/local/bin
sudo chmod +x /usr/local/bin
Note: if you do not have a /usr/local/bin directory, this command will not work. You can create it using terminal command:
dir mkdir /usr/local/bin
Remote connection enablement
Make sure you have enabled your Mac to allow remote connections. From System Preferences select Sharing, then ensure that Remote Login is selected, and your user has access. If you need to interact with an app that has UI remotely on the Mac you also need to enable Remote Management and under Computer Settings enable VNC viewers. You should then be able to access the Mac from Windows using a VNC client.
Connect from Visual Studio
Once the necessary tools are installed on the Mac then Visual Studio can access the Mac using the Connection Manager.
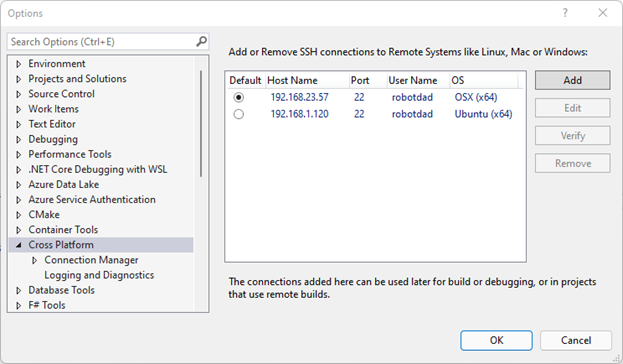
On a Windows machine open Visual Studio (with C++ and Linux workloads installed) and open the Connection Manager from Tools>Options>Cross Platform>Connection Manager. Add a new connection using the Mac machine name or IP address, username, and password.
Once a connection has been set up in Visual Studio it can be used as a CMake target in either a CMakeSettings.json or CMakePresets.json configuration. Below I’ll walk through setting up a new CMake project using CMakePresets.json.
A Sample CMake Project
- Since we will use CMake presets for this example, first ensure that CMakePresets is enabled in your Visual Studio installation. Go to Tools>Options>CMake>General and check “Always use CMakePresets.json”.
- From File>New>Project select CMake Project to create a new project (in this example “CMakeProject90”). The project will open targeting the “Local Machine” by default. From the “Target System” dropdown select the connection to the Mac system that was made in the previous step.


The target for the project will now reflect this choice and identify it as a Mac target.
The CMake pane of the Output Window will contain a log of the copy and CMake configure operations.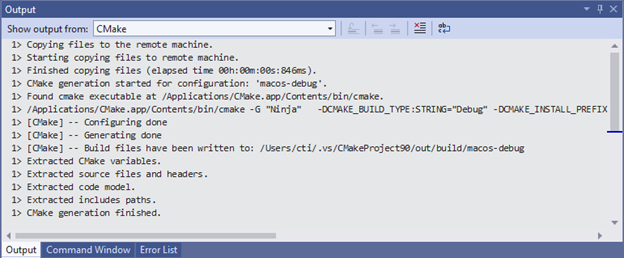
At this point the project is ready to build and debug.
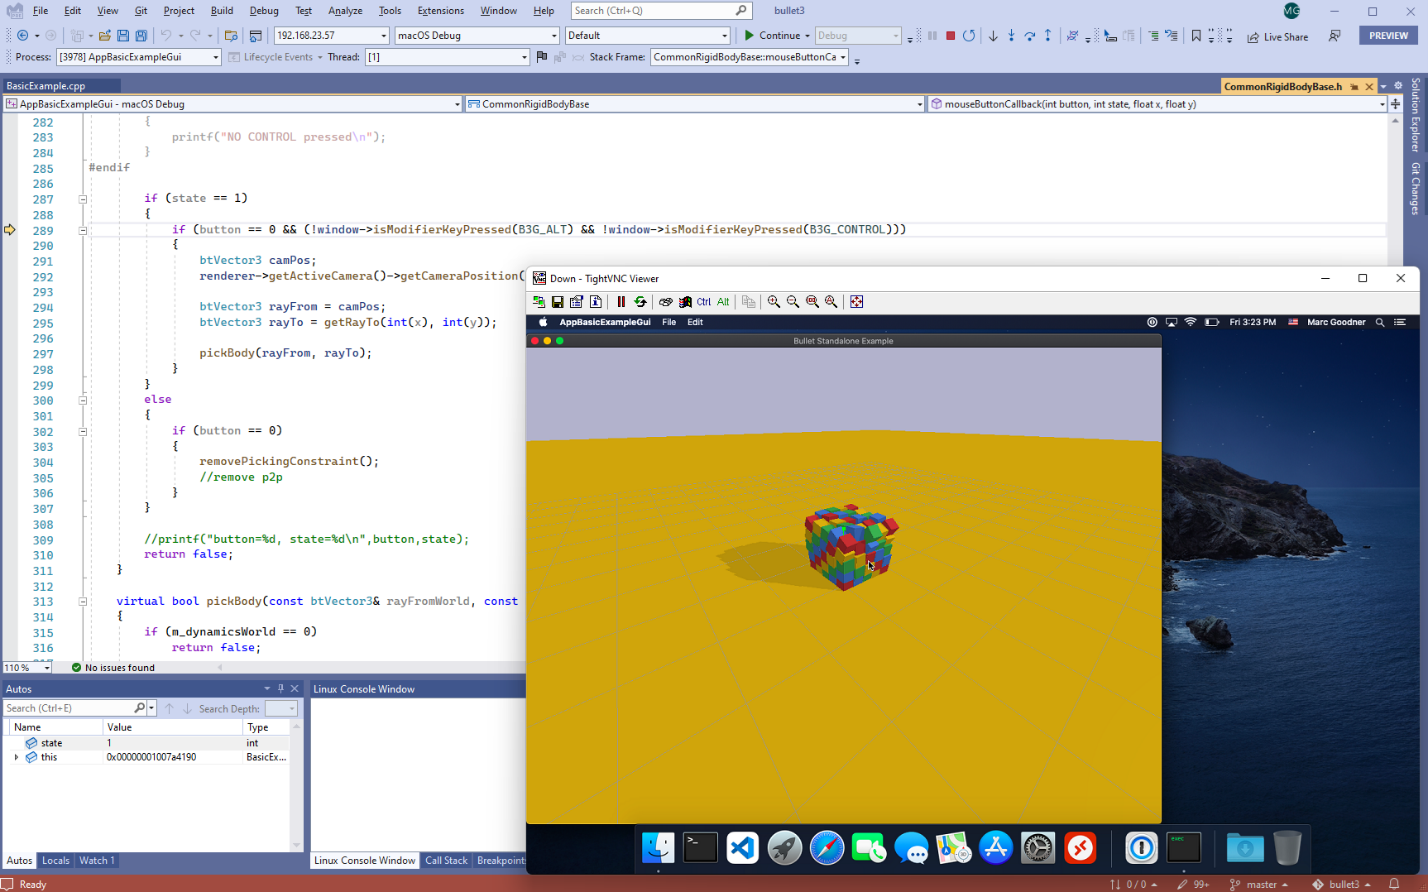
- From the Solution Explorer open CMakeProject.cpp and place a breakpoint on the first line of main. From the “Select Startup Item” dropdown select “CMakeProject90”. Start debugging (F5). Visual Studio will build the project (see the Build pane of the Output Window) and start the debugger on the Mac. The debugger will halt the application pointing to the location of the breakpoint just set.

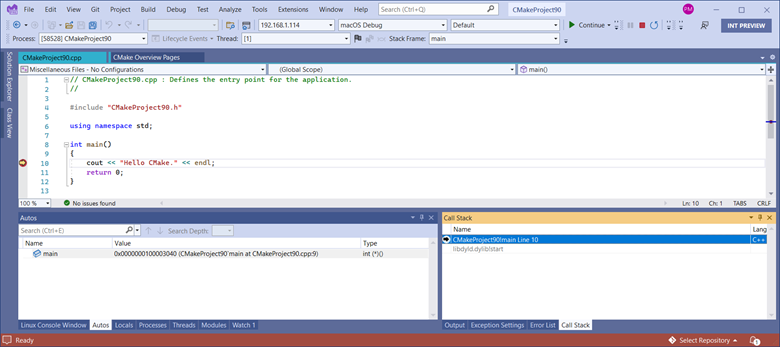
The debugging capabilities of Visual Studio (for example, the locals, watch, and call stack windows) may now be used to examine the application.
Attach Debugging on the Mac
The Visual Studio debugger’s attach-to-process function also works for Mac targets.
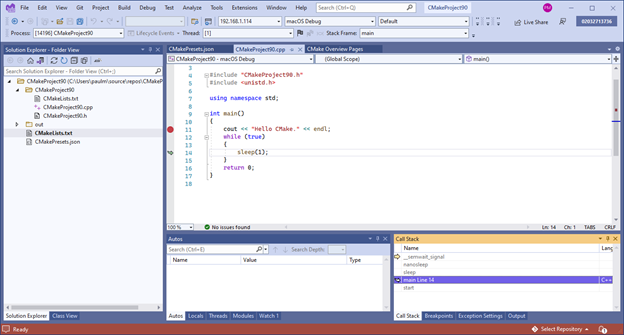
- Change the main function of the above C++ application as follows:
#include "CMakeProject90.h"
#include <unistd.h>
using namespace std;
int main()
{
       cout << "Hello CMake." << endl;
       while (true)
       {
             sleep(1);
       }
       return 0;
}
Save the file and select Debug>Start Without Debugging.
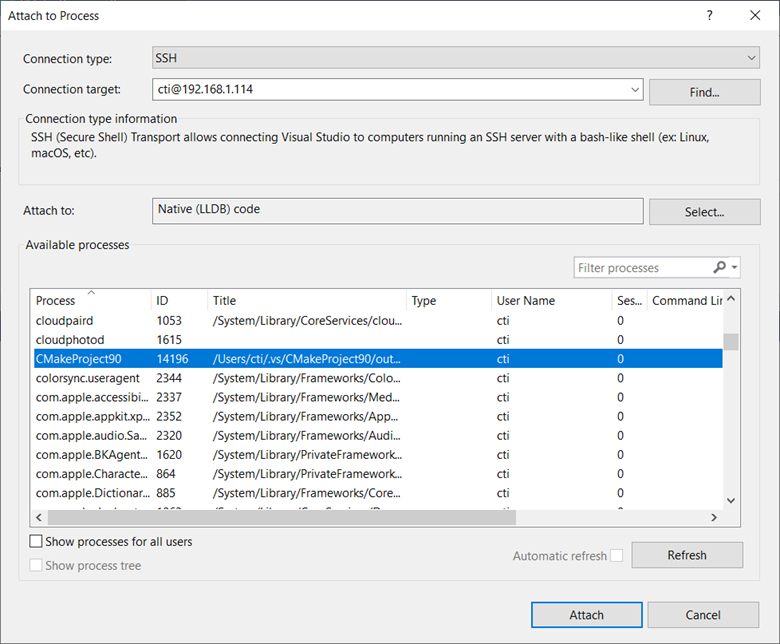
- Select Debug>Attach to Process… On the “Attach to Process” dialog select Connection type “SSH”. Then Select the Mac connection from the “Connection target” dropdown. The dialog will populate the “Available process” display with the processes running on the Mac.
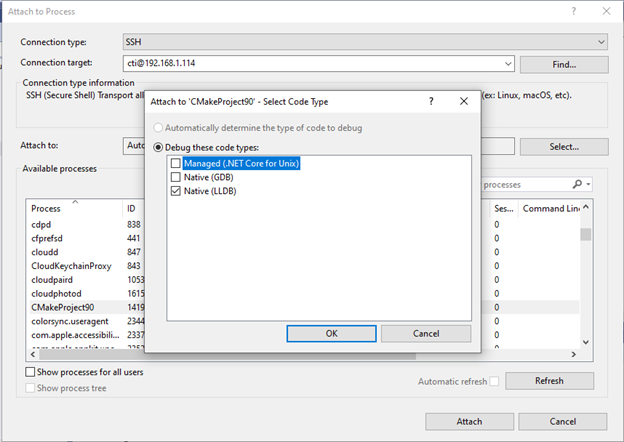
Select “Attach”. A “Select Code Type” dialog will pop-up. Select “Native (LLDB)” and click OK.
The debugger is now attached to the remote process on the Mac. Select Debug>Break All to begin debugging.
Caveats
The Mac must have an OS Version of at least 10.15 to install all of the debugger tools.
Send us your feedback
We hope that these new capabilities will enable you to choose Visual Studio for your macOS C++ development needs. We are very interested in your feedback to continue to improve this experience. The comments below are open, or you can find us on Twitter (@VisualC), or via email at visualcpp@microsoft.com.
A special thanks to Paul Maybee for authoring this post.
This is very cool. Are you planning on supporting xcode projects? Or any plans to support C++ desktop development in Visual Studio for Mac?
This is amazing, thanks for the great ongoing cross-platform work!
I wonder, would this work for .NET 6 or 7 as well? And if so, how?
Thanks!