
If your project targets one of the Windows platforms only (Desktop or UWP), you should consider using MSBuild as your C++ build system. If you consider expanding beyond these platforms though, consider using CMake to specify your build. To learn more, read about the CMake support in Visual Studio.
Using MSBuild has the benefit that from a single codebase you can easily target all the Windows platforms that VS supports today, and you can leverage the C++ Project System that provides file and project management functionality. This makes it easy to manage your project as it grows (easily adding project references between projects, configuring PCHs, configuring compiler and linker switches across multiple projects, etc.).
This article covers the high-level steps needed to migrate your existing C++ code targeting Windows to use MSBuild. You can read about other C++ project types in the guide for Bringing your C++ code to Visual Studio.
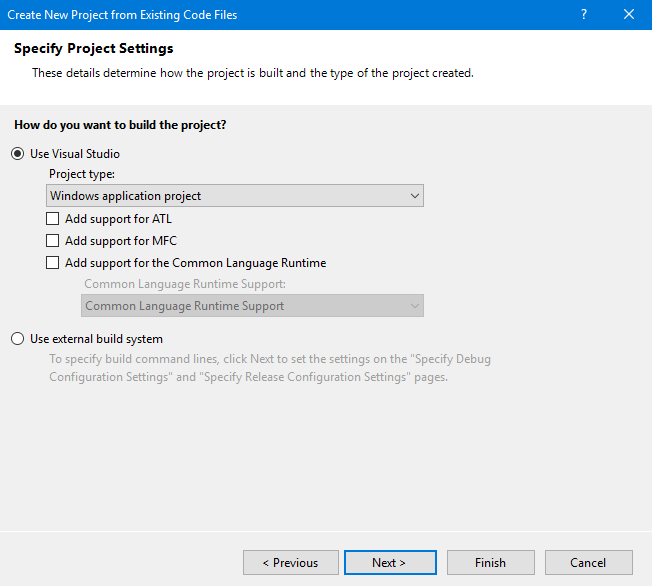
Step 1. Run the Project from Existing Code wizard: Launch “File > New > Project from existing code…” and follow the wizard steps to create a new VS project for your sources. On the “Specify Project Settings” step, make sure you select “Use Visual Studio” before configuring any other option that might apply (e.g. using MFC, ATL or CLR).
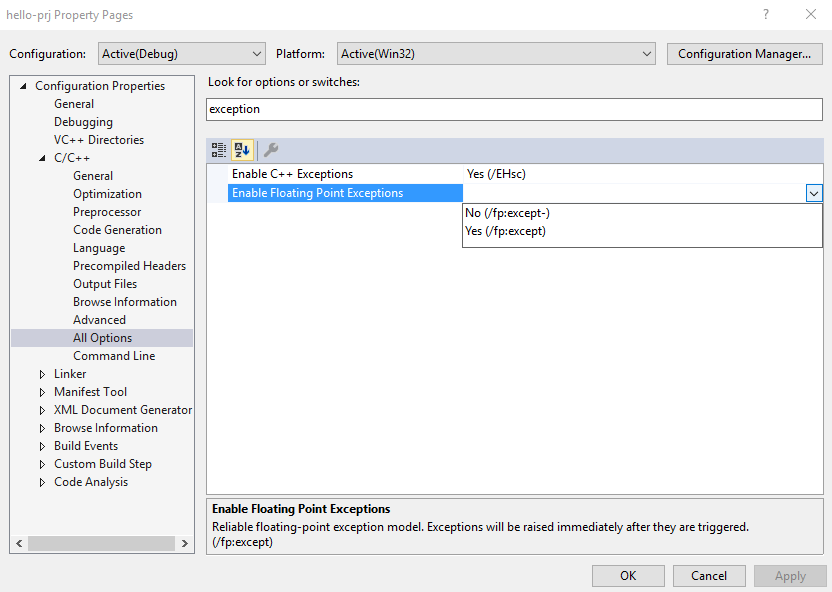
Step 2. Translate compile options to VS: For this step, it’s recommended to turn up the verbosity of MSBuild (from Tools > Options > Projects and Solutions > Build and Run, change “MSBuild project build output verbosity” to “Detailed”). This step will list the compiler command lines that MSBuild uses to run the build. You can compare this against a log of the previous build system you were using.
Differences can be reconciled in the Project Properties dialog (right-click on the project in Solution Explorer and select “Properties”) > Configuration Properties > C/C++ > All Options. In the search box, you can search for a specific switch to find the property that maps to that switch and operate changes to make sure that MSBuild ends up calling the compiler with the same command line that your previous build system was.
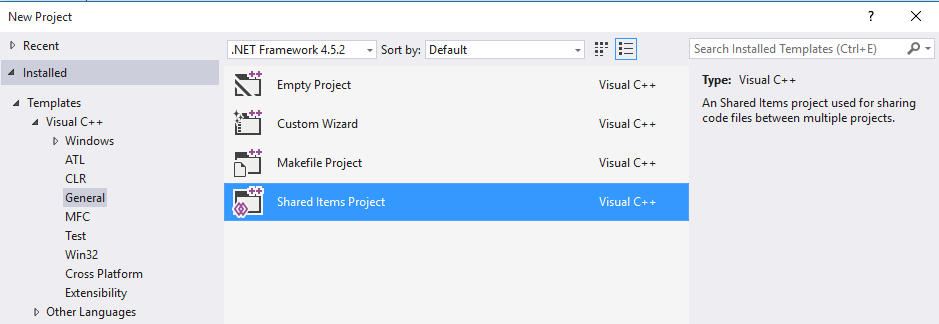
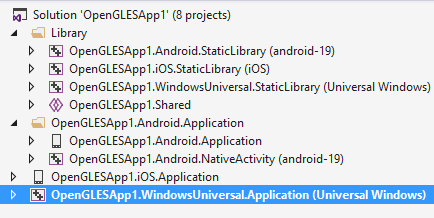
Step 3. Use Shared code projects: If you want to expand your project to target more platforms in addition to Windows, follow the instructions in the “Cross-platform code sharing with Visual C++” article to move your C++ code into a shared code project and share it among C++ projects targeting Windows, UWP, Android or iOS.
Step 4. Consume 3rd party C++ libraries. If your project is depending on any open-source C++ libraries today, chances are that you will find them in vcpkg’s catalog. Vcpkg can easily integrate with MSBuild projects and can simplify both the build process for these 3rd party open-source libraries as well as the consumption in your own projects. To learn more about vcpkg, check out the Getting started with vcpkg introductory post.
What’s next
If you’re new to Visual Studio, learn more by reading the Getting Started with Visual Studio for C and C++ Developers topic and the rest of the posts in this Getting Started series aimed at C++ users that are new to Visual Studio. Download Visual Studio 2017 today, try it out and share your feedback.
0 comments