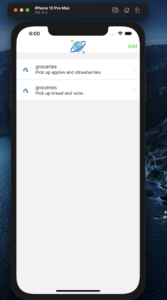
Building a mobile application with Azure Cosmos DB and React Native is simple… let’s give it the old college try :$. First, let’s set up our environment. I use a Mac, so adjust accordingly. To setup up our environment, we need a few things React Native, Expo, Yarn, snack (optional), and Azure Cosmos DB keys.
Prerequisites
Step 1: Installing Node and Watchman
The official guide suggests using Homebrew to install Node and Watchman. First things first run the below command to install Homebrew
/bin/bash – c “$(curl –fsSL https://raw.githubusercontent.com/Homebrew/install/master/install.sh)”
Run the following commands to install Node and Watchman.
brew install node
brew install watchman
Step 2: Creating a new Application
Now all the dependencies are installed, and we can create our new Application. Run this command to create a new React Native App
Expo
npm install --global expo-cli
expo init cosmosdb-react-native
React Native
npx react-native init cosmosdb-react-native
This command creates a new project named cosmosdb-react-native. If you’ve used “gem” to install CocoaPods, you will also need to run the pod command to install all the dependencies.
Running apps using the command line
- First, navigate to the project folder. cd cosmosdb-react-native then execute this command to run the app in simulator next react-native run-ios
- Running app with Xcode
- Locate your app folder, then go to the iOS or Android folder. You will see a file named cosmosdb-react-native.xcworkspace.
- Open the workspace file. Select an iOS or Android simulator and run your app. Tadaaa!! 🎉 🎊
Step 3: Install Azure Cosmos DB package
https://github.com/Azure/azure-sdk-for-js/tree/master/sdk/cosmosdb/cosmos
NodeJS
Npm comes preinstalled with NodeJS. You should be using Node v10 or above.
npm install --save @azure/cosmos@latest
npm install --save isomorphic-webcrypto
npm install --save react-native-crypto
npm install --save react-native-get-random-values
npm install --save randombytes
Get Account Credentials
You will need your Azure Cosmos DB account endpoint and key. You will find these in the Azure portal or use the Azure CLI snippet below.
This snippet is formatted for the Bash shell.
az cosmosdb show --resource-group <your-resource-group> --name <your-account-name> --query documentEndpoint --output tsv
az cosmosdb list-keys --resource-group <your-resource-group> --name <your-account-name> --query documentEndpoint --output tsv
Create an instance of CosmosClient
Interaction with Azure Cosmos DB starts with an instance of the CosmosClient class. Make sure to follow best practices to securely retrieve your endpoint and master key.
const CosmosClient = require('@azure/cosmos').CosmosClient
const endpoint = //securely get your endpoint string here
const authOrResourceToken = //securely get your auth or resource token string here from a token broker server-side
const databaseId = 'ToDoList'const containerId = 'Items'
const client = new CosmosClient({ endpoint, authOrResourceToken })
Create the query spec
const querySpec = {
     query: 'SELECT * from c'
};
Create an instance of CosmosClient
      const response = client
            .database(databaseId)
            .container(containerId)
             .items.query(querySpec)
             .fetchAll()


Call me crazy, but I feel really uncomfortable about exposing my DB directly to the internet, and having an app talking to it. At least if there’s anything sensitive in there, and most apps do.