Searching for how to change your partition key in Azure Cosmos DB? You have come to the right place!
Lets get the “bad news” out of the way quickly: technically, it is not possible to “update” your partition key in an existing container. The reason for this is that the partition key field you chose when creating your container is used as the basis for a consistent hashing scheme that dictates the distribution of data across logical and physical partitions behind the scenes in Azure Cosmos DB’s backend infrastructure. This is what facilitates massive and seamless horizontal scalability in Azure Cosmos DB. We cannot allow this value to be changed once created in an existing container/collection.
But have no fear! The good news is that there are two features, the Change Feed Processor and Bulk Executor Library, in Azure Cosmos DB that can be leveraged to achieve a live migration of your data from one container to another. This allows you to re-distribute your data to match the desired new partition key scheme, and make the relevant application changes afterwards, thus achieving the effect of “updating your partition key”. In this blog, we are going to present you with a custom deployable .NET app that implements these features, to help you achieve this in a relatively painless way!
Prerequisites
You will need to have access to an Azure subscription, and an Azure Cosmos DB SQL API account that will be used for the migration metadata (this can be the same as the collection where you wish to change partition key scheme, if you wish). Note that all of the below guidance applies to SQL API only.
The deployment uses Azure Resource Manager (ARM) to deploy two app service plans. One is for a client node.js application, and the other is to handle the migration workload and Change Feed processing. An instance of Azure Application Insights will also be provisioned:

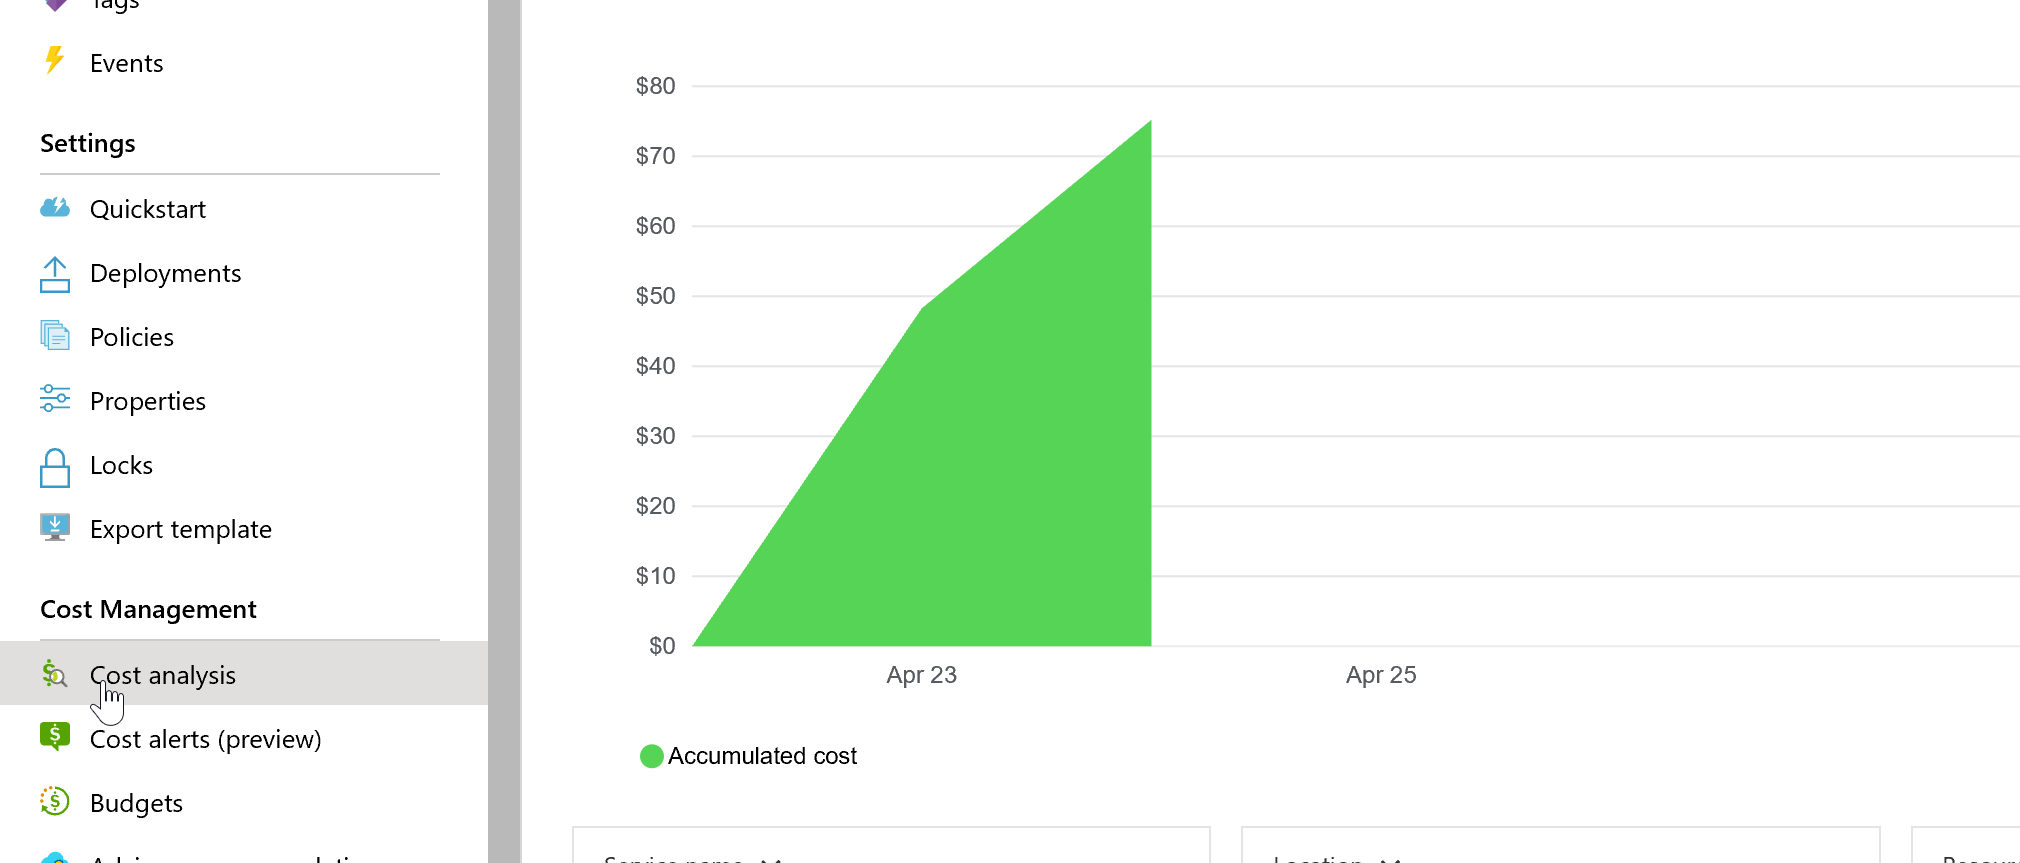
You should ensure you understand the ongoing costs of running the app using the cost analysis tab:

Quickstart
To deploy the app to Azure, click here.
![]()
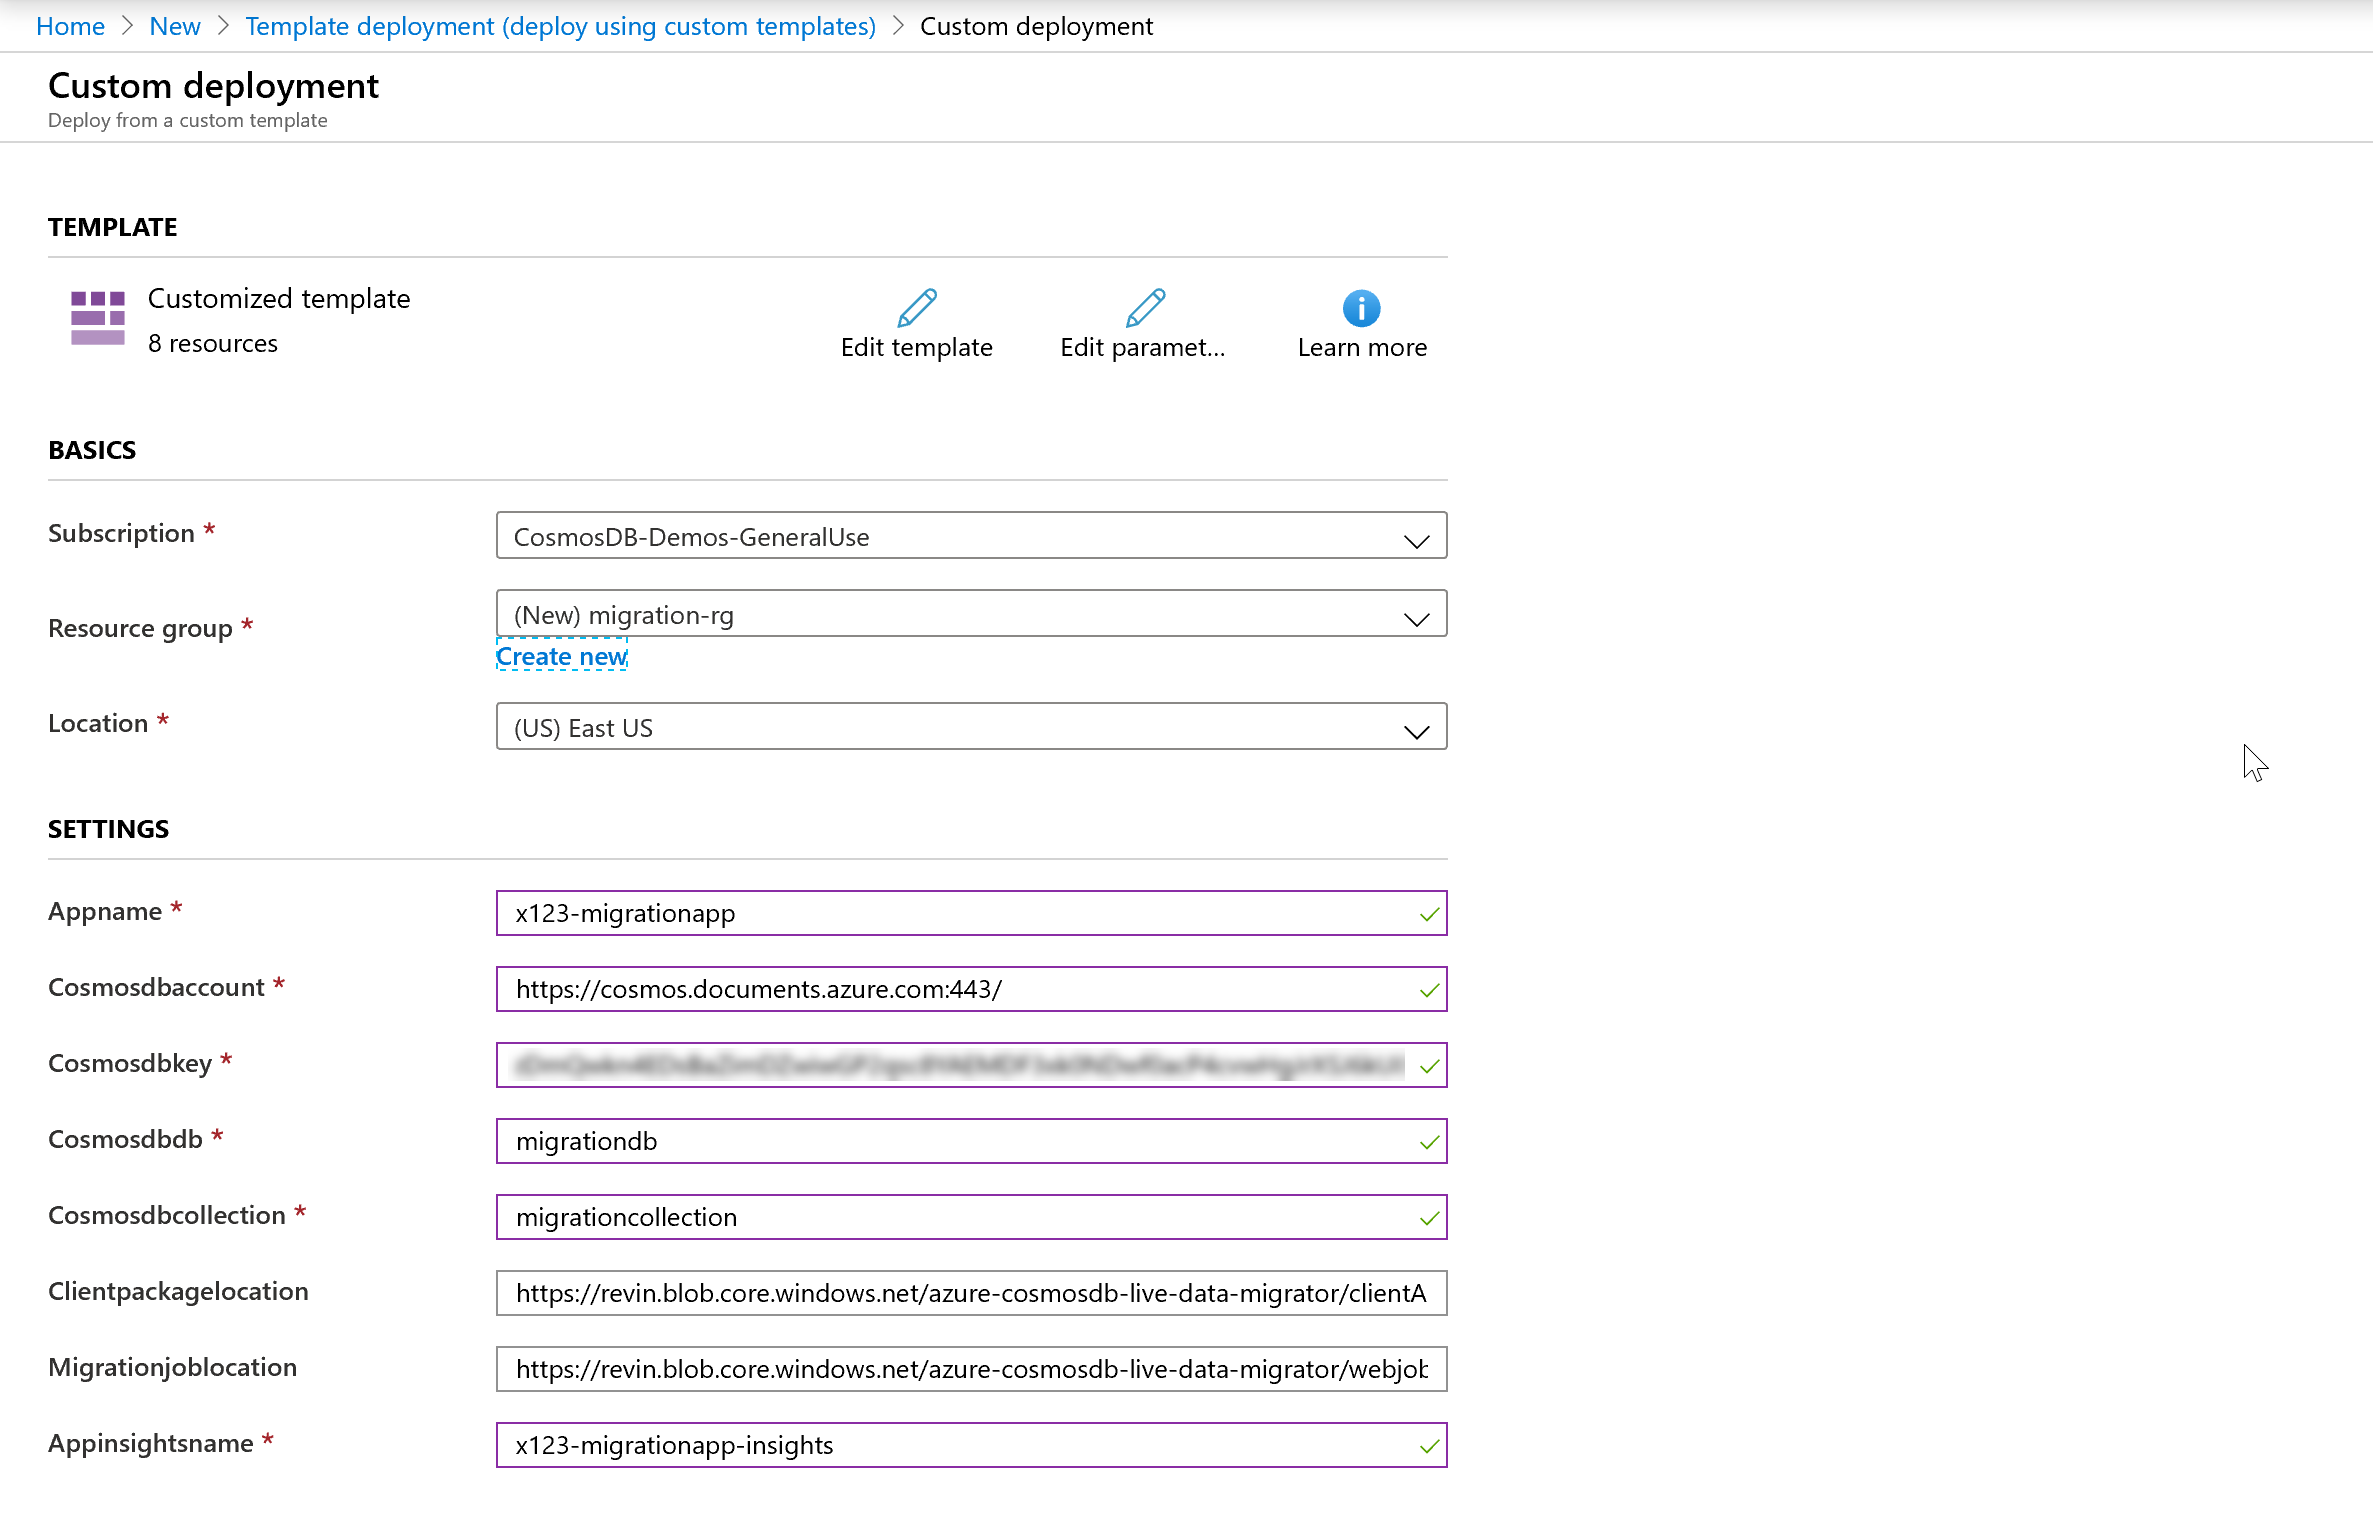
You will be presented will some fields you need to populate for the deployment;
- An identifiable Appname and an Appinsights name (this can be used to track and monitor/diagnose any issues)
- Azure Cosmos DB Account information to store the migration metadata and migration state (you do not need to create the actual database or collection, these will be created in the deployment, you just need to have an Azure Cosmos DB account per the prerequisites mentioned above).
You should also create a new Resource group so that it is easy to co-locate the different components of Service. Make sure that the Resource group region is the same as the region of Azure Cosmos DB source and target collections. Please note that this is not the Source and Target Azure Cosmos DB details (we will enter these at a later stage). The Clientpackagelocation and Migrationjoblocation are pre-populated with the zipped files to be published.
The entered fields should look something like the below (agree to terms and click “purchase” to deploy):

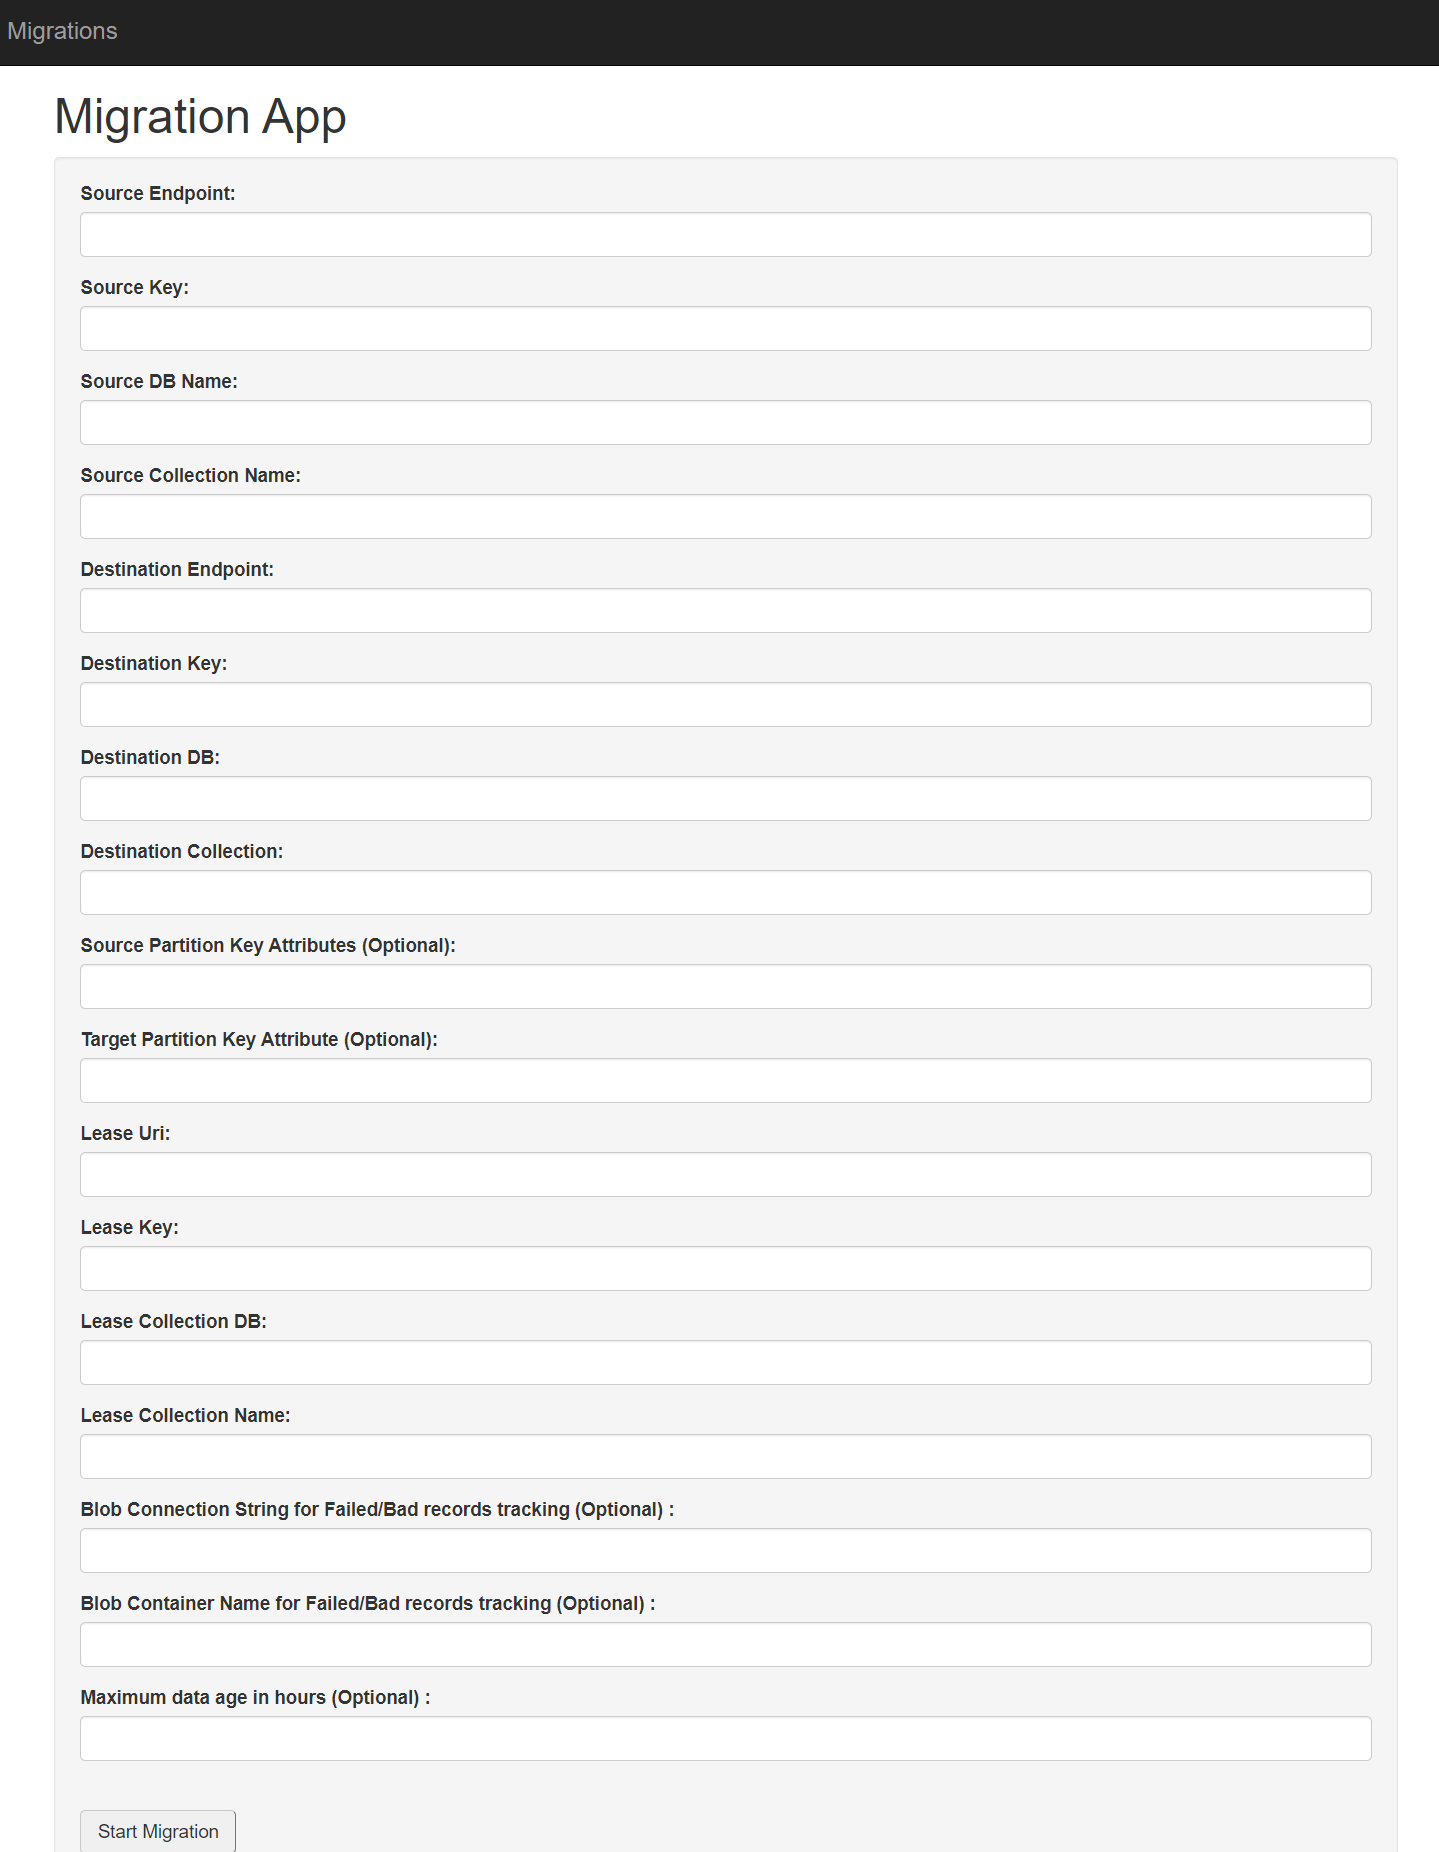
When the deployment is complete, open the web app client resource and click on the URL (it will be of the format: https://appnameclient.azurewebsites.net). You should see a page like the following:

You will need to:
- Enter the credentials for the source collection whose partition key needs to change in the fields preceded by “Source”.
- Enter account credentials in the fields preceded by “Destination”, with a new name for that collection in the “Destination Collection” field. This app was designed for live migrations, but since we are changing the partition key scheme, you will also need to explicitly create a new collection with the desired new partition key that you want (see below).
Note: if the database for the source collection does not already have a “leases” collection (used for bookmarking in any Change Feed processing), you will need to create this (although it is recommended that you create a dedicated leases collection for the purposes of live migration). Simply create a collection with minimum throughput, with a partition key of id, and an identifiable name, and then enter the appropriate values in the fields preceded by “Lease”.
Changing the Partition Key
Now for the part you came for! If your existing collection does not have a dedicated or synthetic partition key – that is, your application is not mapping values from each document into an explicit partition key field, then all you have left to do is make sure you have created a new collection where you selected a different partition key field. The application will simply migrate data from source collection to target collection, where the new collection has a different partition key defined (assuming that attribute already exists in each document record of the existing data).
However, if you do have a synthetic key in your existing collection, or if your intention is to create a synthetic/dedicated partition key field (mapped from another attribute) instead of defining an existing attribute as the partition key, then there will need to be a mapping during migration and re-distribution of the data. For this, you can use the optional “Source Partition Key Attributes” and “Target Partition Key Attribute” fields. If we consider a scenario based on this example, you would enter the following in these fields (note that multiple source fields are separated by commas):

Nested source fields are also supported by the app in the mapping, for example Parent1/Child1,Parent2/Child2. If you want to select an item in an array, for example:
 	{
 		"id": "1",
 		"parent": [
 			{
 				"child": "value1"
 			},
 			{
 				"child": "value2"
 			}
 		]
 	}
You can use xpath syntax, e.g. parent/item[1]/child. In all cases of synthetic partition key mapping, these will be separated with a dash when mapped to the target collection, e.g. value1-value2 would be the value of the new synthetic key if “Source Partition Key Attributes” contained parent/item[1]/child,parent/item[2]/child as the mapping.
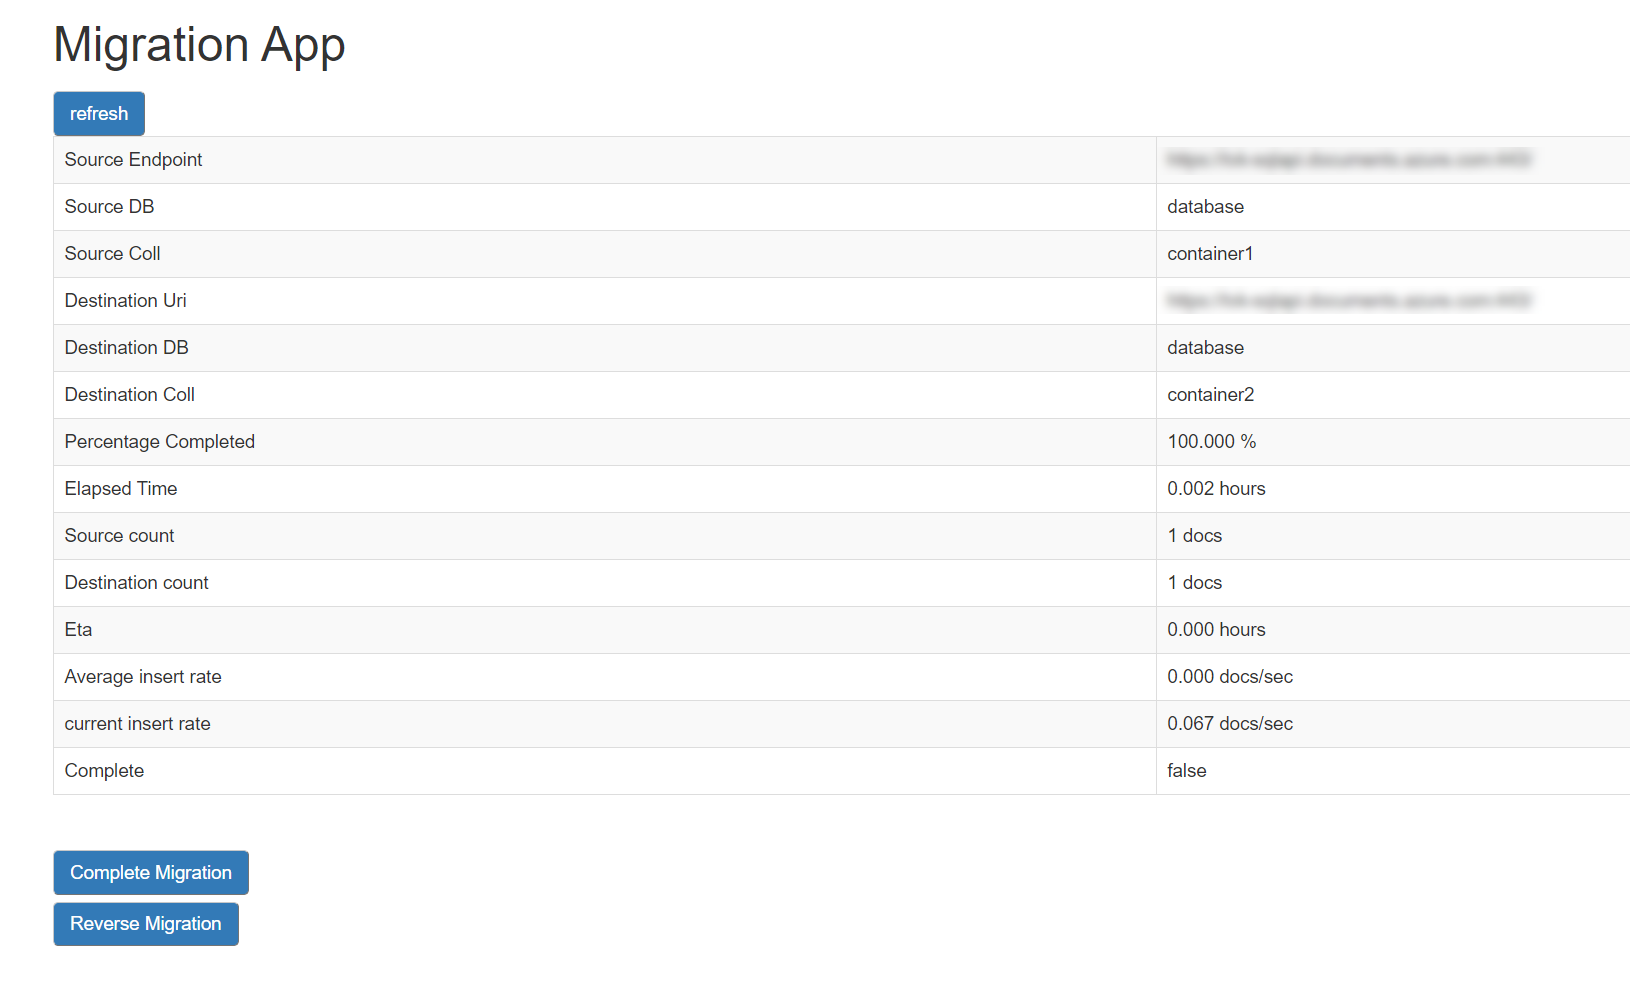
If no dedicated or synthetic partition key field is required, you can leave these fields blank and hit “start migration”, when you will be taken to the following page:

You can keep hitting “refresh” to see the progress of the migration. Note: if you need to apply the partition key change to a live running application, you should not click “complete migration” until you have made any required changes in your client code based on the new partition key scheme, as clicking this will shut down the change feed processor and stop any ongoing changes from being replicated from source to target collection. Click on Complete Migration once you are satisfied that all the documents have been migrated to Target container and your application changes are complete and pointing to the new container with the changed partition key scheme.
Some other optional fields
- Azure Blob Connection string and Container Name to store the failed / bad records. The complete records would be stored in this Container and can be used for point inserts. You would need to create an Azure blob storage account for this.
- Maximum data age in hours is used to derive the starting point of time to read from source container. In other words, it starts looking for changes after [current time – given number of hours] in source. The data migration starts from beginning of when records were first created in the source container, if this parameter is not specified.
Other use cases for live migration
In this blog we have presented a custom built app for the purpose of changing partition key. However, there are some other scenarios where you may find the Azure Cosmos DB Live Migrator sample app useful. These are:
- Migrating a container with dedicated throughput to a database with shared throughput. If you have created a database without shared throughput (see here for more information on this), you cannot change these containers to work on a shared database throughput basis. However, you can use this custom app to achieve a live migration in order to facilitate a change in throughput provisioning of an existing container.
- Migrating a container where physical partitions have grown to a size no longer required by the throughout needs of the application, and the goal is to therefore “shrink” the container to a minimal number of partitions.
- Migrating a production container to another account (e.g pre-production), in order to trouble shoot using live data.
- Renaming of a container (re-naming is not possible once a container has been created, but you can migrate to another container with a different name).
Performance benchmarks
Below shows achieved throughput docs/secs from benchmarking a migration of 150 million documents – this depends on the target RU and indexes.

Some limitations
Deletes are not supported by the Change Feed. The impact of this is that any deletes that happen to documents in your source collection, that have already processed by the change feed processor during a migration using this application, will not be reflected. If this is important to your process, you should consider implementing soft deletes, combining this with Time-to-live capability, in your application prior to migration.
If you want to make changes to this app to support additional needs or requirements, you can find the source code on GitHub here. We welcome contributions!


Hi All,
Need help for azure cosmos db. I am the new of azure cosmos db. I have existing collection there around 50 documents are there.
There is no partition key. how to create a new partition key for existing collections in azure cosmos.
can any one please help me on this.
Partition keys are immutable. To change to a new key you need to create a new collection and migrate the data.