Installing Windows 8 Release Preview on a .VHD file from a bootable USB-Pen
** May 31st 2012 – UPDATE TO WINDOWS 8 RELEASE PREVIEW **
There are quite a few steps to do, so I’ll write it down for my records.
Specifically, I have installed the Windows 8 Release Preview on a on a Samsung Slate Series 7 Tablet, but on a .VHD with native Boot:
For more info about .VHD with Native Boot, see (Updated: May 31, 2012 Applies To: Windows 8):
http://technet.microsoft.com/library/hh825689.aspx
Requirements:
– You’ll need a USB keyboard plugged into your tablet.
– A USB-Pen with at least 8 Gb.
A.- INSTALLING THE OPERATING SYSTEM
STEP #1
Backup your data on your Series 7.
STEP #2
Update BIOS
(this step is optional – unsupported developer BIOS will resolve hardware button incorrect mapping when Windows 8 is installed.) Use at your own risk.
Download the last BIOS for the Series 7 Slate from the Samsung Support web site and install it following the provided procedure.
STEP #3 – Configure BIOS (do this even if you don’t update the BIOS.)
Enter BIOS setup: Power off the PC. Power the system back on and at the same time, press the “HOME” hardware key on the bezel. Select “ENTER SETUP” (note: if you do not have a USB keyboard attached you can use the VOL+/VOL- keys to select, Rotation Lock button as “enter”, and both vol buttons at the same time to go back.)
– Select the ADVANCED menu option in the BIOS menu
– Change “Allow UEFI boot” to YES
– Save settings and exit.
STEP #3
Get the Windows 8 Release Preview bits (ISO image)
First of all, you need to get the bits. I want an .ISO image so I’ll burn it on an USB pen.
You can download the .ISO image from here: http://windows.microsoft.com/en-US/windows-8/iso
Then, having an empty USB pen (it will be formatted), just burn it on it. You can use the Microsoft Store USB/DVD Download Tool. Grab it from here:
http://www.microsoftstore.com/store/msstore/html/pbPage.Help_Win7_usbdvd_dwnTool#ms_help_topics_at4
Once installed, you run the tool and you’ll get a wizard where you specify the origin .ISO image and the destination bootable USB Pen:

So, ready to start the real process!.
STEP #4 – Booting the Windows 8 Release Preview from the USB-Pen
– Plug the bootable USB-Pen into the USB slot in your Tablet.
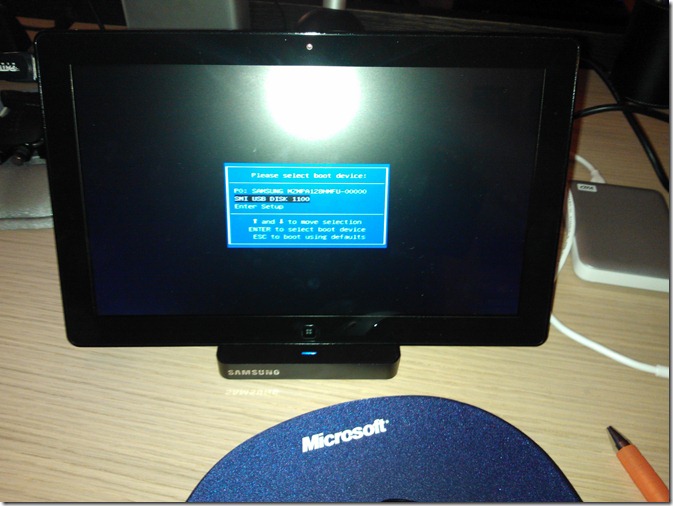
– Start the tablet, but almost instantly (after half a second), press on the small “HOME/WINDOWS” hardware key on the center of the tablet. This will show you the BOOT-MENU, so I can boot from the USB-Pen:
Again, in order to select the right option (USB DISK), if you do not have a USB keyboard attached you can use the VOL+/VOL- keys to move up/down on the Boot menu, and then select the option pressing the second small harware key on the right of the tablet (beside the ‘on’ key).
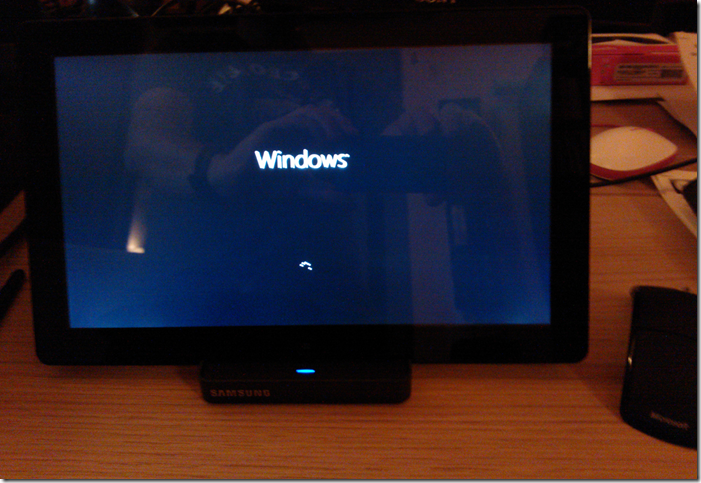
You will see a “Windows” word over the black background (no more the small fish of the Consumer Preview) when starting the Windows 8 setup:
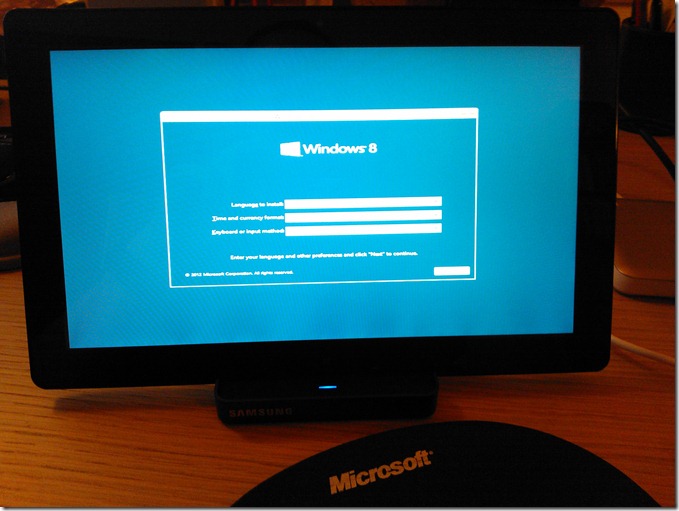
Then, you’ll see the initial “Windows 8” setup Window:
STEP #5 – Creating a .VHD file drive from the Windows 8 setup process
Instead of installing Windows 8 on the plain hard-drive, we’re going to create .VHD file and then we’ll install Windows 8 on that .VHD file. The booting start will be native (no HyperV), having the same performance than installing it on the plain hard-drive, but it is a much cleaner way. When I get another version of Windows 8, I’ll install it on a different .VHD file. It is a nice, clean and great way to handle native Dual/multiple booting.
– Select keyboard and ‘time & currency’ preferences for the setup, and then press the ‘Next’ button. You’ll see a Windows 8 window with a single “Install now” button. Press on the ‘Install button’ button (This is a different way than when doing a similar setup procedure using Windows 7).
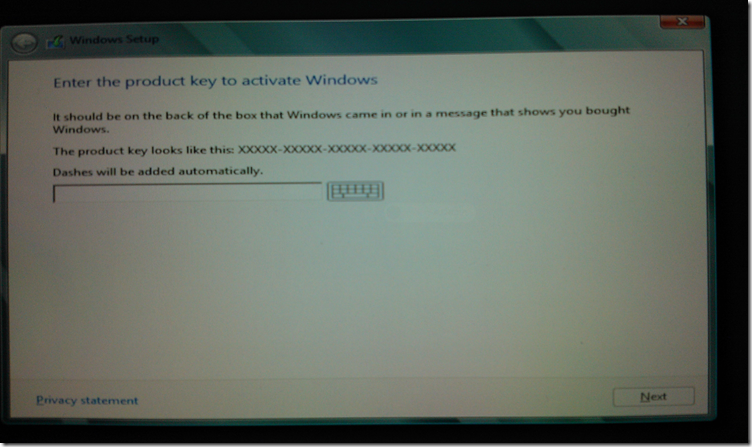
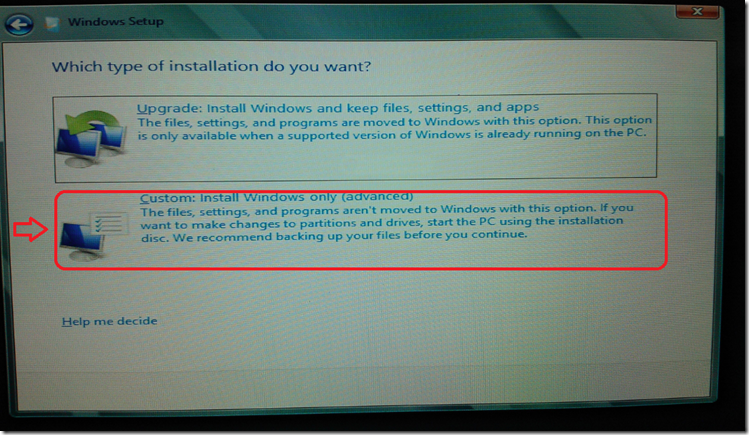
– Carry on with the typical screens (Product Key, License, etc.) until you get to the ‘Installation type’. Select ‘Custom Install’:
Go until the Drive selection screen.
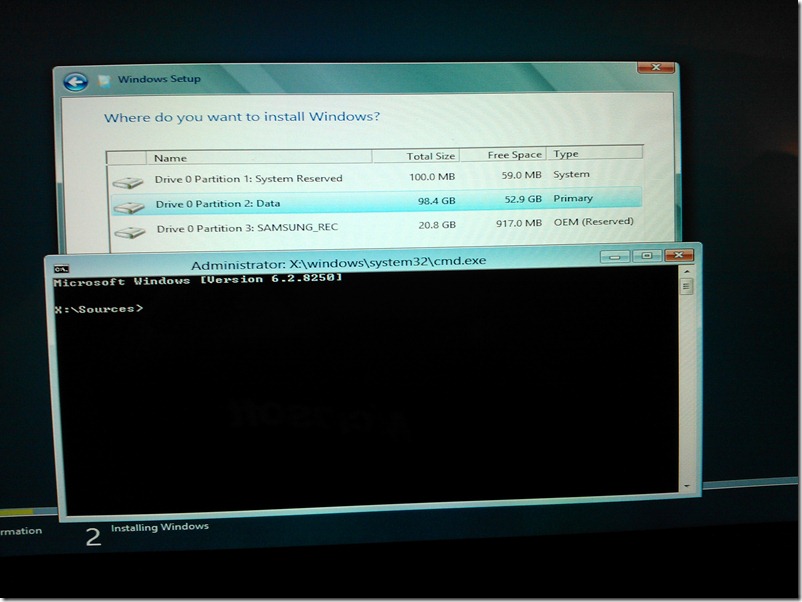
– CAUTION: You’ll get to the Drive selection Window. Now, pay attention here.
DO NOT PICK AN EXISTING HARD DRIVE. As shown in this screenshot, instead hit SHIFT-F10 to get to a console command-prompt. We want to create and attach our VHD file and install Windows 8 to THAT instead!!.
– Now we finally get a Command prompt Windows where we’ll be able to create a native bootable .VHD file-drive. We’ll install Windows 8 on that .VHD file, afterwards.
– Explore de drives you can see from the command prompt (C:, D:, E:, etc.). When installing Windows, it usually creates several small initial partitions, therefore, when you do the following steps, you have to specify E:\ drive instead C:\ drive (At least, that is my case). If you try with C:\ and you get an error message saying something like "You don’t have space enough". Try specifying E:\ drive, and check the partition where you are going to create the .VHD file.
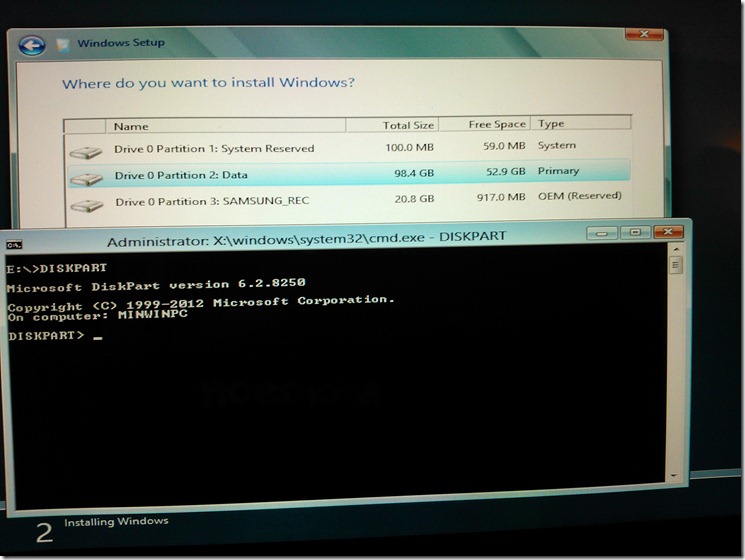
– Run the Diskpart command-tool writing Diskpart.
– Now, we create the .vhd file. I’m going to create a 30GB expandable file. You can create it bigger or smaller.
Type: Create vdisk file=E:\Windows8.vhd maximum=30000 type=expandable
– Select the .vhd file so the Windows 8 setup is able to see it as a drive
Type: select vdisk file=E:\Windows8.vhd
– Attach this drive to the setup system:
Type: attach vdisk
and Finally get out of the DISKPART tool, too.
Type: exit (you will exit DISKPART)
– Finally get out of the command prompt, another ‘exit’:
Type: exit (you will leave the Windows Command-Prompt, but Do Not Reboot!!)
– We return now to the ‘Drive selection Window’.
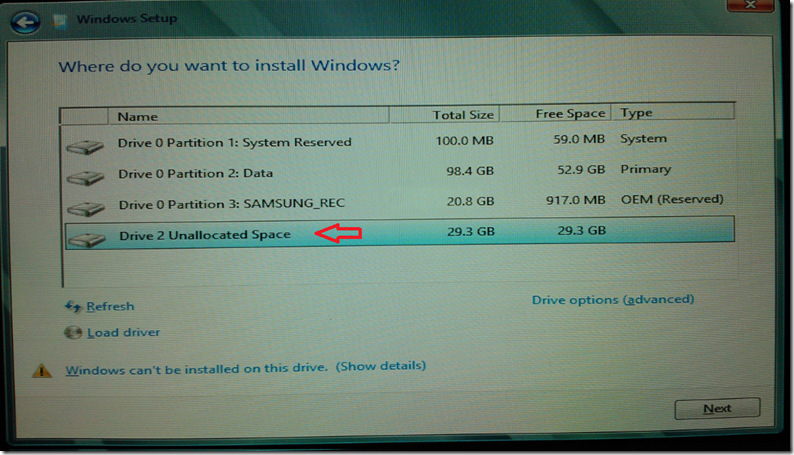
– Press the ‘Refresh’ button, and you’ll see our new .VHD drive!:
– Install Windows 8 on this attached .VHD. First you’ll need to create a partition & format it, selecting the drive which is really our .VHD file, and then clicking on the "Drive Options (Advanced)". From tha tmenu you can create a partition within the .VHD file and format it, afterwards.
You might get an error/warning saying that your computer hardware might not support this disk, just ignore it and press ‘Next’..
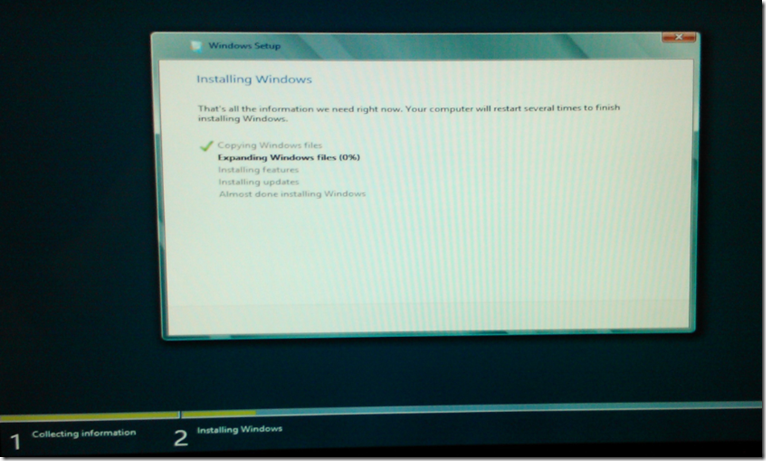
-It will reboot, etc., and you got it!!!!
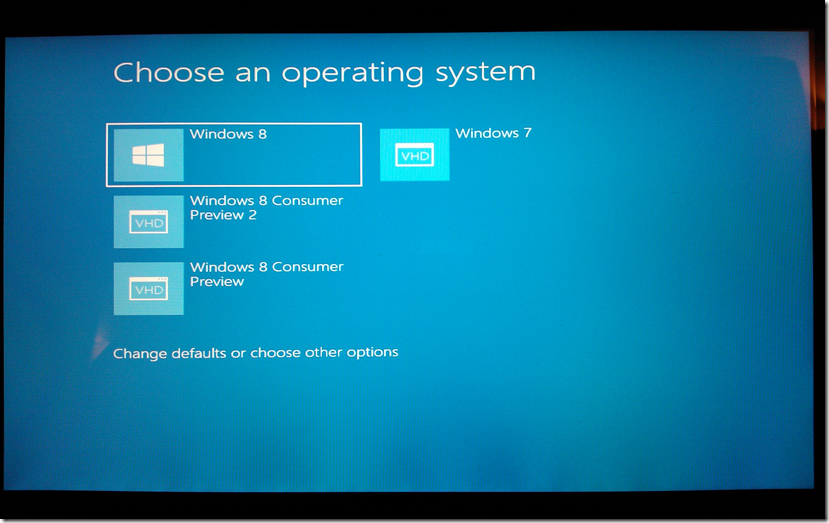
– When starting, I have now a native & multiple-Boot, for Windows 8 (Release Preview), Windows Consumer Preview and Windows 7, because I already did similar setup processes with older OS versions:
Remember, the great thing here is that even when we are starting Windows 8 from a .VHD file, it is booting in a native way, so performance will be good (graphics card, etc.). Starting like that, Windows 8 runs smoothly in this Samsun Tablet.
I have my native operating systems stored in just a few files, so my hard drive is kept clean, for the future (next versions, etc.).
Something like the following files:
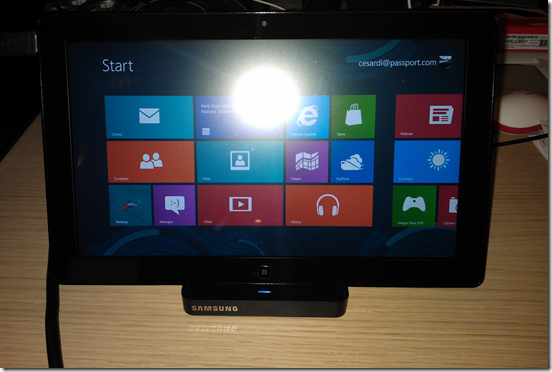
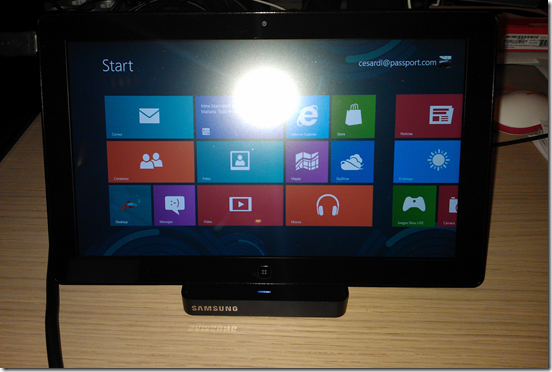
There you have it, the first METRO screen of Windows 8 Release Preview:
Enjoy Windows 8 Release Preview!
B.- (OPTIONAL) CONFIGURING BOOT OPTIONS
You might want to change dual boot options, option string names, etc.
When you want to configure the boot options of windows you can use bcdedit.exe to modify the boot settings.
For instance, once you have booted in Windows 8 (any boot, you might have 2 ‘Windows 8’ option strings… ;-)), you might want to change those boot options strings. In order to do so, start a CMD prompt and run bcdedit.exe (in \Windows\System32) to see the GUID of your boot options:
bcdedit /v
Remember/copy the GUID of your VHD installation and type the following line, of course, changing my ‘xxxxxxxx’ stuff to your GUID.
bcdedit /set {xxxxxxxx-xxxx-xxxx-xxxx-xxxxxxxxxxxx} description "Windows 8 .VHD Image"
You can put the description you like, but the above line will change the description for your VHD installation boot option.
You can also change the order of the boot options typing the following:
bcdedit /displayorder {xxxxxxxx-xxxx-xxxx-xxxx-xxxxxxxxxxxx} /addlast
—
Finally, once you have these kind of .VHD images, you can copy it and have as many BOOT options as you want.
The easiest way is to copy an originall boot menu option, like:
bcdedit /copy {Original_GUID_Number} /d "my new description"
or
bcdedit /copy {current} /d "my new description"
or
bcdedit /copy {default} /d "my new description"
Type again the following to see the new GUID for your new copied boot option:
bcdedit /v
Copy that GUID to a notepad or a paper…
After that, you must change the 2 pointers within the menu option, so they point to the new/right .VHD file:
bcdedit /set {My_new_GUID_Number} device vhd=[C:]\MyNewVMFile.vhd
bcdedit /set {My_new_GUID_Number} osdevice vhd=[C:]\MyNewVMFile.vhd


 Light
Light Dark
Dark
0 comments