

Azure SQL CICD Part 1: Getting Started
Continuous Integration (CI) and Continuous Delivery/Deployment (CD) are a set of principles or methodologies that empower development teams to deliver code faster, more reliably, and with fewer bugs compared to traditional software development such as the waterfall model. Teams that use CI/CD also usually adhere to some version of the Agile Methodology, working on smaller features as part of a larger overarching requirement in sprints rather than monolithic tasks spanning months or years.
We can apply the CI/CD methodology to Azure SQL Database change management by giving developers personal environments to work in, repositories for a common code base, detailed and thorough automated testing, and a feedback process that encourages good coding standards. While a very lofty goal, this series of articles will help guide you in creating these conditions for development success.
The next few articles will cover:
- Setting up your local environment
- Using GitHub as the code repository
- Creating a SQL Database Project in Visual Studio Code/Azure Data Studio
- Publishing your project to a local database
- Committing your code to GitHub
- Automated testing with tSQLt and GitHub actions
Where Do I Start?
What does the development environment look like and how do you start with Azure SQL CICD? Your Operating System really does not matter too much but just so we can have a consistent story here, let’s use Windows 11 as our base. What else do we need? Here is a checklist:
- git installed
- A GitHub account
- Visual Studio Code installed (Azure Data Studio can be used as well)
- Docker installed
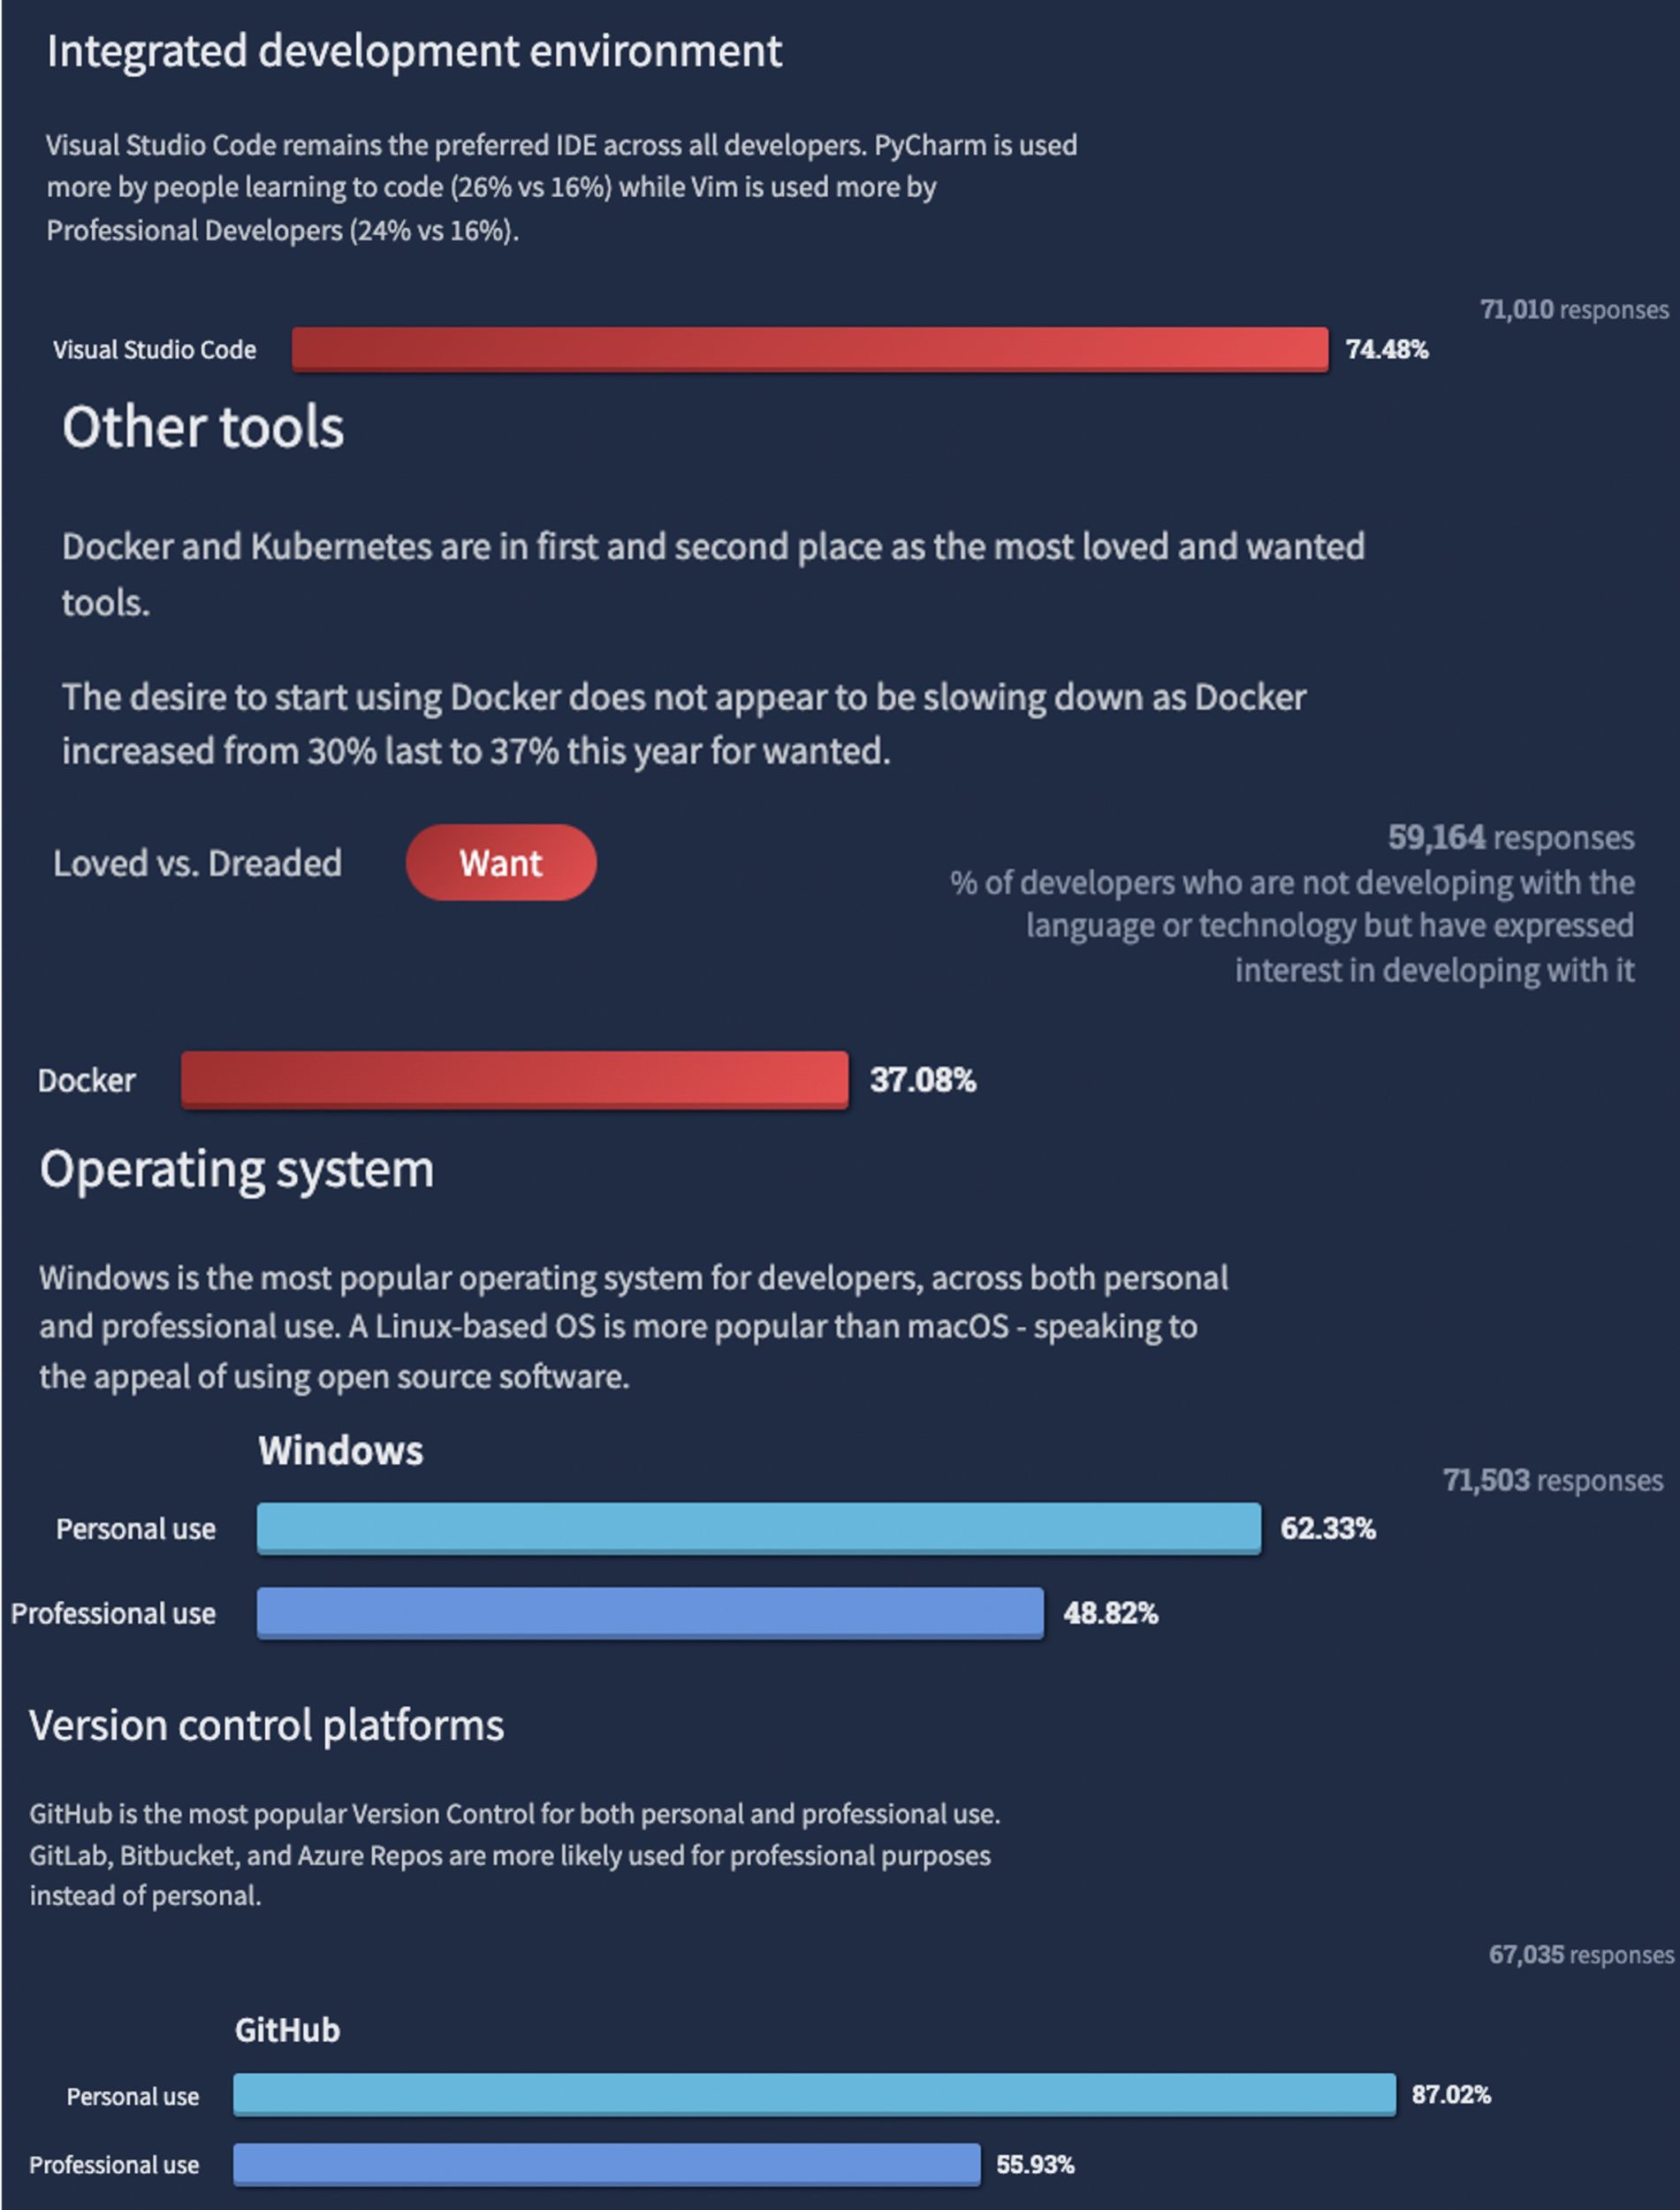
According to the Stack Overflow 2022 Developer Survey, many of these tools are very popular with developers and you probably have them installed already.
Create a GitHub Repository
Complete before moving on
These posts will be using GitHub. Please ensure that you have set up a connection to GitHub using either SSH or 2FA (Two Factor Authentication) after you have created an account or with your existing account.Now that we have everything we need, it’s time to start putting the Azure SQL CICD pieces together. The first step is to create a GitHub repository that we will use for our database code.
Once you have the GitHub account, simply click the New button on the GitHub home page
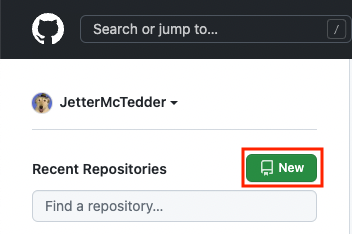
Or click on your profile picture in the upper right of the page and select Your repositories.

Then, on the repository page, click the New button in the upper right.

On the Create a new repository page, select your GitHub user as the owner and name the repository AzureCICD.

I usually also add a README file as well, so check the box next to Add a README file.

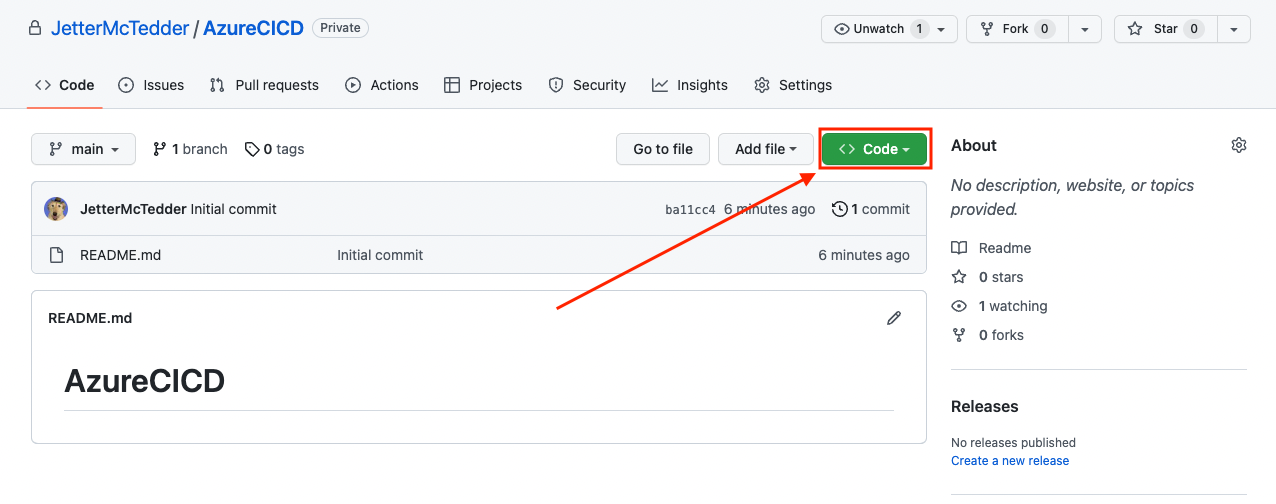
Then on the bottom of the page, click Create repository. That’s it! You have a new GitHub repository ready to go for our Azure Database CICD journey.
Last step is to clone this repository to your local computer so that we can put our work in there and push it up to the repository. On the new repository page, click the <> Code green button.
Now, in the code box, select the Local tab if not already selected and then the SSH option.
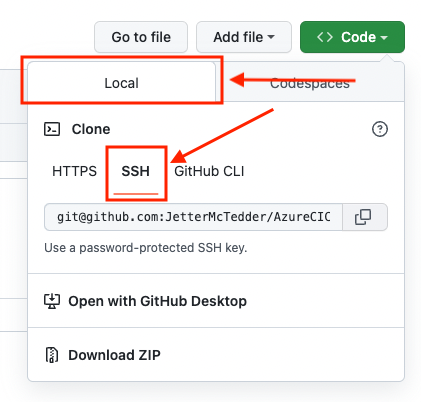
Then click the copy icon to the right of the git@github command.

Clone the Repository
We now need to clone this repository from GitHub to our local environment. Yes, you can use a command prompt/terminal shell/etc but we are going to see why everyone loves Visual Studio Code so much. Open Visual Studio Code and on the bottom, click the Terminal tab (If the tabs are not at the bottom of Visual Studio Code, you can use the Terminal Menu on the top and choose New Terminal).
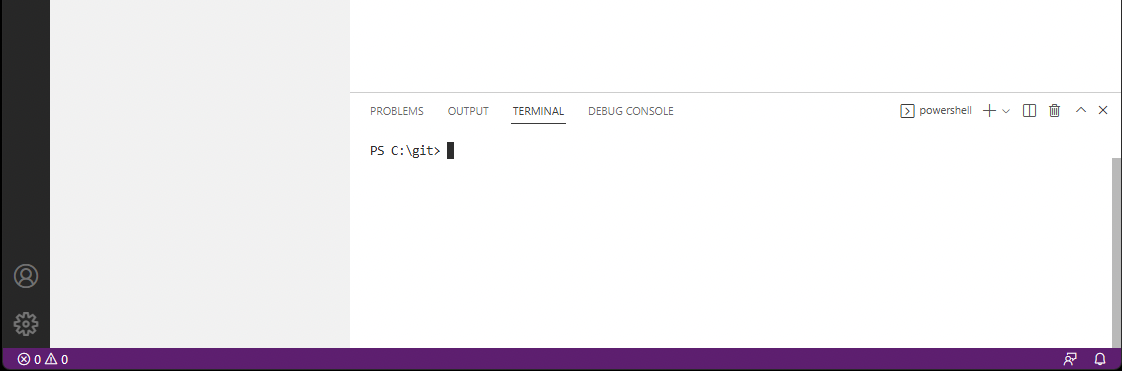
I have a directory at the top level of my C: drive for git repositories. You can use any directory you wish here but which ever one you use, enter that directory and run the following code (The git@github section will be the code you just copied from the GitHub UI with the copy icon ![]() ):
):
git clone git@github.com:YOUR_GITHUB_USERNAME/AzureCICD.git

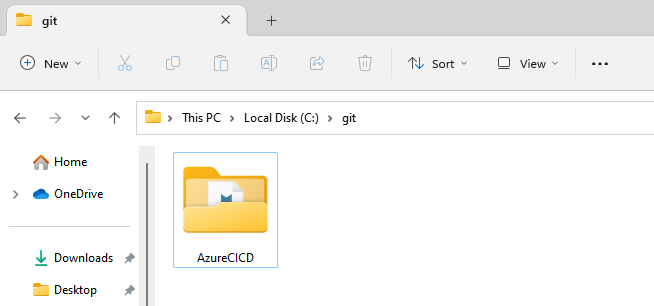
And the project is now cloned to your local environment.
Setting up Visual Studio Code
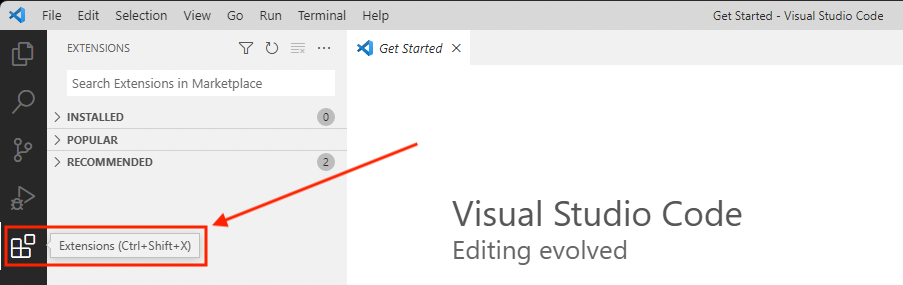
Next is setting up Visual Studio Code for Azure SQL CICD. With Visual Studio Code still open from using the terminal, go to the extensions tab on the left.
Using the Search Extensions in Marketplace bar, search for mssql. Once you find the SQL Server (mssql) extension, click the install blue button.
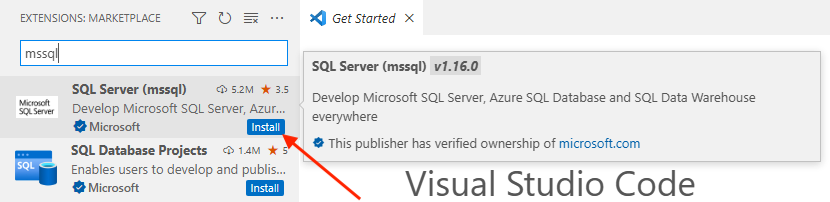
This will install a few extensions, most importantly the SQL Database Projects extension. You can see the new extensions on the left of the Visual Studio Code window.
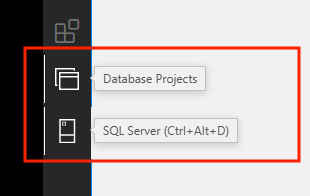
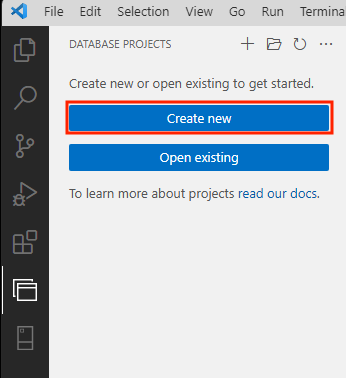
We are going to start with Database Projects. Just simply click the extension to bring up the Database Projects panel. Here, click the Create New button.
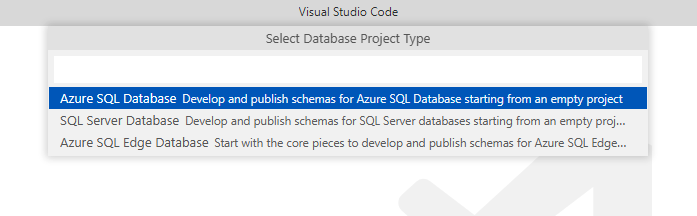
This will start the dialog boxes for creating a Database Project in the middle top of the Visual Studio Code window. The first question is Select Database Project Type. Select Azure SQL Database.
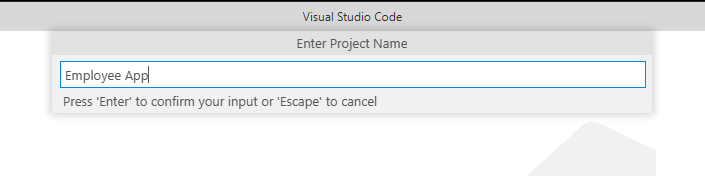
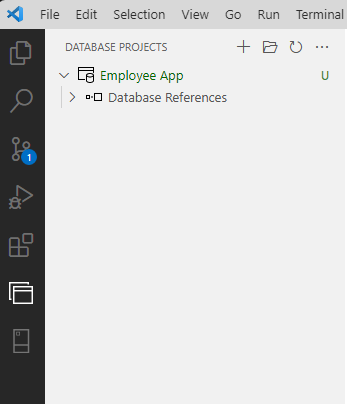
Next we can enter the projects name. Let’s use Employee App.
When asked to Select Project Location, use the Browse option to find our GitHub repository folder we previously cloned.

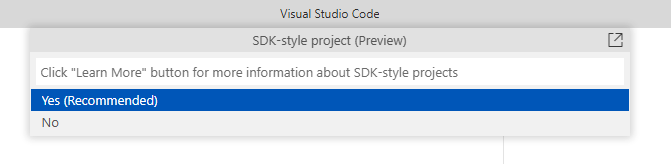
Choose Yes for SDK-style projects.
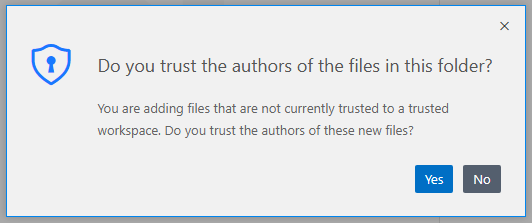
And if you get a warning about trusting the files in the folder, select Yes.
You have now created a SQL Database Project!
Azure SQL CICD to be Continued in Part 2
Our environment is up and running and we are ready to start with our Database Project. The next post on Azure SQL CICD will go over creating database objects and deploying them into a local SQL Database!
0 comments