
Azure Functions is a particularly versatile and powerful service in Azure that allows developers to quickly deploy and run code in production. It provides great scalability with minimal upfront cost (both in terms of money and technical effort). And because it is so easy, we want to ensure that our Functions operate securely, whether we need to pull data from a storage account, communicate with another API or work with SQL Server.
In this blog, we’ll examine how to build an Azure Function that uses the latest Azure SDKs to communicate with Azure Storage securely both during local development and in production by leveraging the Azure.Identity library and Managed Identities.
Prerequisites
You’ll need to have the following available:
- Azure Subscription (get one for free)
- .NET Core 3.1
- Azure Functions Core Tools (CLI)
- Visual Studio Code
- Azure Functions extension for VS Code
Getting started with Azure Functions
There are many ways to work with Azure Functions locally, especially if you’re a .NET developer. You can use Visual Studio, Visual Studio Code, Visual Studio for Mac, or your favorite text editor with the Azure Functions Core Tools. For this blog, we’ll start by creating a new .NET Azure Function with an HTTP Trigger using the CLI. Open your favorite terminal and type:
func init <YourProjectName>
Select dotnet and press Enter:
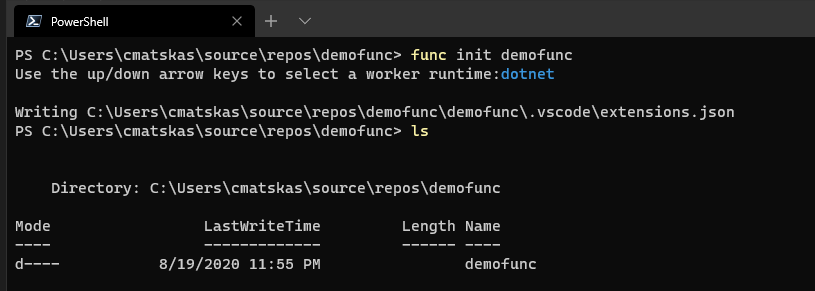
This has created the Function app but we don’t have an actual Function yet. Therefore, we need to use the CLI to add some code. On the terminal, type:
func new
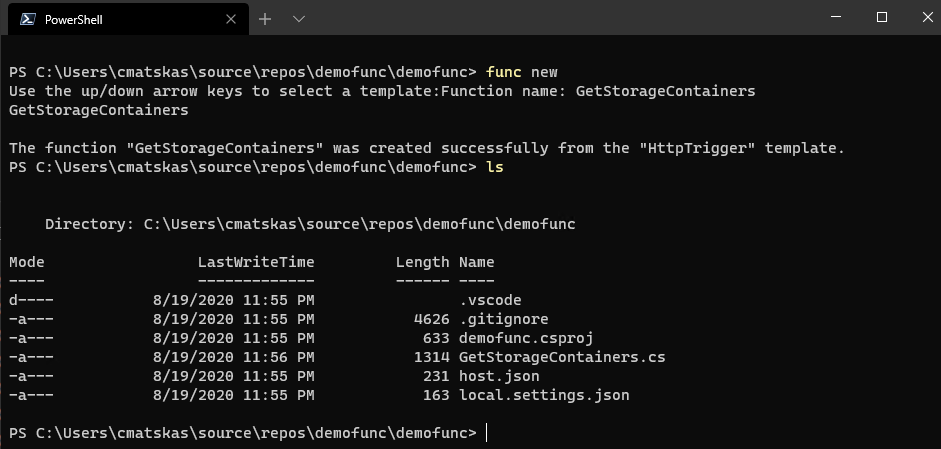
We can now use your favorite IDE to start working with the code. In this case we’ll use VS Code so we can type code . in the current directory in the CLI to open the project in VS Code.
Create the Azure Managed Identity
Azure Managed Identities allow our resources to communicate with one another without the need to configure connection strings or API keys. In this instance, our Azure Function needs to be able to retrieve data from an Azure Storage account. Traditionally, this would involve either the use of a storage name and key or a SAS. However, they both need to be stored somewhere and this can potentially compromise the security of our solution. To solve this, we can use Manage Identities which are “service accounts” that are backed by Azure Active Directory and are provisioned to allow communication between services using the least privilege principle. There are two types of Managed Identities:
- System-assigned identities are tied to the service they are provisioned and have the same lifecycle as the service they belong to. There is a strict one-to-one mapping. So, an Azure Function app will have a system-assigned Managed Identity and as soon as the app is deleted, the Manage Identity is deleted with it.
- User-assigned. These managed Identities are created by the user and can span multiple services. A resource can also have multiple user-assigned identities defined. They are separate resources with their own lifecycle.
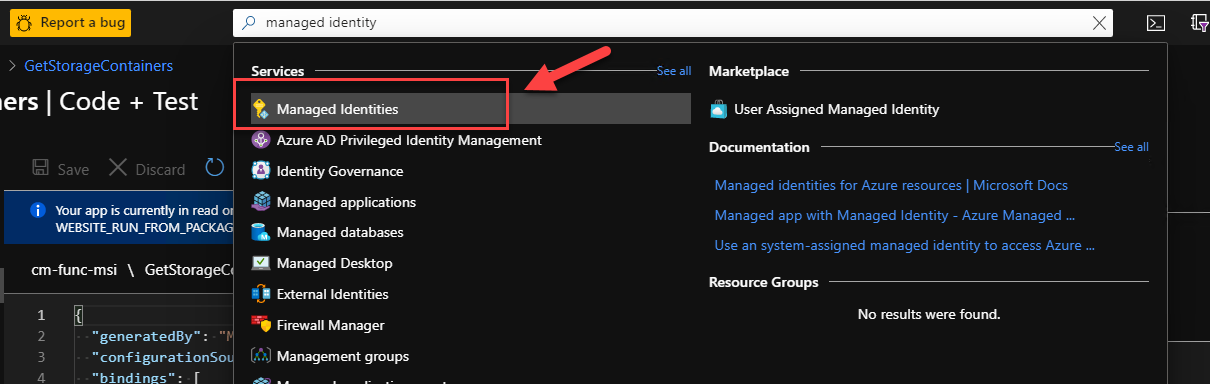
To create a new Managed Identity we can use the Azure CLI, PowerShell or the portal. Let’s use the Portal. In the Azure Portal we can search for Managed Identity using the global search. If you’re not using global search yet, you should as you’re missing out on a big productivity trick.
Open the resource and create a new managed identity by clicking on the Add button.
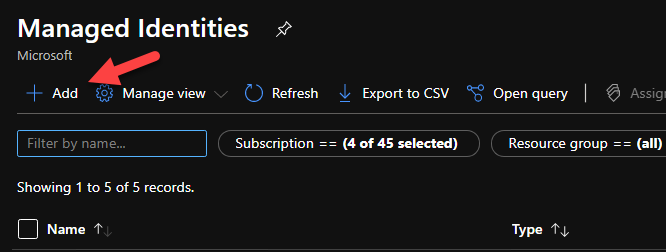
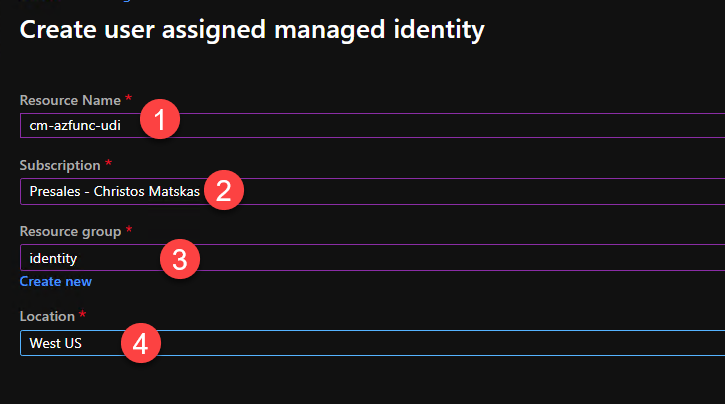
Give it a meaningful name, select the right subscription, add the right resource group and location, and click the Create button.
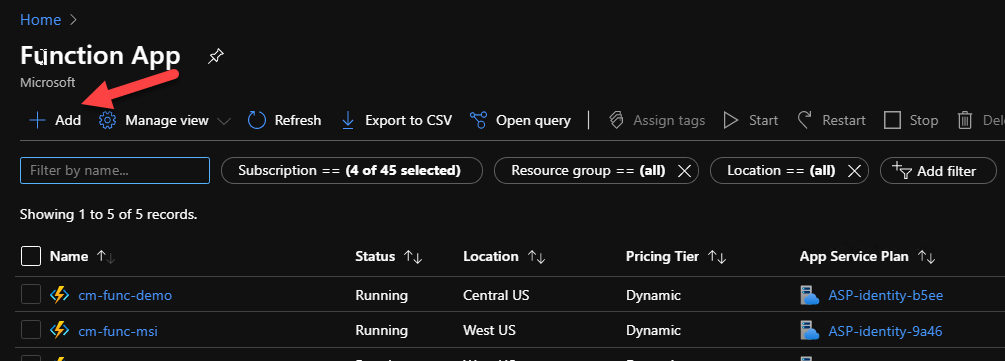
Make a note of the Client ID as we will need it later. Next, we need to create the Function app that will host our code. In the Azure Portal, search for Azure Functions, open the resource and create a new Function app using the Add button:
Choose the appropriate values for – Subscription – Resource group – Function app name – should be globally unique – Runtime stack – should be .NET Core 3.1 – Region
Press Review + Create
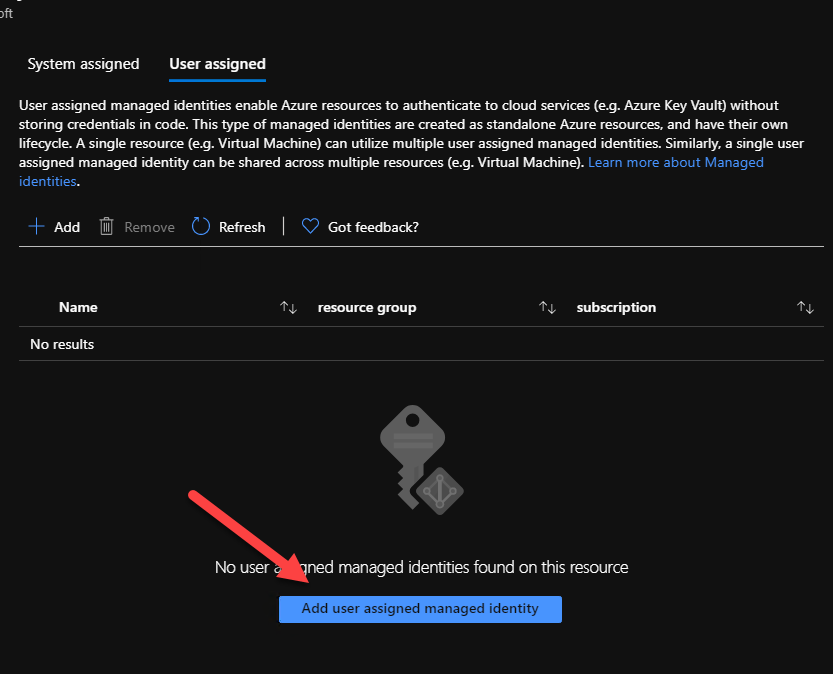
Once the Function app is provisioned, we need to add our user-defined managed identity via the Identity tab.
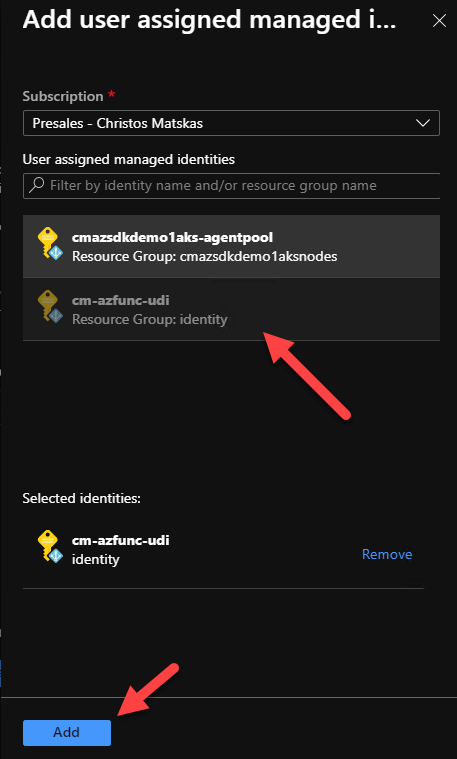
Open a new browser window, select the right subscription and select the user-defined managed identity we created in the previous step. Click on the correct identity and press Add
This means that any code running in the Function app can leverage the managed identity to communicate with other services. However, there is one more step left to ensure that our Function can retrieve data from our Storage account. Search for the Storage account you want to work with and open the Access Control IAM tab. There you need to add the same user-defined managed identity with the appropriate permissions. Select the Storage Blob Data Reader role, find the subscription and managed identity you want to add and click Save

Back in our Azure Function, we need to add two new Application settings. One for the storage account name and one for the managed identity (client) id. In the Azure Function app, open the Configuration tab and add the two new settings using the New application setting button as per below:

Let’s write some code!
Back in our VS Code, we can now edit our Function code to retrieve the Storage containers and return a list of names in the HTTP response. To be able to authenticate and interact with Azure Storage, we will make use of the latest Azure SDKs for .NET. The latest SDKs make this a breeze and provide you with the tools to work both locally and in production without the need to change the code.
For our example, we need to add 2 NuGet packages:
Azure.Identitythat will do the heavy lifting on acquiring the access token for usAzure.Storage.Blobsto work with the Storage account.
Open the *.csproj and add the following two package references:
Check the Azure SDK Release page for the latest version numbers.
<PackageReference Include="Azure.Storage.Blobs" Version="12.5.1" />
<PackageReference Include="Azure.Identity" Version="1.2.1" />
Press Save and restore the unresolved dependencies. Now we can add the necessary code. Open the GetStorageContainers.cs file and update the code with the following:
using System;
using System.Threading.Tasks;
using Microsoft.AspNetCore.Mvc;
using Microsoft.Azure.WebJobs;
using Microsoft.Azure.WebJobs.Extensions.Http;
using Microsoft.AspNetCore.Http;
using Microsoft.Extensions.Logging;
using Azure.Identity;
using Azure.Storage.Blobs;
using Microsoft.Extensions.Configuration;
using System.IO;
using System.Collections.Generic;

namespace Company.Function
{
    public static class GetStorageContainers
    {
        [FunctionName("GetStorageContainers")]
        public static async Task<IActionResult> Run(
            [HttpTrigger(AuthorizationLevel.Anonymous, "get", "post", Route = null)] HttpRequest req,
            ILogger log)
        {
            var config = new ConfigurationBuilder()
                .SetBasePath(Directory.GetCurrentDirectory())
                .AddJsonFile("local.settings.json", optional: true, reloadOnChange: true)
                .AddEnvironmentVariables()
                .Build();

            var existingContainers = new List<string>();

            var credential = new ChainedTokenCredential(
                new ManagedIdentityCredential(string.IsNullOrEmpty(config["UserAssignedIdentity"])
                    ? null
                    : config["UserAssignedIdentity"]),
                new AzureCliCredential());
            try
            {
                var blobServiceClient = new BlobServiceClient(new Uri(config["StorageAccountName"]), credential);
                var containers = blobServiceClient.GetBlobContainers();
                foreach(var container in containers)
                {
                    existingContainers.Add(container.Name);
                }
            }
            catch (Exception e)
            {
                return new BadRequestObjectResult(e);
            }

            return new OkObjectResult(existingContainers);
        }
    }
}
You’ll notice that there is not much code for working with Azure Storage. First, we create ChainedTokenCredential object that can iterate through our defined TokenCredential options. For local development, we rely on the AzureCliCredential. For this to work, we need to have the Azure CLI installed locally and be signed in (open the Azure CLI and type az login). On the other hand, in production, we will be using the managed identity. The reason why we add logic in the ManagedIdentityCredential is because we may want to use the system-assigned instead of the user-defined one and this way we don’t have to change the code. We only need to remove the UserAssignedIdentity application setting from the Function app and the code will work as expected.
var credential = new ChainedTokenCredential(
                 new ManagedIdentityCredential(string.IsNullOrEmpty(config["UserAssignedIdentity"])
                    ? null
                    : config["UserAssignedIdentity"]),
                 new AzureCliCredential());
The code to retrieve the Storage containers is only 2 lines:
var blobServiceClient = new BlobServiceClient(new Uri(config["StorageAccountName"]), credential);
var containers = blobServiceClient.GetBlobContainers();
Finally, since we are running locally and we don’t have access to the Function app settings, we need to add a new property in the local.settings.json. This file is only used during local development but there is a way to sync the settings, if desired, either during the deploy via VS Code or through the Azure Function Core Tools (CLI). In the local.setting.json, add the new property as per the example below:
"StorageAccountName": "https://azfuncwithmsistorage.blob.core.windows.net"
We can now run and test our Function locally. In VS Code, switch to the Debug tab, then choose the Attach to .NET Functions option and press Run
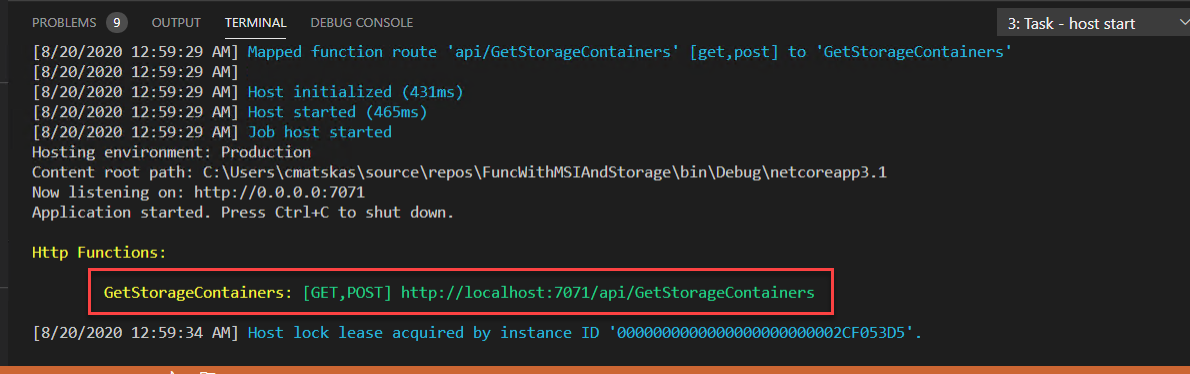
We can test the Function in the browser or a tool like Postman.

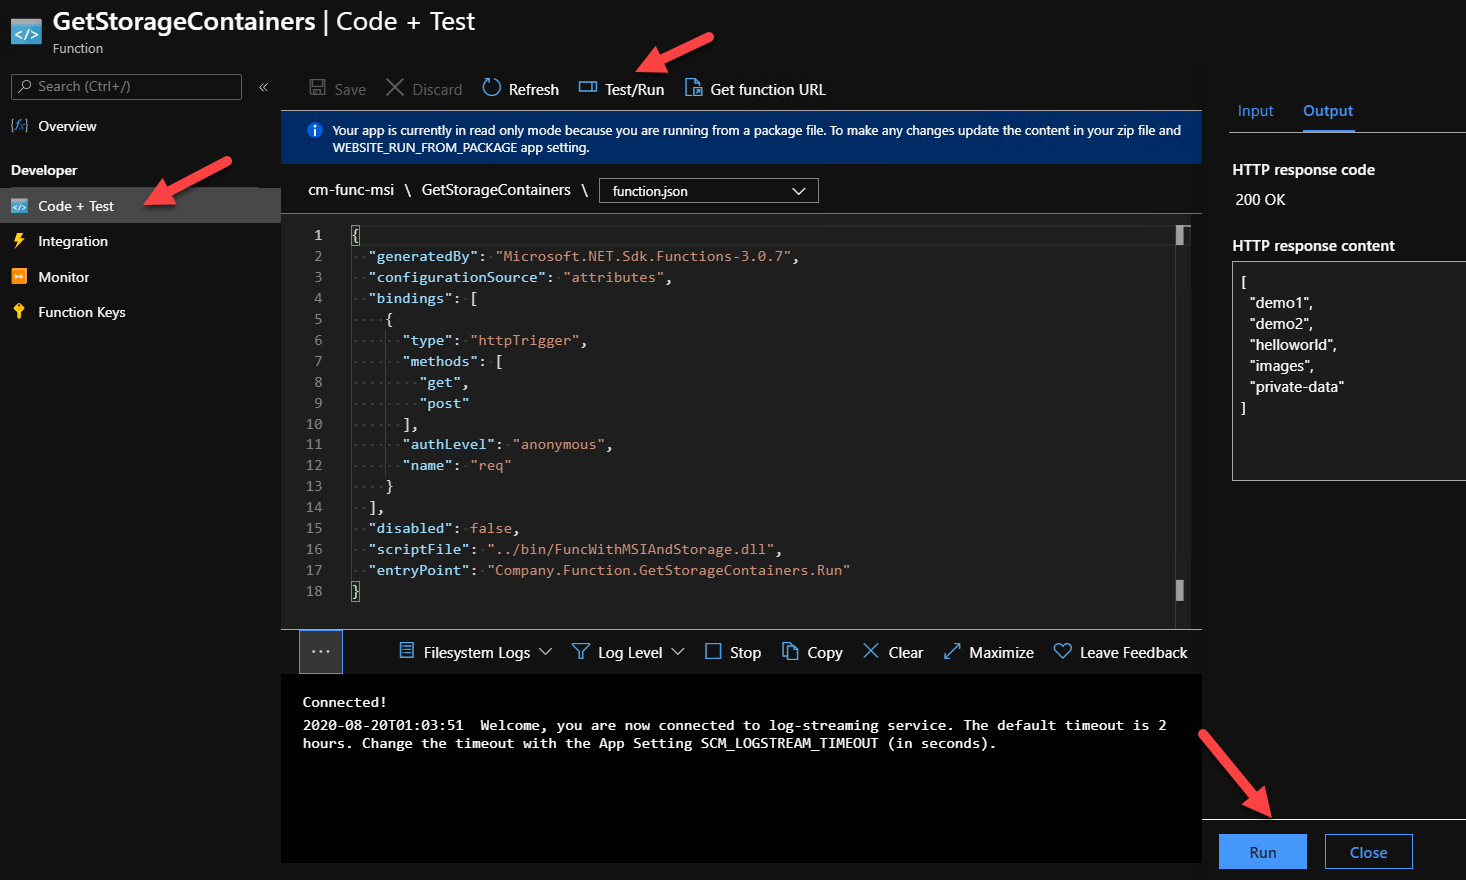
We can now deploy our Function to Azure (production environment) and test it there as well. VS Code is excellent for this so make sure to leverage the Azure Functions extension. Alternatively, you can use the Core Tools or, even better yet, Azure DevOps/GitHub Actions to deploy the code. Once our Function code is deployed, we can navigate to the Azure portal and test that everything’s working as expected. In the Azure Function app, we select the function that we just deployed and choose the Code+Test tab. Our Function is read-only as the code was pre-compiled but we can test it by selecting the Test/Run menu option and hitting the Run button.
Summary
Working with Azure resources is now a lot more straight forward and consistent thanks to the great work that the Azure SDK team has done. The Azure.Identity library handles all our authN/authZ needs and Managed Identities can help make our solutions much more secure by eliminating the need to store connection strings and API keys in plain text. And with RBAC and Azure Active Directory backing up this whole setup, developers can confidently and securely develop and run applications anywhere using their favorite tools.
Azure SDK Links
- Azure SDK Website: aka.ms/azsdk
- Azure SDK Intro (3 minute video): aka.ms/azsdk/intro
- Azure SDK Intro Deck (PowerPoint deck): aka.ms/azsdk/intro/deck
- Azure SDK Releases: aka.ms/azsdk/releases
- Azure SDK Blog: aka.ms/azsdk/blog
- Azure SDK Twitter: twitter.com/AzureSDK
- Azure SDK Design Guidelines: aka.ms/azsdk/guide
- Azure SDKs & Tools: azure.microsoft.com/downloads
- Azure SDK Central Repository: github.com/azure/azure-sdk
- Azure SDK for .NET: github.com/azure/azure-sdk-for-net
- Azure SDK for Java: github.com/azure/azure-sdk-for-java
- Azure SDK for Python: github.com/azure/azure-sdk-for-python
- Azure SDK for JavaScript/TypeScript: github.com/azure/azure-sdk-for-js
- Azure SDK for Android: github.com/Azure/azure-sdk-for-android
- Azure SDK for iOS: github.com/Azure/azure-sdk-for-ios
- Azure SDK for Go: github.com/Azure/azure-sdk-for-go
- Azure SDK for C: github.com/Azure/azure-sdk-for-c
- Azure SDK for C++: github.com/Azure/azure-sdk-for-cpp
@Christos Matskas
Thank you!!
I was curious if we can use Azure SDK for Python for achieving same or it is available only with Azure SDKs for .NET.?
thank you ,
Datta Valkunde
Hi @Datta,
You absolutely can. Check out the Azure SDKs for Python (https://azure.github.io/azure-sdk/#python) and if you want to know which languages are supported, hit this link aka.ms/azsdk to find out all you need, including docs and samples… Good luck and let us know how you get on
Thanks Christos, very helpful indeed. Yet, what would be even more helpful would be to be able to have bindings use the MSI as well. E.g. when using queue-/blob-triggered functions, the ConnectionName attribute requires an AppSetting name holding the clear-text value of a storage account connection string. Instead it should use MSI. Kind regards
Hi @Jefe, that’s a great recommendation. I will make sure to pass it on to the Azure Functions team.
Thanks for reading and for engaging with us.