
We’re excited to announce that the Azure MCP Server is now available as an MCP Bundle (.mcpb). This means you can install the Azure MCP Server into Claude Desktop and other MCP-compatible clients with minimum setup—no Node.js, Python, or .NET runtime required.
What are MCP Bundles?
MCP Bundles are a portable packaging format for MCP servers. Think of them like browser extensions (.crx) or VS Code extensions (.vsix), but for Model Context Protocol servers. Each bundle is a ZIP archive containing:
- A
manifest.jsonfile describing the server’s metadata, tools, and runtime requirements. - The server binary and all of its dependencies—everything needed to run the server on a specific platform.
The key benefit is simplicity. End users don’t need to install any runtimes, manage dependencies, or write configuration files. You download a .mcpb file, open it in a supported client, and the server is ready to use.
Why MCP Bundles matter for Azure MCP Server users
Until now, using the Azure MCP Server required one of the following runtimes:
| Method | Runtime required |
|---|---|
| npm/npx | Node.js |
| pip/uvx | Python |
| dotnet | .NET SDK |
| Docker | Docker Engine |
MCP Bundles change this paradigm by providing a self-contained binary that doesn’t require any additional runtime. This format is one of the easiest ways to get started with the Azure MCP Server, especially for users who aren’t developers or don’t want to manage runtimes.
Get started in three steps
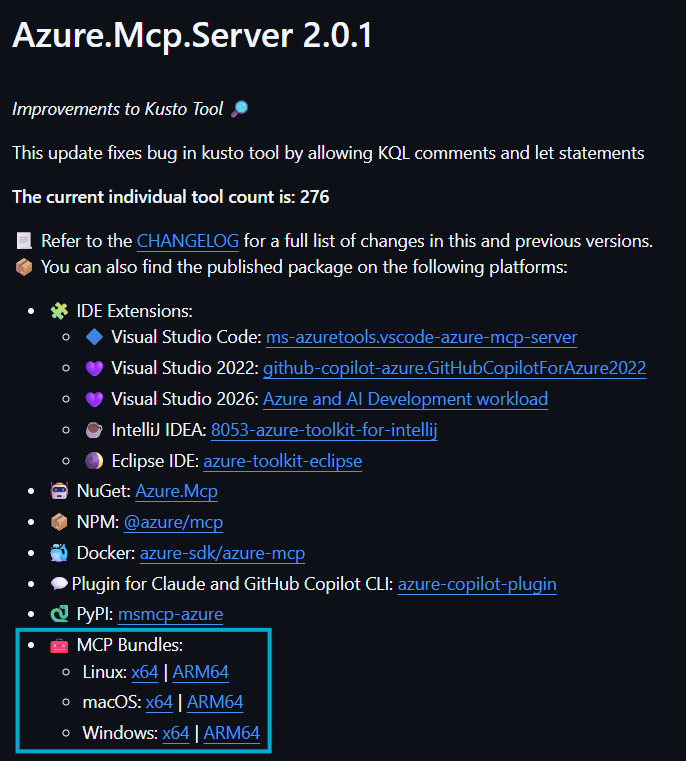
1. Download the MCP Bundle for your platform
Go to the MCP Bundles section of the latest release post on GitHub page. To download the corresponding .mcpb file, select the link that matches your operating system and architecture.
2. Install in Claude Desktop
Drag and drop installation (recommended)
The easiest way to install is to drag and drop the .mcpb file into the Claude Desktop window:
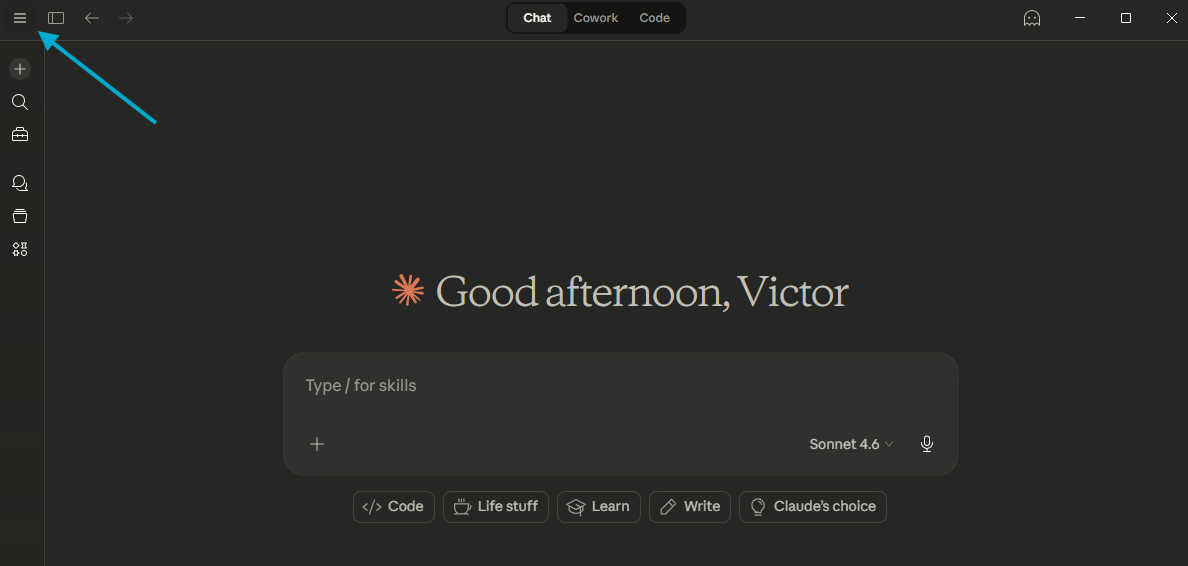
- Open the hamburger menu (☰) in the top left of Claude Desktop.
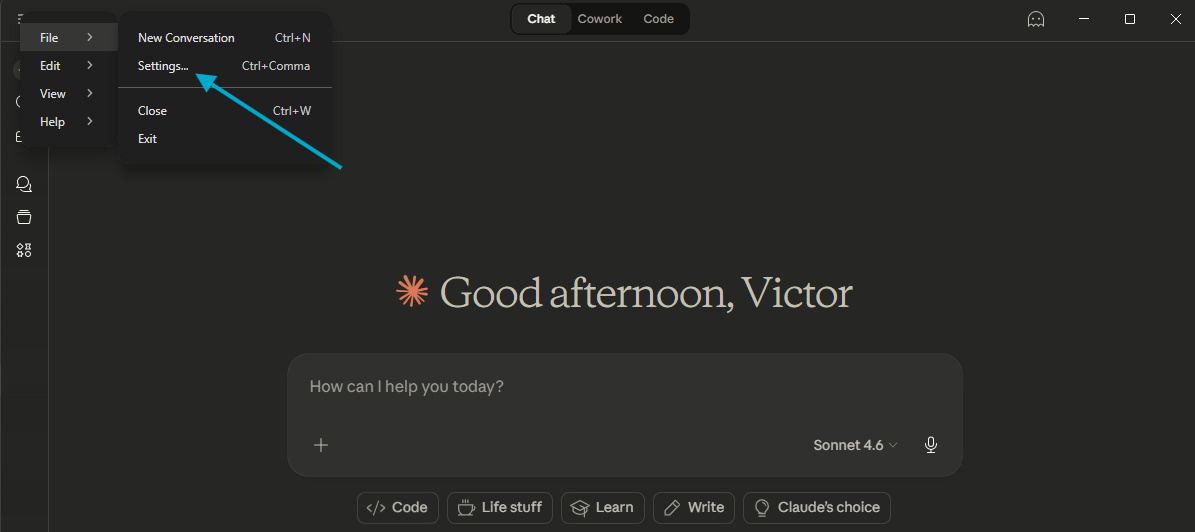
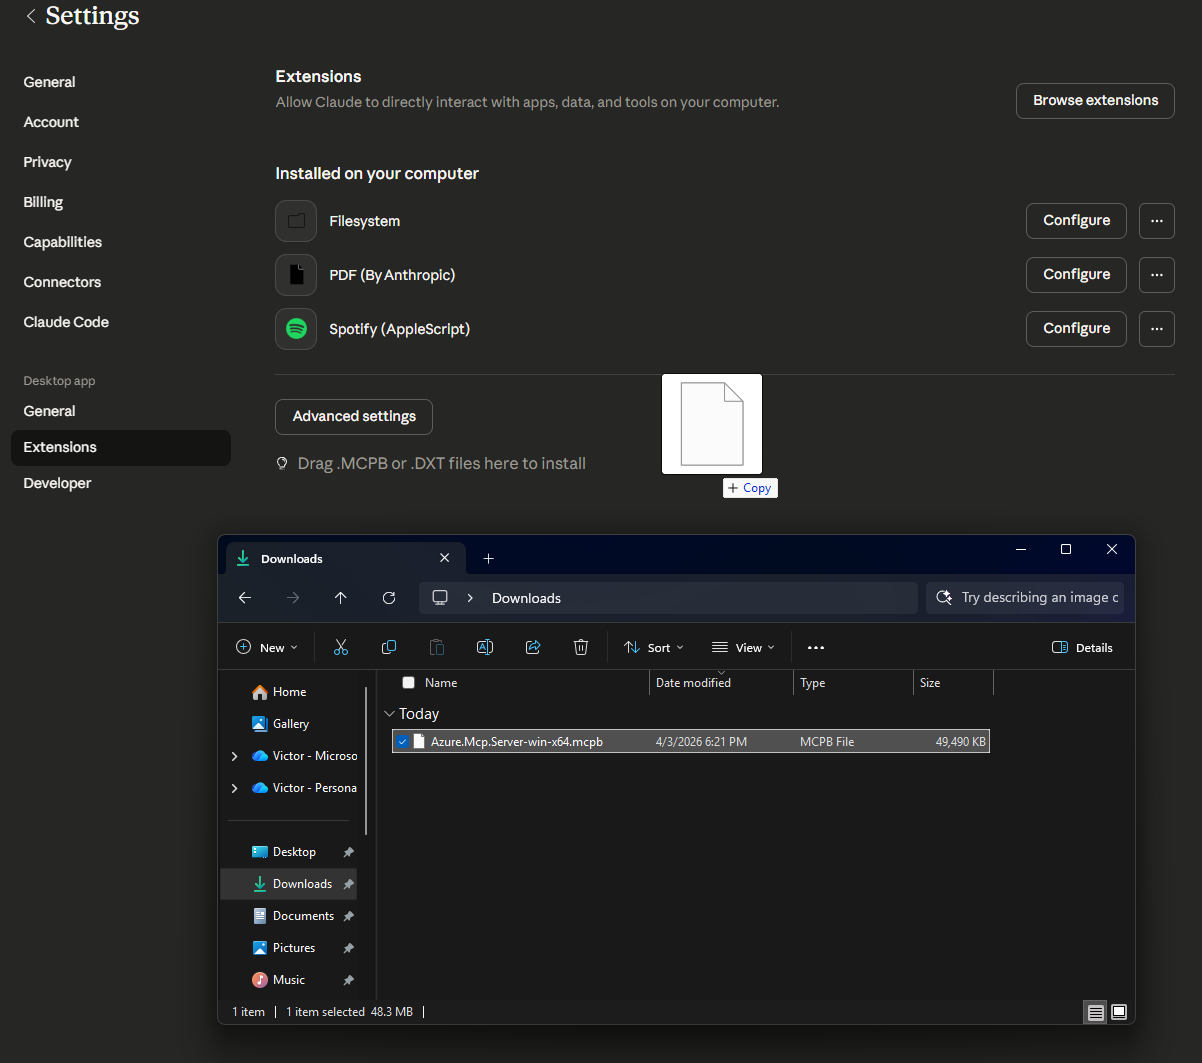
- Go to File > Settings > Extensions.
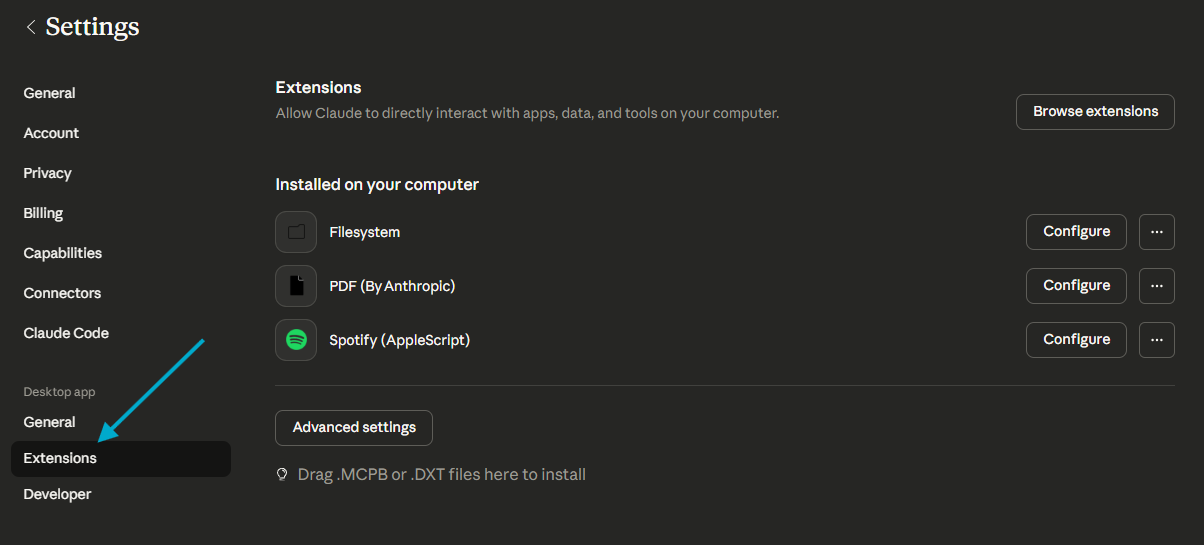
- Drag and drop the downloaded bundle into the Extensions page to install.
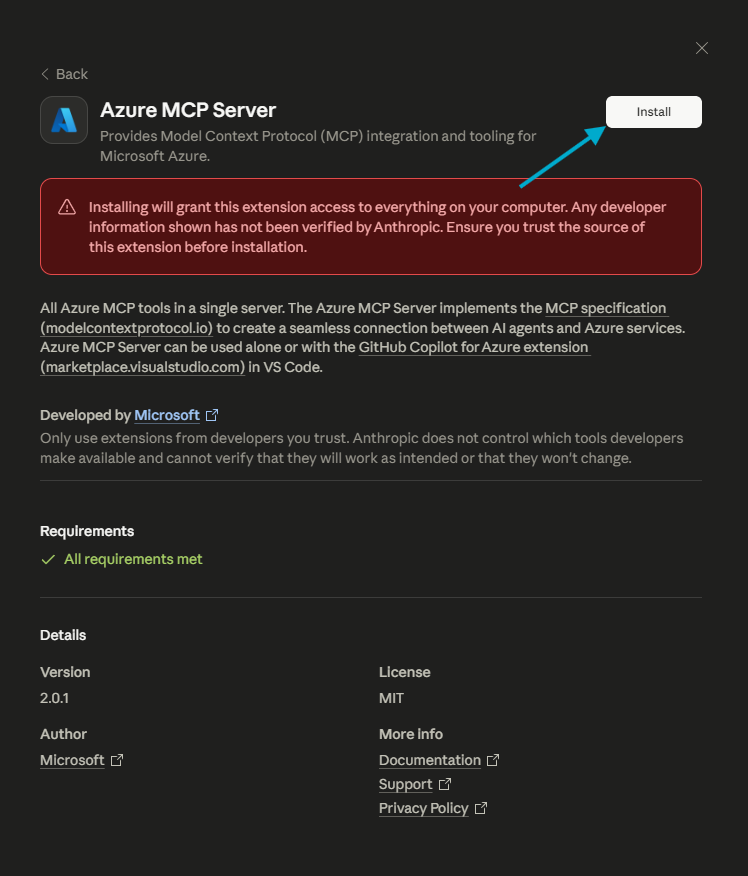
- Review the server details and select Install.
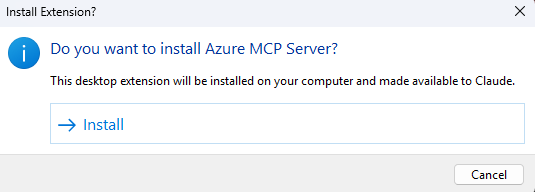
- Select Install again in the pop-up dialog.
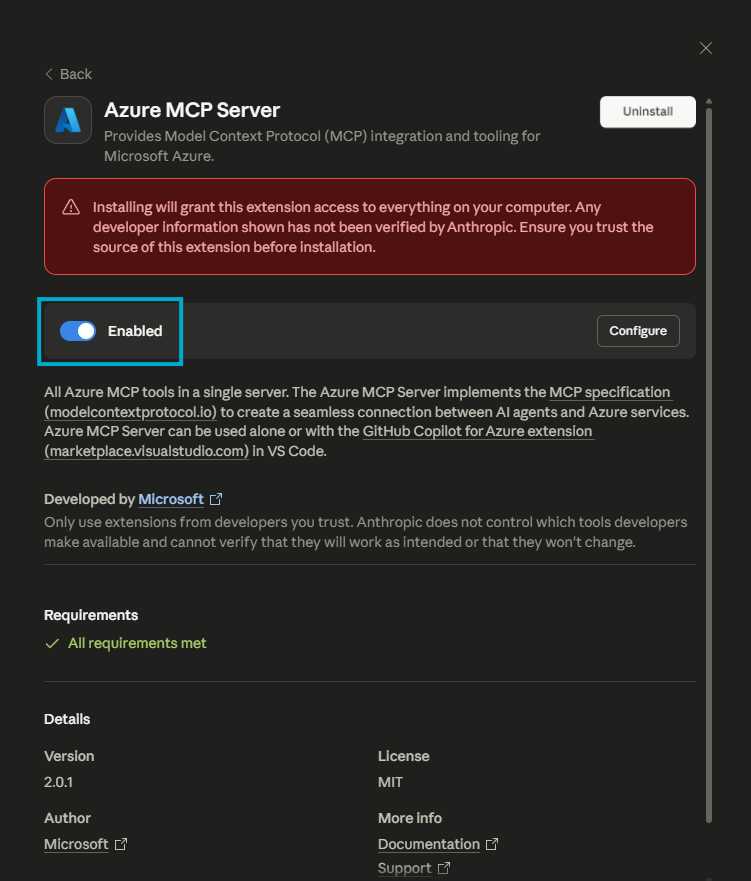
- Once the server is installed, the Install button in the details pane changes to Uninstall and the server shows as enabled.
Manual installation
If you prefer a manual installation, follow these steps instead:
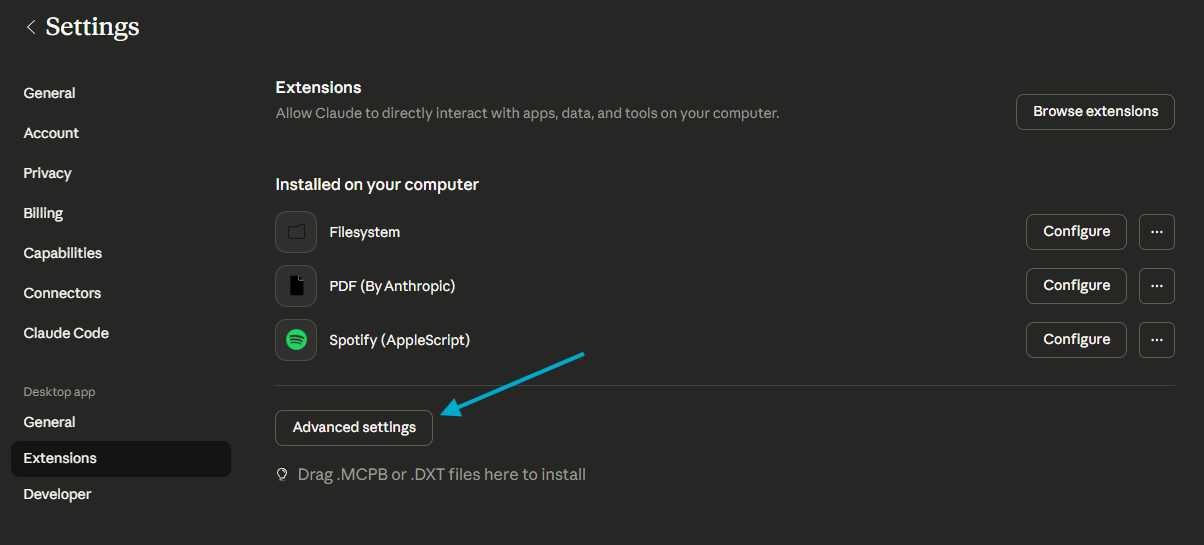
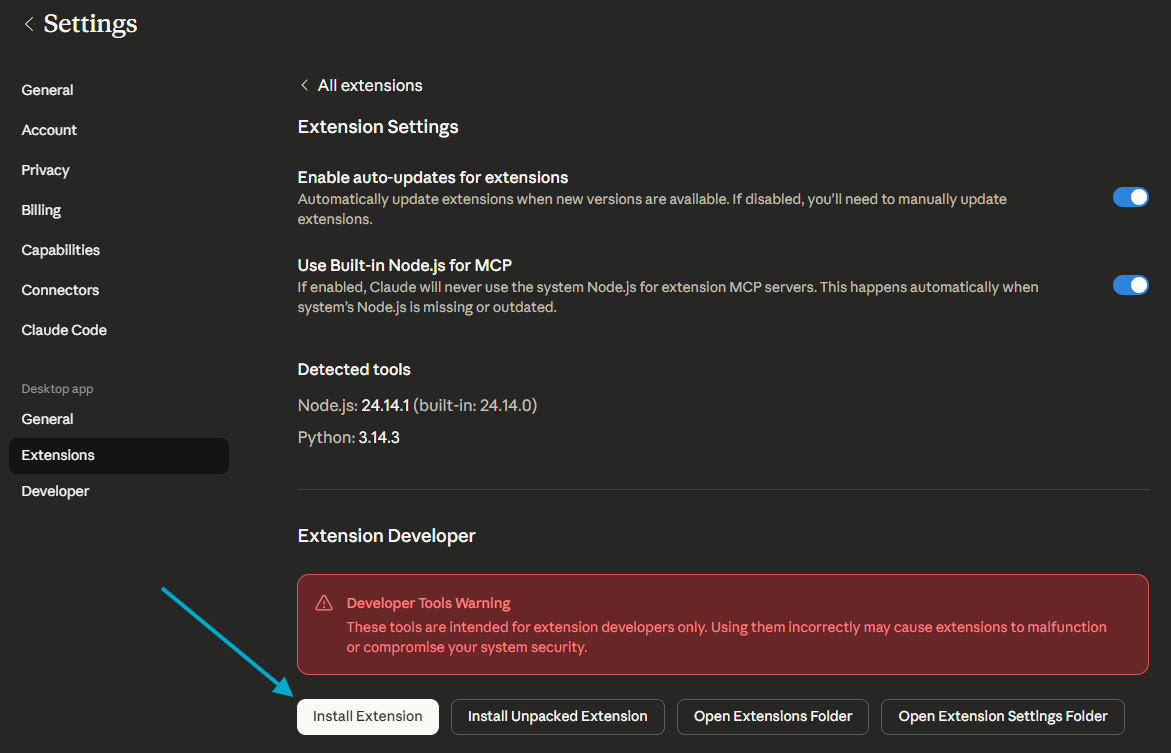
- From the Extensions page, go to Advanced Settings > Install Extension.
- Select the downloaded
.mcpbfile and select Preview.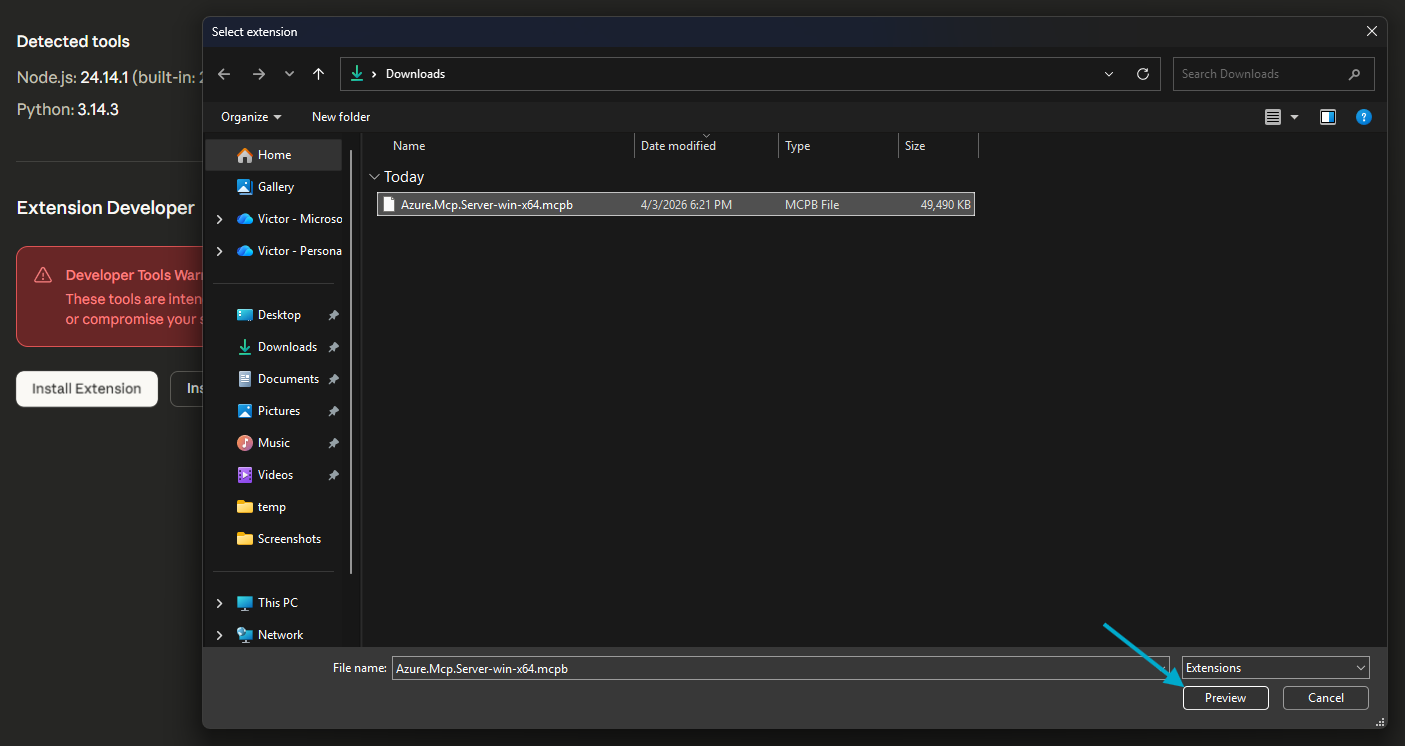
- Review the server details and select Install.
- Select Install again in the pop-up dialogue.
- Once the server is installed, the Install button in the details pane changes to Uninstall and the server shows as enabled.
Tip: You can also set Claude Desktop as the default app for
.mcpbfiles, then simply double-click the bundle to install it.
3. Authenticate to Azure
The Azure MCP Server uses your Azure credentials, so make sure you’re signed in before using Azure tools. The easiest way is to run the following Azure CLI command in your terminal:
az loginFor more authentication options (managed identities, service principals, etc.), see the Authentication guide.
What you can do
Once installed, you have access to the full set of Azure MCP Server capabilities directly from your favorite client, including:
- 100+ Azure service tools—from Cosmos DB and Storage to Key Vault, App Service, and Microsoft Foundry
- Azure CLI command generation—get the right
azcommands for any task - Infrastructure guidance—Bicep and Terraform template generation
- Architecture design—cloud architecture recommendations based on your requirements
- Diagnostics—resource health, monitoring, and troubleshooting
Try prompts like:
- “List all resource groups in my subscription”
- “Show me the secrets in my Key Vault named my-vault”
- “Generate a Bicep template for a web app with a SQL database”
- “What Cosmos DB databases do I have?”
How is the MCP Bundle different from the VS Code extension?
Both provide access to the same Azure MCP Server and its tools. The difference is the client:
| Option | Client | Best for |
|---|---|---|
MCP Bundle (.mcpb) |
Claude Desktop | Claude users who want a zero-config install |
| VS Code Extension | VS Code + GitHub Copilot | Developers working in VS Code |
| npm/npx | Any MCP client | Developers who already have Node.js |
| pip/uvx | Any MCP client | Python developers |
| Docker | Any MCP client | CI/CD pipelines and containerized environments |
Choose whichever method fits your workflow. The same tools and capabilities are available regardless of how you install the server.
Troubleshooting
If you run into issues installing the bundle:
- Make sure Claude Desktop is up to date—download the latest version from claude.com/download.
- Verify you downloaded the correct platform—for example, use the
osx-arm64bundle on Apple Silicon Macs, notosx-x64. - Reinstall if needed—in Claude Desktop, go to File > Settings > Extensions, uninstall the Azure MCP Server, and install the bundle again.
For more information, see the Troubleshooting guide.
Get started today
- Download: GitHub Releases
- GitHub Repo: aka.ms/azmcp
- Documentation: aka.ms/azmcp/docs
- VS Code Extension: aka.ms/azmcp/download/vscode
- Create an Issue: aka.ms/azmcp/issues
Summary
The Azure MCP Server is now available as an MCP Bundle, making it easier than ever to connect Claude Desktop to over 100 Azure services. Download the .mcpb for your platform, drag it into Claude Desktop, and start managing your Azure resources through natural language—no runtimes, no configuration files, no friction. Try it out and let us know what you think!
Does this work for claude code terminal?
Unfortunately not at this time, these connectors only work with Claude apps that have a GUI. You can technically use it with Claude Code if you switch to the Code tab from the Desktop tab, but not with Claude Code on the terminal.