
This is a guest post by Sunny Mukherjee.
As a customer of Visual Studio App Center, you linked your code repository, configured your first mobile build definitions, committed your code, watched your builds in real-time, and installed your mobile app on real devices. Bravo! You have set up a full Continuous Integration / Continuous Deployment mobile pipeline where code is committed and new features are available to your testers or customers within minutes.
Now that you have become a rockstar at your company, your boss expects more from your skills and asks, “can we learn more about our customers over an extended period of time to make our products better?” You already integrated the Analytics SDK into your app, but now you are thinking, “how do I store data over an extended period of time? I am not sure.” You definitely don’t want to say that out aloud in front of your boss! Don’t worry. App Center works seamlessly with Azure so you can export your user data to Azure and analyze it there to learn more about your users.
- Shopping app:
- Learn what products your users are saving to learn about popular seasonal products
- Learn what users are searching to recommend products to new users who sign up later
- Restaurant ratings app
- Learn what restaurants your users have rated highly to prioritize similar restaurants on their news feed based on their proximity
- Financial app
- Learn a user’s spending or saving habits to display beautiful dashboards showing their financial habits over time
You get the idea. More data means an intelligent service and a better experience for your customers. You might be thinking. “The data is already in App Center. What else do I need?” Not so fast. Just refer to the documentation to see that your events are stored for a limited period of time:
As you can see, App Center stores your analytics or diagnostics data up to 90 days. You need to store your data on a more persistent storage medium where you can run analytics, execute queries, and export to high-level, polished reports. That is where Azure becomes your best friend. For the remainder of this post, I assume you already have integrated App Center analytics into your app.
Let us start by first setting up a free Azure account. You can try out several resources completely free of charge on Azure for the first 12 months and up to $200 of data usage for the 1st month. That is plenty of time to set up a proof-of-concept for a continuous export of user analytics from your mobile app into Azure. Check out the following sites:
https://visualstudio.microsoft.com/dev-essentials/
https://azure.microsoft.com/en-us/free/
In the above free services, we are interested in using Application Insights for our needs. What is Application Insights? It is an Azure resource originally created for web developers to collect telemetry about their apps and services, diagnose issues, and analyze the performance and usage. You can learn more about this feature from Microsoft’s documentation.
Setting up a data export connection between App Center and Azure is straightforward. App Center offers two ways to set up data export. The first is the standard export option where App Center does the heavy lifting for you by creating your Azure resource, creating your resource group in Azure, and assigning the resource to the resource group. The second is the customize export option where you set up the Azure resource first and then return to App Center to link your Azure resource to App Center.
I will show you the Custom option. After setting up your Azure account, follow the steps below:
- Log into your Azure portal.
- Click the “Create a resource” option at the top left of the left pane.
- Search for Application Insights in the search bar.
- Click the Create button.
After clicking Create and the Azure blade opens, mimic the following values:
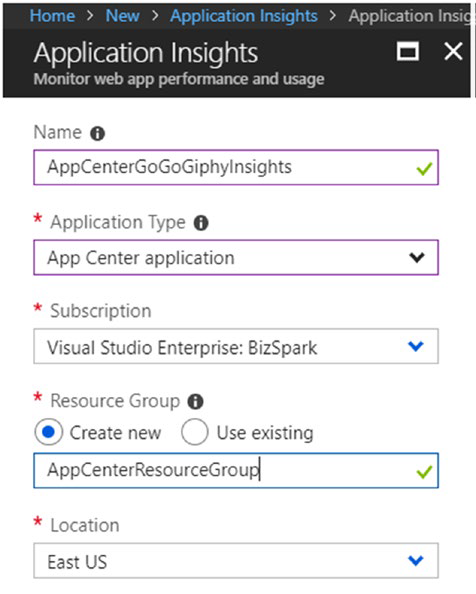
After you click Create, give Azure a few minutes to provision your new resource. Once provisioned, click on Overview on the left panel and copy the Instrumentation Key.
Now you will set up the Azure connection on the App Center side.
- Go into your App Center Organization. My organization is called GoGoGiphyGroup.
- Click Manage.
- Click Azure.
You will add your Azure subscription link now.
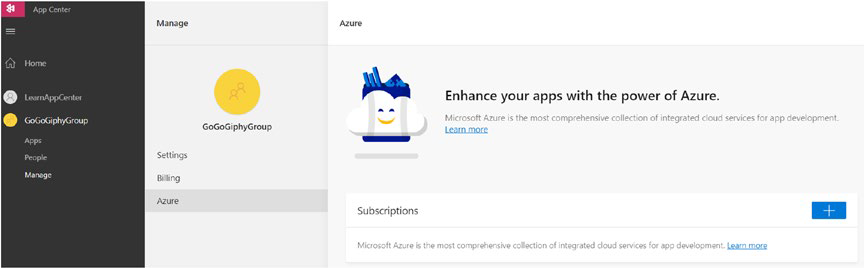
Click the + button shown. If you not are not logged into Azure, log in with your new account credentials. Once logged in, click the Connect button.
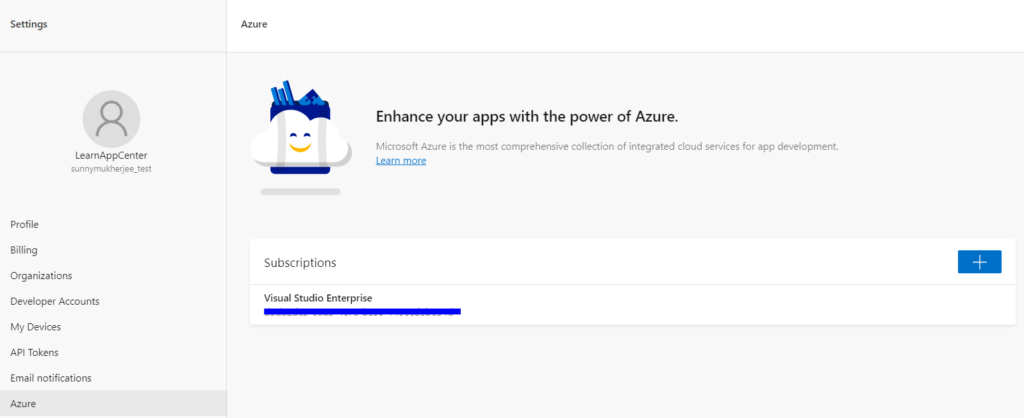
Return to App Center again. Go to your Settings and click on Azure. You will see your Azure subscription linked below.
Finally, we will set up continuous export to Azure.
- Return to your Android or iOS app.
- Go to Settings.
- Click Export.
- Click New Export.
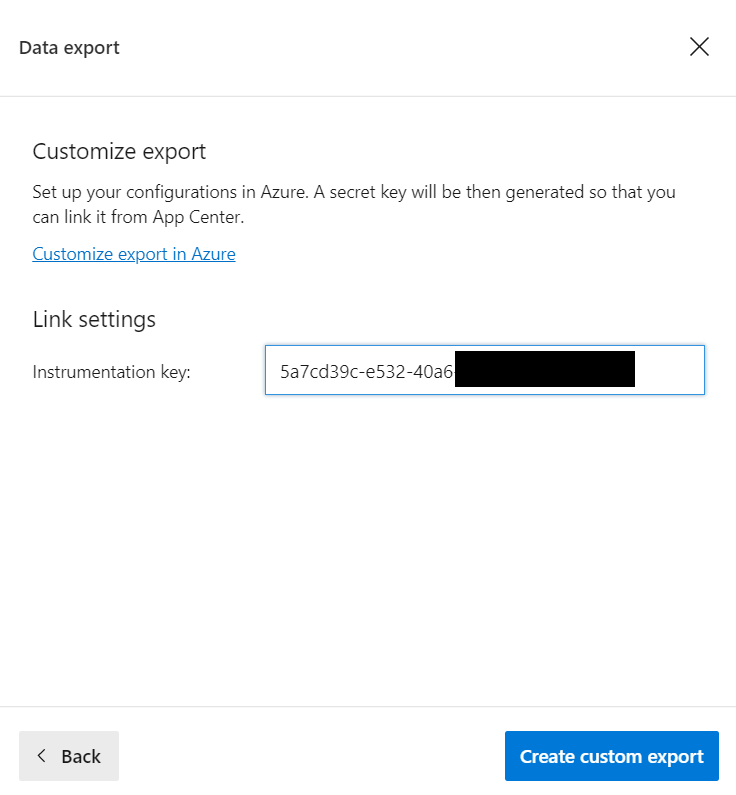
- Click on Application Insights and Customize as shown below.
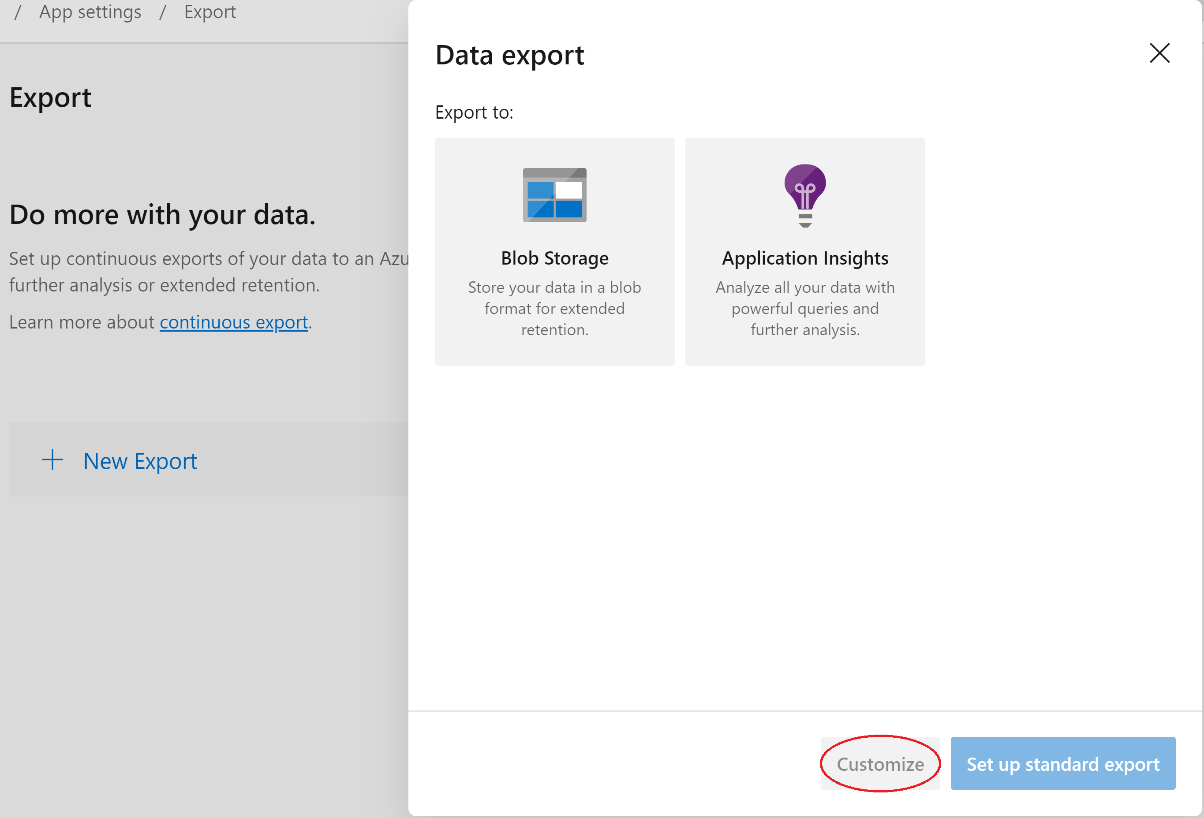
Paste the Instrumentation Key you copied from the first step into the text box below.
At this point, App Center will automatically export all custom events you may have stored in App Center from two days ago. You can now be assured that all your analytics will be saved in Azure going forward.
Now let’s suppose your boss wants to know the most popular searched items from its users. I’ll use the example of the mobile app I created as a companion app to my book “Learn Visual Studio App Center with Xamarin Forms”. This sample app allowed users to search, view, and save gifs. I later integrated App Center Analytics into my app to broadcast the most popular gifs among the user community back to Azure. Now I will show you the same steps I followed where Application Insights can benefit you in the same way by analyzing your events and generating a beautiful pie chart.
- Return to Application Insights.
2. Click Events. At this point, you can view all the events in a simple bar chart over the past 24 hours. But we will go further.
3. Click on “Open Chart in Analytics” button as shown below.

4. Paste the following query into the Editor. This query is based on the Kusto query language. Don’t worry if you don’t know the syntax. I’m just showing all the customEvents over the last 5 days ago, filtering out the session events, and rendering the output to the pie chart.
customEvents

| where timestamp > now(-5d)

| where name != "StartSessionLog" and name != "StartServiceLog" and name != "PushInstallationLog"

| render piechart
5. Click Run. You should now see a beautiful pie chart visualizing the different search criteria. It looks like your users search for “Cookie monster” and “Grumpy cat” the most!

Voila! Now you can see the full potential of collecting any custom event from App Center, exporting them to Azure, and analyzing your user data with Azure Application Insights . Even though the example above is simple, you can imagine more realistic scenarios, such as analyzing their favorite products, learning about their favorite cuisines or restaurants, or understanding the most popular sections in your app.
Now it’s time for you to export your user data to Azure, try out Azure Application Insights, generate some beautiful dashboards and reports, and keep your Rockstar status!
You can learn more recipes and walk-throughs from my upcoming book, “Learn Visual Studio App Center with Xamarin Forms.”
Sunny Mukherjee is a Lead Developer with 15+ years of experience developing on the web, desktop, mobile, and cloud spanning multiple industries like healthcare, finance, retail, and defense. His recent interests include anything .NET, Xamarin, Azure, DevOps, GitHub projects, and Angular 2+. He also loves coming up with new ideas, working on proof-of-concepts, writing, and presenting to others. In his personal life, he is an uber geek / adventurer with interests in science, gadgets, games, movies, motorcycles, world traveling, photography, and working out.
0 comments