Porting existing .NET apps to Android
Android’s growth to number one smartphone platform in terms of units shipped has resulted in a significant increase in interest from businesses and developers to ship applications that run natively on Android devices and that take advantage of features such as the camera and voice recognition. With Xamarin.Android, .NET developers have the ability to write native Android apps in C# using many of the existing .NET APIs that they are already familiar with, but what’s perhaps more attractive is the potential to share your existing .NET code to Android. Almost any .NET codebase, including Windows Forms, WPF, ASP.NET, and Silverlight, has sharable code that can be ported to Xamarin.Android, Xamarin.iOS, Windows Phone & Windows Store.
In my previous blogpost on Porting Existing .NET apps to iOS, we looked at a step-by-step approach in porting an existing Silverlight application Diet Calculator to Xamarin.iOS. In this post I will take a similar approach to what we did in the iOS porting sample to build the same app for Android phones using Xamarin.Android.
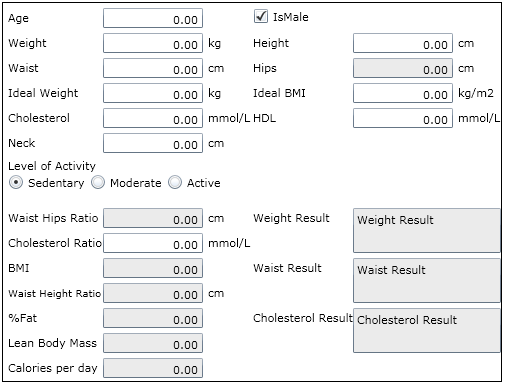
Here’s how the Silverlight sample looks:
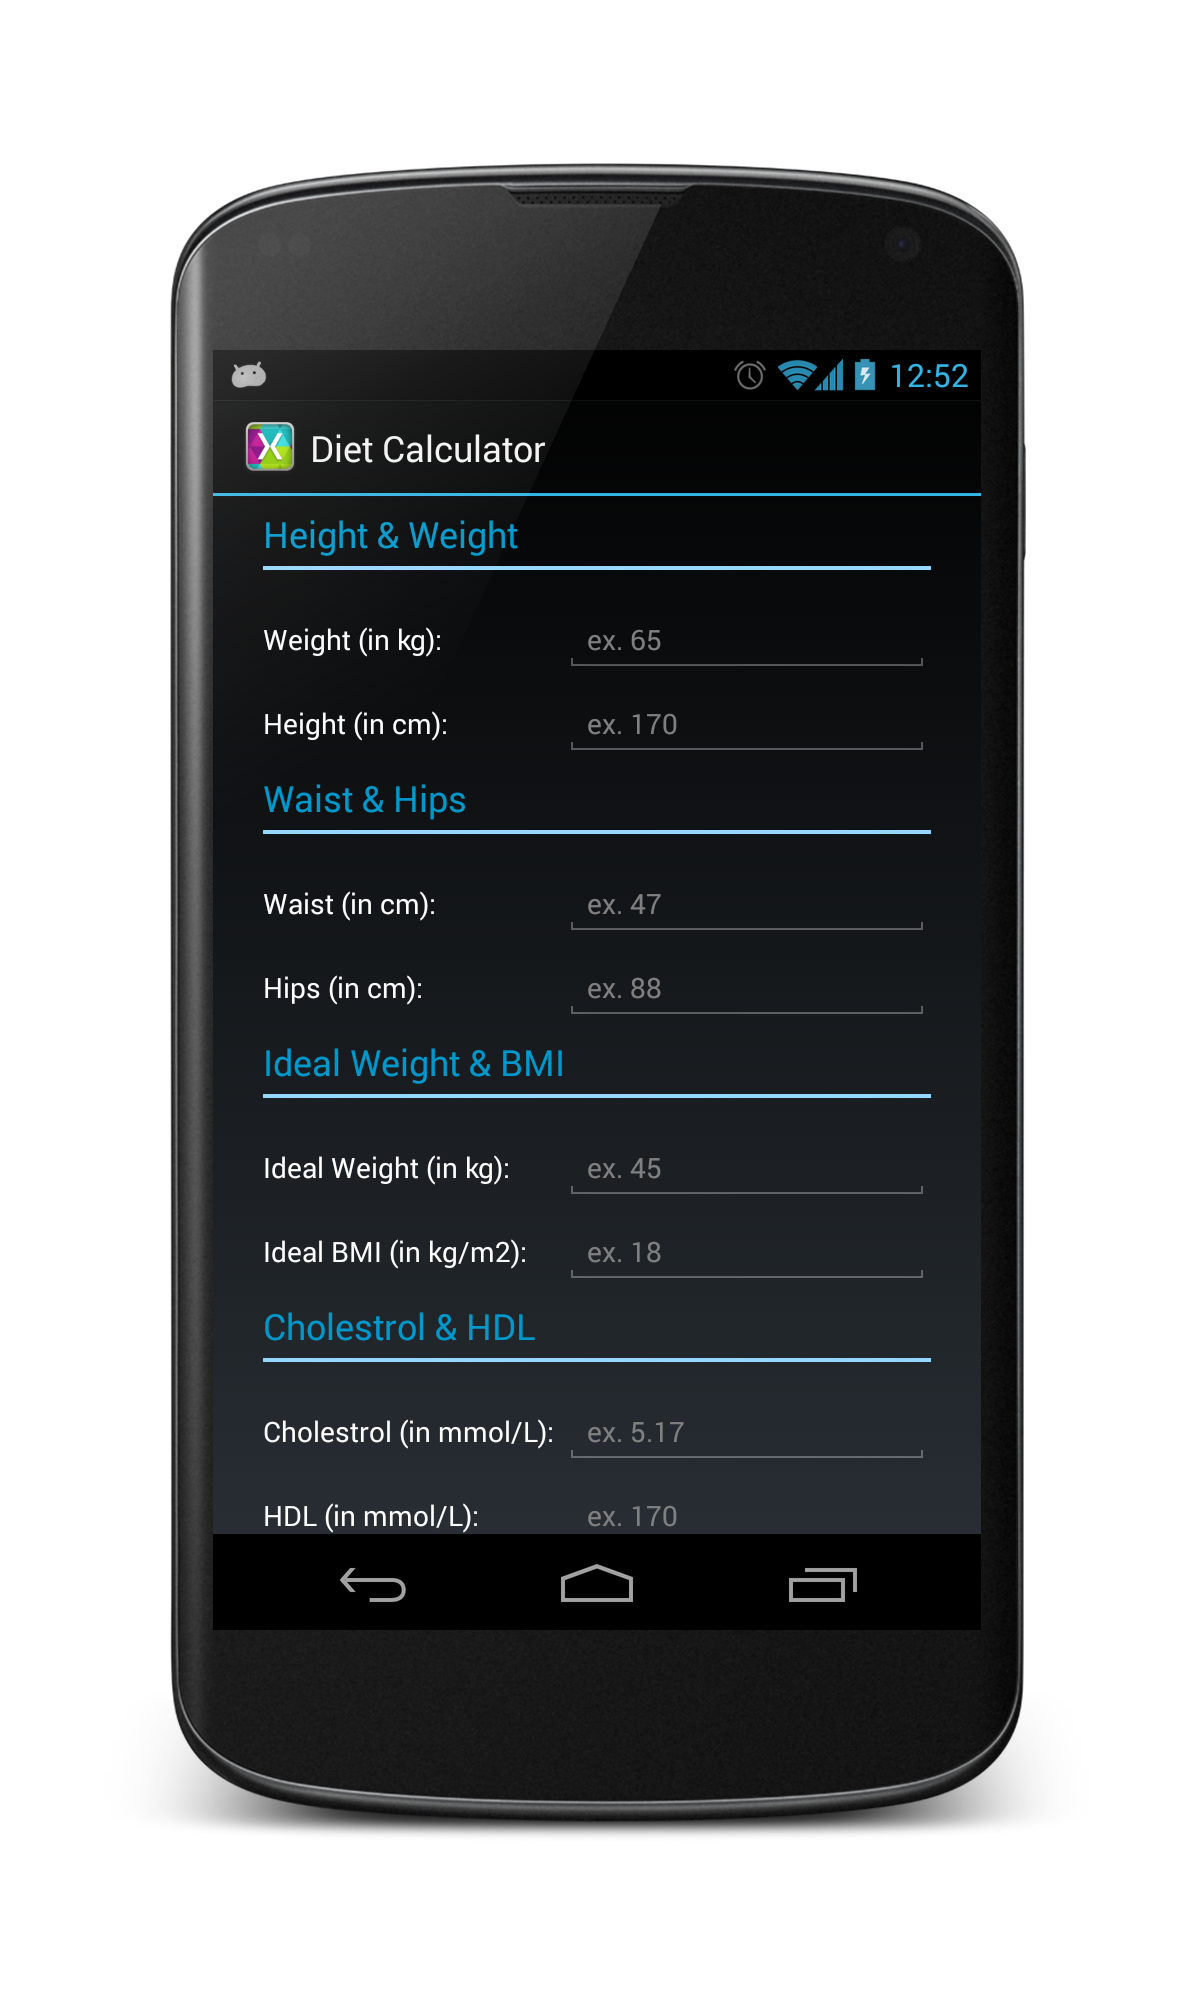
And here’s how the ported application will look on an Android phone:
You can download the code used in this post for the Xamarin.Android DietCalculator sample from github.
Scan your Code for Mobilization
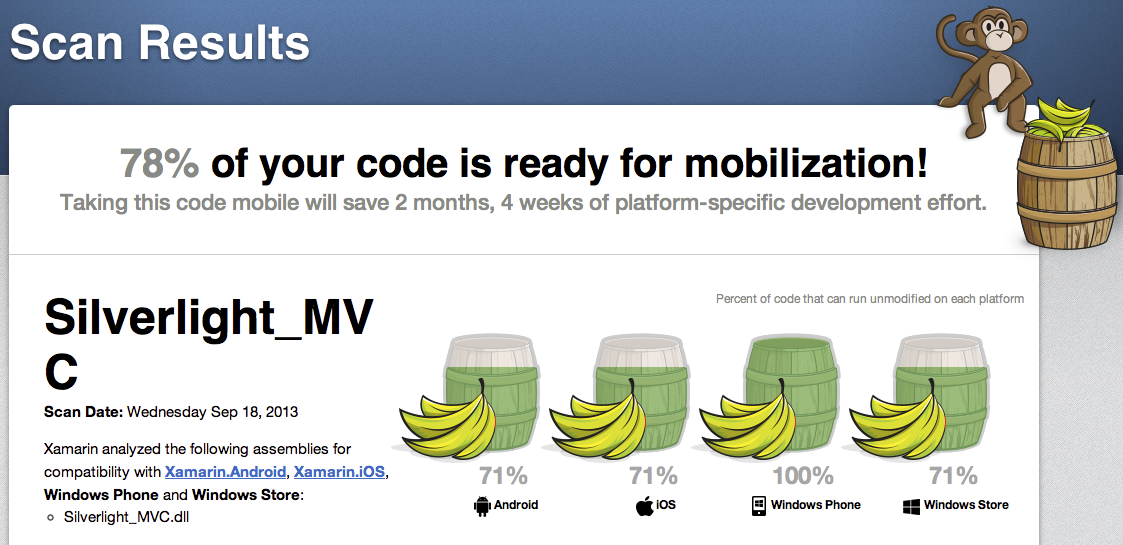
Xamarin’s .NET Mobility Scanner can determine the amount of code sharing and re-use you can expect from an existing .NET app or library and provide a detailed road-map of remaining work required to mobilize it. The Mobility Scanner analyzes compiled .NET assemblies and compares the APIs used with the capabilities of each platform. Since we are porting a Silverlight app we can easily extract the Silverlight_MVC.dll from the .XAP and upload that to the Scanner.
We analyzed how mobile our Silverlight code is and concluded that 71% of the app code can be re-used. As per the detailed report, all of the platform-specific method calls (i.e., code that we can’t re-use across platforms) are user-interface specific and hence the business logic code that consists of Models, Controllers and Helpers from the Silverlight_MVC project can be re-used in our Xamarin.Android application! Now we are all set to build a Diet Calculator’s User Interface native to the Android platform!
Separate Reusable Code into a Core Library
When we set up our solution, we followed the separation of responsibility principle and moved our Models, Controllers and Helpers from the Silverlight application to a core project called DietCalculator.Core and referred them using File Linking on iOS and Silverlight projects. We will take the same approach and refer to these files from our Xamarin.Android project. Don’t forget to check-out our detailed documentation on Building Cross Platform Applications.
Now that you’ve got a fair idea about how we separated the business logic from the existing Silverlight_MVC project to a core project and referred them to iOS and Silverlight projects, let’s create a Xamarin.Android project and re-use them there.
Adding Xamarin.Android project to Visual Studio solution
Xamarin makes it possible for developers to use Visual Studio for Android & iOS Development: you can access your Android, iOS, Windows Phone & Windows Store app projects from one solution, code in on programming language, with one IDE.
To create a new Android project in Visual Studio:
-
File > New > New Project > Visual C# > Android > Android Application (DietCalculator.Droid)
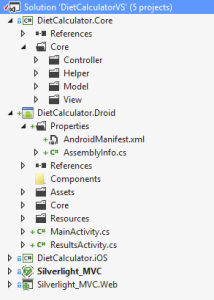
Now, our solution file will consist of 5 projects including existing Silverlight_MVC projects, Core Library, Xamarin.iOS & Xamarin.Android projects:
Once you add the project, create a folder called Core in it and link all the files from your Calculator.Core project using File Linking. Other approaches to enable source code sharing would include using a Portable Class Library project or the Project Linker; however, discussing the pros and cons of each approach is beyond the scope of this article.
Building the User Interface
A key benefit of using Xamarin is that the application user interface uses native controls on each platform and is therefore indistinguishable from an application written in Objective-C for iOS or Java for Android. We can take advantage of native UI toolkits to present a familiar interface to the user. You can build your UI completely in code or use declarative XML and layout your controls. XML-based User Interface for Android is very similar to technologies such as XAML for Windows Phone and HTML for the web. When using the declarative approach, XML files can be either hand-edited or modified visually by using the Xamarin.Android designer for Visual Studio. Use of a designer allows immediate feedback during UI creation, speeds up development, and makes the process of UI creation less laborious. If you are new to the Android platform, our get started guide can get you up to speed.
The existing Silverlight application displays user inputs & resulting fields in one big screen. This is OK for desktop applications, however we cannot afford to do the same in mobile applications. Instead as we built in iOS, we split it into two screens – an input screen(Main.axml) and a result screen(Results.axml). Main screen will have a Calculate button which, when tapped, navigates to the result screen and displays all results.
Main.axml
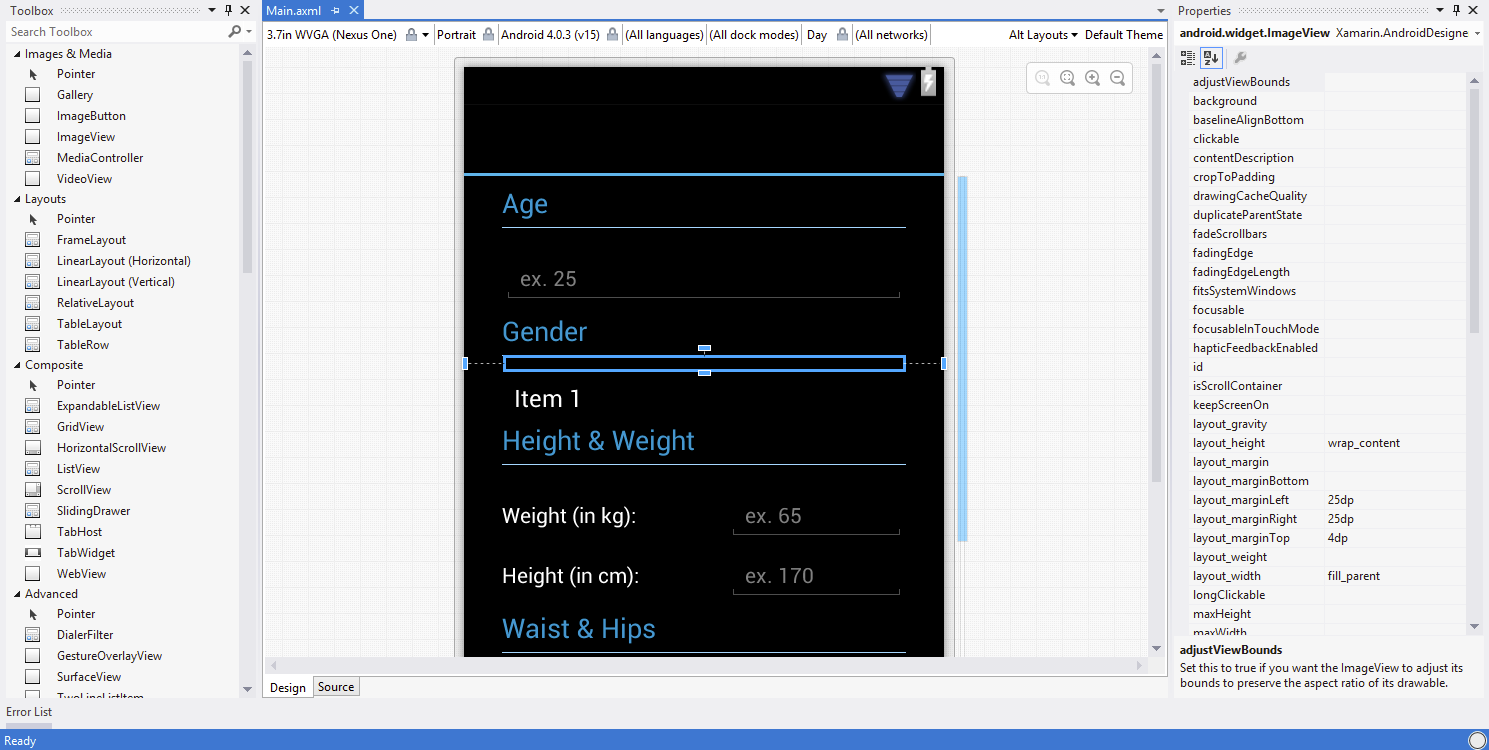
Under the Resources > Layout folder is a file called Main.axml. Let’s design the UI with all the necessary controls for Diet Calculation in Visual Studio. Here’s our famous Android Designer for Visual Studio with all the android controls in the toolbox and a property window to set the attributes:
Results.axml
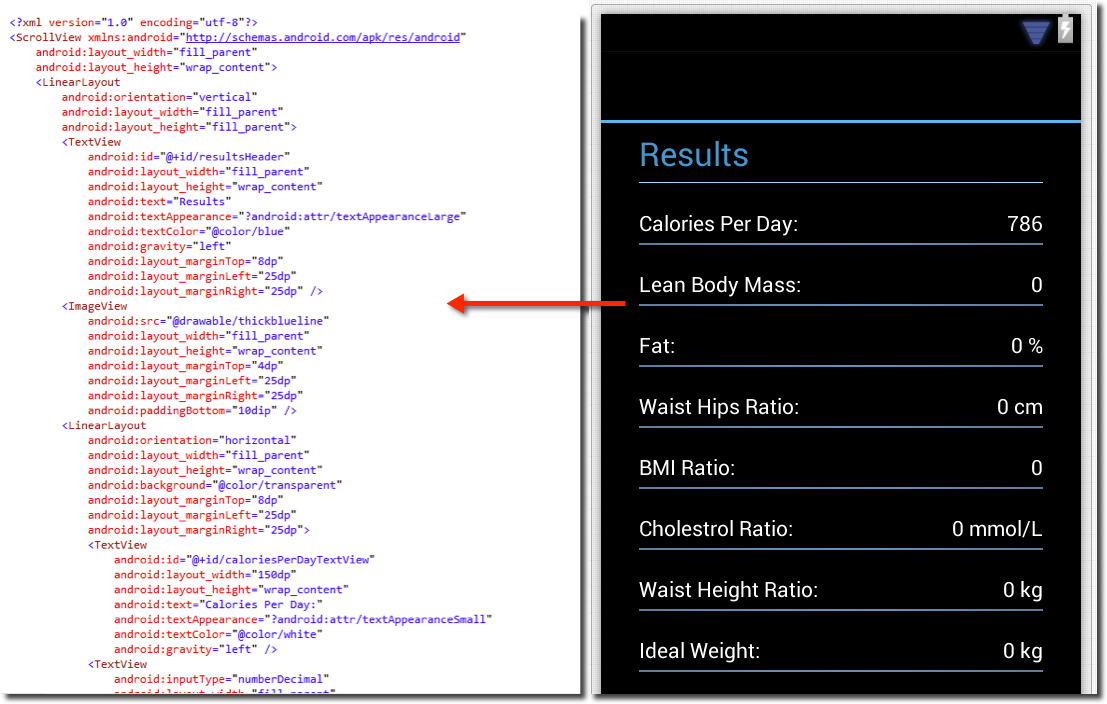
We need a result screen to display all the values calculated based on the inputs provided by the user in the first screen. To do so, create a new Android Layout:
-
Right Click on Layout Folder > Add new Item > Xamarin.Android > Android Layout (Results.axml)
Find above the resulting xml generated by the designer for Results screen.
Activities
When we created a new Xamarin.Android Project, the project template also created a class called Activity1 in the file Activity1.cs. An Activity is a class that models a destination where a user can perform some action while using an app, typically via a user interface.
Conceptually, an activity can be thought of as being mapped to an application screen. An activity is similar in some ways to a Page in ASP.NET, in that every activity has a lifecycle associated with it. An Activity contains methods to be called at certain points in the lifecycle. These methods can also be overridden. For example, the Activity subclass created by the project template overrides the OnCreate method, which is called after an Activity first starts. I recommend reading the Activity Lifecycle article to effectively handle user data in changing states such as Running, Paused, Backgrounded & Stopped.
MainActivity
Rename the existing class Activity1 to MainActivity and Set the Content View to the Layout that we created in the Resources.
[Activity(Label = "Diet Calculator", MainLauncher = true, Icon = "@drawable/icon")]
public class MainActivity : Activity
{
 protected override void OnCreate(Bundle bundle)
 {
 base.OnCreate(bundle);
 // Set our view from the "main" layout resource
 SetContentView(Resource.Layout.Main);
 }
}
Now, we can access all the controls created in the Layout file in the MainActivity class by calling the FindViewById method and passing the Resource ID. For e.g:
// retrieve the widgets in UI using FindByViewId
// to interact programmatically
var ageText = FindViewById(Resource.Id.ageText);
// … do the same for other controls
Initialize DietCalculator’s Model and Controller from the Core project (re-usable code):
model = new DietCalculatorModel();
controller = new DietCalculatorController(model);
When the calculate button is tapped, we need to do two things:
-
Populate the values from the input fields and set the controller methods accordingly
-
Navigate to Result screen with updated values
CalculateButton.Click will set the values for all of the fields on the form, for instance:
controller.SetAge(StringToNumberUtility.GetInt32(ageText.Text, 0));
//...
We use Intents to pass the resulting data to the second screen. Intents are used throughout Android to make things happen by sending messages. They are most commonly used within applications to launch Activities. For more information, I recommend reading Hello, Multiscreen Applications.
// Since Model classes are already populated with the results, pass them to Result Activity
// using PutExtra method
var resultIntent = new Intent(this, typeof (ResultsActivity));
resultIntent.PutExtra("CaloriesPerDay", model.CaloriesPerDay.ToString());
//...
StartActivity(resultIntent);
ResultsActivity
Finally, in the resulting view you retrieve the data passed in the Intents and set it to the UI:
FindViewById(Resource.Id.caloriesPerDayResultText).Text = Intent.GetStringExtra("CaloriesPerDay");
//...
Final Output:
Please note, the logic in the program is ported as is — so all calculation results will depend on the algorithm used by the original author 🙂 You can download the sample code from github.


 Light
Light Dark
Dark