Go Large with iOS 11
One of the more obvious user interface changes in iOS 11 is the larger titles that are used across the system apps, from the App Store and Apple Music to Notes and Mail. The Health and Contact apps are shown below:

The title animates off the screen and shrinks to a normal-sized navigation bar when the content is scrolled so that the screen real estate is used efficiently. Apple’s Human Interface Guidelines provide tips on when to use large titles; they’re intended to introduce content and help users differentiate between screens with similar scrolling behavior.
Large titles are implemented as part of the navigation bar, so to implement a large title your app must use a navigation bar. Add the following code in your UINavigationController class’ ViewDidLoad method to cause the title to be rendered in the large style:
NavigationBar.PrefersLargeTitles = true;This setting alone will cause every view controller to use the large style, which is not usually desirable. To force the regular sized navigation bar and font size, set the following property in the ViewDidLoad method of view controllers that should use the regular style:
NavigationItem.LargeTitleDisplayMode = UINavigationItemLargeTitleDisplayMode.Never;There are three possible values for the LargeTitleDisplayMode:
- Never: Force use of the regular, small format navigation bar.
- Always: Force the navigation bar and font size to use the large format.
- Automatic: Use the same style (large or small) as the previous item in the navigation stack.
In the app shown below, PrefersLargeTitles is set to true and the display mode is set to Never on the second view controller in the navigation stack. This results in the first page having the large style, but subsequent pages reverting to the normal height:

Many apps today prefer custom styling to the default colors on iOS. Use the Appearance properties below to customize the large titles:
// < Back button color
UINavigationBar.Appearance.TintColor = UIColor.FromRGB(0xE7, 0x63, 0x3B); // e7963b dark
// Title bar background color
UINavigationBar.Appearance.BarTintColor = UIColor.FromRGB(0xF7, 0xE2, 0x8B); // f7e28b light
// 'small' Title bar text
UINavigationBar.Appearance.SetTitleTextAttributes(new UITextAttributes()
{
    TextColor = UIColor.FromRGB(0xE7, 0x63, 0x3B), // e7963b dark
    TextShadowColor = UIColor.Clear
});
// 'Large' Title bar text
UINavigationBar.Appearance.LargeTitleTextAttributes = new UIStringAttributes
{
    ForegroundColor = UIColor.FromRGB(0xE7, 0x63, 0x3B), // e7963b dark
};
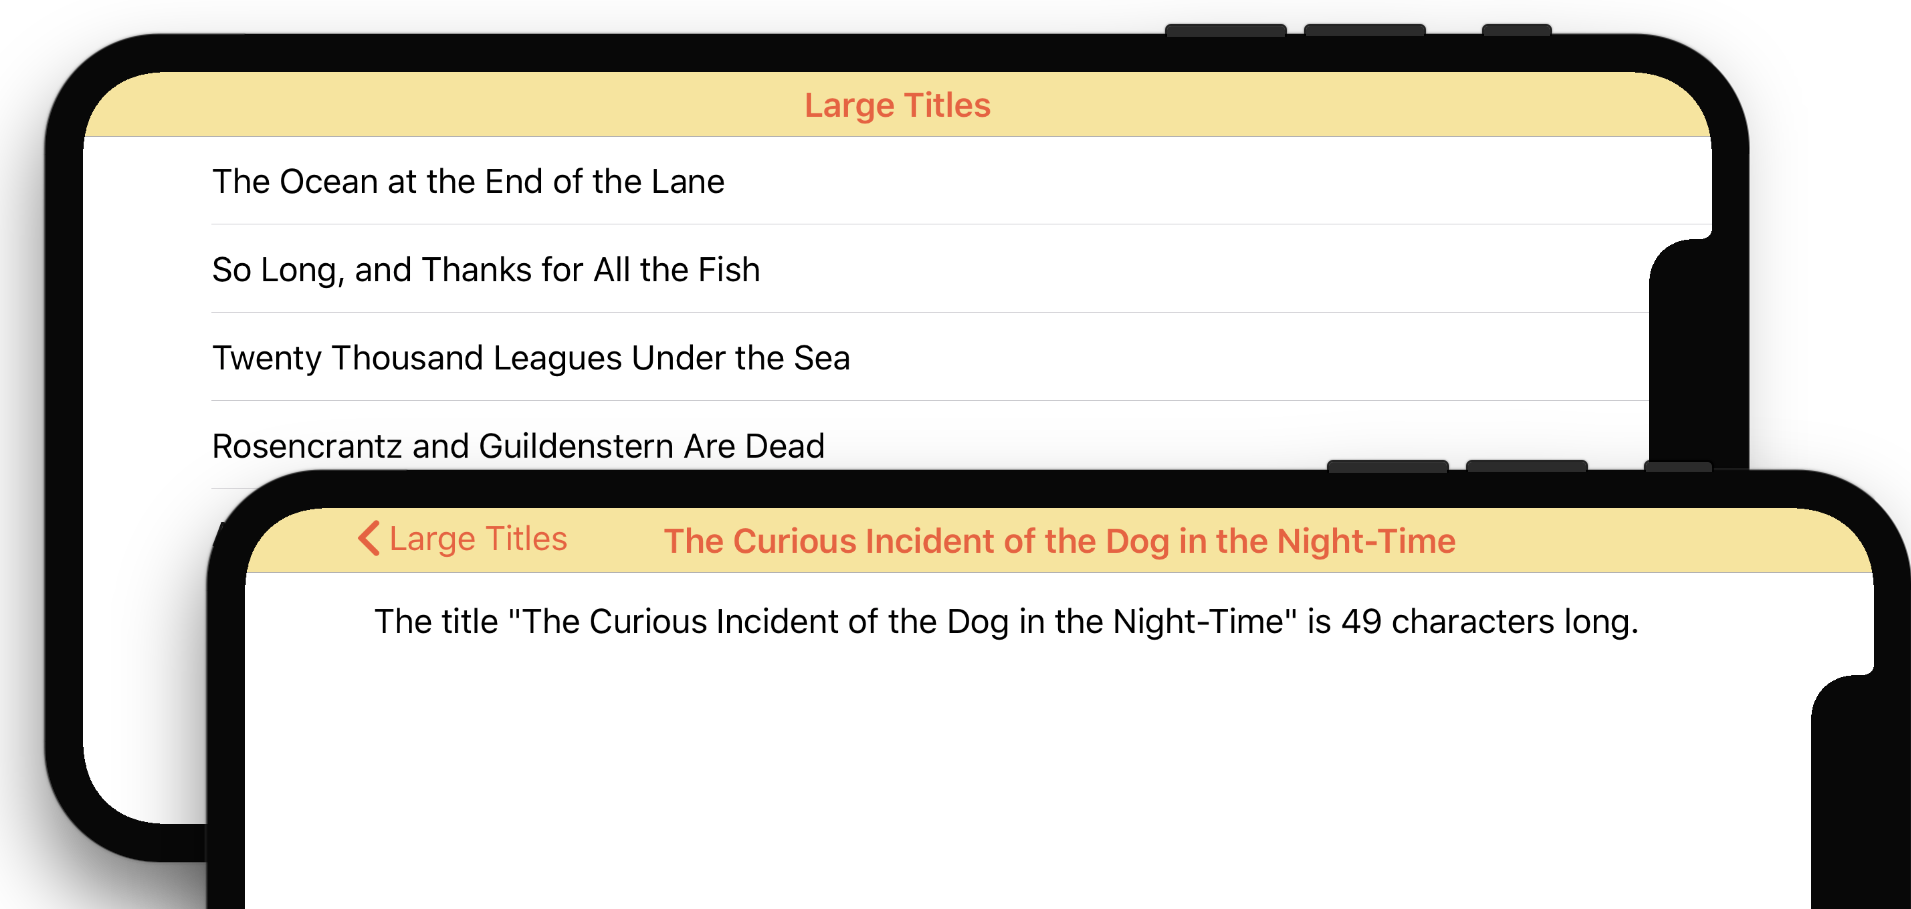
Finally, note that in landscape the navigation bar is always rendered with the normal height for that orientation, regardless of the PrefersLargeTitles setting:

Remember that these new properties are only available in iOS 11! If your app also targets earlier versions of iOS, use a version check to prevent errors on older phones.
You can download the code for the LargeTitles sample from GitHub. Visit the Xamarin Developer Center for more iOS 11 tips!
Discuss this post in the Forums!

 Light
Light Dark
Dark
0 comments