
This is the third post of four in the Debugging Xamarin Open Source Frameworks series, debugging Mono. Part 1 covers building Xamarin.Forms from the source and debugging that code, Part 2 covers Xamarin.iOS, and Part 4 steps into the source code to build and debug Xamarin.Android.
Debugging in Mono
If you work with Xamarin to develop awesome mobile apps, at some point you may have received an exception or error from the Mono runtime or BCL (Base Class Library). You may have wanted to step through that code to see if the error is something you can resolve, or if it’s a bug in the Mono code. You might even have wanted to file a pull request to merge a fix into the framework itself. Since Mono and the Xamarin frameworks (i.e. Xamarin.iOS, Xamarin.Android, and Xamarin.Forms) are all open source, this post will show you how you can help contribute to debugging!
For this post, a Mac computer will be used to build Mono from the source code. You can also use Windows or Linux.
Getting the Mono source code
There are a number of ways to get the Mono source code. The official Mono repository on GitHub is located at: https://github.com/mono/mono. If you’re already familiar with using git and GitHub, you can get the source code using your preferred method and skip to the next section.
Use your Github account to fork the Mono repository and then clone that fork to your computer. If you do not have a GitHub account, just clone the official Mono repository directly to your computer.
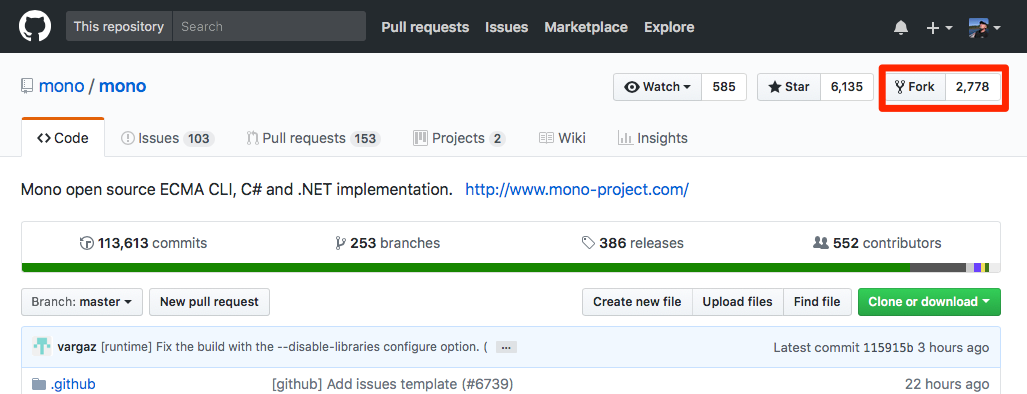
In the Mono repository linked above, you can fork the official repository to your own GitHub repository by hitting the Fork button in the upper right, which will create a new repository under your account:
Whether you fork the repository or not, you can just select the Clone or download button, either in your fork or on the official Xamarin.iOS repo. Clicking the Clone or download button gives you two options:
- Open in Desktop: Opens the GitHub Desktop app on your Mac (get it here) and clone the repository to the directory that you specify:
- Make commits
- Start pull requests
- Switch branches using the GitHub Desktop app, no command line necessary.
Note: only the master branch on GitHub will be downloaded. On the GitHub Desktop, you can switch branches and then that branch will be downloaded onto your computer as well (this may take some time).
- Download ZIP: Downloads the currently selected branch as a .zip file. When you unzip, you will note that this is not a GIT repository, so it isn’t ready to do commits, pull requests, switch branches, etc. If you only want to work with one specific branch, this may be the right option for you.
Building Mono Dependencies
Once you have the source downloaded to your machine, use these instructions as a guide to build Mono on your Mac, with some caveats noted below. It is recommended to read this entire section before starting.
By default, you build the master branch of Mono. Verify that the master branch is building successfully by checking the Build Status OS X section on the main page of the GitHub repository. If OS X shows as failing or unstable, get a different branch to build.
In the Building Mono Dependencies section of the instructions linked above, you’ll see a reference to Homebrew, a macOS package manager. Get it here to install dependencies like autoconf and cmake.
Build and Install Mono
Once you’re done installing your Mono dependencies, you’re ready to build and install Mono using the instructions for Building Mono From a Git Source Code Checkout. It’s important to set the PREFIX, which will be the path for your Mono install. Use /usr/local, as in the build instructions for a release package.
In this case the Mono repo is at path:
/Users//git/monoCreate the following folder for the Mono install:
/Users//git/mono-installWe do not need to run the git clone … command since the repository is already cloned. Instead, do the following:
- Open Terminal and navigate to your Mono repository (replace /path/to/mono with the actual path to your Mono repository):
cd /path/to/mono - Set the PREFIX variable (replace /path/to/mono-install with the actual path to your Mono install folder):
PREFIX=/path/to/mono-install - Add PREFIX/bin to your $PATH variable:
PATH=$PREFIX/bin:$PATH - Run the following commands to build in 64 bit mode:
./autogen.sh --prefix=$PREFIX --disable-nls- Make
- Make install
Congratulations, you have now successfully built Mono! See the troubleshooting section for any possible issues.
Bring Mono to Visual Studio for Mac
There are a couple of things to do in Visual Studio for Mac to make your shiny new Mono build available and start stepping into the Mono source code:
- Open Visual Studio for Mac.
- Open Visual Studio > Preferences.
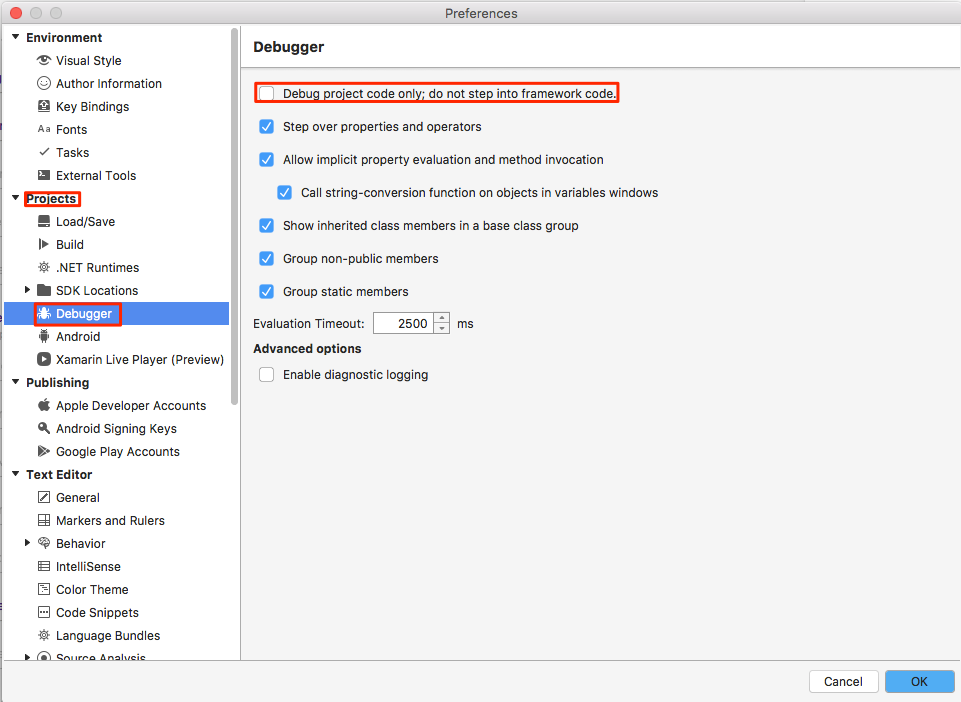
- Select Projects > Debugger on the left.
- Uncheck "Debug project code only; do not step into framework code".

- Select Projects > .NET Runtimes on the left.
- Click the Add button.
- Browse to the folder where you installed Mono earlier.
- Select and Open.

Once you have a solution loaded, select your new build of Mono using the Project > Active Runtime menu. You can now step into the Mono source code while debugging.
Debugging Mono Source Code
- Open Visual Studio for Mac.
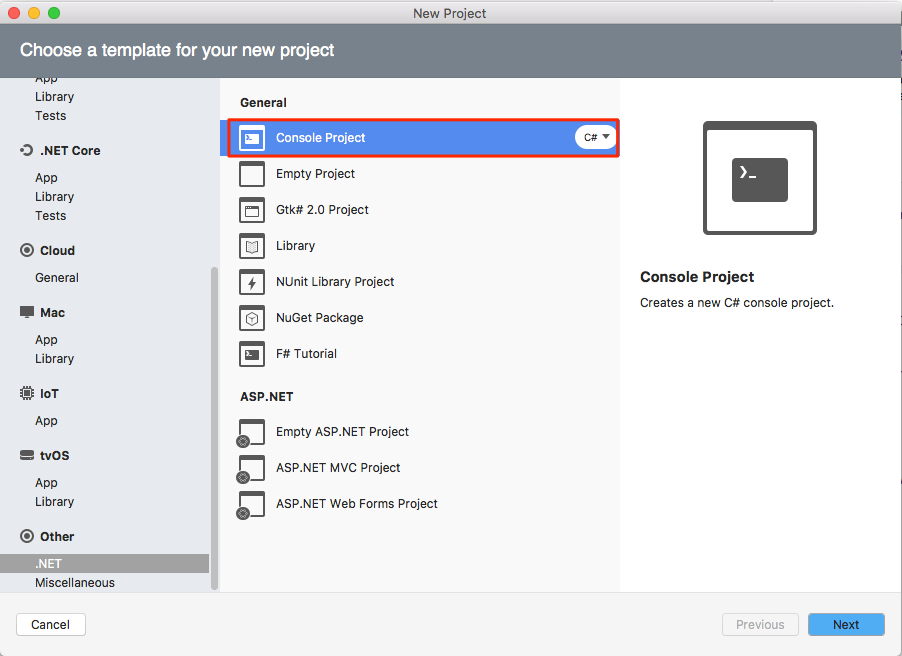
- Create a new .NET Console project (File > New Solution > Other > .NET > Console Project).

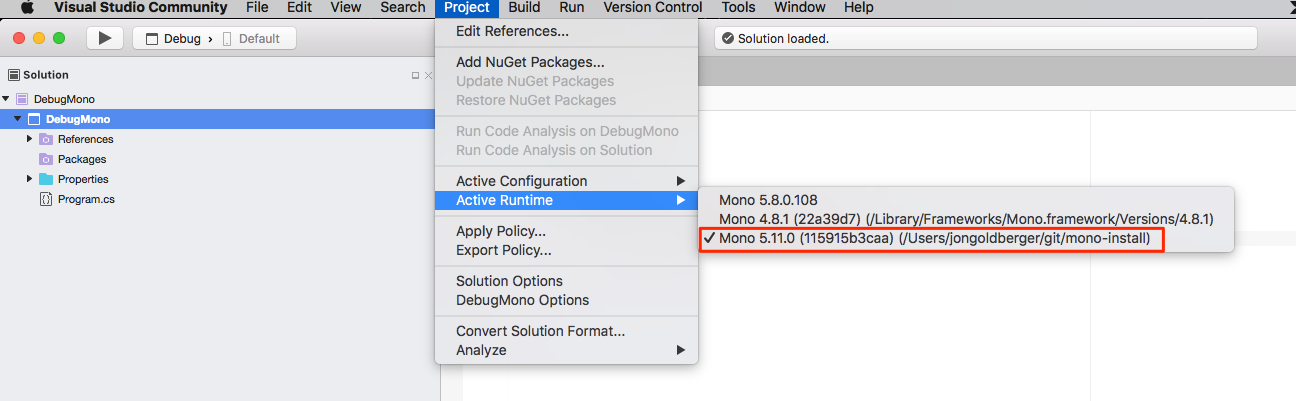
- Select the Mono runtime you just built as the active runtime:
a. Select menu Project > Active Runtime.
b. You will see your Mono runtime along with others installed on the system. Select the runtime that matches the path where Mono is installed.

- By default, MSBuild is not included when building mono from source. Use xbuild instead of MSBuild for this console project:
a. Right click on the console project in the solution explorer and select Options.
b. Select Build > General on the left.
c. Uncheck the Use MSBuild build engine... option.

- Open the Program.cs file.
- Place a breakpoint on the Console.WriteLine statement.
- Run the project with debugging.
- When the program pauses on the Console.WriteLine statement, step into the code.


Congratulations, you're now stepping into and through Mono source code! Right click on the tab for the Mono source code file that opens in Visual Studio for Mac, and select Reveal in Finder.
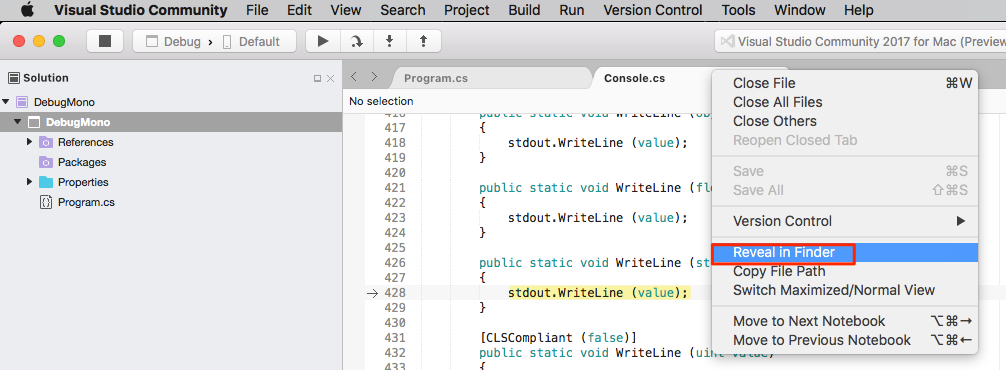
A Finder window will open with the source code file highlighted so you can see that this is the source code file from your cloned Mono repository. Assuming you cloned the repo instead of downloading a .zip archive, you can also edit the code and make a new commit or pull request using GitHub Desktop.
Summary
Through this post, you now have the ability to use, build, and install Mono from source code onto your computer. Additionally, you learned how to make your build of Mono available to Visual Studio for Mac and use it in a Console project to step into and through the Mono source code.
If you fixed a bug or made some improvement during this process that you would like to share, please contribute to debugging Mono.
Enjoy this post? Discuss it on the forums!
it seems there is no part 4