
Xamarin.Forms allows you to build native user interfaces for iOS, Android, and Windows from a single shared codebase using C# or XAML. Each user interface element in Xamarin.Forms is rendered natively on each platform using a renderer class that creates the corresponding native control for that platform. For example, the Xamarin.Forms control <code>Entry</code> is rendered as a <code>UITextField</code> on iOS, an <code>EditText</code> on Android, and a <code>TextBox</code> on Windows. By extending the existing renderer for a control, you can easily customize the appearance or behavior of a control. You can even create entirely new controls by defining a shared interface in Xamarin.Forms and create custom renderers to render the control on each platform natively. This approach is perfect for heavy platform-specific customizations.
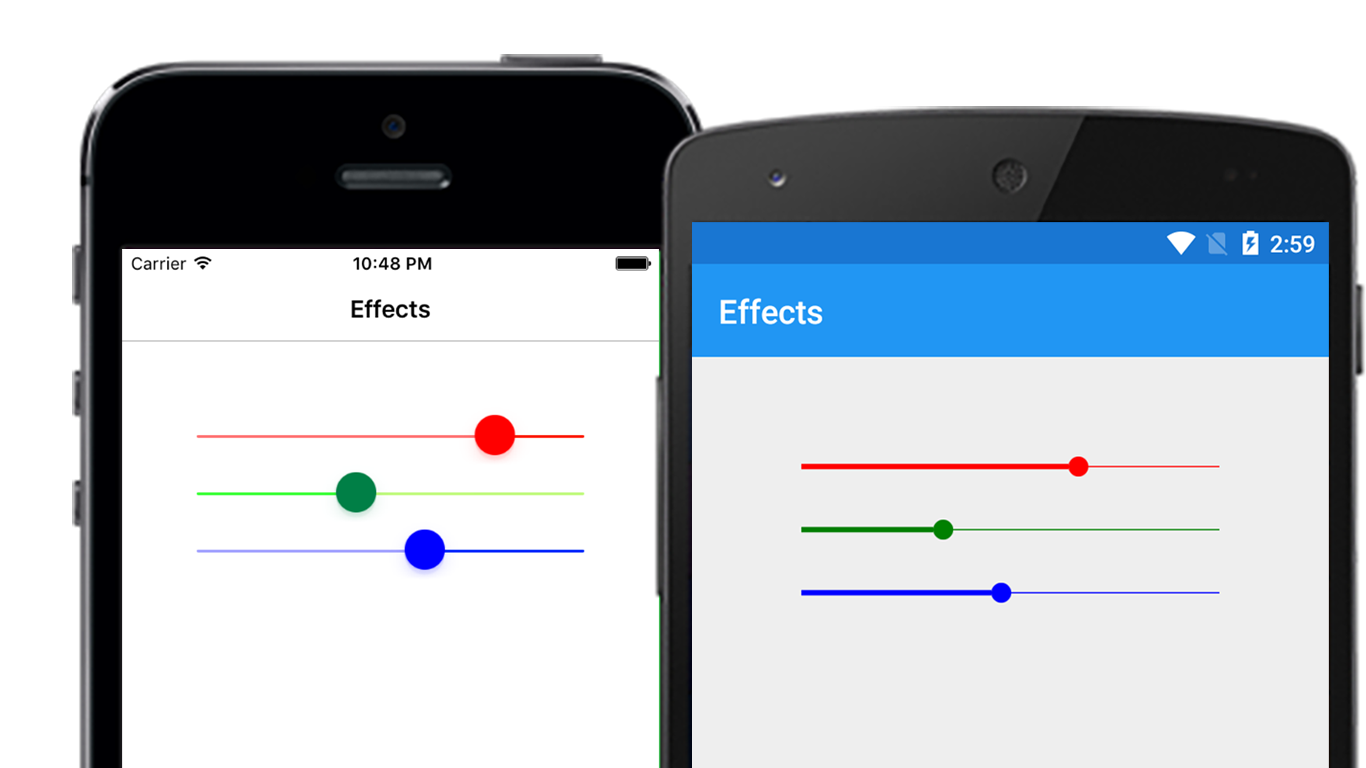
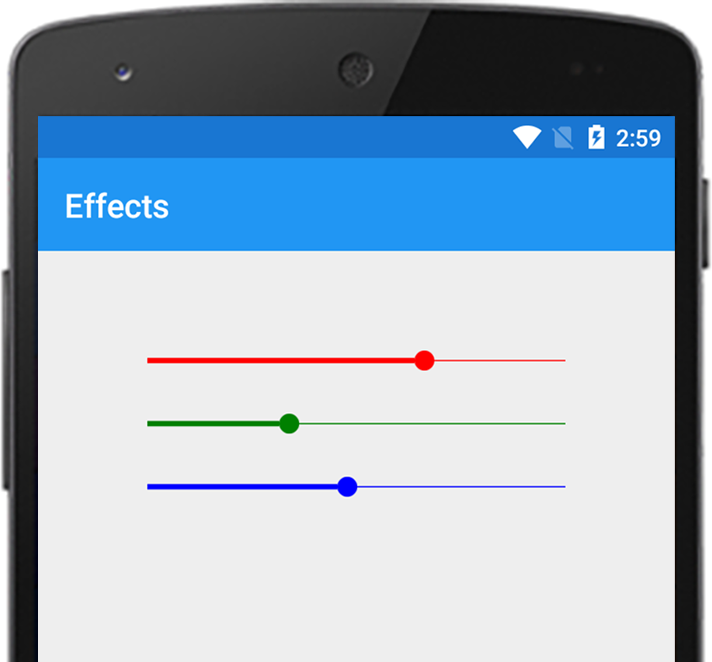
What if you would like to perform a simple control customization? Creating a custom renderer sometimes can be a heavyweight response. Xamarin.Forms 2.1 introduces a new feature named effects that greatly simplifies this process, allowing native controls on each platform to be more easily customized. In this blog post, you will learn how to create your own custom effect for the Slider control in Xamarin.Forms.
Introduction to Effects
Effects allow the native controls on each platform to be customized without having to implement a custom renderer. They simplify the customization of a native control and are typically used for small styling changes. Anything that can be achieved with an effect can also be achieved with a custom renderer. However, custom renderers offer more flexibility and customizations. Refer to our guidelines on which approach is right for your customization.
Getting Started
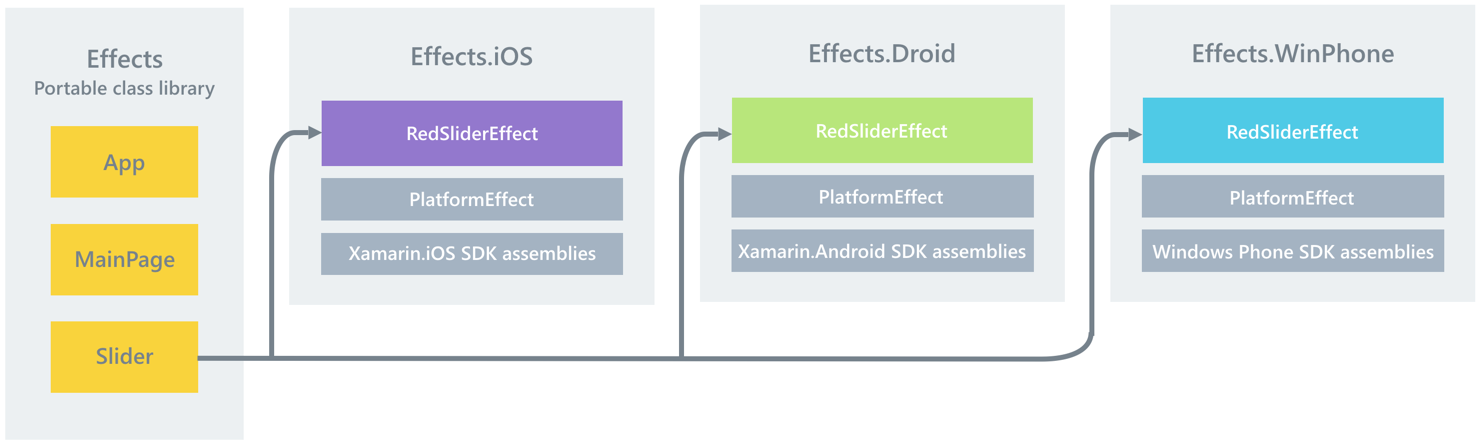
Effects are written in platform-specific projects and are consumed in shared or PCL projects in Xamarin.Forms. Creating an effect involves two simple steps:
- Create an effect by subclassing
PlatformEffectin the native platform you wish to customize. - Consume the effect by attaching it to the appropriate Xamarin.Forms control.
Creating an Effect
Effects are created in the platform-specific project. First, create a custom class that inherits from PlatformEffect and override the OnAttached and OnDetached methods.
OnAttached: called when an effect is attached to a Xamarin.Forms control. Use this method to perform customization of the control, along with exception handling in case the effect cannot be applied to the specified Xamarin.Forms control.OnDetached: called when an effect is detached from a Xamarin.Forms control. Use this method to perform any effect cleanup, such as resetting to an older value or de-registering an event handler.
Applying the Customization for iOS
Subclass the PlatformEffect class and override the OnAttached method.
public class RedSliderEffect : PlatformEffect
{
    protected override void OnAttached()
    {
        var slider = (UISlider)Control;
        slider.ThumbTintColor = UIColor.FromRGB(255, 0, 0);
        slider.MinimumTrackTintColor = UIColor.FromRGB(255, 120, 120);
        slider.MaximumTrackTintColor = UIColor.FromRGB(255, 14, 14);
    }

    protected override void OnDetached()
    {
        // Use this method if you wish to reset the control to original state
    }
}
Applying the Customization for Android
Subclass the PlatformEffect class in your Android project and write the customizations in the OnAttached method.
public class RedSliderEffect : PlatformEffect
{
    protected override void OnAttached()
    {
        var seekBar = (SeekBar)Control;
        seekBar.ProgressDrawable.SetColorFilter(new PorterDuffColorFilter(Xamarin.Forms.Color.Red.ToAndroid(), PorterDuff.Mode.SrcIn));
        seekBar.Thumb.SetColorFilter(new PorterDuffColorFilter(Xamarin.Forms.Color.Red.ToAndroid(), PorterDuff.Mode.SrcIn));
    }

    protected override void OnDetached()
    {
        // Use this method if you wish to reset the control to original state
    }
}
Setup Attributes
For Xamarin.Forms to discover the effects created in the platform-specific projects, we need to add ResolutionGroupName and ExportEffect attributes.
- Add a
ResolutionGroupNameattribute to the custom effect class. This attribute ensures the effects are created inside a unique namespace preventing collisions with other effects with the same name. Please note, this attribute can be applied only once per project. In the sample project you will see them specified only once in theRedSliderEffectclass. - Add an
ExportEffectattribute to the custom effect class. This attribute registers the effect with a unique ID that’s used by Xamarin.Forms, along with the group name, to locate the effect prior to applying it to a control. The attribute takes two parameters: the type name of the effect and a unique string that will be used to locate the effect prior to applying it to a control.
[assembly: ResolutionGroupName("EffectsSample")]
[assembly: ExportEffect(typeof(RedSliderEffect), "RedSliderEffect")]
namespace Effects
{
    ...
}
Consume the Effect in Xamarin.Forms
Effects are consumed by first defining the control in Xamarin.Forms and then adding the custom effect to its Effects Collection.
var redSlider = new Slider
{
    Minimum = 0,
    Maximum = 100,
    Value = 80
};

var content = new ContentPage
{
    Title = "Effects",
    Content = new StackLayout
    {
        VerticalOptions = LayoutOptions.Start,
        Children = {
            redSlider
        }
    }
};

redSlider.Effects.Add(Effect.Resolve("EffectsSample.RedSliderEffect"));
The RedSliderEffect is attached to the Slider instance by adding the effect to the control’s Effects Collection. The Effect.Resolve method returns an effect for the specified name, which is a concatenation of the values specified in the ResolutionGroupName and the ExportEffect attributes on the effect class.
Wrapping Up
Effects are a useful feature since they allow the native controls on each platform to be customized without having to implement a custom renderer for simple and small styling changes. Effects can be further empowered for reusability by using parameters. For more information, visit our documentation on passing parameters to an effect. For a hands-on look at effects, be sure to download the slider sample used in this blog post.