
Apple introduced a great feature when it released the iOS 3.2 SDK way back in 2009: support for adding custom fonts to apps. Since then, developers have made their apps stand out by using different fonts.
Although adding fonts should be a very simple process, developers often express confusion over how to do it for Xamarin.iOS apps. The process has a few “gotcha’s” that might catch you off guard if you skipped your morning coffee or you are trying to get a release out late at night.
In this blog post, I describe how to add a custom font to a label. This should give you an understanding of the process and help you if you’re stuck.
First, find yourself a font with a suitable license. I use dafont.com, a great resource for finding awesome-looking fonts. You can quickly find free fonts that you can use in your application at no cost; however, if you find a premium font you like, you may be able to license it. In this example, I am going to use a free font titled HollywoodHills.ttf. You can download a copy yourself if you wish to follow along.

When searching for suitable fonts, it’s worth remembering that iOS only supports TTF and OTF. This shouldn’t be a problem as most fonts available online come in these two formats.
Add the font
You should add the font to your project by either dragging and dropping it to a folder or right clicking and selecting ‘Add existing file.’ In this example, I have added the font to the Resources folder. You can, of course, add the font to any folder—including the root directory if you so choose.
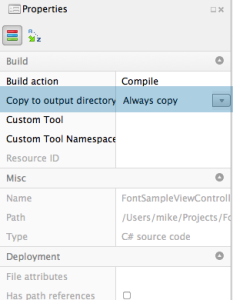
Once you’ve added the font, you should then right click it and select the ‘Properties’ menu option. You will need to change the build property ‘Copy to output directory’ to ‘Always copy.’ If you forget to do this, you will get a null exception error when trying to reference the font at runtime. This will cause your App to crash.
Info.plist
The next step is to tell iOS where your custom font is stored. iOS will load these fonts at startup, so it pays to use custom fonts sparingly—it can slow the startup time of your App.
To tell iOS you are using custom fonts, you should open the Info.plist file and select ‘Source’ at the bottom of the view. This will change the UI to be more inline with Xcode’s property editor.
Once you’ve done this, you should then double click on ‘Add new entry’ and select the ‘Fonts provided by application’ option. It is here that you input the location of the font so that iOS knows where to look when loading the fonts at startup. Because I have put the font in Resources, I can simply type ‘HollywoodHills.ttf’ as the value. If I had put the font in Resources/Fonts, then I would set the value to ‘Fonts/HollywoodHills.ttf’.
Using the custom font
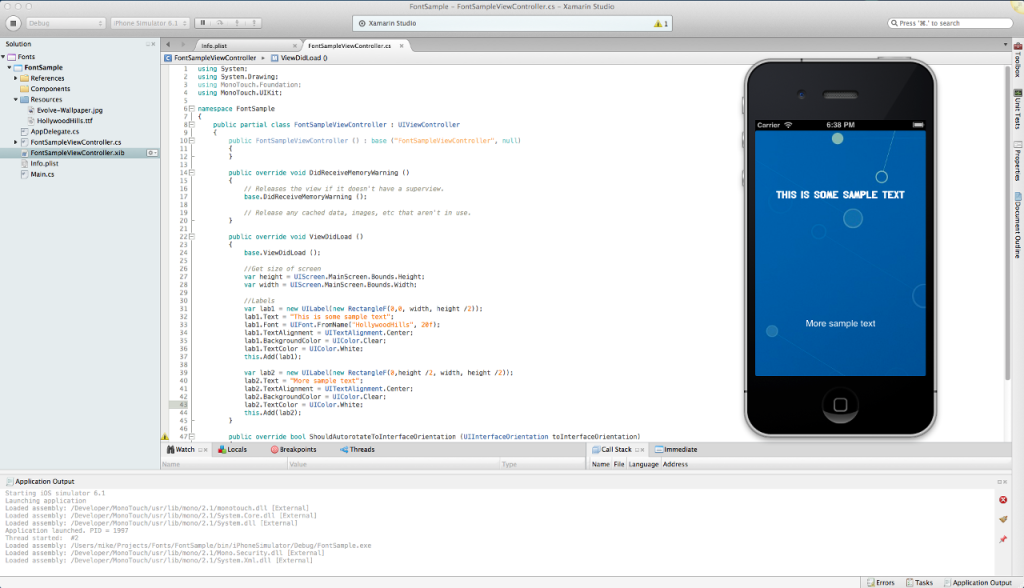
Now comes the interesting part: using the font. Let’s create two labels, one with our custom font and the other with the default. I’ve included code below that will make and place these labels for you. You can copy and paste the following code into your application’s ViewDidLoad method. Try running the app to see how it looks. If you configured your project as I described above, it should work with no issues.
//Get size of screen
var height = UIScreen.MainScreen.Bounds.Height;
var width = UIScreen.MainScreen.Bounds.Width;

//Labels
var lab1 = new UILabel(new RectangleF(0,0, width, height /2));
lab1.Text = "This is some sample text";
lab1.Font = UIFont.FromName("HollywoodHills", 20f);
this.Add(lab1);

var lab2 = new UILabel(new RectangleF(0,height /2, width, height /2));
lab2.Text = "This is some more sample text";
this.Add(lab2);
When you run your App, you will now see that the top label uses the custom font you downloaded from Dafont. It’s as easy as that. If you are having problems, you should double-check that you have selected the ‘Always copy’ build property for the font and that the path is correct in the Info.plist.
I hope you enjoy using custom fonts in Apps as much as I have.