
 Whether it’s automatically tagging friends in our Facebook photos or “live filters” on Snapchat, facial recognition is increasingly becoming a large part of our everyday lives. Adding facial recognition to software in the past was extremely challenging, however. Now, though, Microsoft Cognitive Services makes it as easy as a few lines of code—for free.
Whether you’re building consumer or enterprise applications, there’s a Microsoft Cognitive Services API that will make your app more innovative and pleasant to use. In this blog post, you’ll learn how to add facial recognition with Microsoft Cognitive Services’s Face APIs to an employee directory app, so we can identify an unknown employee from a photo.
Introducing the Facial Recognition APIs
Microsoft Cognitive Services lets you build apps with powerful algorithms in just a few lines of code, providing 22 APIs that use artificial intelligence and machine learning to do everything from OCR, to speech and facial recognition. APIs are broken down into five main groups: vision, speech, language, knowledge, and search. The Face APIs from Microsoft Cognitive Services allow you to detect human faces, organize people into groups, find similar faces, and identify previously-tagged faces in images.
Xamarin has grown a ton over the past few years, and sometimes it’s tough to know exactly who everyone is. The great thing about Microsoft Cognitive Services is it’s not only great for innovative apps, but for all types of apps, including apps built for the enterprise. In this blog post, let’s build an employee directory app that identifies an employee from a photo to help ensure I don’t get into an awkward situation at a company party if I don’t know someone I should.
To get started for free, visit the Microsoft Cognitive Services subscription page, and subscribe to the Face APIs. Once registered, you should have a free subscription to the Face APIs, including API keys.

Download the starter code for the Xamarin employee directory app, which we’ll extend to use facial recognition to identify employees from a photo.
Identifying Employees with Facial Recognition
To identify a person in a photo, we must first train the facial recognition model. Identifying the person in a photo is as easy as these four steps:
- Create a person group.
- Add people with corresponding faces to that person group.
- Train the facial recognition model.
- Detect and identify the people in a photo.
Training the Facial Recognition Model
To get started, open EmployeesViewModel and add a new method named RegisterEmployees. We start off by creating a new person group, which is just a container for a group of people. After we’ve created a person group, we need to add people to that group. Each person also needs one or more faces from which we can identify them. Finally, we need to train the person group. This will identify the unique features of a each face that can later be used to identify a person.
async Task RegisterEmployees()
{
    var faceServiceClient = new FaceServiceClient("{FACE_API_SUBSCRIPTION_KEY}");

    // Step 1 - Create Person Group
    personGroup = Guid.NewGuid().ToString();
    await faceServiceClient.CreatePersonGroupAsync(personGroupId, "Xamarin Employees");

    // Step 2 - Add persons (and faces) to person group.
    foreach (var employee in Employees)
    {
        // Step 2a - Create a new person, identified by their name.
        var p = await faceServiceClient.CreatePersonAsync(personGroupId, employee.Name);
        // Step 3a - Add a face for that person.
        await faceServiceClient.AddPersonFaceAsync(personGroupId, p.PersonId, employee.PhotoUrl);
    }

    // Step 3 - Train facial recognition model.
    await faceServiceClient.TrainPersonGroupAsync(personGroupId);
}
In production, the process of creating a person group, adding people and faces, and training the model would probably be done on your backend. For example, when you provision a new employee on your backend, a new person (and corresponding face) would automatically be added and the model would be retrained.
Next, call RegisterEmployees from the constructor of the EmployeesViewModel to ensure that we are configuring our facial recognition model at startup. We’re now ready to identify employees!
Facial Detection and Identification
Now that we’ve properly trained our facial recognition model, we can use Microsoft Cognitive Services to identify a person from a photo. Because we’re using the MVVM pattern in our employee directory app, we can use commanding to respond to events on our user interface and execute code in our view model. Navigate to the ExecuteFindSimilarFaceCommandAsync method in EmployeesViewModel, which is a backing method for our command where we’ll write the logic to identify an employee.
First, we need to take a photo from which we can identify an employee. We can use the Media Plugin for Xamarin and Windows to take or select photos from shared code:
MediaFile photo;

await CrossMedia.Current.Initialize();

// Take or select a photo using the Media Plugin for Xamarin and Windows
if (CrossMedia.Current.IsCameraAvailable)
{
    photo = await CrossMedia.Current.TakePhotoAsync(new StoreCameraMediaOptions
    {
        Directory = "Employee Directory",
        Name = "photo.jpg"
    });
} else {
    photo = await CrossMedia.Current.PickPhotoAsync();
}
Now that we have a photo, let’s pass that to Microsoft Cognitive Services to identify the employee:
using (var stream = photo.GetStream())
{
    var faceServiceClient = new FaceServiceClient("{FACE_API_SUBSCRIPTION_KEY}");

    // Step 4a - Detect the faces in this photo.
    var faces = await faceServiceClient.DetectAsync(stream);
    var faceIds = faces.Select(face => face.FaceId).ToArray();

    // Step 4b - Identify the person in the photo, based on the face.
    var results = await faceServiceClient.IdentifyAsync(personGroupId, faceIds);
    var result = results[0].Candidates[0].PersonId;

    // Step 4c - Fetch the person from the PersonId and display their name.
    var person = await faceServiceClient.GetPersonAsync(personGroupId, result);
    UserDialogs.Instance.ShowSuccess($"Person identified is {person.Name}.");
}
That’s it! All of our facial recognition logic is now complete. Jump over to EmployeesPage.xaml, where we’ll add a ToolbarItem to the navigation bar for users to click on to launch the camera and identify an employee:
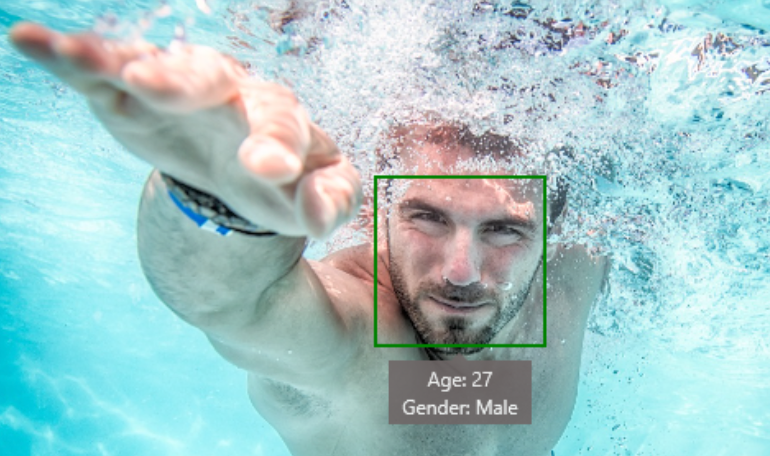
We can now identify employees. The great thing about Xamarin.Forms is you can both build great mobile apps that run on iOS, Android, and Windows 10 mobile, but also desktop apps with Xamarin.Forms for UWP. Let’s identify a photo of me using the employee directory app and a Windows 10 laptop:
Wrapping Up
In this blog post, we used Microsoft Cognitive Service’s Face APIs to identify an unknown employee from our employee directory by taking or selecting a photo. To learn more about Microsoft Cognitive Services, watch the “Build ‘Smart’ into your app with Microsoft Cognitive Services” session from Xamarin Evolve 2016. For more examples of using Microsoft Cognitive Services to build smart mobile apps, and to download the complete code for this blog post, check out my smarter-apps GitHub repository.