
At //BUILD 2017, we shipped an update to the Continuous Delivery Tools for Visual Studio. This update has support for configuring a Continuous Integration and Continuous Delivery pipeline for ASP.NET Core projects with container support to an existing Azure Service Fabric cluster directly from Visual Studio 2017.
To configure continuous delivery to a Service Fabric cluster, first you need to create a preview version Service Fabric cluster. Start by creating a security certificate to secure administrative access to the cluster. Open a PowerShell console, login to Azure and select the Azure subscription that you want to deploy the cluster in then create and encrypt a password for the certificate used by Service Fabric to secure access to your cluster by running the following commands:
Login-AzureRmAccount

Select-AzureRmSubscription -SubscriptionId <subscription-id>

$pwd = "<your password>" | ConvertTo-SecureString -AsPlainText -Force
Keep your PowerShell console running and download the Azure Resource Management Template for Service Fabric azuredeploy.json and the sample azuredeploy.parameters.json locally. Edit the parameters file to name, size and secure your cluster as well as set its location. Ensure that the clusterCodeVersion is set to the preview version 255.255.5718.255. Once your configuration files are ready, create the cluster by running the following commands:
New-AzureRmServiceFabricCluster

 -TemplateFile C:\<your_working_folder>\azuredeploy.json `

 -ParameterFile C:\<your_working_folder>\azuredeploy.parameters.json `

 -CertificateOutputFolder C:\<your_working_folder>\ `

 -CertificatePassword $pwd `

 -CertificateSubjectName "<your_cluster_name>.<cluster_location>.cloudapp.azure.com" `

 -ResourceGroupName <your_cluster_RGname>
Once the Service Fabric creation is completed, the command will output cluster information to the console window and copy the security certificate to your working folder. Double click on the certificate to import it to the current user certificate store. Remember to mark the certificate key as exportable in the private key protection step and complete the import wizard. This will allow the Configure Continuous Delivery experience to export the key while configuring your release definition.
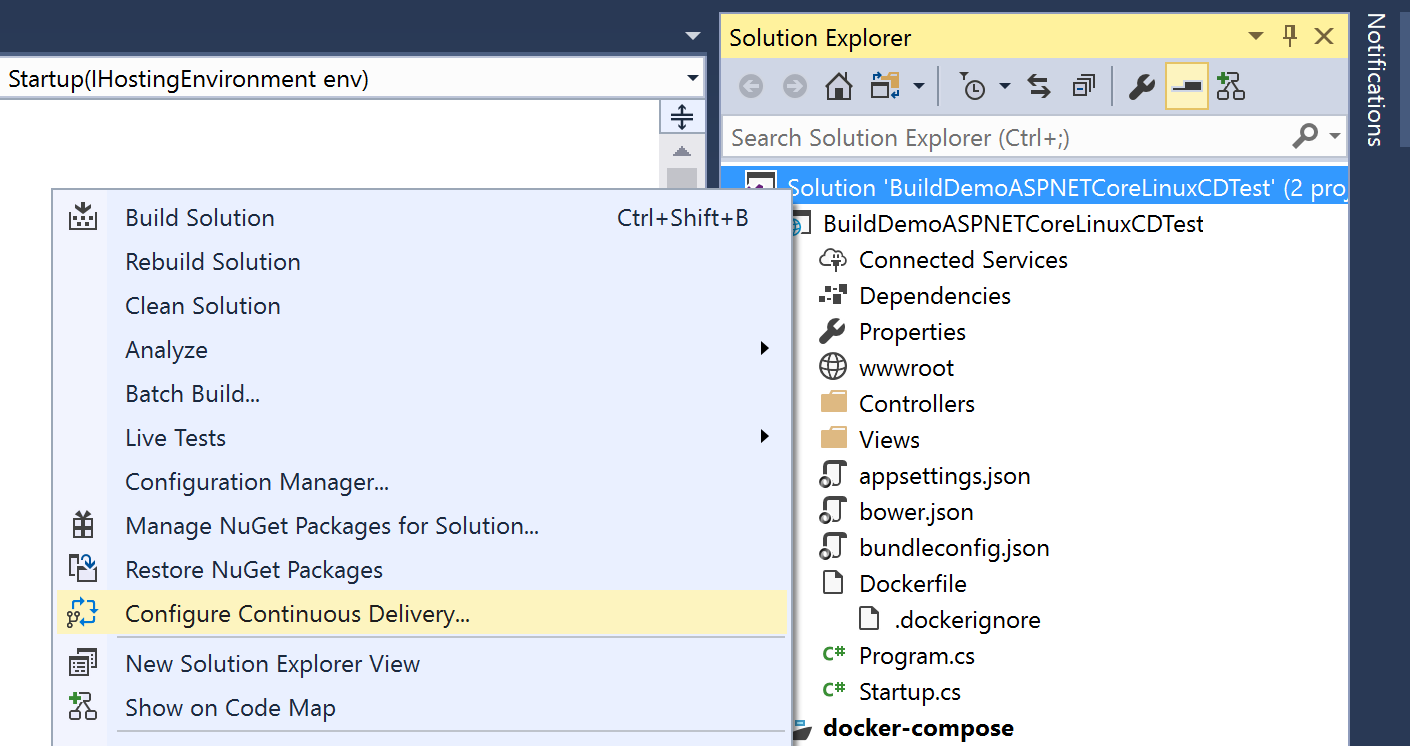
With a preview version of the Service Fabric Cluster, you can now configure Continuous Delivery from Visual Studio 2017 with the latest version of the Continuous Delivery Tools for Visual Studio extension. Create or open an existing solution with an ASP.NET or ASP.NET Core project. Add Docker support to the project and ensure that the solution is under version control on VSTS or GitHub. Right click on the solution in Solution Explorer and select Configure Continuous Delivery.
With Service Fabric Cluster as the Target Host type, select your newly created Serviced Fabric cluster to act as a target for continuous delivery.

Visual Studio will automatically pick up the cluster certificate from your user certificate store and verify the thumbprint. Enter the password for the certificate and select your Azure Container Registry then click OK. Once the configure continuous delivery completes, you will have a configured build and release pipeline for your project to your new Service Fabric Cluster.
To expose your web service outside its container you need to enable port mapping for your container by modifying the docker-compose.yml file for that project to enable the port mapping for your service. If you have multiple services, you need to do that for each of them.
version: '3'

services:
  <your_service_name>:
    image: <your_image_name>
    ports:
    -	“80:80”
    build:
      context: ./<your_service_context>
      dockerfile: Dockerfile
To expose these services outside the Service Fabric Cluster, you need to configure your load balancer to do so for each service port. By default, the current sample ARM template and parameter files load balance traffic on port 80 and 8081 for the cluster. If you need to configure other ports you can do so by adding new entries in your ARM template
"loadBalancedAppPort1": {
      "type": "int",
      "defaultValue": 80,
      "metadata": {
        "description": "Input endpoint1 for the application to use. Replace it with what your application uses"
      }
and modifying the values in your parameters file.
"loadBalancedAppPort1": {
      "value": 80
    },
    "loadBalancedAppPort2": {
      "value": 8081
    },
Please keep the feedback coming!
Thank you to everyone who has reached out and shared feedback and ideas so far. We’re always looking for feedback on where to take this Microsoft DevLabs extension next. There’s a Slack channel and a team alias vsdevops@microsoft.com where you can reach out to the team and others in the community sharing ideas on this topic.
0 comments