This is Part 2 of the “VB Universal Windows App” series:
- Part 1: Setting up the universal Windows app in the Dev Centers, and in VS Solution Explorer
- > Part 2: Sharing XAML, Assets and Code
- Part 3: Local and Roaming settings, and In-App purchases
- Part 4: Sound effects with SharpDX
- Part 5: How to call platform-specific APIs from common code
- Download full source code
In Part 1 we set ourselves up by registering the app in the two Dev Centers, and by creating the basic structure in Solution Explorer.
In Part 2 today, we’re going to share! From a developer perspective, the benefit of universal Windows apps is in sharing as much as possible between the two projects you have to build. Let’s step back and see what can be re-used…
- MainPage.xaml– yes, we will re-use xaml and codebehind by adding it to the PCL
- App.xaml– we can’t re-use the App.xaml file itself, but we will re-use the bulk of the codebehind file App.xaml.vb by factoring it into common methods in the PCL.
- Manifest- no, these are different between the two projects.
- Assets– yes, we will re-use assets by adding them to the Assets folder of the PCL. However, some assets like application-icons are different resolutions between the two devices and can’t be re-used.
- References – yes, we generally add references and NuGet packages just once to the PCL rather than adding them twice to each app. However some references aren’t PCL-ready and can’t be re-used – this will be covered in Part 4
Sharing XAML
For our simple game, we’re going to re-use a single XAML page and code-behind between Windows and Windows Phone versions of the app. That’s because the page is similar enough between the two form factors.
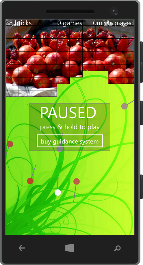
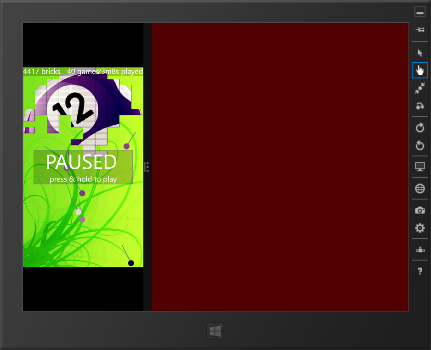
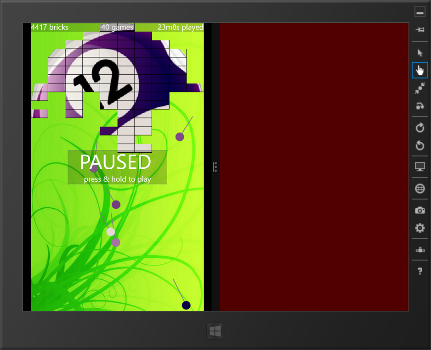
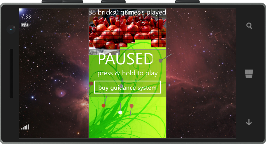
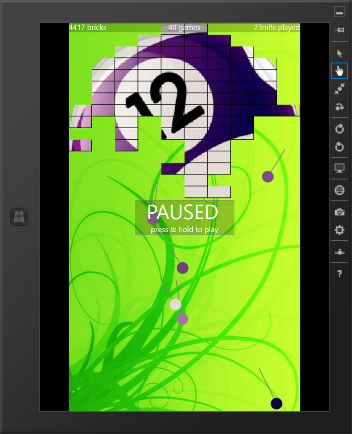
Look at the different ways our game might be displayed on two devices:
|
Phone > Portrait |
Windows > Snapped |
Windows > Half |
|
Phone > Landscape |
Windows > FullScreen |
Windows > Landscape |
What’s striking is that the “Phone Portrait” and “Windows Snapped” views are almost identical – roughly same proportions, similar pixel counts, similar physical dimensions measured in inches.
There’s good potential for XAML re-use between some Windows pages and some Windows Phone pages.
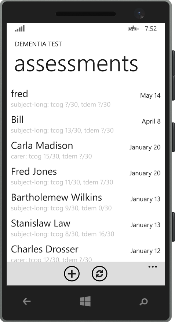
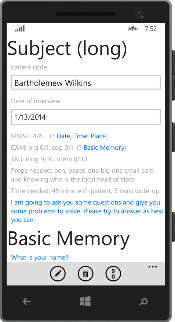
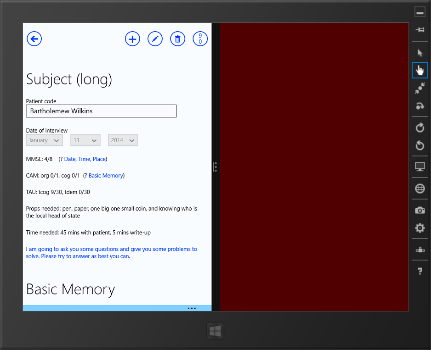
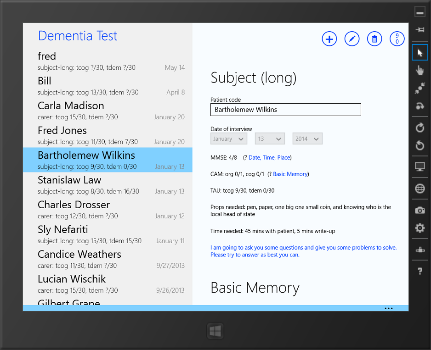
Those screenshots were from a simple one-page game. How does XAML re-use look for a more serious forms-over-data app? Here’s one I wrote called “Dementia Test”, used by clinicians to help diagnose Alzheimer’s Disease. Its look was inspired by the email app that comes with Windows 8. You can see that, even here, there’s still good potential for XAML re-use between devices.
|
List of forms
|
Details view |
On full-screen devices, it can fit the ListOfForms and the DetailsView side-by-side… |
To re-use a XAML page, simply add the page to your PCL.
Use the “Context Switcher” (new in VS2013 Update 2) to preview in the designer how the page looks on Windows and Windows Phone:
You’ll have to make sure the page layout works properly for the device sizes, DPI and aspect ratios it runs on. For this game, I did this with code in the page’s SizeChanged event handler. (If you need to get the actual pixel density, e.g. to make something exactly 1 inch long on every device, read here).
Private Sub Page_SizeChanged(sender As Object, e As SizeChangedEventArgs)
Dim w = e.NewSize.Width, h = e.NewSize.Height
If w > h Then w = h Else h = w
‘ picks the largest square that will fit inside the shape of the current window
border1.Width = w : border1.Height = h
image1.Width = w / 8 : image1.Height = h / 8
End Sub
When does it make sense to re-use XAML? The XAML re-use described here is fine to get you going quickly. But when your app hits the big-time, customers will expect you to invest resources to make your app look absolutely perfect on whichever device, orientation or snap-size they might be using. You might find the differences become so great that you’re better off just using non-shared XAML.
Pro tip: In the XAML file, you can refer to device-specific resources like “{ThemeResource ApplicationPageBackgroundThemeBrush}”. On Windows Phone this will do the right thing (pick light or dark depending on the user’s currently selected theme). On Windows it will do the right thing (pick the standard dark grey #FF1D1D1D). That’s because XAML resolves these resources when the page is created, and the resource dictionaries are already set up correctly for the device.
Pro tip: There must be at least one XAML file in each project, otherwise things don’t work. This can easily be a “dummy” XAML file that you never actually use.
Sharing assets
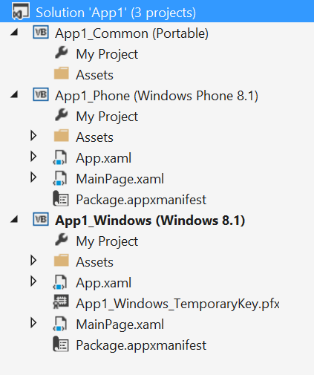
To re-use an asset, simply add it to App1_Common, typically in the Assets folder.
If you need to load a common asset from codebehind, note that its path is prepended with the name of the PCL…
‘ Loading it as a StorageFile
Dim folder = Await Package.Current.InstalledLocation.GetFolderAsync(“App1_CommonAssets”)
Dim file = Await folder.GetFileAsync(“twelve-ball.png”)
‘ Loading it with a URL
Dim img = “ms-appx:///App1_Common/Assets/twelve-ball.png”
image1.Source = New BitmapImage(New Uri(img, UriKind.Absolute))
When does it make sense to re-use assets? Sharing some assets like sound files or configuration files makes perfect sense. As for sharing images, it depends on the kind of image. If it’s a 200×200 jpg mugshot of someone’s face, I’d happily re-use that between Windows and Windows Phone. But if it’s a high-dpi 2560×1600 background image, that’s probably only worth having on Windows.
Sharing code: App.vb
As things stand, the Windows project has “App.xaml.vb”, and the Windows Phone project also has “App.xaml.vb”, and the two are almost identical. We’ll avoid duplication by sharing the code across both projects.
The process is simple:
- Create a new common code file “App.vb” in your App1_Common.
- Move the body of “OnLaunched” and “OnSuspending” out from one of the original App.xaml.vb files into methods in this common App.vb
- Change both of the original App.xaml.vb so they simply invoke the common methods.
Here’s how both of the App.xaml.vb files will look:
NotInheritable Class App
Inherits Application
Protected Overrides Sub OnLaunched(e As LaunchActivatedEventArgs)
App1_Common.App.OnLaunched(e)
End Sub
Private Async Sub OnSuspending(sender As Object, e As SuspendingEventArgs) Handles Me.Suspending
Dim deferral As SuspendingDeferral = e.SuspendingOperation.GetDeferral()
Await App1_Common.App.OnSuspendingAsync()
deferral.Complete()
End Sub
End Class
Pro Tip: It can get confusing to tell which of the two App.xaml.vb files you’re editing. Some people use Tools > Options > ProjectsAndSolutions > General > TrackActiveItemInSolutionExplorer. In Roslyn we also introduced for VB the “project dropdown” in the nav-bar; this shows which project the current file is from.
And here’s how the common “App.vb” will look:
Public Class App
Public Shared Sub OnLaunched(e AsLaunchActivatedEventArgs)
Dim rootFrame = TryCast(Window.Current.Content, Frame)
If rootFrame Is NothingThen
rootFrame = New Frame()
If e.PreviousExecutionState = ApplicationExecutionState.Terminated Then
‘ TODO: Load state from previously suspended application
End If
Window.Current.Content = rootFrame
EndIf
If rootFrame.Content Is NothingThen
rootFrame.Navigate(GetType(App1_Common.AdaptiveMainPage), e.Arguments)
EndIf
Window.Current.Activate()
End Sub
Public Shared Async Function OnSuspendingAsync() AsTask
‘ TODO: Save application state and stop any background activity
&nb
sp; If False Then Await Task.Delay(0) ‘ just to suppress the compiler warning
End Function
End Class
Pro tip: The original App.xaml.vb for Windows Phone had some additional code for transitions. And the original App.xaml.vb for Windows had some additional code to throw exceptions when page navigation fails. For my app they didn’t add much value so I removed them. If you want to keep them, you’ll use the “IOC” technique described in Part 6.
Conclusion
In today’s blog post “Part 2” we made the most of sharing – we shared XAML, Assets and Code. Stay tuned for tomorrow’s post “Part 3”, where we code in the user-facing benefits of universal Windows apps – roaming state, and in-app purchases that work across all devices.
—
Lucian





0 comments
Be the first to start the discussion.