
Visual Studio 2005 Service Pack 1 can take a long time to install and may apply to multiple products on your machine, appearing to install multiple times. This is a large service pack and installs a lot of files, fixing many issues and adding several new features to over 200 Visual Studio 2005 editions.
What follows is a detailed description of the Visual Studio 2005 Service Pack 1 installation experience – or any of our patches for .NET Framework 2.0 and Visual Studio 2005 – describing what is going on during various steps with links to more information and tips to save time and space. Throughout this example, the English Visual Studio 2005 Service Pack 1 for Standard, Professional, and Team editions – among some others – is used, which is by far the largest service pack package shipped to date.
Make sure that before installing the Visual Studio 2005 Service Pack 1 release, you uninstall Service Pack 1 beta if you have it installed.
The installation experience begins when you download the service pack. There are many service packs, split up for Visual Studio 2005 Standard, Professional, and Team editions; and for Visual Studio 2005 Team Foundation Services according to written languages. This optimizes patch size by sharing most of the files for each product in a single embedded cabinet within the .msp file. For Express editions, patch packages are split up for each project language, which optimizes patch size because most of the files are world-wide binaries across project languages resulting in smaller .msp files. Download whichever service pack packages are appropriate for which products you have installed in your environment.
Downloading the package locally will save a lot of time when invoking the patch, but saving the package to a network in appropriate environments makes it available to everyone without having to download it individually. In whichever Windows platform you install the service pack the executable must be mapped into memory when executed. On Windows XP and newer, a SAFER check is performed first to determine if the file can be executed, which also validates a digital signatures if a signature exists. All our patches are signed for customers’ safety and security, so this check requires that the whole executable is read into memory in blocks or in whole. Currently, in Windows XP and Server 2003 the file is read in whole, so the more physical memory a machine has the faster this process will go. The more paging that is required, the slower this process will go. In some uncommon cases, this process may even fail, for which a workaround is available.
On Vista the file is read in blocks, and when validated will show the consent dialog as shown in Figure 1 if the patch wasn’t already executed from an elevated shell. You won’t see this dialog on Windows 2000, XP, or Server 2003.
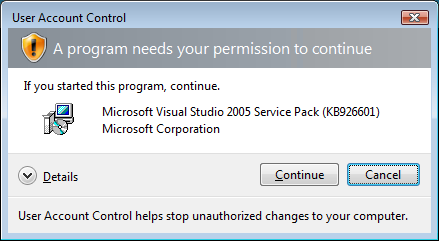
Figure 1: Windows Vista Consent Dialog
Once you click Continue, the executable is executed. For smaller executables this is much faster because the executable can be scanned if necessary, and validated much faster.
On all supported Windows platforms, the patch wrapper must extract the embedded .msp file because all of the Windows Installer APIs and executables work on file paths. Our patch wrapper is responsible for enabling default logging, cleaning up logs upon success if no command-line parameters were specified or the Windows Installer Logging system policy was not set, and installing the patch on all applicable, installed products before requiring any possible reboots. During this process you’ll see an extraction dialog as shown in Figure 2.
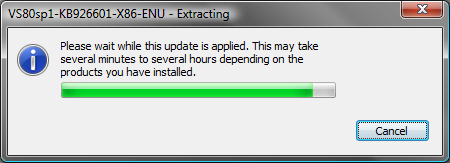
Figure 2: Patch Extraction Dialog
When extraction is complete, the patch wrapper will invoke msiexec.exe as an elevated process to install the .msp file to all applicable, installed products. The client process is elevated to mitigate some incorrectly authored custom actions in the original product .msi files.
If not running silently by passing /quiet to the patch wrapper – which means you wouldn’t see any dialogs anyway – Windows Installer makes a copy of the .msp file in the user’s %TEMP% directory because it is assumed to have write access to that location for user. It does this even though the patch wrapper extracted the .msp file to the %TEMP% directory already. This extra disk I/O is one reason it is worth installing the patch silently by passing the /quiet switch.
During the client installation portion, another SAFER check is performed on the .msp file itself, to provide the user with early indication that the patch package is invalid if that is the case. This is another reason it is worth installing the patch silently by passing the /quiet switch.
Because no dialogs are authored into the target .msi file nor added by the patch transforms, Windows Installer runs using basic UI mode as shown in Figure 3 and skips actions in the InstallUISequence table.

Figure 3: Windows Installer Basic UI
When the Windows Installer finishes processing in the client context, it transfers execution to the Windows Installer service to process the InstallExecuteSequence table. This results in the dialog as shown in Figure 4.

Figure 4: Windows Installer Basic UI during InstallExecuteSequence Processing
The service makes a copy of the .msp file in the %WINDIR%Installer directory, which is the Windows Installer package cache. The .msp file is cached in whole because it provides the source for files to be patched and overwritten, and is required even during repair scenarios. Again a SAFER check is performed on this file to verify that is unaltered from the publisher. This SAFER check is performed because the client should not be trusted – which would otherwise lead to elevation of privileges – and because during silent installation the client would not have performed a SAFER check.
Installation continues by executing a custom action that prompts for confirmation about installing the patch as shown in Figure 5, followed by an End User License Agreement (EULA) for each patch being installed in the same transaction as shown in Figure 6.
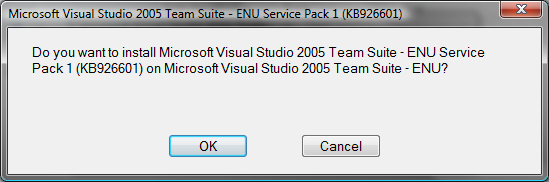
Figure 5: Installation Confirmation Dialog
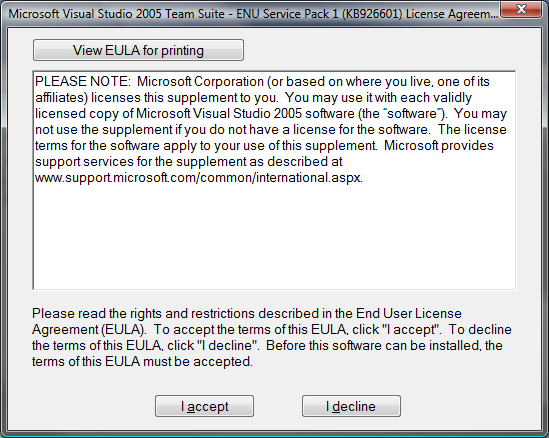
Figure 6: End User License Agreement Dialog
Windows Installer developers might be wondering why dialogs are shown in the execution sequence. The custom action is legacy code that used to guarantee patch installation sequence in Windows Installer 2.0 – as now supported in Windows Installer 3.0 and newer as a standard feature using the MsiPatchSequence table – followed by the installation confirmation prompt and the EULA dialog. The custom sequencing code has been removed, but the custom action’s other purpose to present these dialogs has not. Using the msidbCustomActionTypeFirstSequence (0x100) custom action execution scheduling attribute means this should run during the UI sequence if the UI sequence was run, but since no dialogs are authored and Windows Installer runs in basic UI mode, the InstallUISequence table is not processed.
Windows Installer continues by determining feature and component state, as well as which files must be backed up to the baseline cache, in between the CostInitialize and CostFinalize actions. You can find the feature and component states in a verbose log during the InstallValidate action. This information is handy in determining what should be reinstalled during patch installation and what is actually going to be reinstalled.
Between the InstallInitialize and InstallFinalize actions, Windows Installer will generate a script as shown in Figure 7. This is what makes Windows Installer a transactional installer. While generating the execution script, a rollback script is also generated so that if the execution script fails the rollback script is processed.

Figure 7: Windows Installer Script Generation Dialog
After the script is generated when InstallFinalize is run (or any InstallExecute or InstallExecuteAgain actions, which we don’t currently schedule), the script is executed as shown in Figure 8. It is during this time that backup copies of files are created in a hidden directory named Config.msi if they are in use and can be moved, backup copies of all files being overwritten or patched are copied to the baseline cache, and files in the .msp package are copied to their destination locations. That’s a lot of disk I/O, so making sure you have closed all your applications can help, as well as disabling the baseline cache – understanding that by doing so source will be required to uninstall the service pack or other patch that targets files installed by the product .msi file.
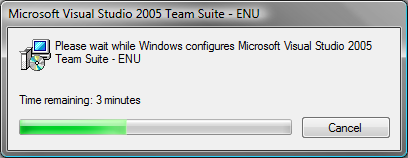
Figure 8: Windows Installer Script Execution Dialog
When files must be copied out of a source location such as the original installation media or an embedded cabinet in an .msp file, an additional SAFER check is required to validate that each source package has not been tampered with.
Please note that during script execution the time remaining can be incorrect. This is often caused by custom actions that do not report back estimated time or actual progress, or because some custom actions may not be able to accurately estimate progress.
Once the execution script is finished, current patches will display a success dialog as shown in Figure 9.
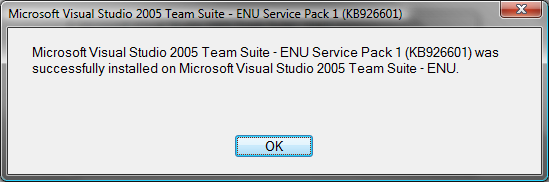
Figure 9: Patch Success Dialog
If any other products are installed on your machine to which the patch applies, this process repeats starting after patch extraction. With Windows Installer, only one installation transaction for a single product can execute at a time, so even though a patch or patches may target multiple products they can only apply to a single product at a time. To help determine if you have multiple products installed to which a patch can apply, you can extract the .msp file by passing /extract to the patch executable you downloaded, optionally specifying a destination directory, and provide the path to that .msp file to the Patch Applicability Browser.
The larger the patch and the more files it installs, the longer the patch will take to install. There is a lot of disk I/O by design to support robust patching under Windows Installer, but there are workarounds you can use at your own risk to improve performance and decrease disk space required as documented here and in linked material.
0 comments