
Last week we announced that the Python development workload is available now in Visual Studio Preview, and briefly covered some of the new improvements in Visual Studio 2017. In this post, we are going to go into more depth on the improvements for the Python Interactive Window.
These are currently available in Visual Studio Preview, and will become available in one of the next updates to the stable release. Over the lifetime of Visual Studio 2017 we will have opportunities to further improve these features, so please provide feedback and suggestions at our GitHub site.
Interactive Windows
People who have been using Visual Studio with many versions of Python installed will be used to seeing a long list of interactive windows – one for each version of Python. Selecting any one of these would let you run short snippets of code with that version and see the results immediately. However, because we only allowed one window for each, there was no way to open multiple windows for the same Python version and try different things.

In Visual Studio 2017, the main menu has been simplified to only include a single entry. Selecting this entry (or using the Alt+I keyboard shortcut) will open an interactive window with some new toolbar items:
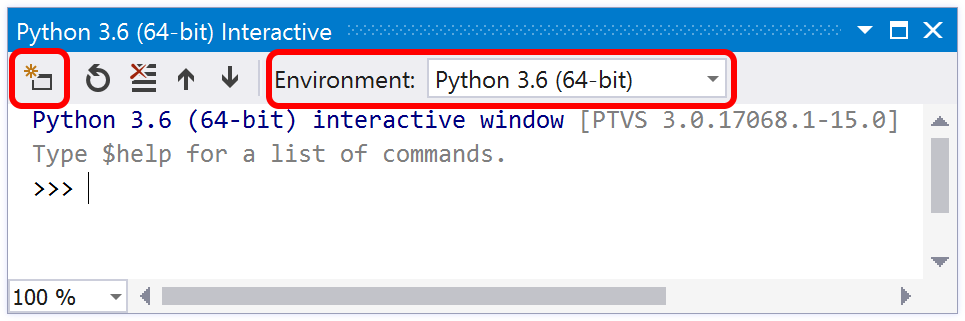
At the right hand side, you’ll see the new “Environment” dropdown. With this field, you can select any version of Python you have installed and the interactive window will switch to it. This will reset your current state (after prompting), but will keep your history and previous output.

The button at the left hand side of the toolbar creates a new interactive window. Each window is independent from each other: they do not share any state, history or output, can use the same or different versions of Python, and may be arranged however you like. This flexibility will allow you to try two different pieces of code in the same version of Python, viewing the results side-by-side, without having to repeatedly reset everything.
Code Cells
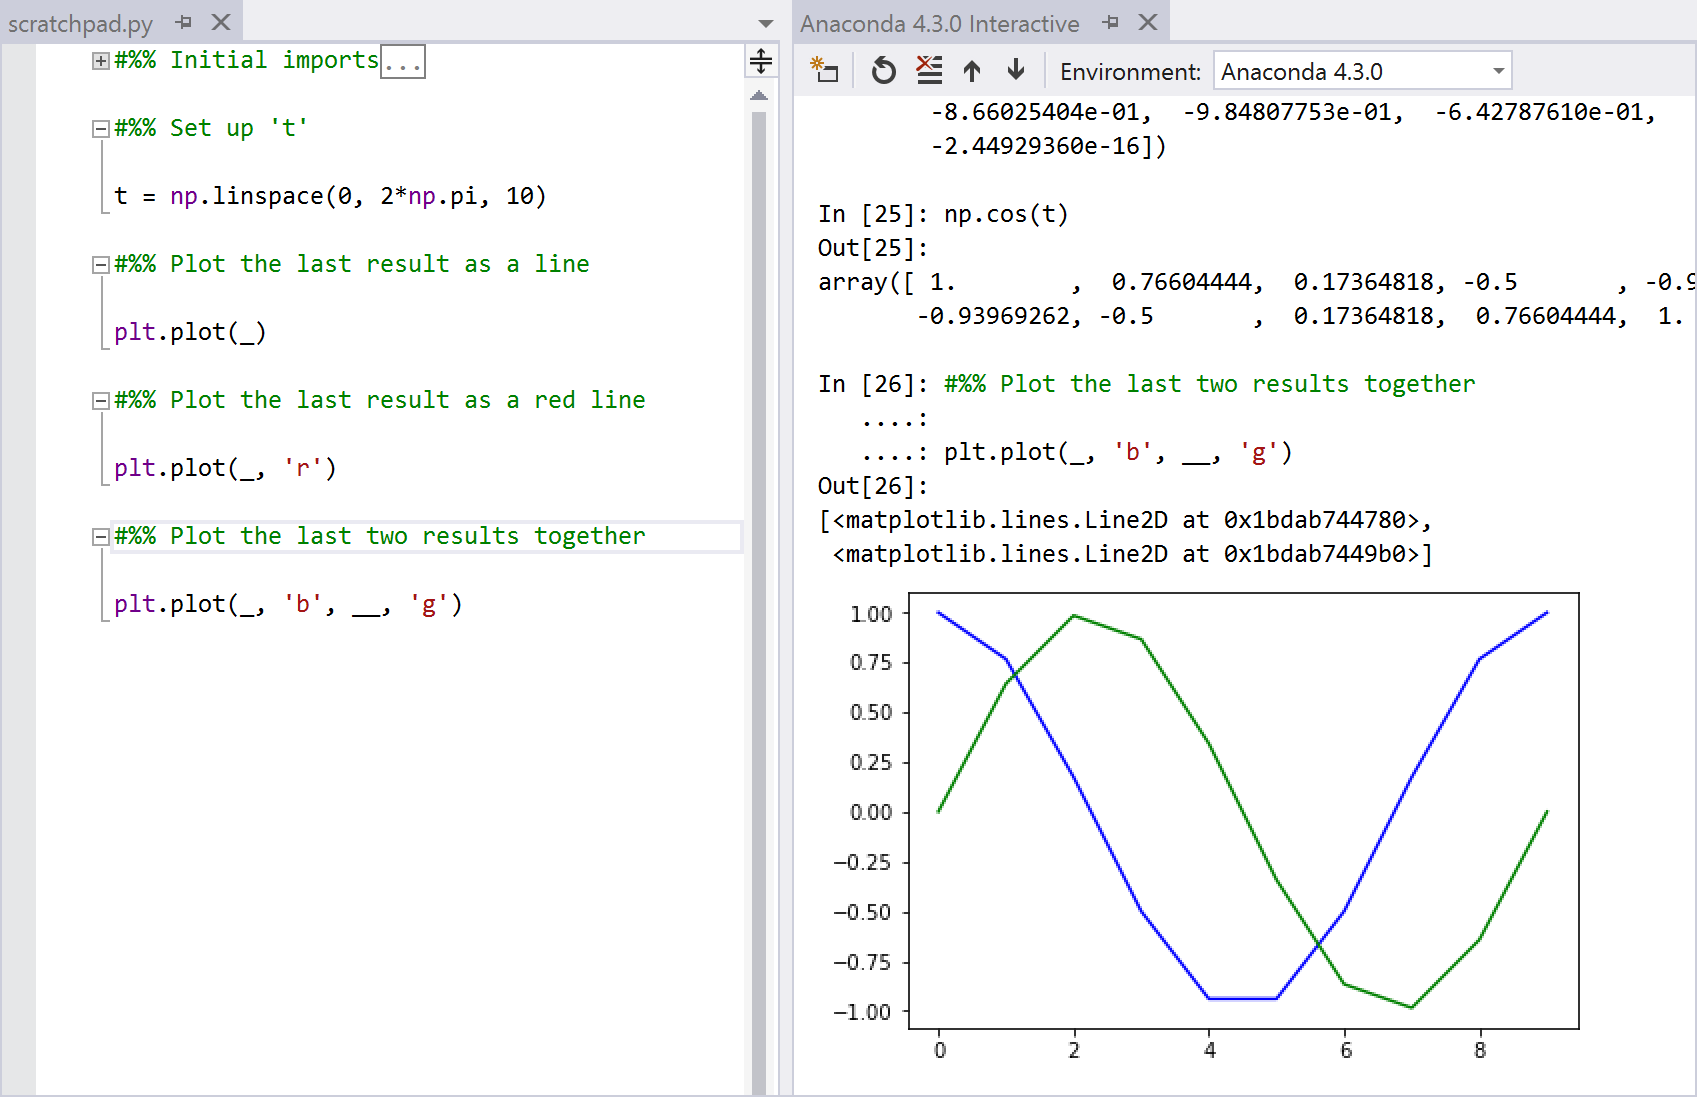
One workflow that we see people using very successfully is what we internally call the scratchpad. In this approach, you have a Python script that contains many little code snippets that you can copy-paste from the editor into an interactive window. Typically you don’t run the script in its entirety, as the code snippets may be completely unrelated. For example, you might have a “scratchpad.py” file with a range of your favorite matplotlib or Bokeh plot commands.
Previously, we provided a command to send selected text to an interactive window (press Ctrl+E twice) to easily copy code from an editor window. This command still exists, but has been enhanced in Visual Studio 2017 in the following ways.
We’ve added Ctrl+Enter as a new keyboard shortcut for this command, which will help more people use muscle memory that they may have developed in other tools. So if you are comfortable with pressing Ctrl+E twice, you can keep doing that, or you can switch to the more convenient Ctrl+Enter shortcut.
We have also made the shortcut work when you don’t have any code selected. (This is the complicated bit, but we’ve found that it makes the most sense when you start using it.) In the normal case, pressing Ctrl+Enter without a selection will send the current line of text and move the caret to the following line. We do not try and figure out whether it is a complete statement or not, so you might send an invalid statement, though in this case we won’t try and execute it straight away. As you send more lines of code (by pressing Ctrl+Enter repeatedly), we will build up a complete statement and then execute it.
For the scratchpad workflow though, you’ll typically have a small block of code you want to send all at once. To simplify this, we’ve added support for code cells. Adding a comment starting with #%% to your code will begin a code cell, and end the previous one. Code cells can be collapsed, and using Ctrl+Enter (or Ctrl+E twice) inside a code cell will send the entire cell to the interactive and move to the next one. So when sending a block of code, you can simply click anywhere inside the cell and press Ctrl+Enter to run the whole block.
We also detect code cells starting with comments like # In[1]:, which is the format you get when exporting a Jupyter notebook as a Python file. So you can easily execute a notebook from Azure Notebooks by downloading as a Python file, opening in Visual Studio, and using Ctrl+Enter to run each cell.
Startup Scripts
As you start using interactive windows more in your everyday workflow, you will likely develop helper functions that you use regularly. While you could write these into a code cell and run them each time you restart, there is a better way.
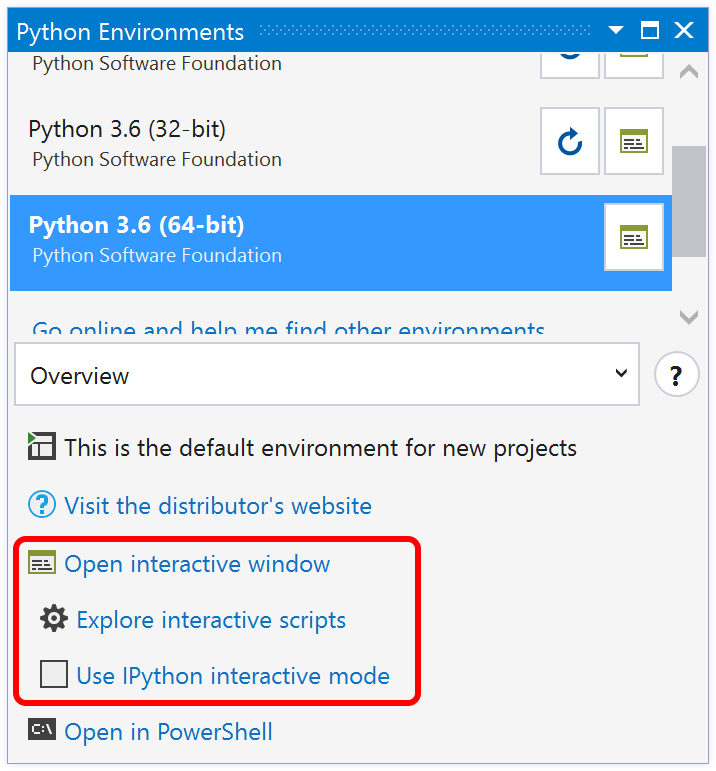
In the Python Environments window for each environment, there are buttons to open an interactive window, to explore interactive scripts, and to enable IPython interactive mode. There is a checkbox to enable IPython interactive mode, and when it is selected all interactive windows for that environment will start with IPython mode enabled. This will allow you to use inline plots, as well as the extended IPython syntax such as name? to view help and !command for shell commands. We recommend enabling IPython interactive mode when you have installed an Anaconda distribution, as it requires extra packages.
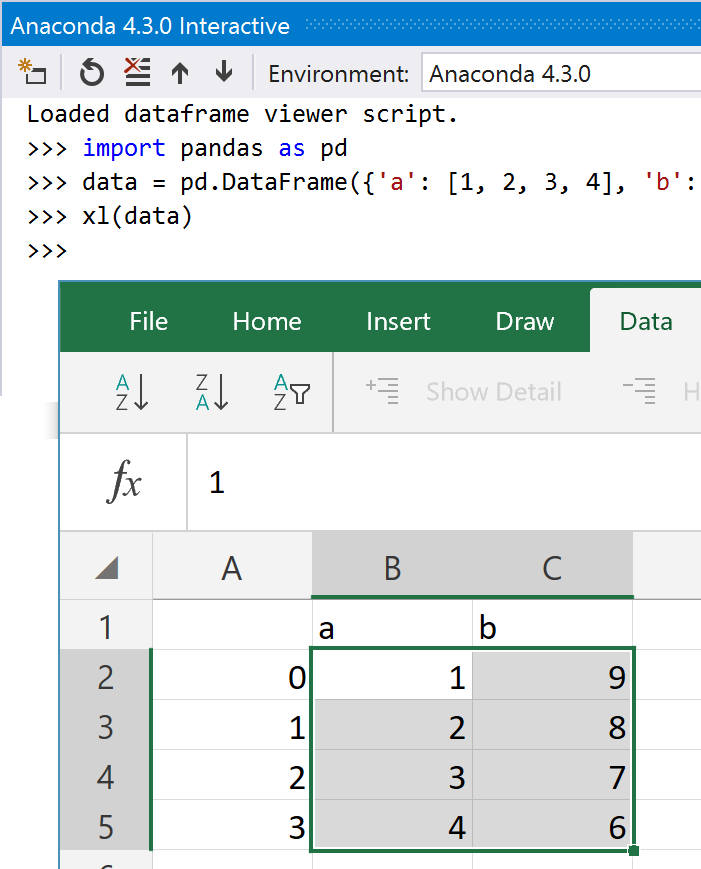
The “Explore interactive scripts” button will open a directory in File Explorer from your documents folder. You can put any Python scripts you like into this folder and they will be run every time you start an interactive window for that environment. For example, you may make a function that opens a DataFrame in Excel, and then save it to this folder so that you can use it in your interactive window.
Summary
Thanks for installing and using Python support in Visual Studio 2017. We hope that you’ll find these interactive window enhancements useful additions to your development workflow.
As usual, we are constantly looking to improve all of our features based on what our users need and value most. To report any issues or provide suggestions, feel free to post them at our GitHub site.
0 comments