
App Dev Manager Art Garcia spotlights the new schedules feature of Azure Lab Services.
Azure Lab services is a quick and easy way to manage environments for your team in the cloud. It is versatile enough to set up development environments, testing and even classroom lab environments. The service handles all the infrastructure, user management, and now scheduling when the lab is available. The ability to stop a lab VM has been around for some time, but the ability to schedule when a VM starts, how long it remains up and then when it is to shut down recently became available.
Azure Lab services is the new name for Azure Dev Test Labs and is being expanded with new types of labs. The new lab type is geared towards the classroom labs. It will allow the lab creator to manage and configure a classroom lab exactly as needed. You can pre-load everything you need for the class in a template then publish it to as many students as needed. This allows the instructor to focus on teaching the class and not on ensuring everyone has the correct tools installed. You can limit the number of hours the student is using the VM for the class work. You can now, as I will show shortly add a schedule of when the VM’s are running and when they will stop. With the scheduling feature you can have the lab mimic the actual class duration. Using Azure labs also frees up physical school computer resources and allows for quick and efficient scaling. You can even delete the labs with a single click. One feature still under development is the ability to use a custom image. Currently you can pick from the list of predefined images. Once you select one you can add to the image, but you cannot re-use the image on another class.
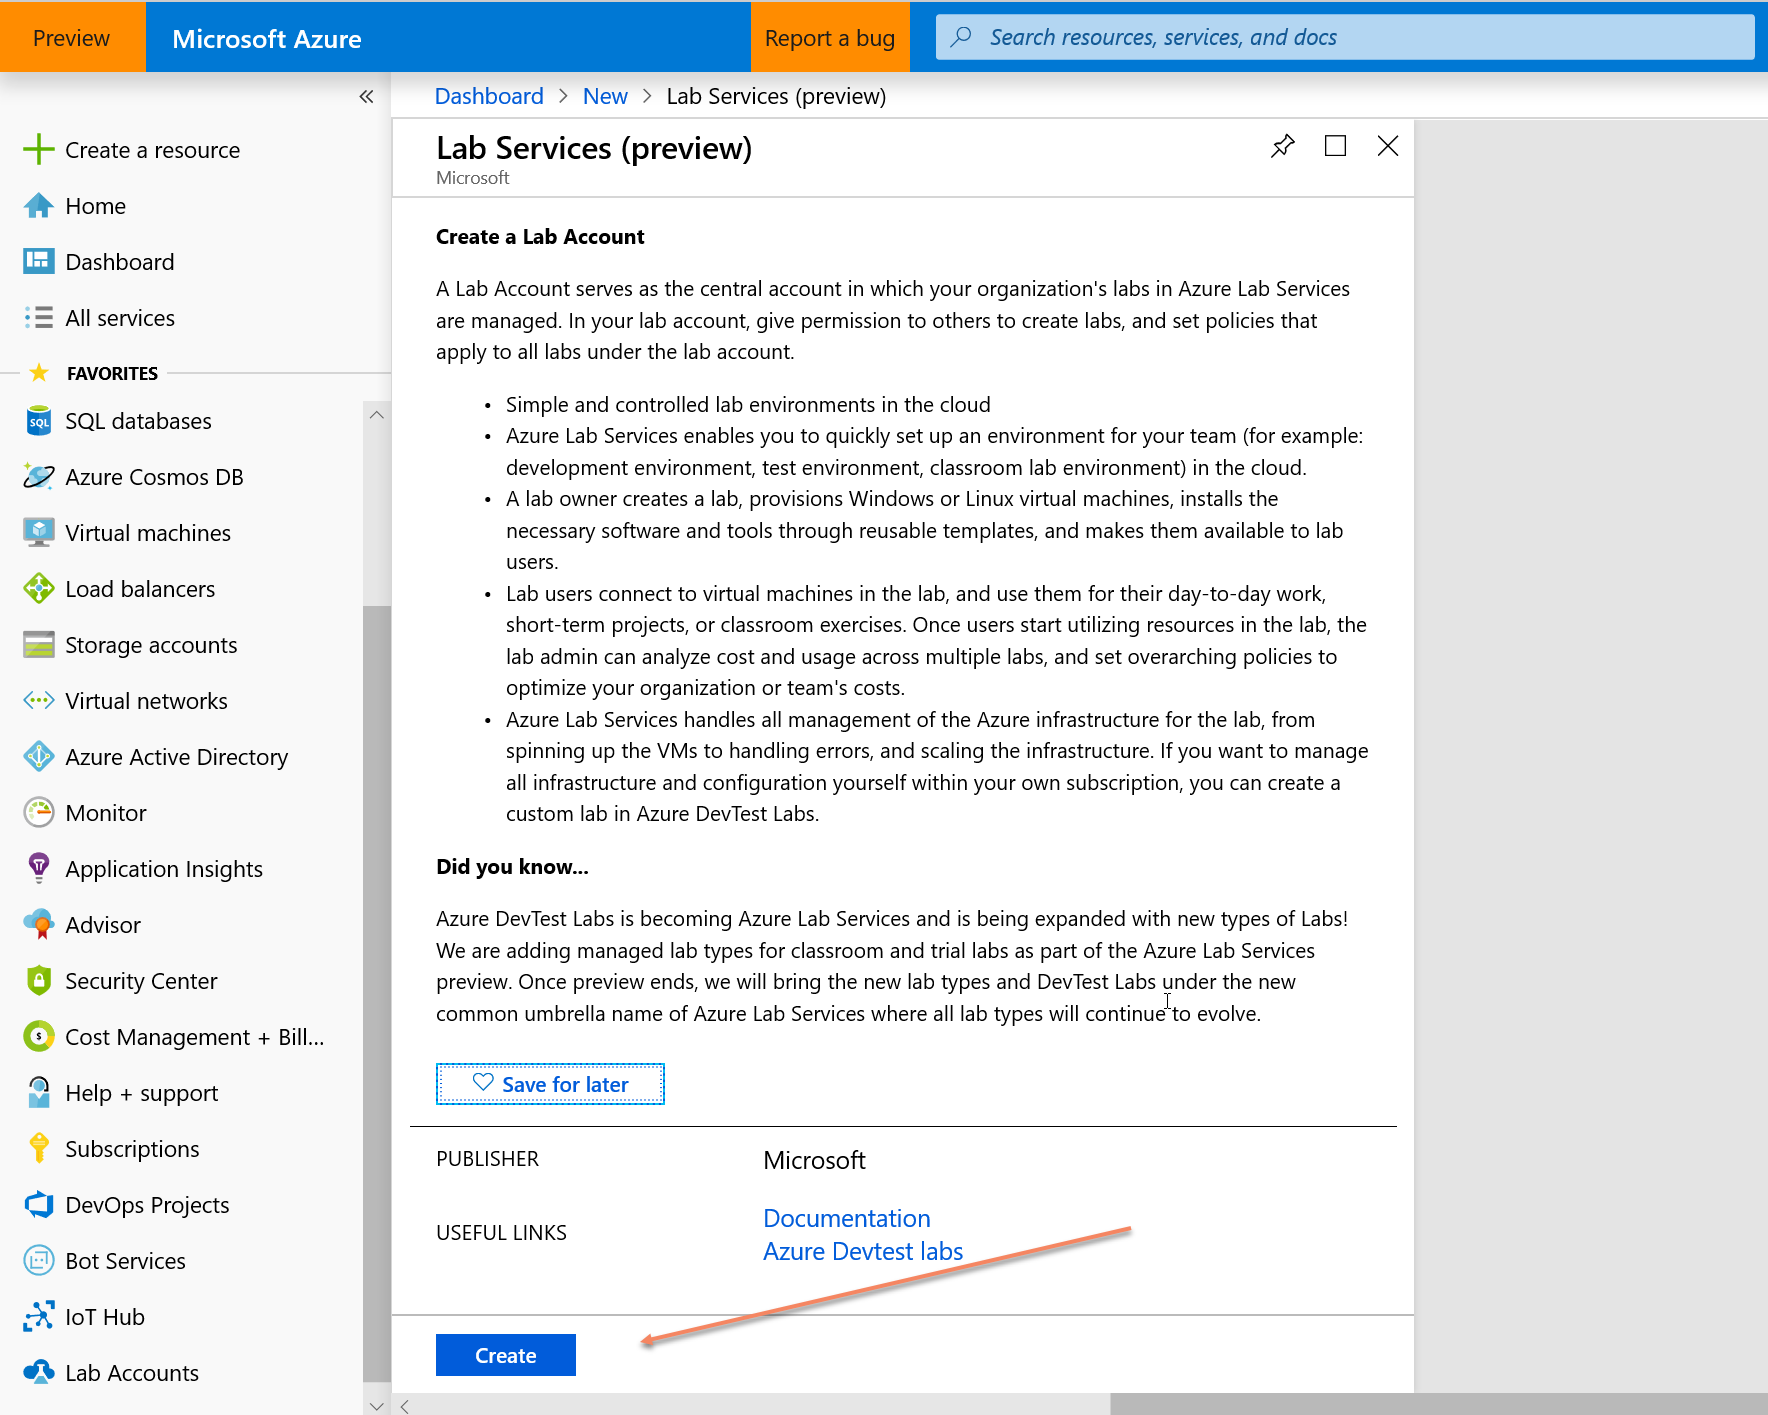
So, let’s look at how easy it is to create a lab account. In the portal select create resource and find Lab Services.
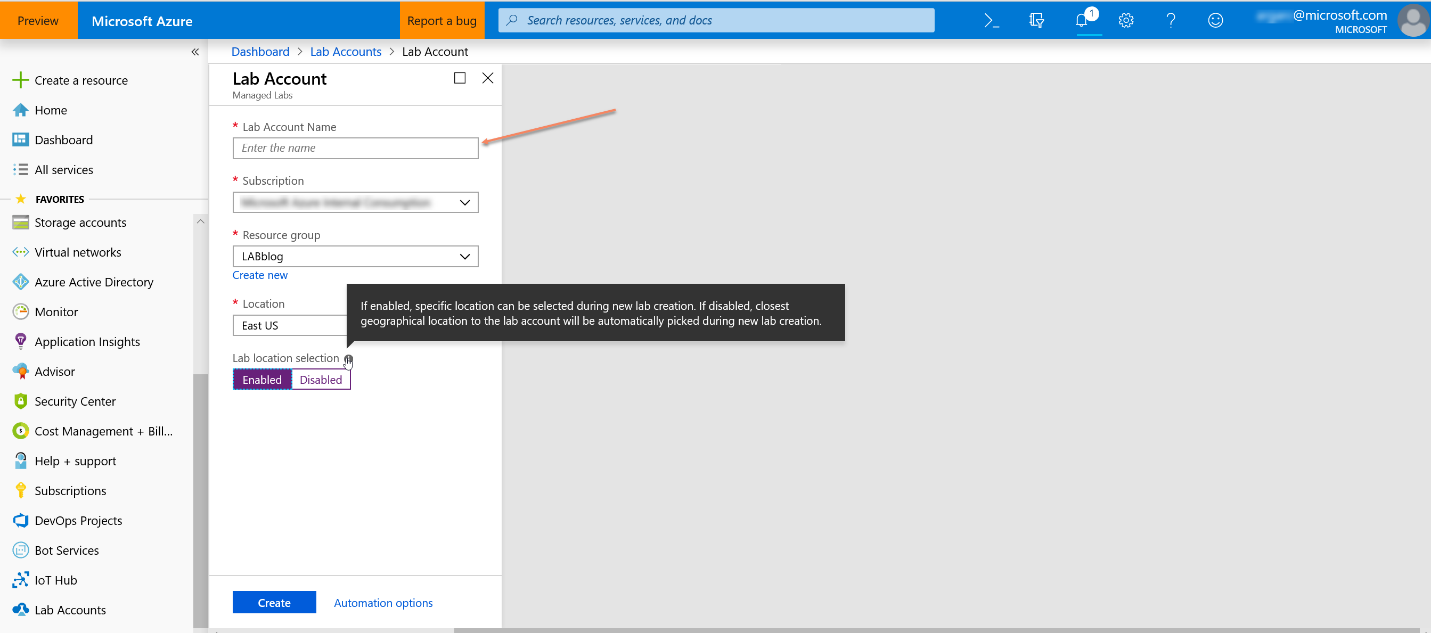
As you can see as of this writing it is still in public preview, but features are constantly being added as it approaches GA. Once you select Create on the previous screen you will get the Lab account screen below. This is a standard blade with one notable difference. The Enable lab location if selected a specific lab location can be selected during lab creation. If not the nearest geographical location to the lab account will be used to create labs.
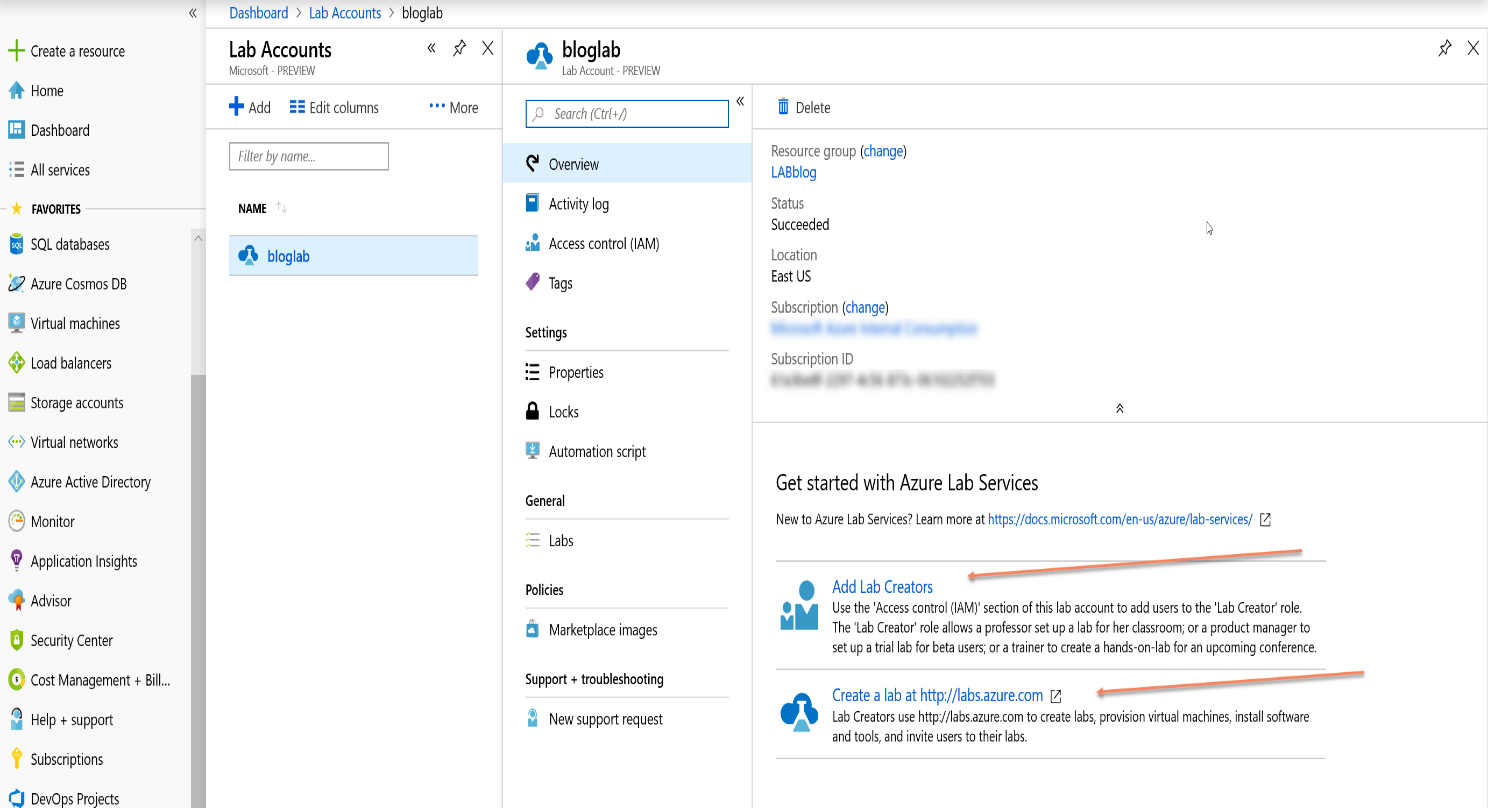
Once the account is created you can add lab creators and then create an actual lab. Lab creator is where you set access control to managing the lab.
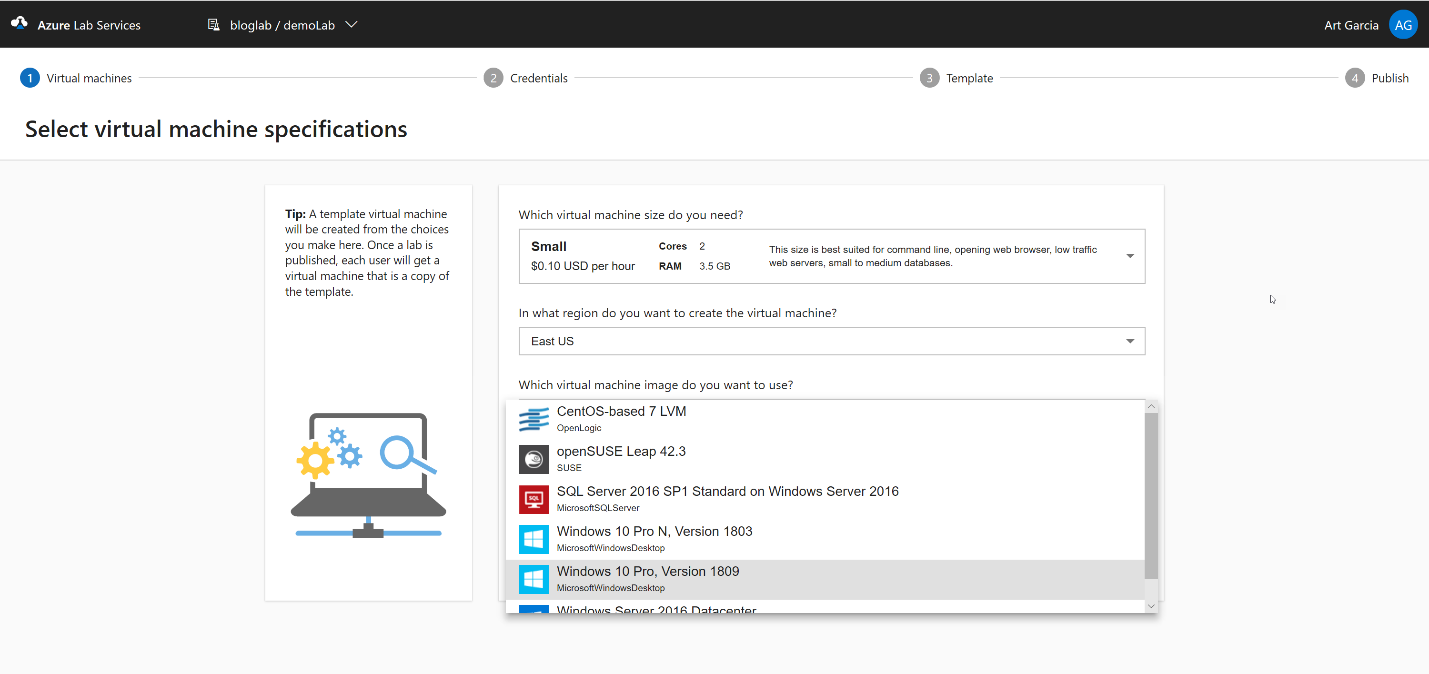
Although security is of utmost importance, I want to focus on the actual lab creation and specifically the scheduling feature. Once you have tackled security, you can go to lab creation. You navigate to https://labs.azure.com . Here you will add the name of the lab and the number of machines to initially add. You can increase or decrease this number later if needed.

After you set the name and number you set machine size, location and image. As noted earlier, you will soon be able to use your own images here. The current machine sizes I believe will be expanded in the future as well.
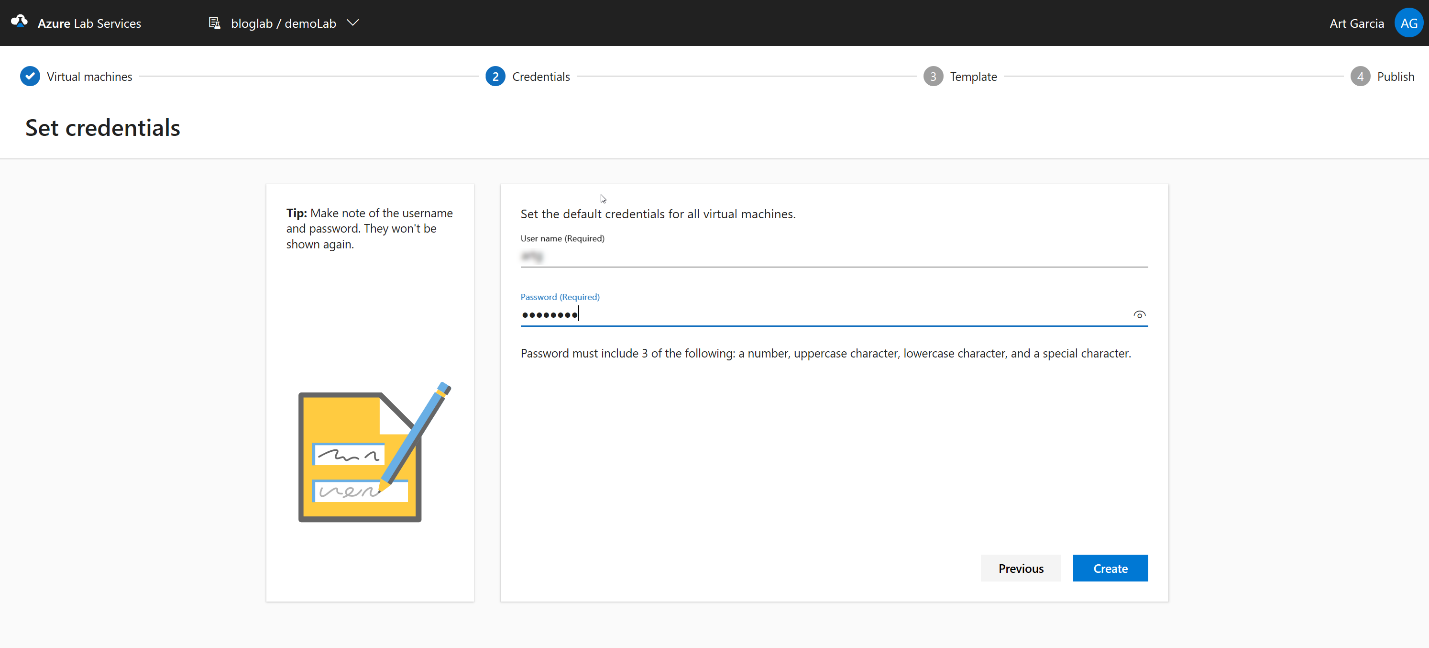
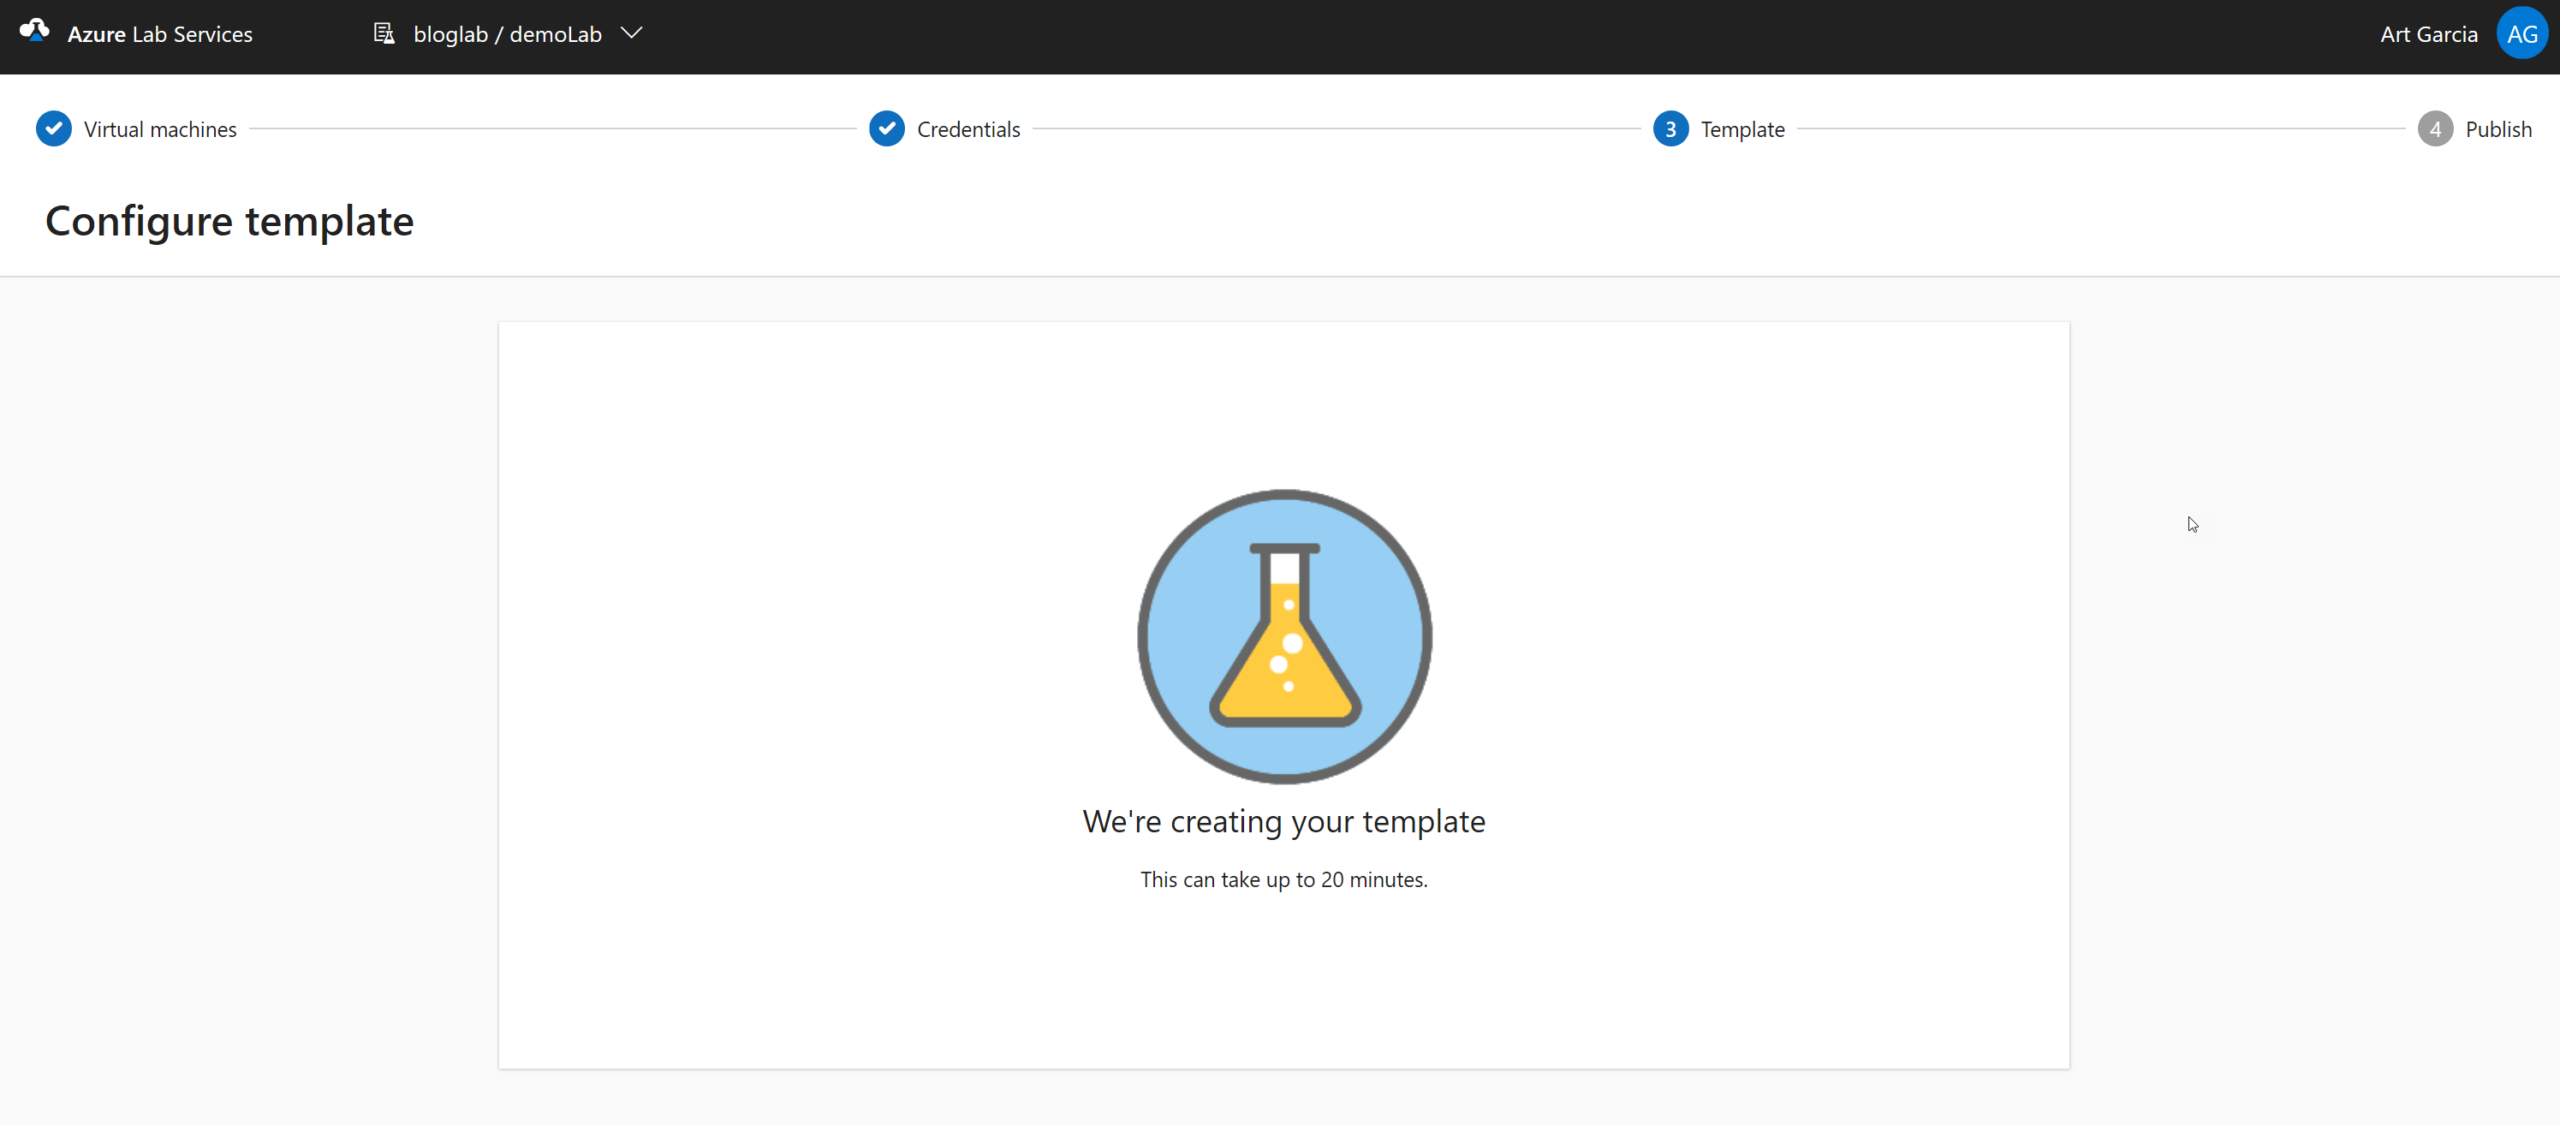
Once completed, the next step is the credentials for the template. Then the system will begin to generate the template. The next step says it can take up to 20 minutes to create the template, but I have seen slightly longer times. Still not unreasonable and I know they are constantly working to improve these times.
Once the template is created you will be able to start and connect to the template as seen below.

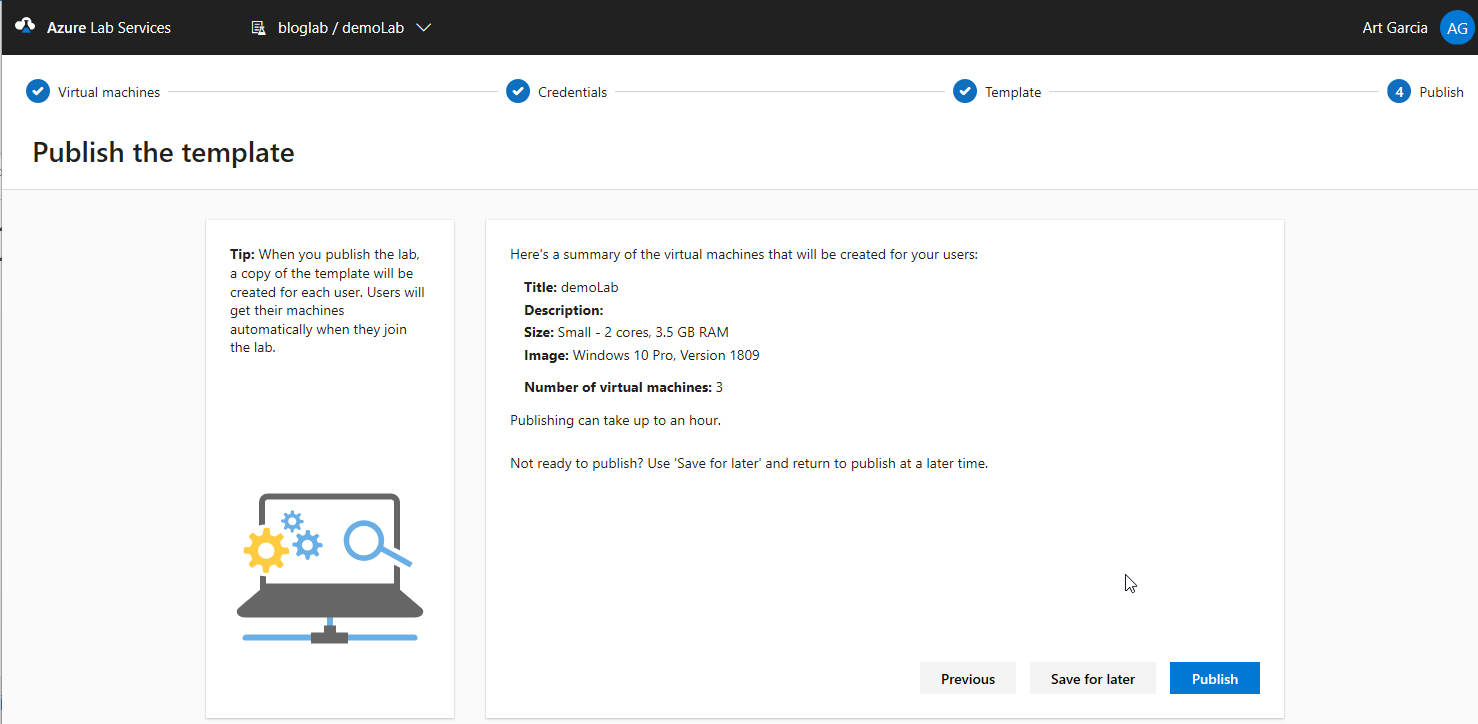
Here you can add whatever class materials and tools you require for your classroom lab. When you are satisfied it is complete, you can publish the templates as shown below. The message says it will take about an hour to publish the templates. My experience has been the time is pretty accurate. My last deployment took about 45 minutes.
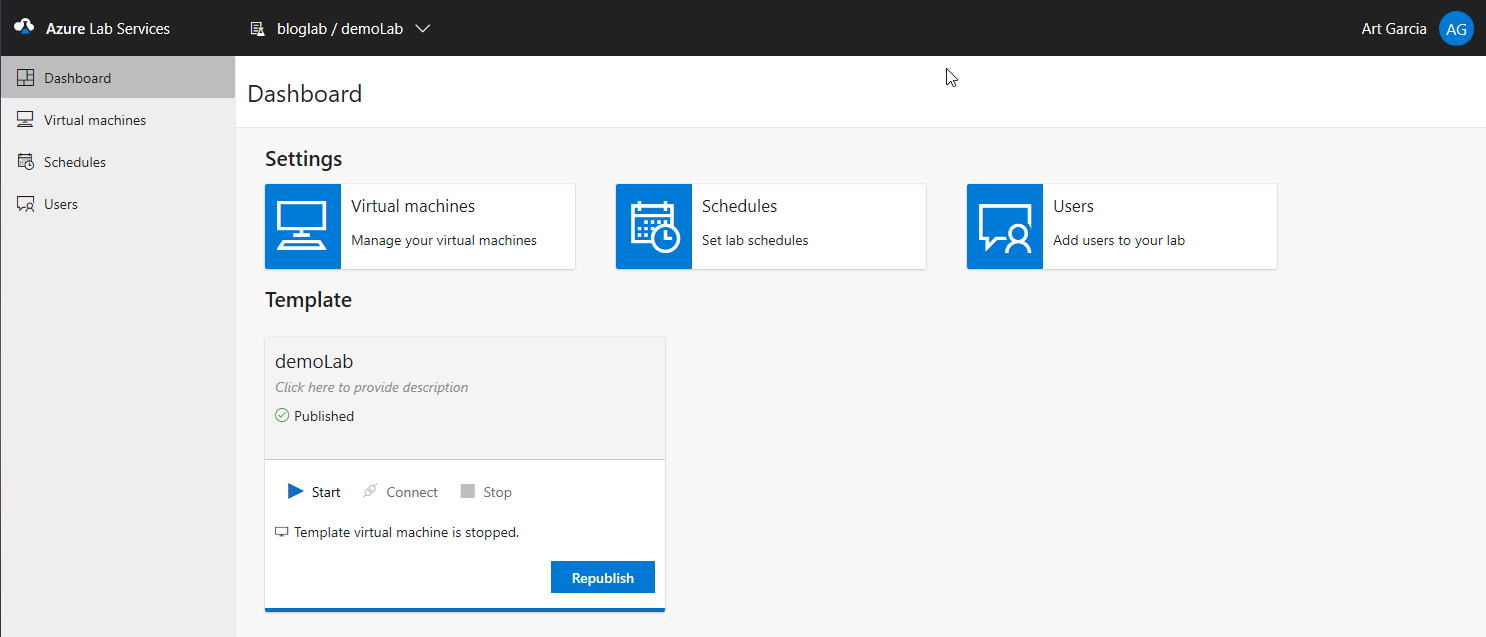
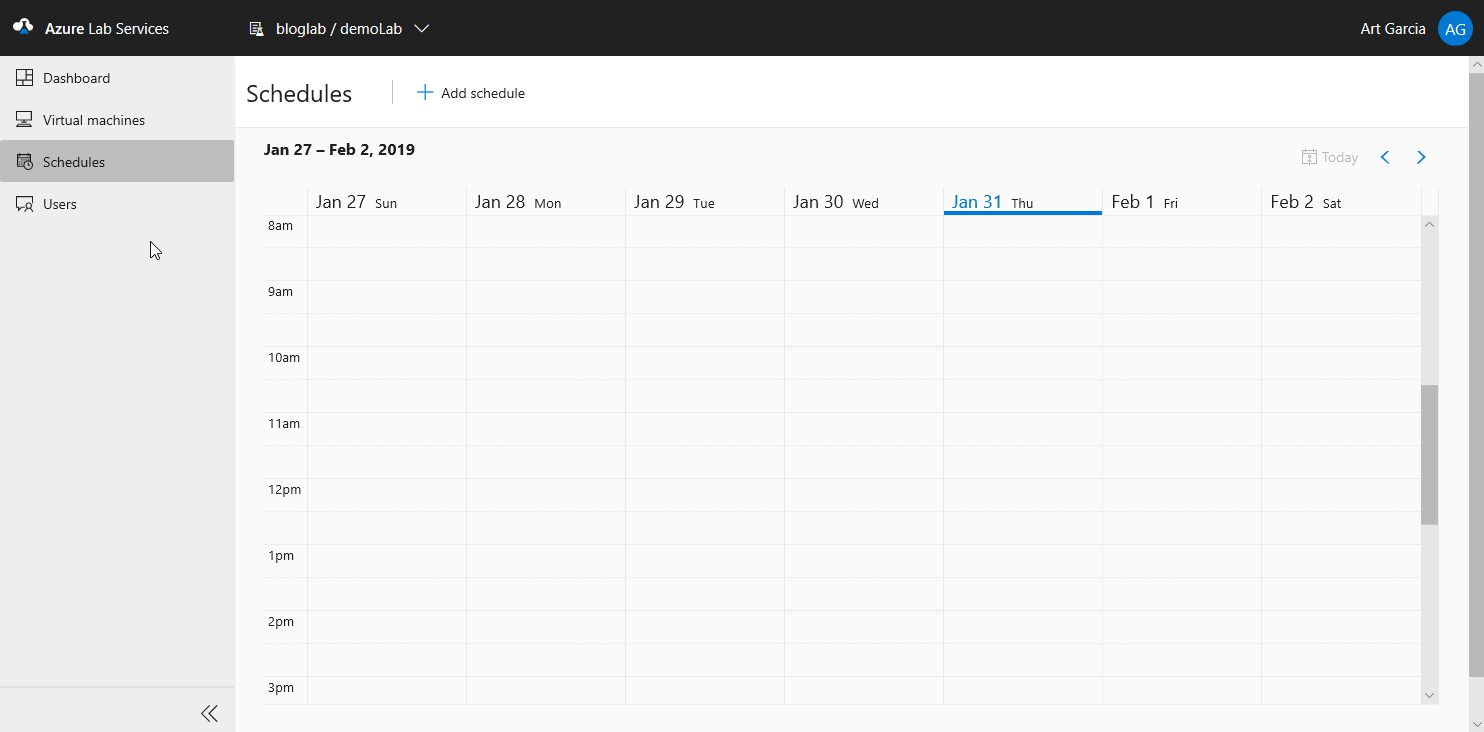
The dashboard is where we will manage the class going forward. Here you can view the usage of each lab VM, add users to the lab and now even schedule the labs.
The schedule page will show a week at a time and allow you to manage the access of the labs.
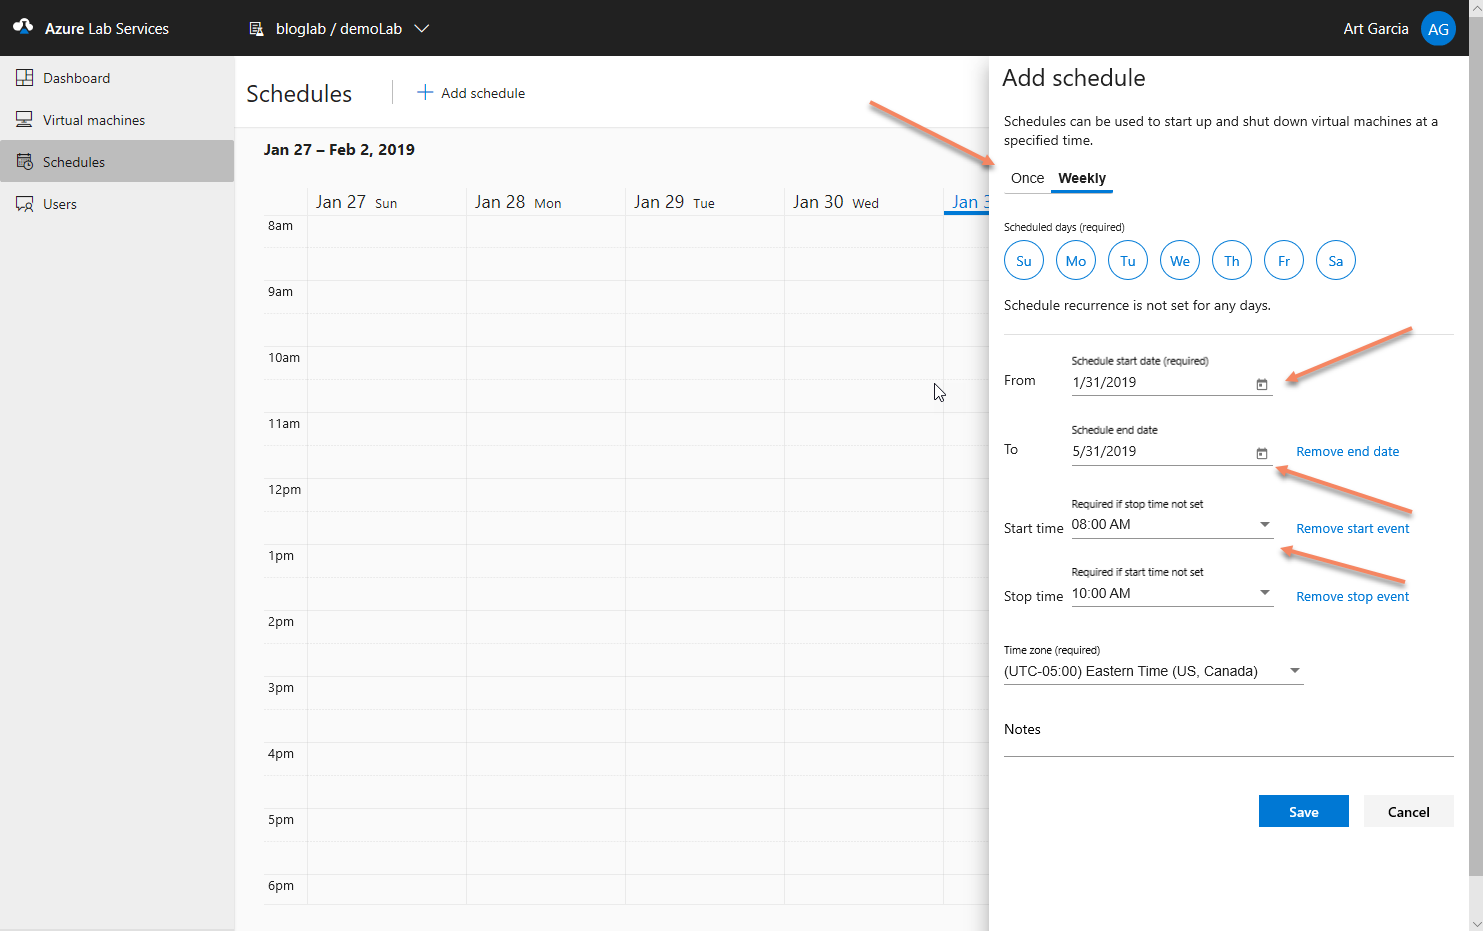
To create a schedule, you merely click the add schedule ![]() icon at the top of the page. This will bring up the Add schedule blade as shown below. Here you can create a one-time schedule or a weekly schedule to mimic the supporting class schedule.
icon at the top of the page. This will bring up the Add schedule blade as shown below. Here you can create a one-time schedule or a weekly schedule to mimic the supporting class schedule.
So, let’s say you have a one-day seminar and need a VM for the users to work. You can do that by setting this up as a Once occurrence in the schedule. You select Once, add the start and stop times and press save. It creates a schedule on the calendar that you can modify or remove.

To select a weekly schedule, you first select Weekly from the top list of Once or Weekly. You then select the days of the week you want the VM to run. Note here you can even select the VM’s to run on the weekend if needed. Next select the start and stop dates of the class and then most importantly the start and stop times of the VM.
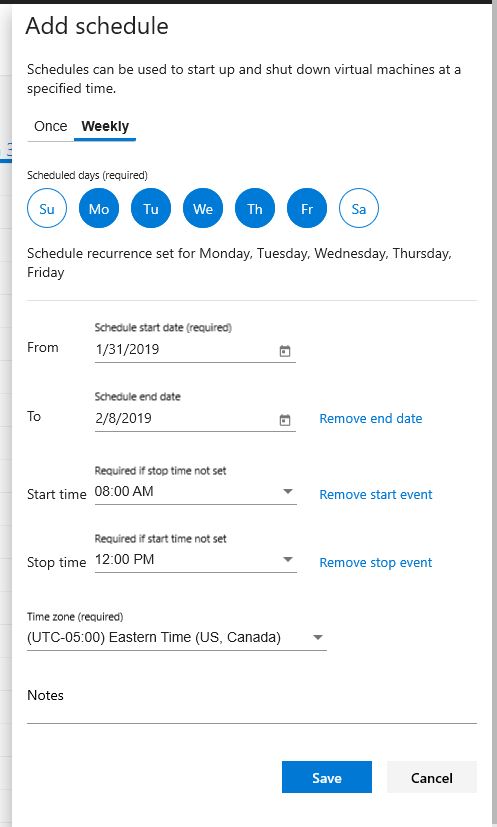
You also can set the time zone and add any notes as needed. As you can see below, I picked Monday thru Friday from 8:00am till 10:00 am from now until 2/8/2019.
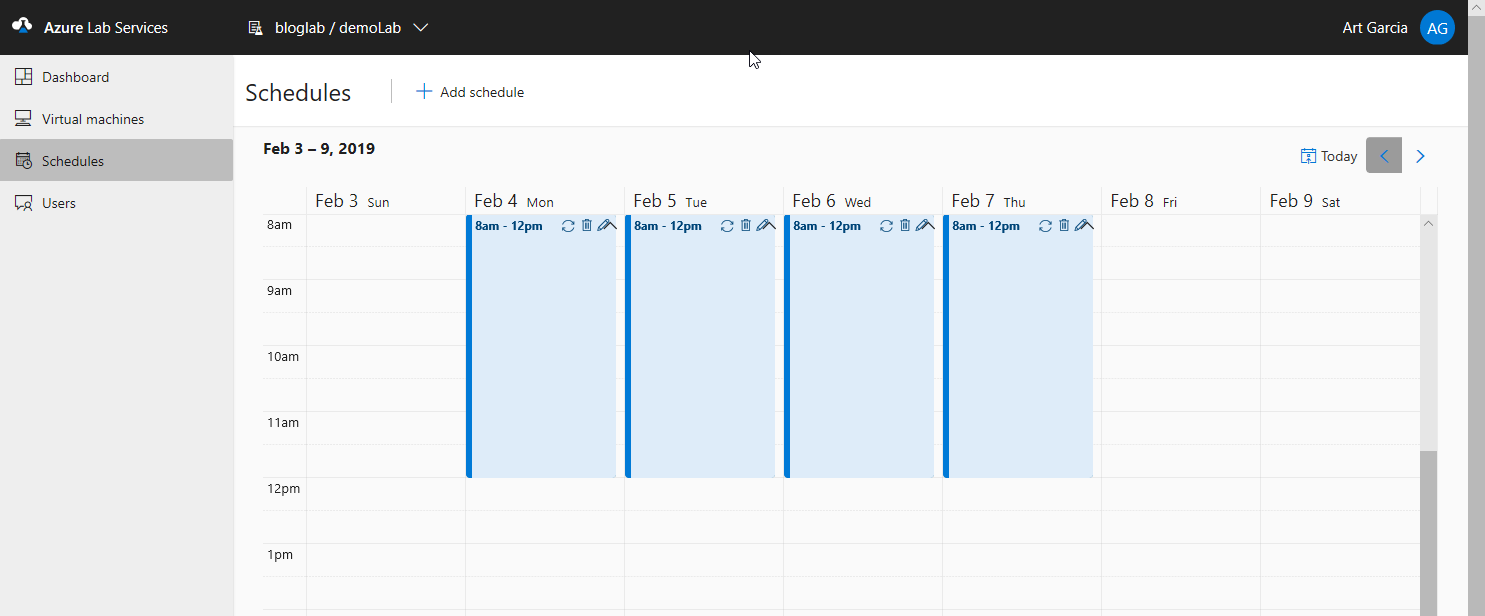
Once you press save, you will see the schedule below. Notice you have an edit pencil icon and a delete icon. The edit icon will allow you to edit the entire schedule and the delete will allow you to delete the entire schedule. A nice option to have would be to allow the user to edit or remove particular days. I will bring that up and see what the Product Group has to say.
This is the newest feature of the Azure Lab services and one that I think is a great step towards making this a useful, viable product for many users. As you use the product, I believe you will find this feature invaluable.
0 comments