
In the earlier posts, I introduced Teams Toolkit v2 Developer Preview extension for Visual Studio Code that generates scaffolding to help you get started with Microsoft Teams apps. I also introduced TeamsFx, the core library that lets you handle things like authorization and making Microsoft Graph API calls.
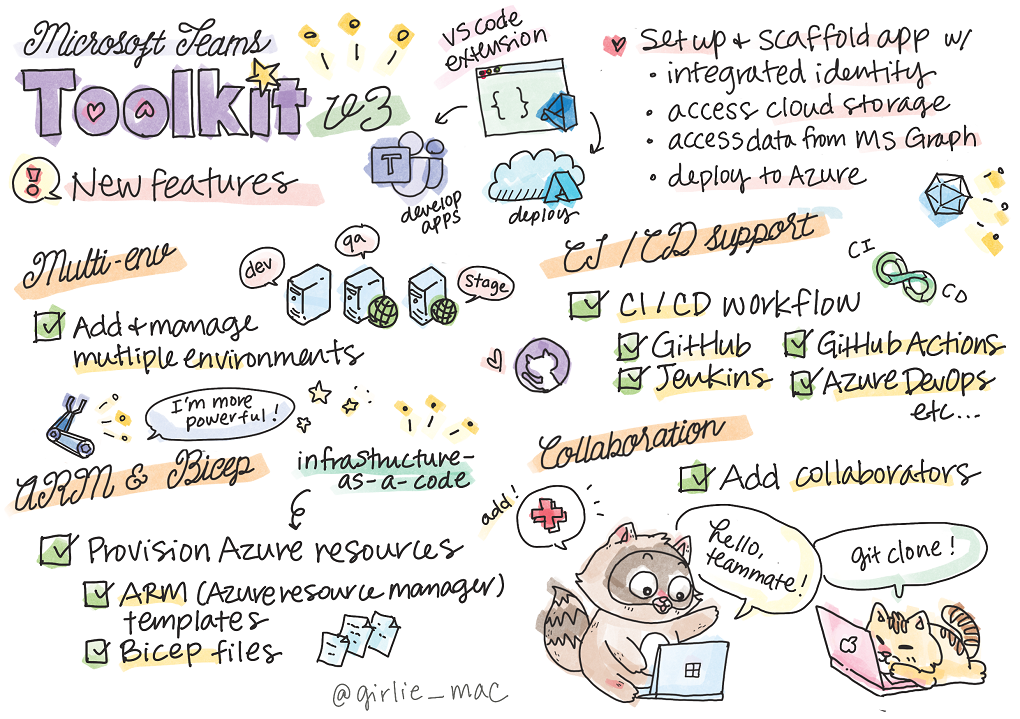
Since then, the tool has evolved with more powerful features and a better user-experience. In this article, I am introducing the new features in the Toolkit v3.0 for developers, especially to empower Teams enterprise developers. 🚀
Quick intro—What are Teams Toolkit & TeamsFx CLI?
Teams Toolkit is a collection of development tools that helps you to create and deploy Microsoft Teams apps with integrated identity, access to cloud storage, data from Microsoft Graph, and other services in Azure and Microsoft 365.
There are a visual interface tool and a command line interface—With Teams Toolkit extension for Visual Studio, you can take advantage of the familiar VS Code visual interface for Teams app development. Teams Toolkit comes with a Command-line tool, called TeamsFx CLI, which lets you run tasks with keyboard-centric experience, as well as enabling CI/CD scenarios.
Now, let’s take a look at what the new features these tools offer! And if you are looking to learn how to get started with Teams Toolkit and the requirement to start developing Teams apps in general, I’d recommend reading Get started documentation on Microsoft Teams developer platform docs first.
☁️ Multi-environment management
You typically start developing in your local environment, but sooner or later, you will need to manage multiple environments as you go. Besides your local env, you probably end up having multiple environments, such as, “dev”, “qa”, “stage”, and the production environment to deploy.
Teams Toolkit provides a simple way for you to create and manage multiple environments. When you created a new project with Teams Toolkit, it generates `local` for your local machine configurations, and `dev`, to represent a remote environment configuration by default.
Now, with this new Toolkit, you can enable a more remote environment. 🎉
To add an extra environment:
- Open a project in Teams Toolkit, and find Environment on the left pane
- Click the Create new environment button (a little “plus sign” button)

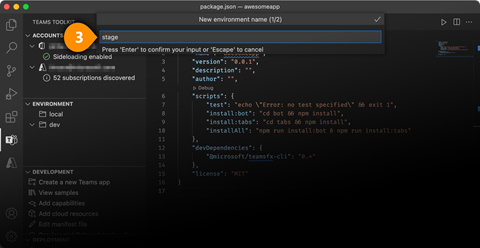
3. Give a name to the new environment and press Enter key
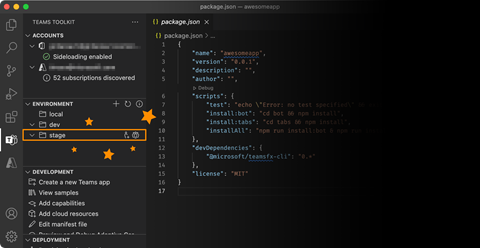
To add more environments, select an existing environment to add a new one. Every time you create an extra environment, the configuration file (`config.<your_new_env>.json` and `azure.parametersm<your_new_env>.json`) will be copied from an existing one.
For more info, please read Manage multiple environments in Teams Toolkit.
🤝 Collaboration among multiple developers
Have you wished it was easier to collaborate on a Teams app project with your coworkers? Well, I have good news! This much-anticipated feature to manage multiple environments was introduced in the latest version of Teams Toolkit, and it supports project collaborations among multiple developers.
Previously, you needed to manually handle the permissions for Teams and Azure AD. But from now on, the Toolkit handles this for you.
To add a collaborator:
- First, make sure you have logged in to both M365 and Azure accounts from the menu under Account in Teams Toolkit
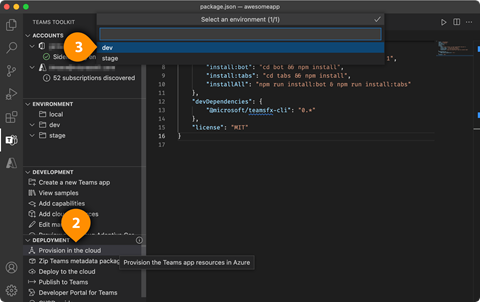
- Under Development, click Provision in the cloud

3. Then choose an environment (if you have multiple working environments).
You may see some popup notifications. Follow the instructions. This will create necessary cloud resources.
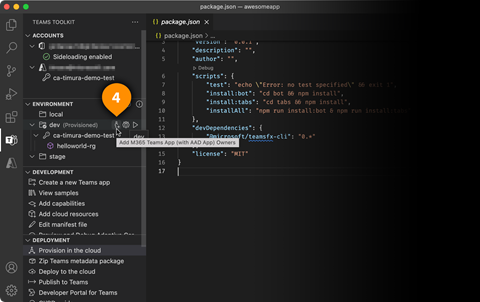
- Once the provision process is completed, now you see the Collaborators list is available under Environment. Click the little Add M365 Teams App (with AAD App) Owners icon
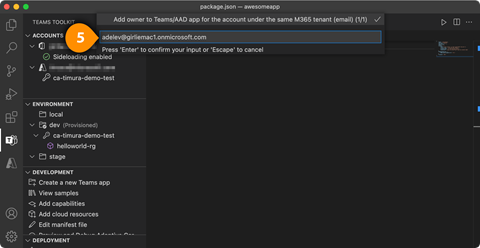
- Then enter an email address of the person who you want to invite
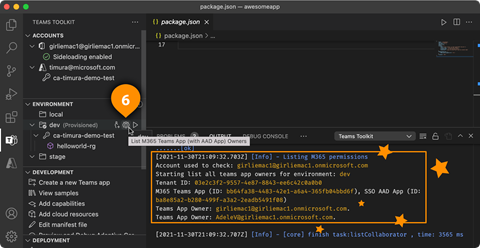
6. To view collaborators in the environment, select List M365 Teams App (with AAD App) Owners button, then collaborators will be listed in the output channel.
Once the collaborator joins, they can develop, provision and deploy the project. You can push the project to GitHub, so that your collaborators can clone the repository and work on the project remotely by signing in on their own M365 and Azure account credentials!
💪 Provision Azure resources using ARM and Bicep
One of the last major upgrades of Teams Toolkit (v2) was the features that let you provision Azure resources using infrastructure-as-a-code approach and deploy your apps to Azure.
Now with this new Teams Toolkit v3, you can declaratively provision to author ARM (Azure Resource Manager) template, which is a set of Bicep files that defines the infrastructure and configuration for your project.
Bicep is a domain-specific language (DSL) that uses declarative syntax to deploy Azure resources. The advantage of using Bicep instead of JSON is that Bicep is verbose and uses simpler syntax to develop your ARM templates.
To provision with ARM, you can customize Azure resources by changing these two sets of files:
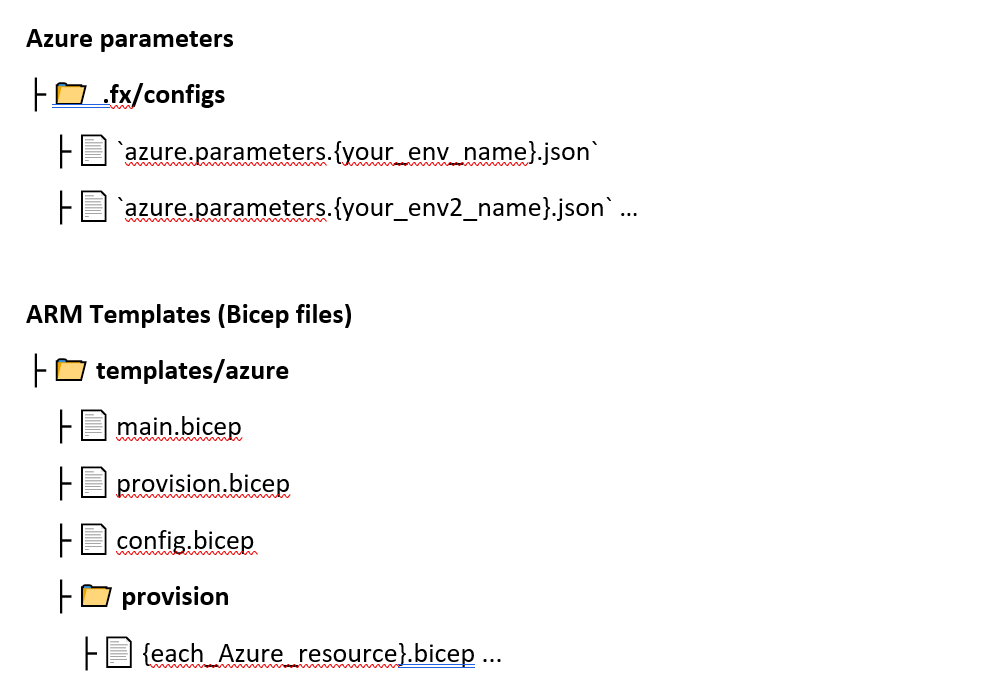
There are predefined parameters and templates. To learn what exactly you can customize and how, please read Customize resource provision section in the documentation.
🥽 CI/ CD support
In your real-life development process, your team is highly likely to rely on a CI/CD platform to automate your builds, testing, and deployment.
Now with Toolkit v3, you can enable CI/CD workflows to automate Teams app development process for multiple environments scenario.
The Toolkit bundles with TeamsFx CLI that comes with various useful commands for your Teams app development, including the integration for the automated CI/CD workflows.
> To enable CI/CD workflow in multiple environment, make sure you have TeamsFx CLI version 0.8.0 or above as its dev dependency in the root package.json!
We prepared sample configuration files, including GitHub, Jenkins, Azure DevOps, and other platforms by scripts (Grab templates of your choice!), as well as GitHub Actions template, which I will show you how—
Setting up GitHub Actions
For example, if you would like to set up CI/CD flow with GitHub Actions with TeamsFx from the web interface:
- On your project repo on GitHub.com, click Actions tab
- Click “set up a workflow yourself”
- Copy the sample file for Continuous Integrations (CI)
- Paste it in the editor
- Customize the workflow to fit your scenarios
- Click Start commit button to commit the file
- Repeat the process with the sample file for Continuous Deployment (CD)
- Fill out your M365 and Azure credentials in the CD config file, under the `env` section
- Commit the file
These files are now stored under .github/workflows.
If you run into a problem with your M365 account permission, please disable the multi-factor authentication from Microsoft 365 admin center. You should be able to change the setting at Users > Active users > Multi-factor authentication.
Also, for Azure account, the account’s security defaults should be turned off at Azure Portal, at Azure Active Directory > Properties > Manage security defaults.
Setting up CI/CD Pipelines with something else
If you would like to set up your workflow with other platforms, such as Azure DevOps and Jenkins, please refer to the TeamsFx Readme.
—
I hope these new features give more confidence to your Teams app development workflow and we are looking forward to seeing your amazing apps on production! And please don’t hesitate to drop your comments and feedback here.
0 comments