
List of all posts in the #30DaysMSGraph series
-Today’s post written by Srinivas Varukala
In Day 9 we discussed how to register an Azure AD Application using V2 endpoint. Today we’ll look at registering an Azure AD Application using V1 endpoint that will be used to communicate with Microsoft Graph.
As mentioned in Day 8 and Day 9, the Azure AD V2 endpoint is the recommended authentication flow going forward. That said there are a limited number of cases where you may need to fall back to the V1 endpoint. You can read about such scenarios in the Limitations section on the “Comparing the Azure AD v2.0 endpoint with the v1.0 endpoint” article. For the purposes of today we will be going through registration of an Azure AD application using the existing Azure AD Portal app registration UI and the Azure AD V1 endpoint. See below diagram adapted from Day 8 current state roadmap with highlighted boxes on the components for today’s focus.

Registering an Azure AD V1 App using Azure AD App Registration
Open a browser and navigate to the Azure AD Portal. Login using a personal account (aka: Microsoft Account) or Work or School Account.
Click Azure Active Directory from the left-hand navigation menu.
Select App registrations from the current blade navigation pane.
Click + New application registration from the current blade content.

On the Register an application page, specify the following values:
- Name = msgraph-clientcred-app-v1 (or any name that works for you)
- Application type = Web app/API
- Sign-on URL = https://localhost:8081
Note: The sign-on URL will also be used as the reply url (or redirect url) value. This value can be changed later and does not need to point to a hosted URI.
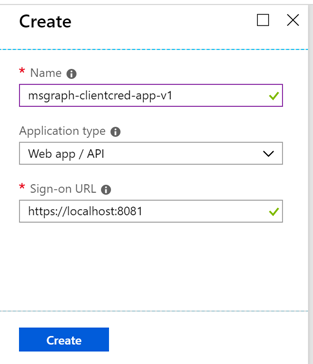
Click “Create” button to register the application. Azure portal will create the app and loads the application information page. On this page, copy the Application ID as you will need it later.

Click on Settings in the current blade navigation pane to open the settings pane.
Select Reply URLs. Add url https://app.getpostman.com/oauth2/callback as the second url and Save it. We will use this URL when calling Microsoft Graph using Postman on day 14.

Select Keys. In the pane that opens create a new Password providing details as follows:
- Description = “Secret1”
- Expires = 1 year
Soon after you hit Save the Value will show the auto-generated client secret. Make a copy of this value.
Important: This secret string is never shown again, so make sure you copy it now.

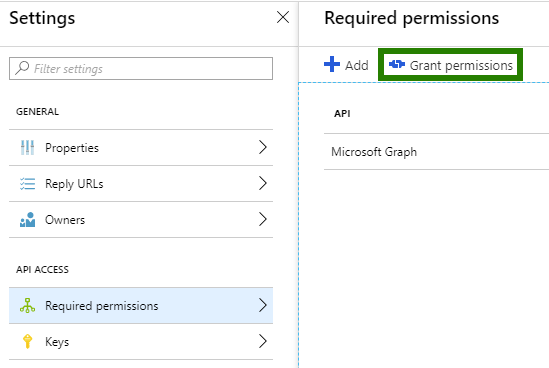
Select Required permissions. In the pane that opens click + Add. In the pane that opens, for Select an API option, select Microsoft Graph and click Select button.

For Select permissions option, select Read all users’ full profiles under the APPLICATION PERMISSIONS category.
Note: You will see that the Admin consent required column shows as Yes. This means the Azure AD Admin must grant the permissions before the application can be used to make Microsoft Graph queries. Please refer to Day 14 post for details on Admin consent.

Back on the Required permissions screen click Grant permissions, then click Yes.
That completes the creation of an Azure AD Application using V1 endpoint.
Try It Out
Navigate to the Azure AD Portal. Walk through these steps to create an app, assign it permissions, and grant admin consent.
- Create a new Azure AD application
- Assign the delegated permission for Read user mail
- Assign the delegated permission for Read user calendars
- Assign the application permission for Read directory data
Join us tomorrow to review Azure AD application permissions in Day 11.
0 comments