
WinML+.NET5
WinML is a high-performance, reliable API for deploying hardware-accelerated ML (Machine Learning) inferences on Windows devices. Since its introduction, many developers started using this technology to develop UWP applications that leverage artificial intelligence. Throughout this blog post, we’ll understand how you can leverage WinML on a simple .NET5 Console app.
.NET5 + WinRT
In my previous blog post, I briefly explained how C#/WinRT works, and how you can access WinRT APIs from a .NET5 app. If you need help understanding how C#/WinRT helps you, I suggest you read this blog post.
Show me the code!
Lets begin with a simple .NET5 console project:
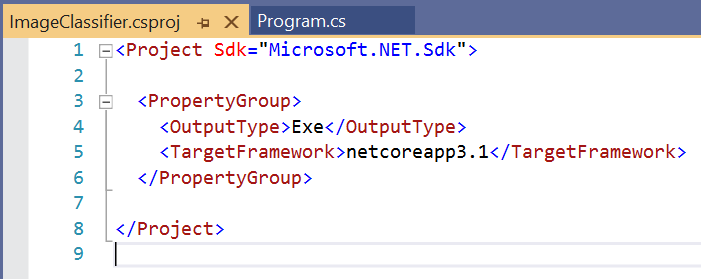
Give the project a name and a location. Since we’ll call WinRT APIs from this app, which are unique to Windows, lets make this app work only on Windows. This can be easily achieved by changing the target framework of our project. Double click on the project in Solution Explorer, and you should see the source of our csproj:
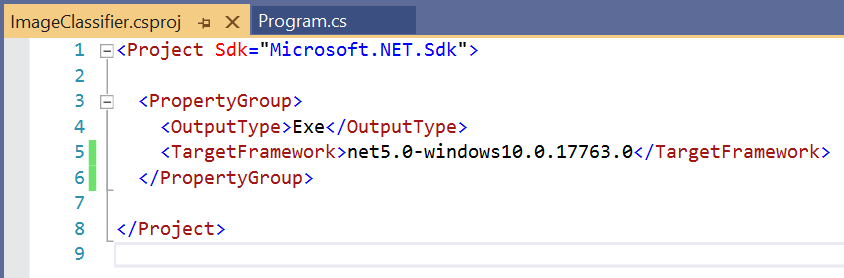
Depending on your Visual Studio version, the template of the project you just created might be using netcoreapp3.1, so lets update this to not only be Windows specific, but also lets make sure it is targeting .NET5. We also want this project to include the Windows SDK, which can now be achieved in a simpler way (compared to netcore3.1) by simply using the right target framework moniker (TFM). These are the supported TFMs:
- net5.0-windows10.0.17763.0 (Windows 10, version 1809)
- net5.0-windows10.0.18362.0 (Windows 10, version 1903)
- net5.0-windows10.0.19041.0 (Windows 10, version 2004)
This will enable your .NET5 app to call WinRT APIs from that specific Windows 10 SDK. Since WinML is already supported on older version of Windows, we don’t need to pick the latest version, so pick 1903 (18362):
Doing that will block our .NET5 app from running on Linux, or even Windows7, since we are specifically stating we support Windows 10 only.
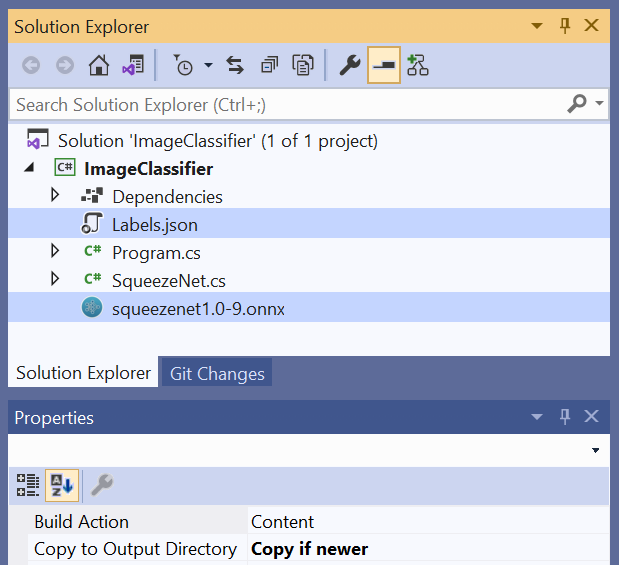
Now that we can call the WinML APIs, lets add an ONNX model to our project. For the sample we have here, lets use SqueezeNet, which is a deep neural network for computer vision. You can download the model here, and the labels here. Without the labels, there is no way to interpret the results, since the output of the model is just a bunch of numbers.
Lets add both files to our project and make sure to change their Build Action to Content, and set Copy to Output Directory to Copy if newer. This will ensure that we deploy the model and the labels side-by-side with our .exe, so we can load them during runtime.
Now we can write our code to use WinML and load this model, as well as the JSON file with the labels. Lets create a new file called SqueezeNet.cs:
using System;
using System.Threading.Tasks;
using Windows.AI.MachineLearning;

namespace ImageClassifier
{
    public sealed class SqueezeNetInput
    {
        public ImageFeatureValue data_0; // shape(1,3,224,224)
    }

    public sealed class SqueezeNetOutput
    {
        public TensorFloat softmaxout_1; // shape(1,1000,1,1)
    }

    public sealed class SqueezeNetModel
    {
        private LearningModel model;
        private LearningModelSession session;
        private LearningModelBinding binding;

        public static SqueezeNetModel CreateFromFilePath(string filePath)
        {
            var learningModel = new SqueezeNetModel
            {
                model = LearningModel.LoadFromFilePath(filePath)
            };
            learningModel.session = new LearningModelSession(learningModel.model);
            learningModel.binding = new LearningModelBinding(learningModel.session);
            return learningModel;
        }

        public async Task<SqueezeNetOutput> EvaluateAsync(SqueezeNetInput input)
        {
            binding.Bind("data_0", input.data_0);
            var result = await session.EvaluateAsync(binding, "0");
            var output = new SqueezeNetOutput
            {
                softmaxout_1 = result.Outputs["softmaxout_1"] as TensorFloat
            };
            return output;
        }
    }
}
This code defines 3 classes: One for the model’s input, one for the model’s output, and one to load and store our model using the WinML APIs. This last class also have a handy async method to evaluate an input and return its output, named EvaluateAsync.
See how we are simply using the Windows.AI.MachineLearning namespace? That is provided by the specific TFM that we are using. It is also noteworthy that data_0 and softmaxout_1 are not random strings. They are specifically what the existing ONNX model is expecting. You can use the Visual Studio Extension mlgen or any ONNX model viewer (like Netron) to see these values when you are binding the inputs and outputs of your models.
MLGen automatically creates a .cs file for each .ONNX file you add to any UWP project, but that capability is not yet enabled for .NET5 projects. The WinML team is looking at improving this experience with .NET5 projects, but since this tool is installed in your Visual Studio’s Extensions folder, you can already manually call it and add the generated C# file to your project. The path to it should be similar to C:\Program Files (x86)\Microsoft Visual Studio\2019\Enterprise\Common7\IDE\Extensions\hiofzu03.xur\mlgen.exe, and you can change Enterprise to your Visual Studio Edition. Calling it with no parameters will give you the common usage:
usage: mlgen.exe -i <INPUT-FILE> -l <LANGUAGE> -n <NAMESPACE> -p <PREFIX> [-o OUTPUT-FILE]
<INPUT-FILE> : onnx model file
<LANGUAGE> : cppwinrt or cppcx or cs
<NAMESPACE> : code namespace
<PREFIX> : generated class prefix
<OUTPUT-FILE>: generated code output file. If not specified
the code will be written to std output.
I used mlgen.exe as a starting point to get our SqueezeNetModel class, and tweaked it a little bit to be better aligned with a string for loading the model’s file. I’ve also changed the data_0 data type from TensorFloat to ImageFeatureValue, which makes it easier for us to use the image we will load.
Now that this code is ready, we can load our model in our Main method:
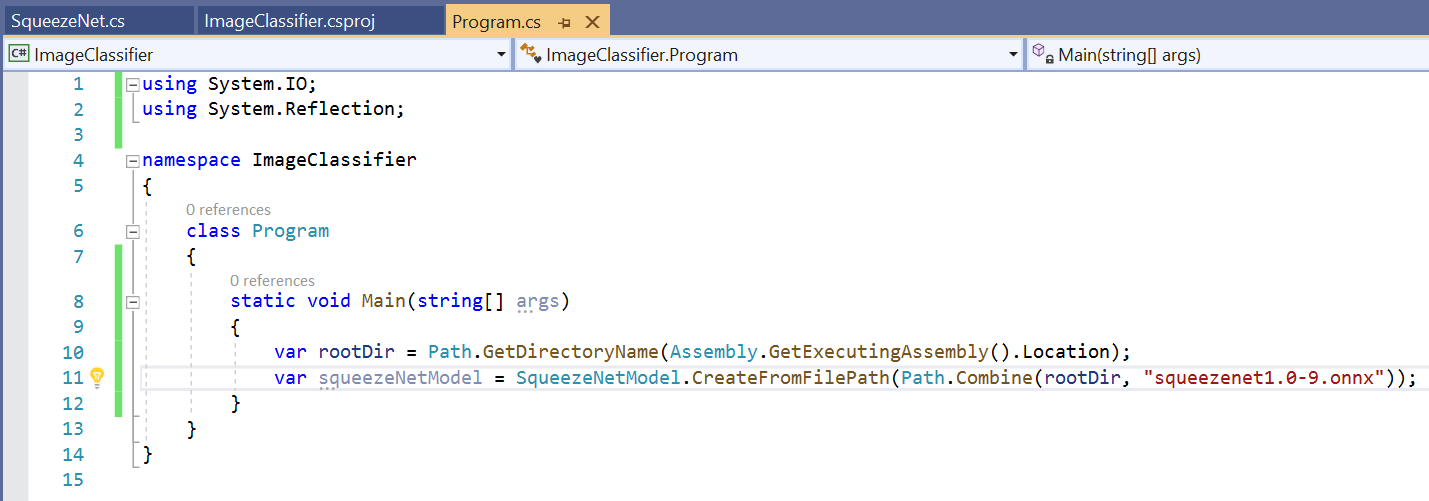
For simplicity, lets assume that there is always one parameter in our Console app args variable, which will represent the image file’s path that we will load and evaluate.
Since our input is expecting an ImageFeatureValue, we will need to load the file and convert it properly, which is straightforward to achieve using the Windows 10 SDK. We also load the JSON file to have a human-readable table of what this class represents:
using System;
using System.Collections.Generic;
using System.IO;
using System.Linq;
using System.Reflection;
using System.Text.Json;
using System.Threading.Tasks;
using Windows.AI.MachineLearning;
using Windows.Graphics.Imaging;
using Windows.Media;

namespace ImageClassifier
{
    class Program
    {
        static async Task Main(string[] args)
        {
            var rootDir = Path.GetDirectoryName(Assembly.GetExecutingAssembly().Location);
            var squeezeNetModel = SqueezeNetModel.CreateFromFilePath(Path.Combine(rootDir, "squeezenet1.0-9.onnx"));

            // Load labels from JSON
            var labels = new List<string>();
            foreach (var kvp in JsonSerializer.Deserialize<Dictionary<string, string>>(File.ReadAllText(Path.Combine(rootDir, "Labels.json"))))
            {
                labels.Add(kvp.Value);
            }

            if (args.Length < 1)
                return;

            var filePath = args[0];

            // Open image file
            SqueezeNetOutput output;
            using (var fileStream = File.OpenRead(filePath))
            {
                // Convert from FileStream to ImageFeatureValue
                var decoder = await BitmapDecoder.CreateAsync(fileStream.AsRandomAccessStream());
                using var softwareBitmap = await decoder.GetSoftwareBitmapAsync();
                using var inputImage = VideoFrame.CreateWithSoftwareBitmap(softwareBitmap);
                var imageTensor = ImageFeatureValue.CreateFromVideoFrame(inputImage);

                output = await squeezeNetModel.EvaluateAsync(new SqueezeNetInput
                {
                    data_0 = imageTensor
                });
            }

            // Get result, which is a list of floats with all the probabilities for all 1000 classes of SqueezeNet
            var resultTensor = output.softmaxout_1;
            var resultVector = resultTensor.GetAsVectorView();

            // Order the 1000 results with their indexes to know which class is the highest ranked one
            List<(int index, float p)> results = new List<(int, float)>();
            for (int i = 0; i < resultVector.Count; i++)
            {
                results.Add((index: i, p: resultVector.ElementAt(i)));
            }
            results.Sort((a, b) => a.p switch
            {
                var p when p < b.p => 1,
                var p when p > b.p => -1,
                _ => 0
            });

            if (results[0].p >= 0.9f)
            {
                Console.WriteLine($"Image '{filePath}' is classified as '{labels[results[0].index]}'(p={(int)(results[0].p * 100)}%).");
            }
            else
            {
                Console.WriteLine("Sorry, but I'm not sure what this is.");
            }
        }
    }
}
You can see that the very last if clause is comparing our result with 0.9f, which represents 90% of confidence in our result. I’ve empirically found that 90% is a good enough value for this model, but you can tweak it depending on what you want to achieve.
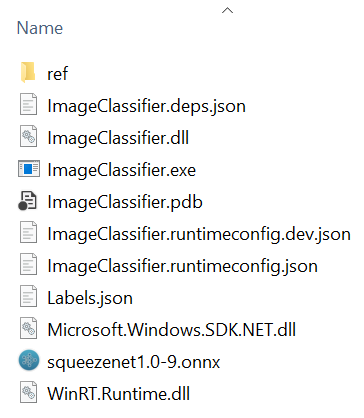
If we build our project, it will output a folder with our exe, its dependencies, as well as the Labels JSON file and our ONNX model.
Now we can call this exe file from a command line prompt and pass an image file as an argument, which will evaluate our input and return the class it thinks it matches best. Lets use this cat image as an example:

Which will output this:

And as you can see, it had a pretty good evaluation, classifying it as an Egyptian cat.
Closing
Checkout the source of the code of the sample shared here. Remember that this is only an example, and there might be inputs that this model does not properly evaluate with confidence, or it might even make mistakes. WinML is a tool, and we need to understand its limitations, which is a complex subject that needs to be handled on a case-by-case basis. Yet, its a very powerful tool, so use it wisely!
Thanks for the code sample!
When you say “You can download the model here, and the labels here.”, we are on the risk to right click and save directly, and if we do, we actually get some github files rather than the real one, then the code will break when running. Better give direct link or mention it clearly.
I tried to download another kind of cat and Panda’s picture, and the program didn’t recognise any!