With the release of Visual Studio 2013 RTM, we added support for scaffolding OData controllers with Entity Framework. In this blog topic we will cover the following topics
• Scaffolding an OData controller with Entity Framework on a Web API 2 project.
• Extra configuration steps required to setup OData scaffolding in a MVC project.
Scaffolding an OData controller with Entity Framework on a Web API2 project
Create a Web project using ASP.NET Web Application template and select Web API. Create the following model classes in the Models folders of the project
public class Customer
{
public int CustomerId { get; set; }
public string CustomerName { get; set; }
public ICollection<Order> Orders { get; set; }
}
public class Order
{
public int OrderId { get; set; }
public string OrderName { get; set; }
public Customer Customer { get; set; }
}Build the project.
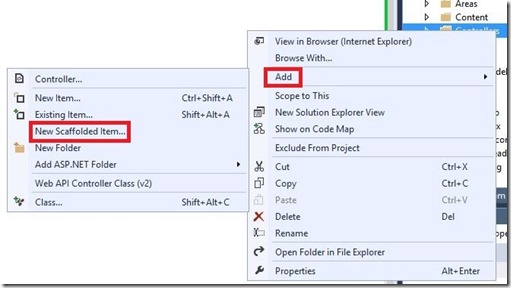
Right click on the Controllers folder and select “New Scaffolded Item”. As an alternative, you can also select “Controller”

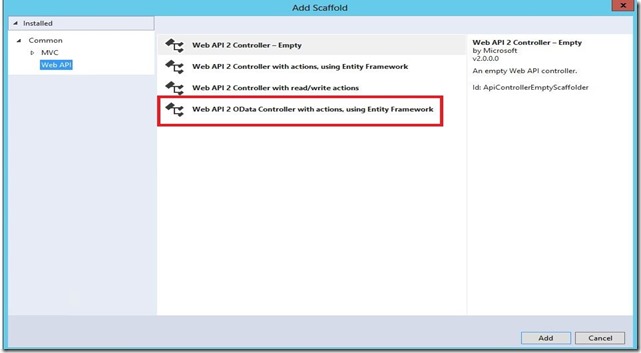
Choose “Web API 2 OData Controller with actions, using Entity Framework”
In the “Add Controller” dialog, name the controller “CustomerController”. Choose Customer class as the model in the dropdown menu and click on “New Data Context”. If you check “Use async controller actions”, it will create an OData controller with async methods. You can look at the blog topic for async controllers here.
This creates an OData Controller for Customer. To get this code running, we need to follow the instructions in readme.txt that gets generated once a controller is created.
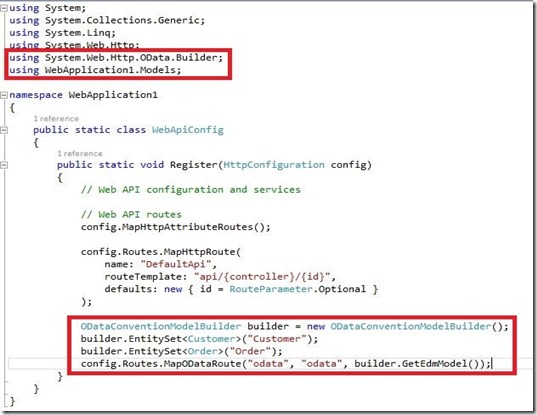
As mentioned in readme.txt, look at the instructions in CustomerController.cs. Copy the using statements (that don’t already exist) in the instructions of CustomerController.cs file to the top of the Webapiconfig.cs file. Copy the rest of the statements in the instructions of CustomerController.cs and place them inside the Register method of WebapiConfig.cs. After you are done, your Webapiconfig.cs should look like this:

If your model has one or more navigation properties, besides the CRUD actions for the entity, the Get method is created for each navigation property too

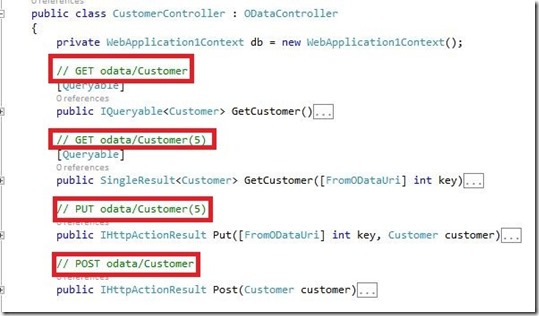
Build the project. Now you are all set to run your application and use the OData actions in Customer controller.Do note that OData is case-sensitive, so when calling your actions, make sure you call them with right capitalization. For instance, the URI for the GetCustomer actions is: http://localhost:43910/odata/Customer. Each action has its relative URI as a comment above it for guidance.

If you scaffold OrderController too in the similar way mentioned above, do note that generated instructions in OrderController.cs file will include adding Order and Customer entity sets (again) to Register method of WebapiConfig.cs file. Since these were already added once, you don’t have to add them again.
Extra configuration steps required to setup OData scaffolding in a MVC project
If you are using an Mvc project, apart from adding ODataRoute to Webapiconfig.cs file, you should also modify the Global.asax.cs file as explained in the readme.txt file
Hope you find this helpful. Thanks to all my team members for reviewing this blog.
Related Posts
http://www.asp.net/web-api/overview/odata-support-in-aspnet-web-api/creating-an-odata-endpoint


0 comments