


This is a guest blog from Toine de Boer.
I’m a .NET developer primarily focused on .NET MAUI to ASP.NET backend services. Because I recently have worked a lot with Widgets and encountered many obstacles and very limited documentation in the initial phase, I decided to write this article to show that it is absolutely possible to build complete Widgets with .NET MAUI. And to do so in a professional way comparable to using the native development environment, without having to fear that everything might break with every new build or update.
This isn’t a hands-on tutorial; instead, these are the biggest and most important parts in order of how to tackle the biggest obstacles when building an iOS widget. It’s advisable to have some experience with .NET MAUI or Xamarin, and access to macOS is required, as creating an iOS Widget without macOS unfortunately isn’t possible. You can cherry‑pick what you think you need, but I recommend reading from start to finish or you may miss small details that keep the Widget from working. The text starts with creating a simple static widget, and ends with a basic system for a fully interactive widget.
To help you get started quickly, I have created a fully functional interactive widget, which is available on github > Maui.WidgetExample
Note
iOS Widgets are standalone apps that are linked to a host app. For simplicity I mostly refer to the .NET MAUI app as the ‘app’ and the Widget app as the ‘Widget’.Prerequisites
Before we begin we need a few things from Apple’s developer console. Besides the Bundle ID of your existing app you also need a Bundle ID for your Widget. If your app uses com.enbyin.WidgetExample then conventionally you append something for a Widget such as com.enbyin.WidgetExample.WidgetExtension. Additionally, both Bundle IDs need the App Groups capability with a dedicated group. Create a Group ID by prefixing the app Bundle ID with group, for example group.enbyin.WidgetExample.
What to collect from Apple Developer Console:
- App Bundle ID (e.g.
com.enbyin.WidgetExample) - Widget (App) Bundle ID (e.g.
com.enbyin.WidgetExample.WidgetExtension) - Group ID (e.g.
group.enbyin.WidgetExample)
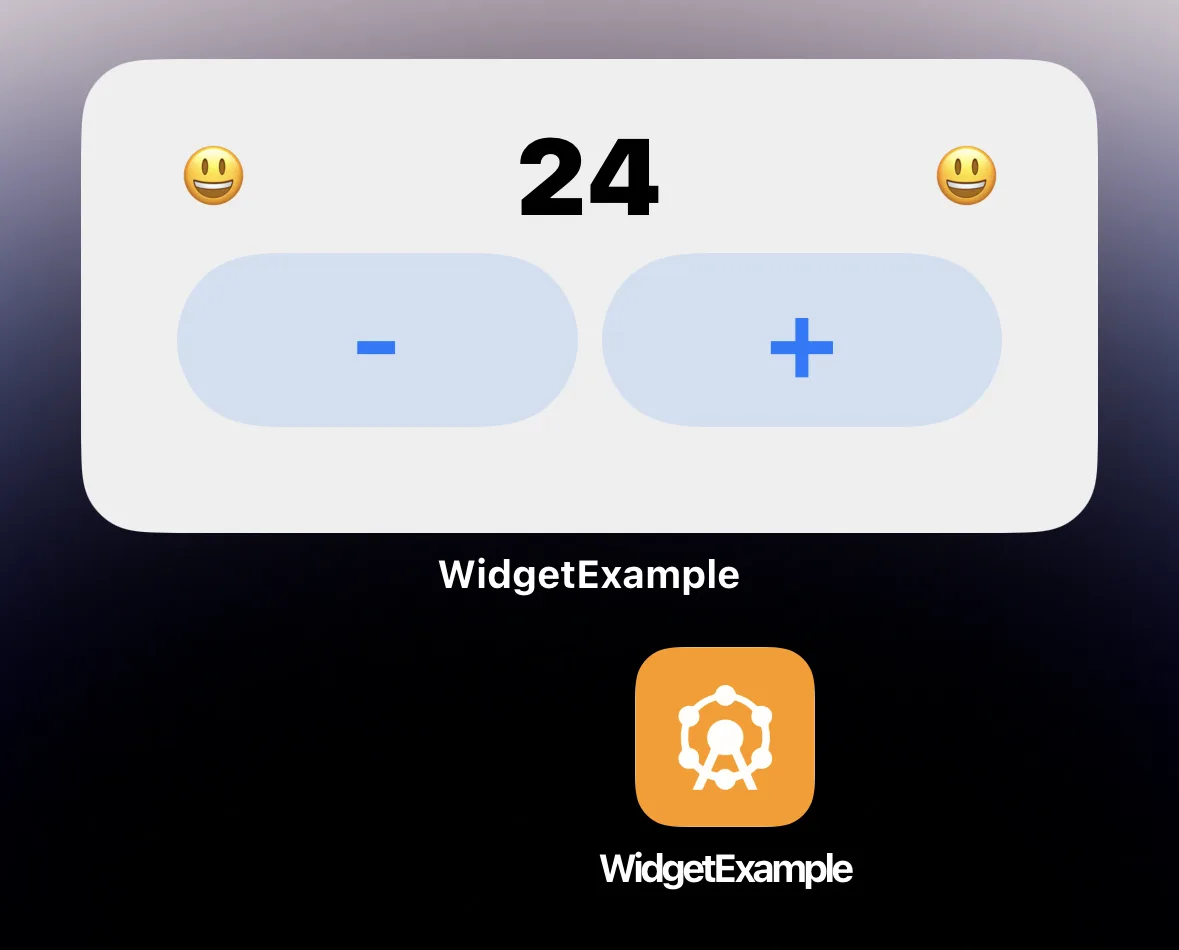
For demo purposes I created a default .NET MAUI app targeting only iOS and Android. I set the iOS target to the newly created Bundle ID com.enbyin.WidgetExample. I also added a very noticeable app icon so we can easily observe if the correct icon has been used on the Widget screens.
Creating the Widget project
Let’s begin with the biggest step for me as a .NET developer: working on Xcode and Swift. After creating the projects in Xcode, I can recommend to switch to VS Code and pair with Copilot to iterate quickly. You can have a solid small app set up quickly while following Apple’s conventions.
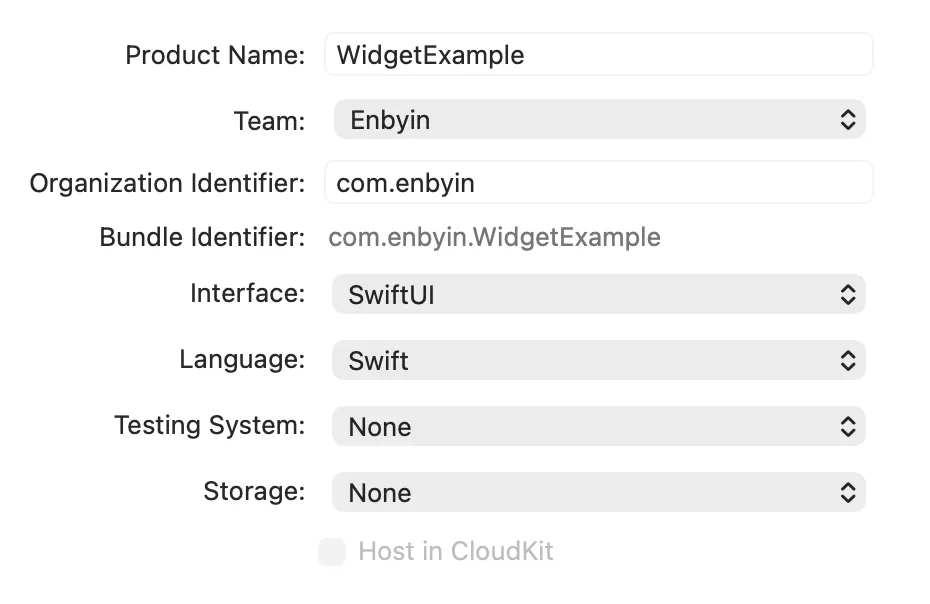
I begin in Xcode by creating an app project using the App template using Swift coding. This serves as the base project to which I attach the actual Widget extension, and optionally, I can use it for some light testing. I give it the same Bundle ID as the .NET MAUI app has; reusing a Bundle ID is not a problem because this almost empty Xcode app will never ship.
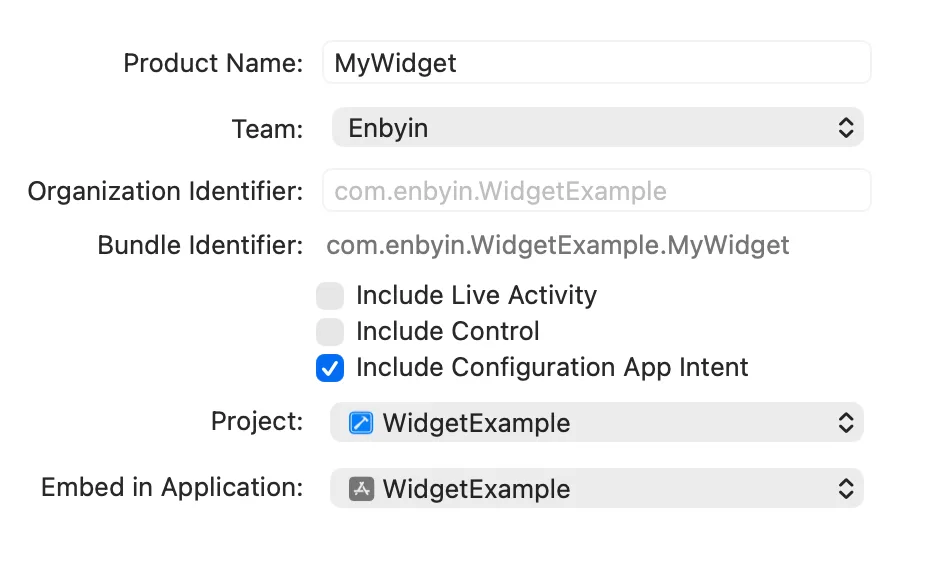
With the app project in place, create the Widget extension next. In Xcode go to File > New > Target and choose the Widget Extension template. Pick a name that already uses the correct Bundle ID for the widget so you avoid later edits. To simplify generating sample data select the Include Configuration App Intent option; this gives a working widget immediately.
When all projects are created I always align the desired iOS version, make sure it is the same for all Xcode targets. To check this just tap the solution name to open the solution settings in the main window, then set for all targets on tab ‘General’ under ‘Minimum Deployments iOS version’. Now give it a trial run on a device using Product > Build in Xcode.
Objects and flows inside the Widget
Creating the Widget project in XCode generates many objects. Understandably it is overwhelming at first, especially because almost everything is placed into one file. Therefore I always start by refactoring: moving every object into its own file and add some folder structure. You can do this without penalty because Swift does not really use namespaces; everything inside this project effectively falls under the same namespace regardless of folder structure.
After refactoring the flow is actually straightforward. Here are the main objects, functions and their roles:
- WidgetBundle: the entry point of the Widget extension, here you can expose one or more widgets to the end user
- Widget: the configuration of a specific widget, here everything is listed such as the View, Provider, ConfigurationIntent and the supported sizes
- AppIntentTimelineProvider: provides the data models to build the view, multiple models can be provided which are published according to a timeline.
- func placeholder: provides a minimal data model while the widget is loading (almost never visible)
- func snapshot: provides a data model for when the widget is shown in the gallery as a preview and when first added to the screen
- func timeline: provides a single data model (or a collection) for normal use, this is the main source where all data models for the widget come from
- TimelineEntry: the data model instance
- View: the visual elements of the widget
- WidgetConfigurationIntent: enables an end-user to configure the widget, in
timeline()of the AppIntentTimelineProvider you receive these settings so they can be processed into the data model when needed
Managing models or any other data in memory, like cache systems or just simple static fields, makes little sense. An iOS Widget is a static object that lives very briefly to perform very small action. In the AppIntentTimelineProvider the functions are invoked almost at the same time but they really run as distinct processes. For exchanging and storing data it is best to use some form of local storage (covered later).
App Icons
Previously I had recurring problems with the widget showing wrong icons on different views. Since I explicitly added the AppIcon images to Assets in the Widget extension and referencing them in its info.plist I had almost no problems. If icons are still wrong after updating the assets and info.plist, reboot your test device because iOS seems to do some kind of icon caching with Widgets.
In Xcode the AppIcon Assets are predefined in the Widget project. When you open the AppIcon Assets page and then open the Attributes Inspector (top right) you can select iOS ‘All Sizes’. This gives you the ability to set all image sizes. Personally I find that too much manual work, so I use an online iOS icon generator that produces all formats and copy them straight into the Assets.xcassets/AppIcon.appiconset folder.
To adjust the plist settings, open the widget extension’s Info.plist outside of Xcode (e.g. in VS Code) and insert the entries below inside the NSExtension section:
<key>NSExtensionPrincipalClass</key>
<string>MyWidgetExtension.MyWidgetBundle</string>
<key>CFBundleIcons</key>
<dict>
 <key>CFBundlePrimaryIcon</key>
 <dict>
  <key>CFBundleIconFiles</key>
  <array>
   <string>AppIcon</string>
  </array>
  <key>UIPrerenderedIcon</key>
  <false/>
 </dict>
</dict>
<key>CFBundleIconName</key>
<string>AppIcon</string>
Adjust NSExtensionPrincipalClass using the following format:
<key>NSExtensionPrincipalClass</key>
<string>{YourWidgetModuleName}.{YourWidgetName}</string>

<!-- YourWidgetModuleName can be found in: Extension > Build Settings > Product Module Name -->

<!-- YourWidgetName is the name of the Widget bundle, like ‘MyWidgetsBundle’ in: -->
<!-- @main -->
<!-- struct MyWidgetsBundle: WidgetBundle { -->
Creating a release build of the Widget
Release builds are easy to make in Xcode, but finding the right settings can be a hassle for me. Therefore, I use a standard script that makes it much easier to collect the releases into a dedicated folder, which can also be used in build pipelines. I run this script from the root of the Xcode projects and the releases go to an XReleases folder, the X to prevent them from being excluded by the default Visual Studio .gitignore.
rm -Rf XReleases

xcodebuild -project XCodeWidgetExample.xcodeproj \
-scheme "MyWidgetExtension" \
-configuration Release \
-sdk iphoneos \
BUILD_DIR=$(PWD)/XReleases clean build

xcodebuild -project XCodeWidgetExample.xcodeproj \
-scheme "MyWidgetExtension" \
-configuration Release \
-sdk iphonesimulator \
BUILD_DIR=$(PWD)/XReleases clean build
Adding the Widget release to the MAUI app
The widget build output is an .appex (a magic macOS bundle folder, similar to an .app). On Windows with Visual Studio I previously had much build errors where the appex couldn’t be found. To avoid this I now place the release outputs under Platforms/iOS/ and include them with CopyToOutput.
Use the snippet below in your .csproj to get the files available for the build:
<ItemGroup Condition="$(TargetFramework.Contains('-ios'))">
   <Content Remove="Platforms\iOS\WidgetExtensions\**" />
   <Content Condition="'$(ComputedPlatform)' == 'iPhone'" Include=".\Platforms\iOS\WidgetExtensions\Release-iphoneos\MyWidgetExtension.appex\**" CopyToOutputDirectory="PreserveNewest" />
   <Content Condition="'$(ComputedPlatform)' == 'iPhoneSimulator'" Include=".\Platforms\iOS\WidgetExtensions\Release-iphonesimulator\MyWidgetExtension.appex\**" CopyToOutputDirectory="PreserveNewest" />
</ItemGroup>
Now add the Widget extension to the .NET MAUI app project. The ItemGroup below ensures that this is done during the build, pay attention to the paths and filenames because this is very strict.
<ItemGroup Condition="$(TargetFramework.Contains('-ios'))">
   <!-- the appex folder path without the platform suffix -->
   <AdditionalAppExtensions Include="$(MSBuildProjectDirectory)/Platforms/iOS/WidgetExtensions">
      <!-- the appex file without the .appex suffix -->
      <Name>MyWidgetExtension</Name>
      <!-- the appex folder platform suffixes -->
      <BuildOutput Condition="'$(ComputedPlatform)' == 'iPhone'">Release-iphoneos</BuildOutput>
      <BuildOutput Condition="'$(ComputedPlatform)' == 'iPhoneSimulator'">Release-iphonesimulator</BuildOutput>
   </AdditionalAppExtensions>
</ItemGroup>
At this point the Widget should be visible in your .NET MAUI app build. Right now it is a Widget that works entirely on its own, without data or communications from your .NET MAUI app.
Note
Widget extensions will most likely not be visible when you build from Visual Studio for ‘iOS Local Devices’.Data sharing between App and Widget
iOS Widgets can best be treated as standalone apps. The .NET MAUI app and the Widget can not freely exchange data or communicate. For data exchange we can use .NET MAUI Preferences which maps to UserDefaults on iOS. To ensure they use the same source, both projects need an Entitlements.plist specifying the same Group ID which we created earlier when setting up the Bundle ID with App Groups capability.
An example Entitlements.plist with group id group.com.enbyin.WidgetExample:
<?xml version="1.0" encoding="UTF-8"?>
<!DOCTYPE plist PUBLIC "-//Apple//DTD PLIST1.0//EN" "http://www.apple.com/DTDs/PropertyList-1.0.dtd">
<plist version="1.0">
  <dict>
  <key>com.apple.security.application-groups</key>
  <array>
  <string>group.com.enbyin.WidgetExample</string>
  </array>
  </dict>
</plist>
For clarity: both the Widget Xcode project and the .NET MAUI project must use such entitlements, and do not forget to create a new release of the Xcode project after adding the entitlements. Additionally the entitlements of the Widget Xcode project must also be referenced in the .NET MAUI project under the AdditionalAppExtensions element in the .csproj for the .NET MAUI build.
<ItemGroup Condition="$(TargetFramework.Contains('-ios'))">
   <!-- the appex folder path without the platform suffix -->
   <AdditionalAppExtensions Include="$(MSBuildProjectDirectory)/Platforms/iOS/WidgetExtensions">
      <!-- the appex file without the .appex suffix -->
      <Name>MyWidgetExtension</Name>
      <!-- the appex folder platform suffixes -->
      <BuildOutput Condition="'$(ComputedPlatform)' == 'iPhone'">Release-iphoneos</BuildOutput>
      <BuildOutput Condition="'$(ComputedPlatform)' == 'iPhoneSimulator'">Release-iphonesimulator</BuildOutput>

      <!-- entitlements for the appex, without this the shared storage won't work -->
      <!-- errors that entitlements could not be found: include the entitlements with CopyToOutput -->
      <!-- errors when reading entitlements during build: store entitlements file with line-ending type LF -->
      <CodesignEntitlements>Platforms/iOS/Entitlements.MyWidgetExtension.plist</CodesignEntitlements>
   </AdditionalAppExtensions>
</ItemGroup>
At this point the App and Widget should be able to use the same data source. In both projects the usage of a specific Group ID must be indicated explicitly in code. In .NET MAUI do NOT use Preferences.Default; instead provide the Group ID in the sharedName parameter.
// example how to store data in .NET MAUI.
Preferences.Set("MyDataKey", "my data to share", "group.com.enbyin.WidgetExample");
// example how to store data in Swift.
UserDefaults(suiteName: "group.com.enbyin.WidgetExample")?.set("my data to share", forKey: "MyDataKey")
// example how to get data in Swift.
let data = UserDefaults(suiteName: "group.com.enbyin.WidgetExample")?.string(forKey: "MyDataKey")Note
Storage keys are case-sensitive; I advise to keep keys simple and optionally consistently lowercase to avoid problems.Communication from App to Widget
The Widget does not know when the App shares data and the App does not know when the Widget does so. Signaling new available data from the App to the Widget uses a different mechanism than from Widget to App. Signaling from App to Widget is easy with Apple’s WidgetKit API. This API is not available in .NET MAUI so you must create a binding yourself. It is a very small API and great to experiment with bindings yourself. For this demo I use a NuGet package WidgetKit.WidgetCenterProxy where this has already been done for us.
The WidgetKit API mainly provides two options: reload all widgets on the device or reload only widgets of a specific kind. I always use the latter because the platform will ignore you if you use one of these options too frequently; I imagine they also prefer that you only update your own specific widgets. The kind of your Widget is easy to find in your Widget object in Swift; under the kind property.
// Example on how to refresh all Widgets of kind ‘MyWidget’ in .NET MAUI
var widgetCenterProxy = new WidgetKit.WidgetCenterProxy();
widgetCenterProxy.ReloadTimeLinesOfKind("MyWidget");
Note
WidgetKit reload functions are a polite request to the OS; it decides when it happens and whether you are using it too often. Usually the widget refresh happens immediately.Communication from Widget to App
Communication from Widget to App can happen in two ways, optionally with a very small amount of data. By default a Widget opens the corresponding app when you tap it, if you overwrite this with widgetUrl() you can open the app with a Deep Link that includes data in the url. A drawback is that a Widget is build as a static object, when using widgetUrl the URL must be determined beforehand when setting up the Widget view (often happens in the provider) and passed as string through the data model.
// example of using a DeepLink URL in Swift
struct MyView: View {
   var body: some View {
      // my views
   }.widgetURL(URL(string: "mywidget://something?var1=dummy-data"))
}
A different way to communicate can originate from AppIntents. An AppIntent is a way to execute actions/logic that you can attach to interactive elements like buttons. It is also the place where the OS gives you a bit of time to perform long-running actions, like for making http calls. When you combine local storage with AppIntents you can create a full ‘Interactive Widgets’, as shown in the rendering cycle image below.

For example you can attach a custom AppIntent to a button in your Widget that changes a value in storage, after which the AppIntent itself triggers a refresh of the Widget. The system reloads the widget by calling AppIntentTimelineProvider, creating a new data model (timeline entry) and re-rendering the view with the updated data.
// example of an AppIntent changing data and reloading widget
struct IncrementCounterIntent: AppIntent {
   static var title: LocalizedStringResource { "Increment Counter" }
   static var description: IntentDescription { "Increments the counter by 1" }

   func perform() async throws -> some IntentResult {

   var currentCount = 0

   let userDefaults = UserDefaults(suiteName: Settings.groupId)
   let storedValue = userDefaults?.integer(forKey: Settings.appIncommingDataKey)
   if let storedValueCount = storedValue {
      currentCount = storedValueCount
   }

   // do action
   let newCount = currentCount + 1

   // Save new value
   userDefaults?.set(newCount, forKey: Settings.appIncommingDataKey)

   // Reload timelines > refreshing widget
   WidgetCenter.shared.reloadTimelines(ofKind: "MyWidget")

   return .result()
}
// example of Button using AppIntent in Swift
struct MyWidgetView : View {
var entry: Provider.Entry
var body: some View {
VStack(spacing:4) {
Button(intent: IncrementCounterIntent()) {
Text("+")
}
}
.padding()
}
}Silent communication from Widget to App
On iOS, a Widget can NOT communicate with the App in the background. Any direct call brings the App to the foreground. To keep the App closed and still perform work, you can use AppIntents in the Widget to call your backend. The backend can execute the action and, if needed, send a silent push notification to the App. The App can then handle the update in the background if required. This can be done with any web service and existing push notification provider; For that reason, I’ve included only an illustrative SilentNotificationService as entry point in the demo code rather than a full implementation.
Create a configurable Widget
Because I selected the ‘Configuration App Intent’ option when creating the Xcode Widget extension, there is already a working system in place that allows the user to configure the widget. In the loop of creating the data model in AppIntentTimelineProvider, this configuration becomes available and can be processed into the data that is passed to the Widget view. It’s a simple basic system that’s all implemented in a WidgetConfigurationIntent that is specified in the WidgetConfiguration for the specific Widget.
struct MyWidget: Widget {
   let kind: String = "MyWidget"

   var body: some WidgetConfiguration {
      AppIntentConfiguration(kind: kind,
      intent: ConfigurationAppIntent.self,
      ...
Visually, there is nothing to customize in the WidgetConfigurationIntent. You only need to add ‘@Parameter’ fields for the settings you want users to configure; the platform handles the UI automatically.
struct ConfigurationAppIntent: WidgetConfigurationIntent {
   // title: mainly for Siri/shortcuts, keep it simple if you don't use Siri
   static var title: LocalizedStringResource { "Configuration" }
   // description: mainly for developers in the app intents system, users will never see this
   static var description: IntentDescription { "This is an example widget." }

   // An example configurable parameter.
   @Parameter(title: "Favorite Emoji", default: "😃")
   var favoriteEmoji: String
}
Most built-in types can be used with @Parameter, such as String, Int, Bool, Date, etc. For more complex types like lists or custom objects, a separate type can be created that implements AppEntity. This is a somewhat more extensive topic that I won’t cover completely here. The principle is simple: the AppEntity object is a selectable datamodel that provides its own options through an EntityQuery. This EntityQuery delivers a collection of AppEntity objects from which the user can choose. It’s important to know that the platform can iterate through the different functions of the EntityQuery multiple times, and again these functions have difficulty exchanging data with eachother. My advice is to use local storage (UserDefaults) to cache and exchange data between the different functions.
Wrapping Up and Practical Tips
With the interactive widget fully implemented, the next step naturally becomes refining your logic, layout, and overall design. While most of your core logic can remain inside your .NET MAUI app for reuse across platforms, a bit of Swift will always be required for widget specific tasks like handling storage, building views, or performing lightweight backend actions. Here are some final tips to help you get up to speed during the transition from C# to Swift:
- Use VS Code to pair-program with Copilot when creating your Swift code.
- Keep Xcode open for rapid build and preview cycles to catch issues early.
- Open the Canvas view in Xcode and use #preview data so you can see visual changes quickly.
If you’re interested in taking your widget skills to Android, good news: an article on building Android Widgets with .NET MAUI is coming soon. Stay tuned!
Hi Henrik,
WatchOs apps are not extensions like widgets are on iOS, they are independent apps. You can ship them together with a normal app, but they will operate in different sandboxes.
You can use the WatchConnectivity on iOS to communicate between app and WatchOS app. But it’s currently not available in Maui so you have to make WatchConnectivity available yourself to your Maui code, can be done very easily.
And last thing: the local storage is not shared between the apps.
Kind regards,
Toine
Awesome!
Will try that out and hopefully someone posts a guide to it before to save me some time!
Supernice! Can we use a similar approach to create WatchOs apps?