Aspire enhances the local development process with its powerful orchestration feature for app composition. In the Aspire App Host, you specify all the projects, executables, cloud resources, and containers for your application in one centralized location. When you run the App Host project, Aspire will automatically run your projects and executables, provision cloud resources if necessary, and download and run containers that are dependencies for your app. Aspire 9 added new features to give you more control over how container lifetimes are managed on your local machine to speed up development when working with containers.
Containers with Aspire
Let’s look at a simple example of a Aspire App Host that creates a local Redis container resources, waits for it to become available, and then configures the connection string for the web projects:
// Create a distributed application builder given the command line arguments.
var builder = DistributedApplication.CreateBuilder(args);

// Add a Redis server to the application.
var cache = builder.AddRedis("cache");

// Add the frontend project to the application and configure it to use the
// Redis server, defined as a referenced dependency.
builder.AddProject<Projects.MyFrontend>("frontend")
       .WithReference(cache)
       .WaitFor(cache);
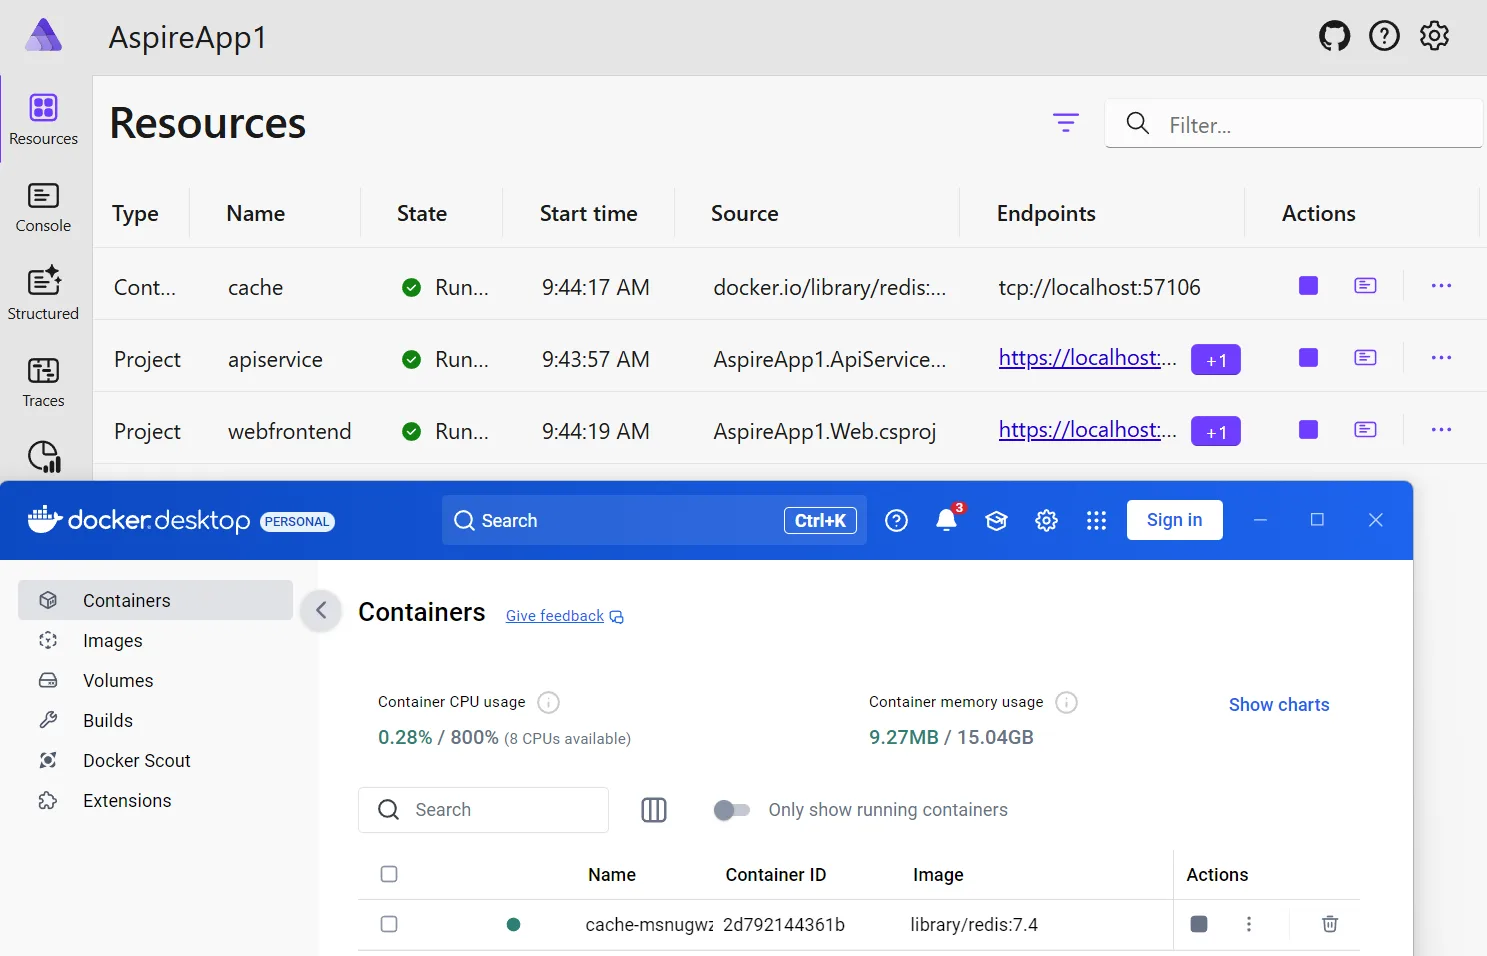
When the App Host is started, the call to AddRedis will download the appropriate Redis image.

It will also create a new Redis container and run it automatically.

When we stop debugging our App Host, Aspire will automatically stop all of our projects and will also stop our Redis container and delete the associated volume that typically is storing data.
Container lifetimes
While this fits many scenarios, if there aren’t going to be any changes in the container you may just want the container to stay running regardless of the state of the App Host. This is where the new WithLifetime API comes in allowing you to customize the lifetime of containers. This means that you can configure a container to start and stay running, making projects start faster because the container will be ready right away and will re-use the volume.
var builder = DistributedApplication.CreateBuilder(args);

// Add a Redis server to the application and set lifetime to persistent
var cache = builder.AddRedis("cache")
                   .WithLifetime(ContainerLifetime.Persistent);

builder.AddProject<Projects.MyFrontend>("frontend")
       .WithReference(cache)
       .WaitFor(cache);
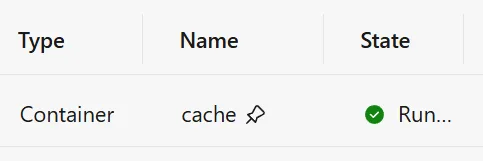
Now, when we run our App Host if the container isn’t found it will still create a new container resource and start it, however if it is found with the specified name, Aspire will use that resource instead of creating a new one. When the App Host shuts down, the container resource will not be terminated and will allow you to re-use it across multiple runs! You will be able to see that the container is set to Persistent with a little pin icon on the Aspire dashboard:

How does it work?
By default, several factors are taken into consideration when Aspire determines whether to use an existing container or to create a new one when ContainerLifetime.Persistent is set. Aspire will first generate a unique name for the container based on a hash of the App Host project path. This means that a container will be persistent for a specific App Host, but not globally if you have multiple App Host projects. You can specify a container name with the WithContainerName method, which would allow for a globally unique persistent container.
In addition to the container name, Aspire will consider the following:
- Container image
- Commands that start the container and their parameters
- Volume mounts
- Exposed container ports
- Environment variables
- Container restart policy
Aspire takes all of this information and creates a unique hash from it to compare with any existing container data. If any of these settings are different then the container will NOT be reused and a new one will be created. So, if you are curious why a new container may have been created, it’s probably because something has changed. This is a pretty strict policy that Aspire started with for this new option, and the team is looking for feedback on future iterations.
What about persisting data?
Now that we are persisting our containers between launches of the App Host, it also means that we are re-using the volume that was associated with it. Volumes are the recommended way to persist data generated by containers and have the benefit that they can store data from multiple containers at a time, offer high performance, and are easy to back up or migrate. So, while yes we are re-using the volume, a new container may be created if settings are changed. Having more control of the exact volume that is used and being reused allows us to do things such as:
- Maintain cached data or messages in a Redis instance across app launches.
- Work with a continuous set of data in a database during an extended development session.
- Test or debug a changing set of files in an Azure Blob Storage emulator.
So, let’s tell our container resource what volume to use with the WithDataVolume method. By default it will assign a name based on our project and resource names: {appHostProjectName}-{resourceName}-data, but we can also define the name that will be created and reused which is helpful if we have multiple App Hosts.
var cache = builder.AddRedis("cache")
        .WithLifetime(ContainerLifetime.Persistent)
        .WithDataVolume("myredisdata");
Now, a new volume will be created and reused for this container resource and if for some reason a new container is created it will still use the myredisdata volume.

Using volumes are nice because they offer ideal performance, portability, and security. However, you may want direct access and modification of files on your machine. This is where data bind mounts come in when you need real-time changes.
var cache = builder.AddRedis("cache")
        .WithLifetime(ContainerLifetime.Persistent)
        .WithDataBindMount(@"C:\Redis\Data");
Data bind mounts rely on the filesystem to persist the Redis data across container restarts. Here, the data bind mount is mounted at the C:\Redis\Data on Windows in the Redis container.
Now, in the case of Redis we can also control persistence for when the Redis resource takes snapshots of the data at a specific interval and threshold.
var cache = builder.AddRedis("cache")
        .WithLifetime(ContainerLifetime.Persistent)
        .WithDataVolume("myredisdata")
        .WithPersistence(interval: TimeSpan.FromMinutes(5), keysChangedThreshold: 100);
Here, the interval is the time between snapshot exports and the keysChangedThreshold is the number of key change operations required to trigger a snapshot.
Integrations have their own specifications for WithDataVolume and WithBindMount, so be sure to check the integration documentation for the ones you use.
More control over resources
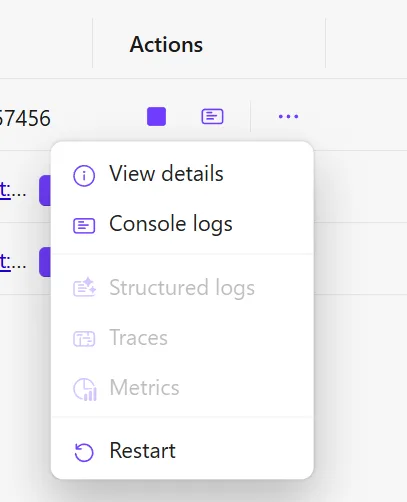
We now have everything set up, persisted, and ready to go in our App Host. As a bonus, Aspire 9 also added the ability to start, stop, and restart resources including containers directly from the dashboard!

This is really nice to be able to test resiliency of your applications without having to leave the dashboard.
See it in action
Upgrade to Aspire 9
There is so much more in Aspire 9, so be sure to read through the What’s new in Aspire 9.0 documentation and easily upgrade in just a few minutes with the full upgrade guide.
There is also newly updated documentation on container resource lifetimes, persisting data with volumes, and the new dashboard features.
Let us know what you think of this new feature in Aspire 9 and all of the other great features in the comments below.


0 comments