One of the great things about ASP.NET Core is its extensibility. The behavior of an ASP.NET Core app’s HTTP request handling pipeline can be easily customized by specifying different middleware components. This allows developers to plug in request handlers like MVC middleware, static file providers, authentication, error pages, or even their own custom middleware. In this article, I will walk you through how to create custom middleware to handle requests with simple SOAP payloads.
A Disclaimer
Hopefully this article provides a useful demonstration of creating custom middleware for ASP.NET Core in a real-world scenario. Some users might also find the SOAP handling itself useful for processing requests from old clients that previously communicated with a basic WCF endpoint. Be aware, though, that this sample does not provide general WCF host support for ASP.NET Core. Among other things, it has no support for message security, WSDL generation, duplex channels, non-HTTP transports, etc. The recommended way of providing web services with ASP.NET Core is via RESTful web API solutions. The ASP.NET MVC framework provides a powerful and flexible model for routing and handling web requests with controllers and actions.
Getting Started
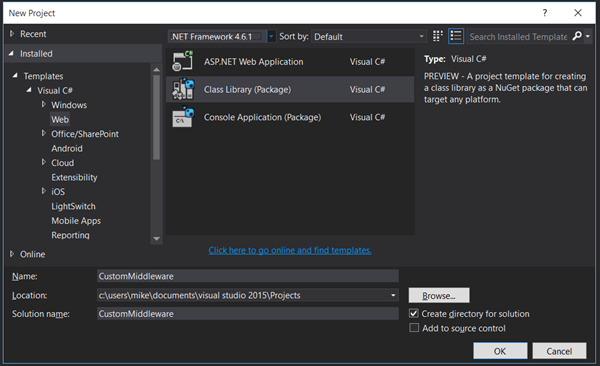
To start, create a .NET Core library (the project type is under web templates and is called Class Library (package)). Throughout this article I will be using the Preview 2 version of the .NET Core tools.

ASP.NET Core middleware uses the explicit dependencies principle, so all dependencies should be provided through dependency injection via arguments to the middleware’s constructor. The one dependency common to most middleware is a RequestDelegate object representing the next delegate in the HTTP request processing pipeline. If our middleware does not completely handle a request, the request’s context should be passed along to this next delegate. Later, we’ll specify more dependencies in our constructor but, for now, let’s add a basic constructor to our middleware class.
Add a dependency to Microsoft.AspNetCore.Http.Abstractions to your project.json (since that’s the contract containing RequestDelegate), give your class a descriptive name (I’m using SOAPEndpointMiddleware), and create a constructor for the middleware class like this:
Next, we need to handle incoming HTTP request contexts. For this, middleware is expected to have an Invoke method taking an HttpContext parameter. This method should take whatever actions are necessary based on the HttpContext being processed and then call the next middleware in the HTTP request processing pipeline (unless no further processing is needed). For the moment, add this trivial Invoke method:
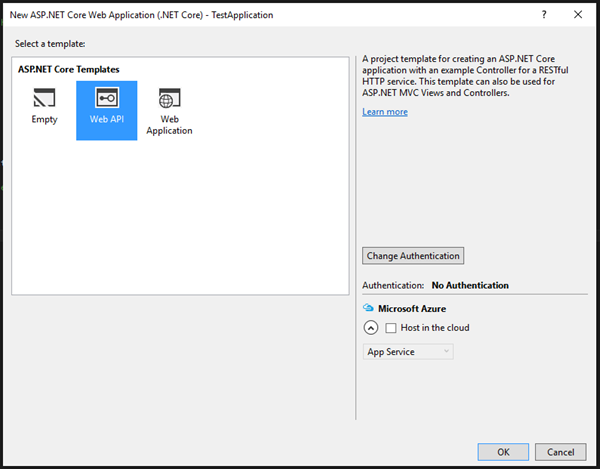
To try out our middleware as we create it, we will need a test ASP.NET Core app. Add an ASP.NET Core web API project to your solution and set it as the startup project.

ASP.NET Core middleware (custom or otherwise) can be added to an application’s pipeline with the IApplicationBuilder.UseMiddleware<T> extension method. After adding a project reference to your middleware project ("CustomMiddleware": "1.0.0.0"), add the middleware to your test app’s pipeline in the Configure method of its Startup.cs file:
You may notice that the other middleware components (MVC, static files, etc.) all have custom extension methods to make adding them easy. Let’s add an extension method for our custom middleware, too. I added the following method in a new source file in the custom middleware library project (notice the Microsoft.AspNetCore.Builder namespace so that IApplicationBuilder users can easily call the method):
The call to register the middleware in the test app then simplifies to app.UseSOAPEndpoint() instead of app.UseMiddleware<SOAPEndpointMiddleware>().
At this point, we have successfully created a basic piece of custom middleware and injected it into our test app’s HTTP request processing pipeline.
Launch your test app (using Kestrel so that you can easily see Console output) and navigate to the hosted site with your web browser. Notice that the custom middleware logs messages as requests are received!
Specifying a Service Type
Now that we have a simple custom middleware component working, let’s have it start actually processing SOAP requests! The middleware should listen for SOAP requests to come in to a particular endpoint (URL) and then dispatch the calls to the appropriate service API based on the SOAP action specified. For this to work, our custom middleware will need a few more pieces of information:
- The path it should listen on for requests
- The type of the service to invoke methods from
- The MessageEncoder used to encode the incoming SOAP payloads
These arguments will all need to be provided when an app registers our middleware as part of its processing pipeline, so let’s add them to the constructor. Note that the MessageEncoder class is in the System.ServiceModel.Primitives contract.
After updating the constructor, it should look like this:
The UseSOAPEndpoint extension method will also need to be updated (and can be made generic to capture the service type parameter):
Because MessageEncoder is an abstract class without any implementations publicly exposed, users of this library will have to either implement their own encoders or (more likely) extract an encoder from a WCF binding. To make that easier, let’s also add a UseSOAPEndpoint overload that takes a binding (and extracts the encoder on the user’s behalf):
Discovering Service Type Operations
Requests handled by our SOAP-handling middleware will be requests to invoke some operation on the specified service type. We can use reflection to find methods on the given service type which correspond to contract operations.
Let’s create a new type (ServiceDescription) to store this metadata. It should take the service type as an input to its constructor and then should walk the type with reflection to discover implemented contracts and operations according to the following heuristic:
- Contracts should be discovered by finding
ServiceContractAttributeelements on interfaces that the type implements- Contract name and namespace information is taken from the attribute
- Operations should be discovered by finding
OperationContractAttributeelements on methods within the contract interfaces- Operation name, properties, and action name are taken from the attribute; the method to invoke is the service type’s implementation of the interface method
Note that ServiceDescription, ContractDescription, and OperationDescription used here are not the types from the System.ServiceModel.Description namespace (so you should not need to depend on that namespace). Rather, they are simple new types used for the purpose of this sample code. If the names are confusing, feel free to change them.
The ServiceDescription type (or whatever you have named it) should end up looking something like this:
The ContractDescription type is similar:
The OperationDescription class looks much the same except that it also contains metadata about how the operation should be invoked:
Once these types exist, the middleware’s constructor can be updated to store a ServiceDescription created from the specified Type instead of storing the Type itself:
Note that this could all be simplified by just having a dictionary of action names and OperationDescription or MethodInfo dispatch methods. I’ve opted to have the whole service/contract/operation structure stored, though, because it will allow expanding the sample with more complex functionality (such as supporting message inspectors) in the future.
Invoking the Operations
At this point, you should have a custom middleware class that takes a service type as input and discovers available operations. Now it’s time to update the middleware’s Invoke method to actually call those operations.
The first thing to check in the Invoke method is whether or not the incoming request’s path equals the path our service is listening on. If not, then we need to pass the request along to other pipeline members.
If the request’s path does equal the expected path for our service endpoint, we need to read the message and compose a response (this code replaces the ‘todo’ in the previous snippet).
After that, we need to get the requested action by looking for a ‘SOAPAction’ header (which is how SOAP actions are usually communicated). Again, this code replaces the ‘todo’ from the previous snippet.
Knowing the requested action, we can build on the previous snippet by finding the correct OperationDescription to invoke. Replace the previous ‘todo’ with the following:
Now that we have a MethodInfo to invoke, we need to extract the arguments to pass to the operation from the request’s body. This can be done in a helper method with an XmlReader and DataContractSerializer.
This argument reading helper assumes the arguments are provided in order in the message body. This is true for messages coming from .NET WCF clients, but may not be true for all SOAP clients. If needed, this method could be replaced with a slightly more complex variant that allows for re-ordered arguments and fuzzier parameter name matching.
With the operation and arguments known, all that remains is to retrieve an instance of the service type to call the operation method on. This can be done with ASP.NET Core’s built-in dependency injection.
Change the middleware’s Invoke method signature to add an IServiceProvider parameter (IServiceProvider serviceProvider). Then, we can use the IServiceProver.GetService API to retrieve service types that the user has registered in the ConfigureServices method of their Startup.cs file.
All together, the call to invoke the operation (replacing the ‘todo’ back in our Invoke method) should look something like this:
Encoding the Response
Finally, with a response in hand, we can use the MessageEncoder specified by the user to send the object back to the caller in the HTTP response. Message.CreateMessage requires an implementation of BodyWriter to output the body of the message with correct element names. So, add a class like the one below that implements BodyWriter.
Then we can update the middleware’s Invoke method (replacing the final ‘todo’) to create a response message (if the operation isn’t one way) and write it to the HTTP context’s response.
And that’s it! You have written custom ASP.NET Core middleware for handling SOAP requests.
Testing it Out
Now that our custom middleware actually works with service types, the simple test app we created before will need to be updated. We’ll need a simple service type to call into. If you don’t have one on-hand to test with, you can use this sample:
The UseSOAPEndpoint call we added to the Configure method in our test host’s Startup.cs file will need updated to point to this new type: app.UseSOAPEndpoint<CalculatorService>("/CalculatorService.svc", new BasicHttpBinding());. Note that we’ve also created an HttpBinding (to get a message encoder from). To use BasicHttpBinding, we will need to add a reference to the System.ServiceModel.Http contract in the test app’s project.json file.
Also, since the instance of our service is created with dependency injection, the following line will need added to the ConfigureServices method in our host’s startup.cs file: services.AddSingleton<CalculatorService>();
If you have a WSDL for your test service, you can create a client from that using WCF tools. Otherwise, create a client directly using ClientBase<T>.
Here is a simple client I created (as a .NET Core console application) to test the middleware and host (be sure to reference System.ServiceModel.Http and System.ServiceModel.Primitives in the project.json file):
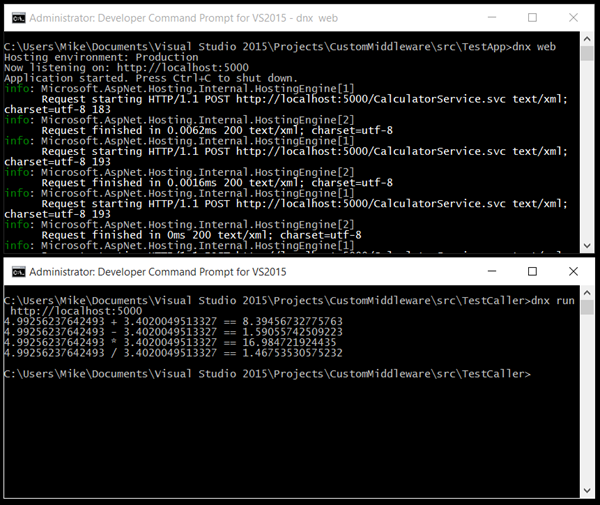
Launch the test host and point a test client (like the one pasted above) at it to see ASP.NET Core handle a SOAP request with our custom middleware!

Using a network monitoring tool like Wireshark or Fiddler, we can observe the requests and responses.
Request from sample:
Response from sample:
Conclusion
I hope that this article has been helpful in demonstrating a real-world case of custom middleware expanding ASP.NET Core’s request processing capabilities. By creating a constructor that took the middleware’s dependencies as parameters and creating an Invoke method with the logic of deserializing and dispatching SOAP requests, we were able to serve responses to a simple WCF client from ASP.NET Core! SOAP handling middleware is just one example of how custom middleware can be used. More details on middleware are available in the ASP.NET Core documentation.

The snippet texts are not being loaded after the change of page design.