

Earlier this year, I wrote about an update to the roadmap for F# and .NET Core. I had mentioned that there were a number of things you could build with F# and .NET Core today, such as web services. In this post, I’ll walk through building a web service with F# and .NET Core 2.0 using the Giraffe library.
It’s also worth noting that Giraffe is not the only technology you can use to build web APIs. Suave and Freya are two other great technologies that can be used on .NET Core. I encourage you to try each of them and see which you prefer.
A complete application shown in this post is available on GitHub.
Overview of Giraffe
Giraffe allows you to write web API routes in a functional style. Although F# is fully supported in ASP.NET Core MVC, Giraffe has a different technical philosphy which takes advantage of multiple F# features, such as higher-order functions, partial application of arguments, and F# Types.
Additionally, Giraffe sits atop the Kestrel HTTP Server, which is the same underlying technology that ASP.NET Core uses. This means that services written in Giraffe will have comparable performance to services written with ASP.NET Core MVC.
Creating the Giraffe project
To get started with Giraffe on .NET Core 2.0, you’ll need to ensure you have the .NET Core 2.0 SDK installed. Next, enter this into your terminal:
dotnet new -i "giraffe-template"
This will install the Giraffe template for you, and you’ll see it in the list of project types when you enter dotnet new into the terminal.
Next, create a new giraffe project:
dotnet new giraffe -o GiraffeSample
This will place the template in a new folder called GiraffeSample.
Inspecting the code
In this example, I’ll use Visual Studio Code with the Ionide-FSharp plugin to explore and edit the project. If you don’t have it installed already, you can learn how to do so in our official documentation.
Open Visual Studio Code in the newly created project by navigating to it and entering the following in the GiraffeSample directory:
code .
To get IntelliSense for this project, enter dotnet restore in your terminal. Red squiggles in the editor will go away after this is completed.
There are two relevant files here:
GiraffeSample.fsproj– This is the project file. If you open it, you’ll notice F# source files listed alongside package dependencies. This is where new files, project references, and package references are added.Program.fs– This file contains the entry point of the application, setup code to bind API routes to the Kestrel HTTP server, and the API routes themselves.
The rest of the scaffolded files and folders can be safely ignored.
Here is the Program.fs file scaffolded by the template in its entirety:
Upon inspecting Program.fs, you’ll notice three major regions:
- The Web App. This contains the web API routes that we’ll be adding to later.
- The Error Handler. This logs exceptions that can occur on the server and configures the HTTP 500 returned.
- Setup. These various functions configure the error handler, configure services for ASP.NET Core, configure application logging, and perform setup to allow the web app to run on Kestrel.
The best way to run this app while developing is by entering dotnet watch run in your terminal. This will start a process which watches for changed files on your machine, recompiles the source files, and restarts the web server. If you open your browser to http://localhost:5000, you’ll see “Hello World, from my Giraffe App!”.
Let’s take a look at some of the syntax. The most important section for this blog post is the web App.
This is known as “Combinator-based Routing”. There are four important pieces here:
- The
choosefunction, which defines expressions that can be evaluated based on input. - The
GETfunction, which represents routes which are HTTP GETs. - The
setStatusCodefunction, which allows you to define the behavior for a given HTTP status code. - The
>=>operator, which chains together expressions.
Let’s walk through each one.
The choose function is at the core of how routes are defined. If you hover over it, you’ll see the following type signature:
val choose : handlers:HttpHandler list -> next:HttpFunc -> HttpFunc
This is saying that choose is a function which takes two parameters as input: an F# list of HttpHandler, and an HttpFunc. It then produces an HttpFunc. The first parameter, the F# list of HttpHandler, is specified after the choose function by [] (an F# list), with HttpHandler functions inside. The behavior of choose is simple: a running web application will iterate through the list of HttpHandler functions to find one which matches the incoming request.
If you hover over GET, you’ll see that is of type HttpHandler. No surprises there! All this does is filter all HTTP GET requests into the next choose function.
The setStatusCode function is a fallback: if an incoming request uses a route which isn’t defined, the above code will set the response to a 404, with the text “Not Found”.
Finally, the >=> operator (known as the compose combinator), is what chains everything together. The GET handler is composed with an inner choose combinator, which defines API routes.
Adding more routes
Let’s add two more routes. Replace the webApp function with this one below:
When you save Program.fs, the .NET watch tool will notice your changes, recompile your application, and re-run the web server. You can navigate to each route (“localhost:5000/hello-json” and “localhost:5000/goodbye-xml”) to see the JSON and XML returned. The json and xml functions are built into Giraffe so that you don’t need to serialize things yourself.
Extending the API to add and find restaurants
At Microsoft, we’ll often gather in small groups and go out to lunch together. However, people have different preferences and dietary requirements, so the task of finding a suitable place to eat can take some time. Let’s solve that problem.
As a reminder, the entire source code (and database) is available on GitHub. Clone the repository or download the code to follow along.
Database and types used in the API
First, let’s establish the source of the data. I’m choosing SQLite. I’m a big fan of SQLite. It’s perfectly suitable for a basic web API like this, extremely simple to configure and use, and easy to develop for. It’s also completely free! When building a more robust production system, you’ll probably want to use other database technologies (such as MSSQL, MySQL, and PostgreSql), as SQLite struggles under moderate load in an environment such as a web service. But for something which would see very little request activity, it’s quite suitable.
Let’s create a new SQLite database with a single table:
The database file (I called it Sample.db) can then be saved in the root directory of the project. This is an easy place to store it.
Next, let’s define some simple types for our domain, in a new file called LunchTypes.fs. First, create the file, and add it to the project file (.fsproj). To add this to the project, simply add the following line to the project file in the ItemGroup section where Program.fs is. Make sure to add it above Program.fs:
Now, add the following code:
The first is a class type which corresponds to the table schema in the database. The second type is an F# Record, which will optionally contain pieces of data that we can use to query the database with.
At the time of writing, Type Providers are not yet available on .NET Core. Once they are, the LunchSpot class will no longer be necessary to interact with a SQL database.
Building the Web API
Next, let’s define the shape of the API:
There’s a little bit to unpack here. I’ll start at the bottom.
An HTTP GET will retrieve lunches (more on this later), and an HTTP POST will submit a new lunch to be added to the database. Note that there is no choose used here: this is because there is only one route per HTTP action; thus, there is no need for choose. Each of the routes are composed with a handler function via the >=> operator. Let’s take a look at them.
The first handler, handleLunchFilter, is defined as such:
It takes in an HttpFunc and an HttpContext as its parameters. This is how you “plug in” custom functionality in the HTTP pipeline, and it allows the handler to compose via >=>.
The body of the handler is quite simple. The first line takes values out of the query string and binds them to an instance of the LunchFilter type defined in our domain. The second line passes that filter to the data access layer, which will then query the database for the set of LunchSpots. The last line will serialize those into JSON, then send that JSON back as a response. The syntax, <function> input next ctx is how you “align” your handler with the HTTP pipeline.
The second handler, handleAddLunch, is defined as such:
Note that the “shape” of this handler is the same as handleGetLunches – it takes in an HttpFunc and HttpContext as its parameters. Because this is a handler in the HTTP pipeline, it must conform to this shape.
If you’re not familiar with Computation Expressions in F#, don’t worry! They’re quite easy to deal with. All this one does is compute the body as a .NET Task.
The let! keyword, in this context, is equivalent to saying, “Compute the Task<‘T> expression on the right-hand side, and give me the T back when it’s done”. It’s non-blocking. The return! keyword is shorthand for:
The return keyword wraps the result as a Task<'T>. This allows the entire expression to be treated as a Task<'T>, which will eventually be unwrapped by a lower level of ASP.NET Core.
In this case, the request has JSON in its body. The handler will deserialize that JSON, add it to the database, and send a response with some nice text in the body. All of this will happen as a Task<'T>, and will be scheduled and awaited by ASP.NET under the covers.
The data access layer
Finally, I’ll define some functions for interacting with our database. I’ll actually use two different approaches: getLunches will use the NPoco ORM, and addLunch will use Microsoft.Data.Sqlite directly. In a real-world application, you would likely not mix technologies like this. I’ve done so here to demonstrate that there is already an ecosystem of libraries that you can use for these kinds of tasks with F# and .NET Core 2.0 today. The choice of data access technologies are large, and I recommend that you explore each and choose which works best for you.
First, add the NPoco and Microsoft.Data.Sqlite packages:
dotnet add package Microsoft.Data.Sqlite
dotnet add package NPoco
Next, create a new file called DataAccess.fs, and add it to the project file, in between Program.fs and LunchTypes.fs:
Now, use the following code:
If you’re developing under the dotnet watch un tool, you’ll need to restart it so that the dependency on NPoco is picked up.
This data access layer is fairly straightforward. getLunches calls getLunchFetchingQuery, which builds a SQL query based on information in the filter record. The code to do that isn’t the prettiest in the world (interfacing with a SQL database is rarely pretty), but it’s flexible and easy to debug. It’s also worth noting that SQLite does not support Stored Procedures. If you were to use databases like MSSQL, PgSQL, or MySQL, the above SQL expressions would likely be Stored Procedures. The sql query defined above might actually be a Stored Procedure in a different SQL database.
The SQL query is then sent to the database, and the result is deserialized as a set of LunchSpots. When we complete Type Provider support for .NET Core, data access for relational databases via the SqlProvider will make these kinds of operations very easy and pleasant to write.
The addLunch function uses Microsoft.Data.Sqlite directly, mostly for demonstrative purposes. If you’re familiar with ADO.NET, this code should look very familiar. Note that the |> ignore construct is used a lot here. That is because the ADO.NET methods all return a value. Return values are not implicitly discarded in F# and will produce a warning unless you explicitly ignore them.
Running the app and debugging it
If you’ve been using dotnet watch run, you should already have a running application bound to port 5000 already. If not, you can use either dotnet run or dotnet watch run to start the web server. For testing out GETs and POSTS, I recommend using Postman. It’s free. Postman makes it very easy to define a JSON body for the POST, and it also returns pretty-printed JSON by default.
It’s also very easy to debug the app in Visual Studio Code. To debug, you’ll need to do the following:
-
- Install the C# plugin. It’s the only way to get the .NET Core debugger right now.
- Click the Debugging icon on the right-hand side of Visual Studio Code.
- Click the Gear icon at the top, and select “.NET Core”.
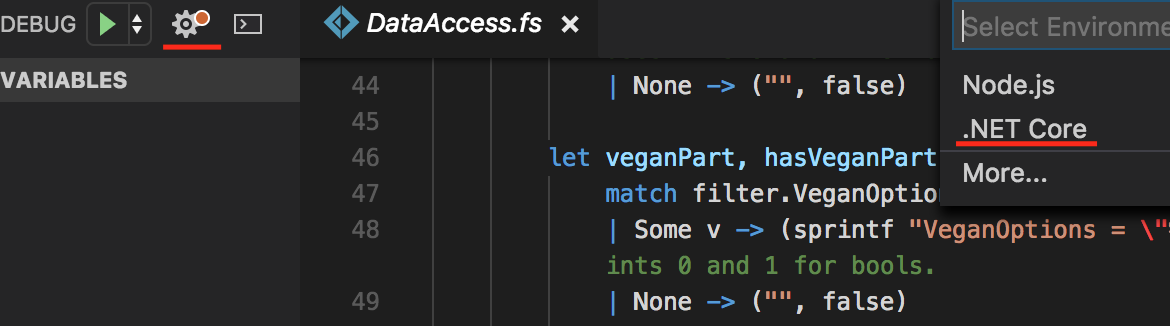
-
- Under the “program” entry, add the path to the
.dllfor your app. In my case, it’s “${workspaceRoot}/bin/Debug/netcoreapp2.0/GiraffeSample.dll”. - Press the Play button. When prompted by the error message, press “Configure Task Runner”.
- Under the “program” entry, add the path to the

- Select .NET Core
- Press the Play button again.
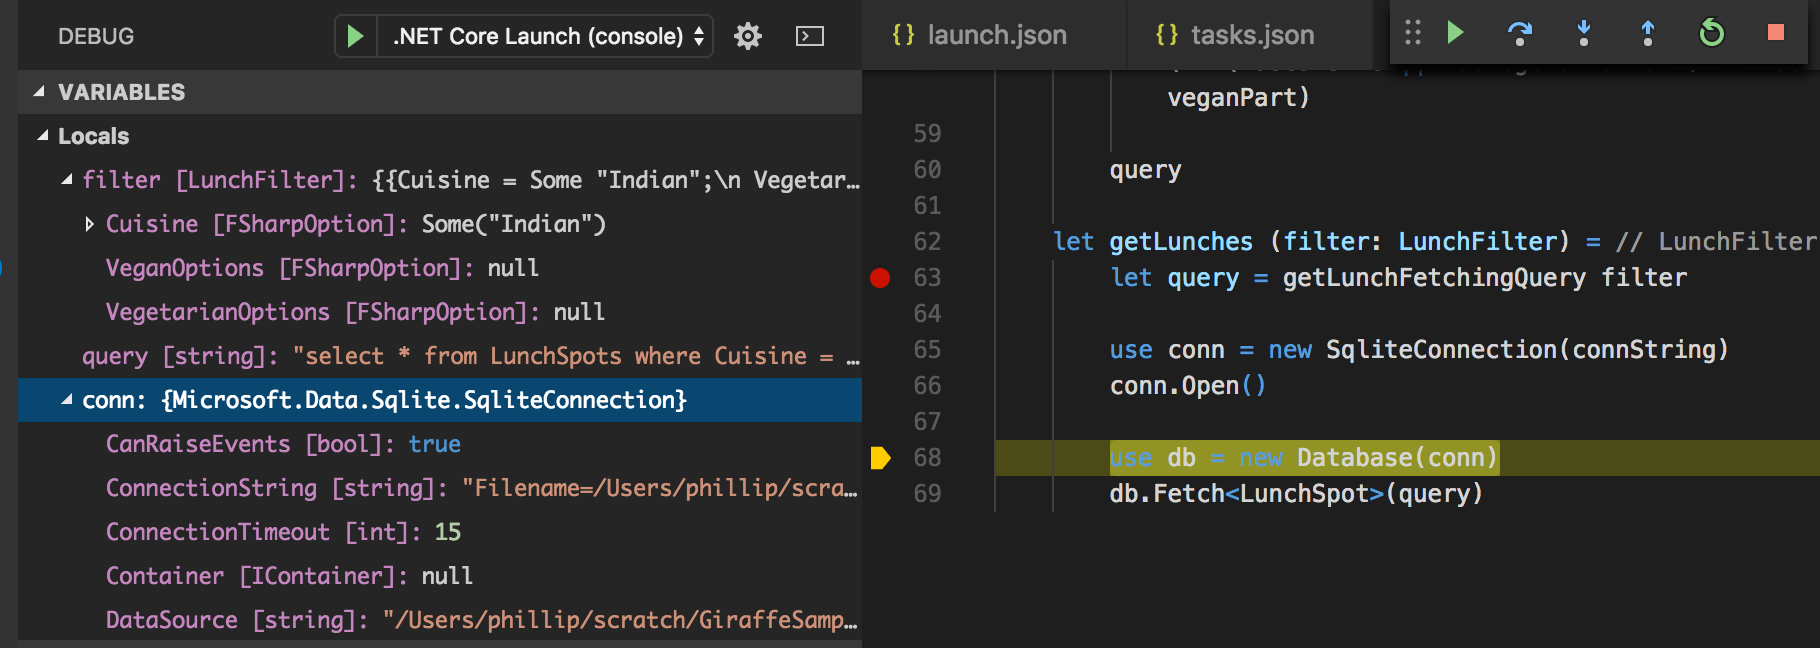
Now, you can debug with the .NET Core debugger:
Wrapping up
This post covered quite a lot of concepts! Let’s quickly summarize:
- There are multiple technologies available for building web services with F# on .NET Core today. I used Giraffe for this post.
- Giraffe has some functional idioms that differ quite a bit from ASP.NET MVC.
- Data access (in this case, with SQLite) is quite easy to do with F# and .NET Core. There are multiple options for access data here.
- F# has some powerful features, such as Computation Expressions, that allow you to pack a lot of power into a small amount of code.
Lastly, this is all very easy to put together. All you need to do is install two packages on top of the Giraffe template (Microsoft.Data.Sqlite and NPoco), and all pieces of this application are very lightweight in terms of concept count. In general, F# on .NET Core has what I like to call a “Linear complexity curve”. What I mean by that is that it’s easy and straightforward to get small things done, and as the problem space grows, the complexity you must deal with grows linearly. Plugging into the HTTP pipeline to add custom functionality follows a small set of documented rules. Adding a data access layer just means adding a few packages and writing some functions which access the data source with SQL (Note: with a database such as MSSQL, PgSQL, or MySQL, these can be Stored Procedures instead of stringified SQL). Furthermore, F# has additional language features that are flexible in the face of change, easy to extend, and don’t require much code. It’s a great fit for building production systems.
In total, this project has the following line of code statistics (including whitespace, formatting, and comments):
- Project file: 28 lines
- LunchTypes.fs: 16 lines
- DataAccess.fs: 86 lines
- Program.fs: 77 lines
That’s small enough to easily keep in my head (which is important, because I have trouble keeping a lot in my head), and there’s no resorting to magic frameworks, either. F# is ready for web services on .NET Core 2.0 today, and it’s only going to get better. Download the sample code and play around with it to see what else you can build!
0 comments