
In April 2025, we announced the deprecation schedule for legacy TFVC check-in policies. This change was required due to limitations in how those policies were previously implemented and stored. The old policies have been marked as obsolete, and you can replace them by selecting the equivalent updated policy.
We are currently in Phase II of this transition. During this phase, you can still replace obsolete policies through Team Explorer. When attempting to check in, you’ll also see a notification indicating that your configuration is out of compliance and still using obsolete policies.
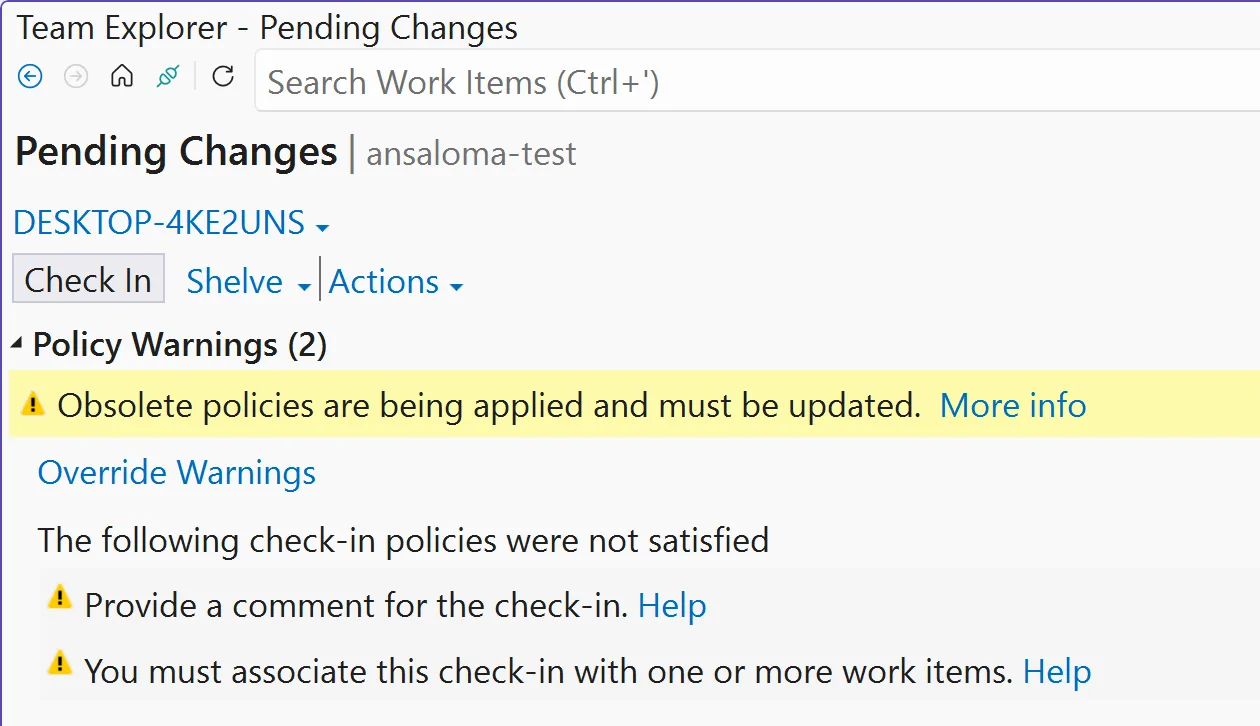
The final phase of this transition is about to be completed. Once it takes effect, any remaining obsolete policies will block all users of the repository from checking in changes. These policies will also no longer be visible or manageable through Visual Studio Team Explorer.
If you are still using obsolete policies at that point, you will need to run a C# code snippet to remove them and restore compliance.
📌 Update Policies with Visual Studio
If you are able to do so, removing the obsolete policies through Team Explorer takes just a few minutes.
- Open Visual Studio
- Connect to the project
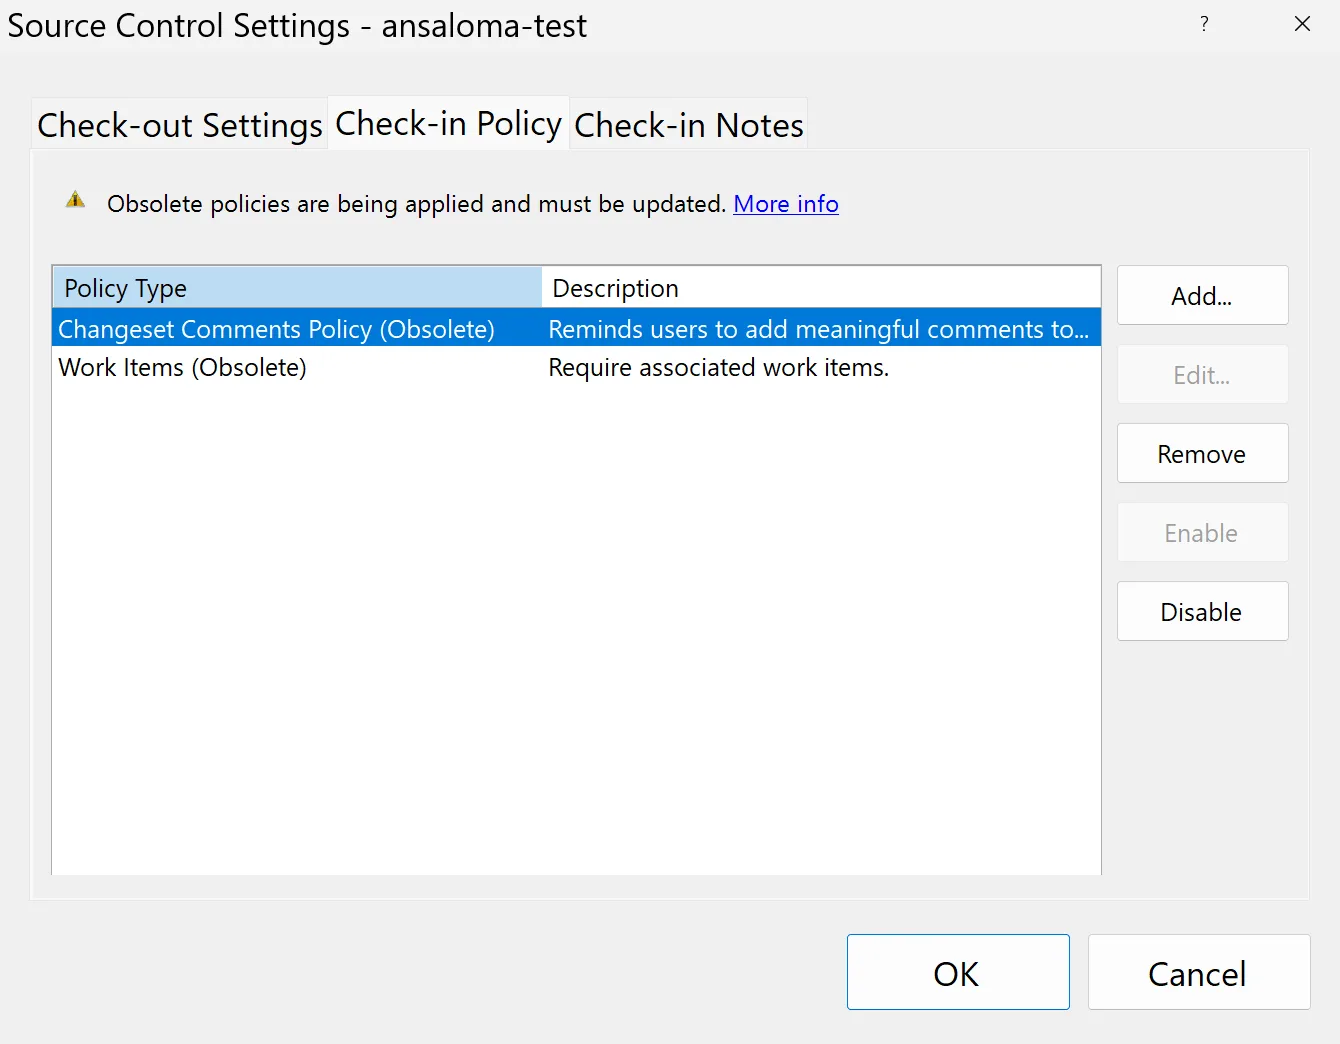
- Go to Team Explorer > Settings > Source Control
- Click on the Check-in Policy tab
-
Add new policies and remove obsolete policies

👨💻 Update policies through C# app
One of the challenges in updating how we store policies is that TFVC is a legacy system. This makes it difficult to deprecate policies without disrupting customers or introducing higher-risk changes to older code paths. This situation highlights the complexities that can arise when updating legacy components. When these policies are deprecated, they are removed from the Team Explorer experience but remain in storage and must still be manually removed.
We strongly recommend replacing any obsolete policies now to avoid disruption. If it is too late and you are blocked, you can create a small C# application and run the provided code to remove the policies and unblock yourself.
Please note that you must be a Project Administrator in order to run the command and remove the obsolete policies.
- Open Visual Studio
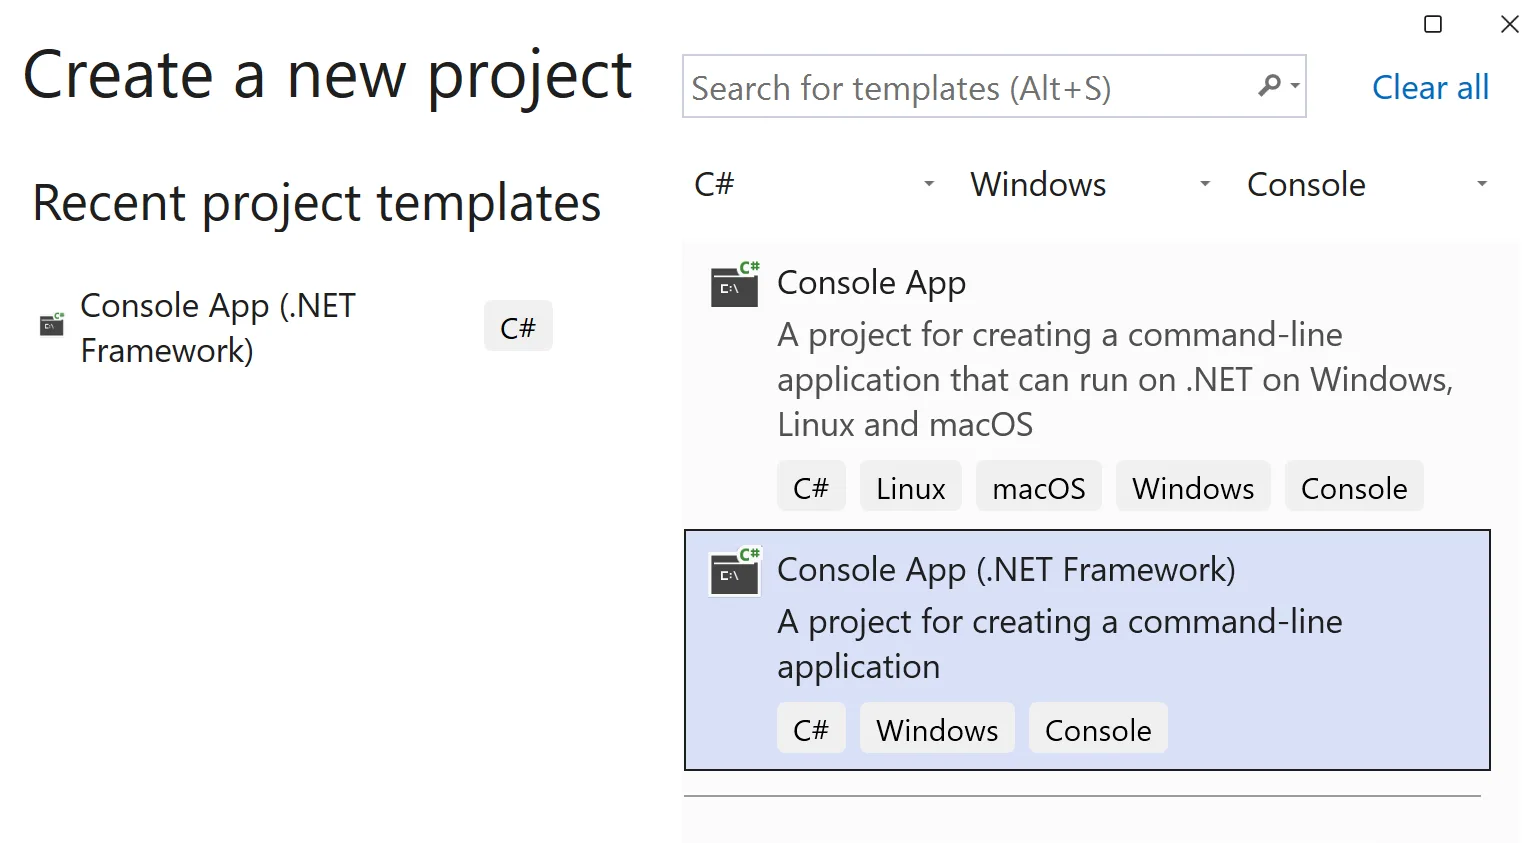
-
Create a new C# Console App using .Net Framework

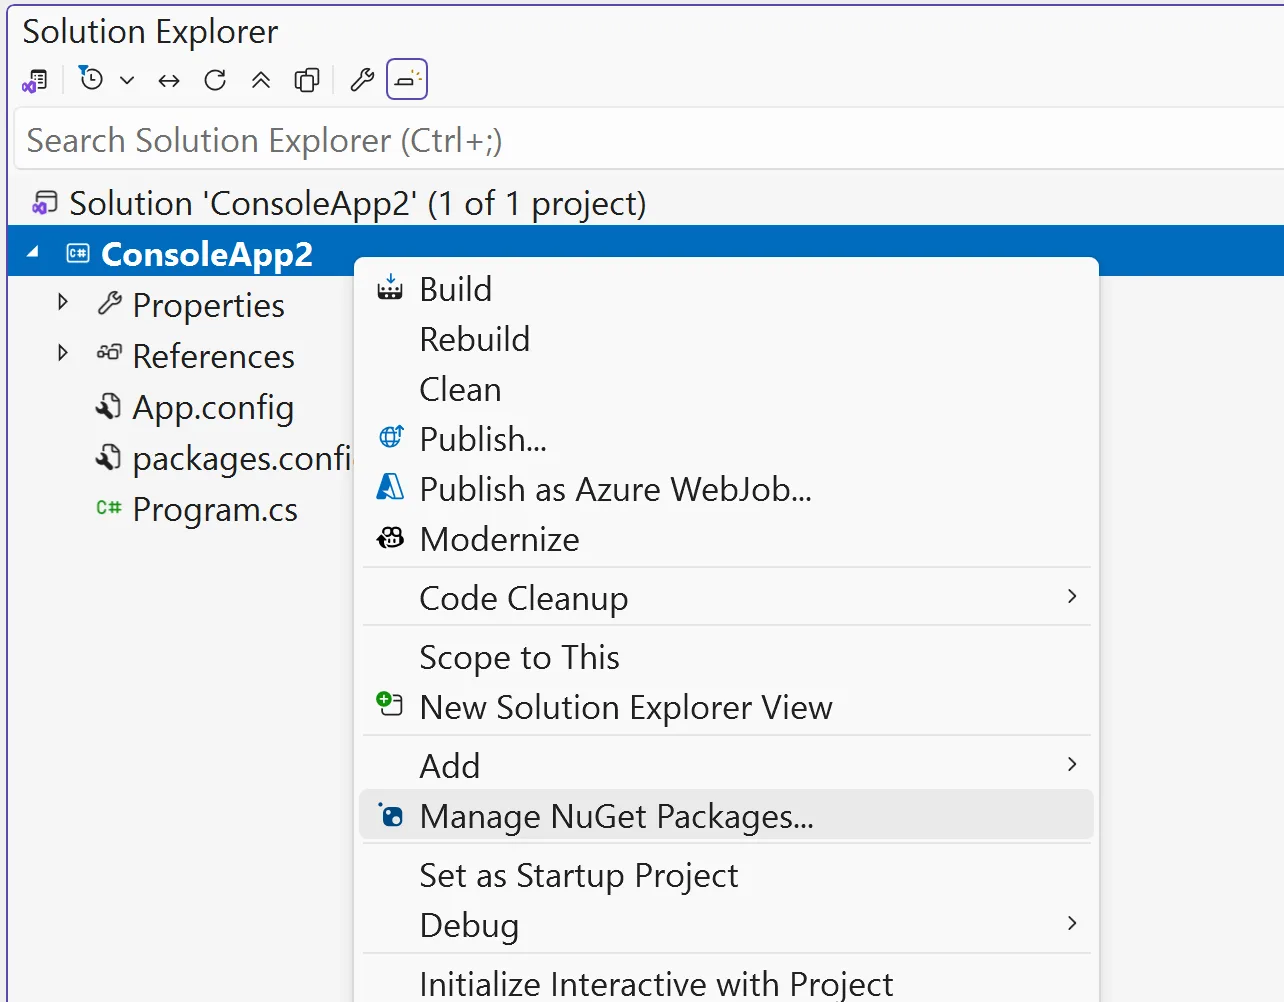
-
Open Solution Explorer. Right click on the project and add select Manage NuGet packages.

-
Search for
Microsoft.TeamFoundationServer.ExtendedClientand install. -
Open the
Program.csfile and add the following code into the Main method.var collectionUri = "https://contoso.visualstudio.com/"; var currentProjectName = "fabrikam"; using (TfsTeamProjectCollection tpc = new TfsTeamProjectCollection(new Uri(collectionUri))) { var versionControlServer = tpc.GetService<VersionControlServer>(); TeamProject teamProject = versionControlServer.GetTeamProject(currentProjectName); teamProject.SetCheckinPolicies(null); } -
Update the
collectionUriandcurrentProjectNamevariables to match your environment. -
Run the project.
When the code begins to run, you may be prompted to sign in using the same identity you use for Azure DevOps. After signing in, the script will execute and remove the obsolete policies.
Once the process is complete, you can reopen Visual Studio to add policies for your project.
👟 Walk me through it
To learn more about migration and dealing with custom policies, be sure to read our migration guide.
We’ve also put together a short video to guide you through both options for removing obsolete policies.
Just a clarification: the project should .net framework based? I get different errors when the project was defaulted to .net based.
Also, will there be any plans sometime in future to have the Microsoft.TeamFoundationServer.ExtendedClient nuget package support .net ?
Per the info in the blog post, you need to create a .NET Framework app. But you should not need to do that now. You can just go in and remove them manually via VS. The app is only relevant once start to rollout on the next phase.