Installing the Advanced Configuration of TFS 11 from the BUILD Conference in Anaheim
I am posting walkthroughs of the the various TFS install wizards for the upcoming version of TFS previewed at the BUILD Conference in Anaheim this week. Installation of TFS 11 is very similar to installation of TFS 2010. You can use the install guide for TFS 2010 to review the current guidelines for install. And you can find the late breaking information about this version of TFS install on the TFS setup forums.
This post covers the advanced configuration option. This is the installation that allows you to change any of the default install options for TFS. The big change here is the addition of SharePoint Foundation 2010 as the default portal for TFS and its hefty hardware requirements that we discussed earlier this week. More on that below.
To use the advanced configuration, you have to have an instance of SQL Server and Reporting Services already installed. You can also use an existing installation of SharePoint, or let the TFS installer lay down SharePoint Foundation 2010. The system requirements for SharePoint are hefty enough to warrant a mention. You have to have 4 Gigabyte of RAM minimum to install. If you only have 4 Gigabytes, the installer complains that you don’t have 10 Gigabytes, but at least you can install. You also need 64 bit hardware and a Quad core CPU. Look here for all the details on SharePoint Foundation 2010 system requirements.
If you want help installing SQL Server for TFS, use this video I created for TFS 2010. The steps are exactly the same. If you want help getting MOSS 2010 ready for TFS, you can use videos I created for installing MOSS 2010 for TFS 2010 or manually configuring it. I created these videos for TFS 2010, but the steps remain the same for this version of TFS.
Get the preview and launch it.
Accept the license agreement and click Continue.
We recommend you enable updates. Click Install Now.
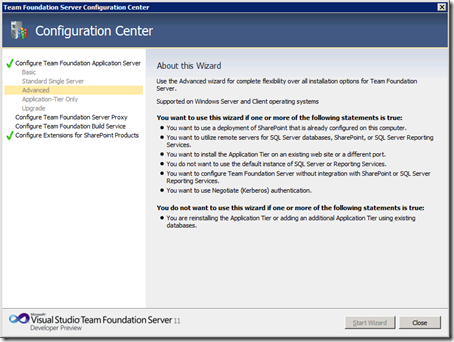
Select Advanced, and then click Start Wizard.
Click Next. Ignore the the "Click here" link on this page. If you opted into the updates earlier, you’ll automatically get the latest updates during install.
Enter the name of the SQL Server running the Database Engine. Click Next.
Enter the account you’ll use for the service account for TFS (TFSService). I’m using Network Service, the default account. Click Next.
You can edit the name of the TFS website, the port it will run on, and the virtual directory. I’m keeping all the defaults. Click Next.
You can skip reporting, but I’m not. Click Next.
Enter the name of the server running SQL Server Reporting Services and click Populate URLs. If it’s a local installation of SQL Server, the URLs appear automatically. Click Next.
Enter the name of the server running Analysis Services. Click Next.
Enter the account you’ll use for the report reader account (TFSReports). Click Next.
You can skip SharePoint, but not me. Click Next.
You can point to an existing SharePoint installation, or you can install SharePoint Foundation 2010 on the same server as TFS. I’m going to install SharePoint. Click Next.
Click the big Install SharePoint Foundation 2010 button to launch the SharePoint installer.
The SharePoint installer dialog appears (pictured left). When it closes, the TFS wizard churns a little more (pictured right). You can tell it’s still working by the little spinning doughnut shape at the top right.
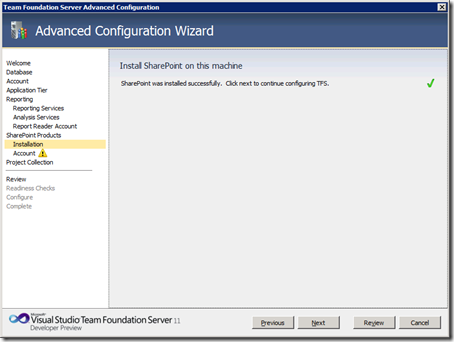
Once SharePoint is installed, you get the success screen. Click Next.
Enter the account to use for the SharePoint Farm Admin. I’m using the same account here as the account I used for the report reader account (TFSReports), but you can use a different one if you want. Click Next.
I’m going to use the default collection name. Click Next.
Review your selections and click Next.
After the readiness checks run, click Configure.
Once configuration completes, click Next.
You’ve succeeded! Click Close.
Note that the Configuration Center shows you have installed TFS and the TFS SharePoint extensions. During a single server install of TFS, the TFS SharePoint extensions are automatically installed. You only have to manually install the TFS extensions for SharePoint if SharePoint is on a server different from TFS.


 Light
Light Dark
Dark
0 comments