
How many times have you been in a situation when you found a bug while doing some ad hoc testing but couldn’t report it because you couldn’t reproduce it again. Or you filed a bug during a bug bash, it was fixed but it reappeared in the software because there was no way you could have remembered to test it again. If you are a software tester, I am sure you would have been in many such situations. But no more worries, Exploratory testing with Microsoft Test Manager is here to solve all such problems.
Exploratory testing, by definition is simultaneous test execution and test design. And Microsoft Test Manager 11 lets you do just that, it lets you explore you application, file rich actionable bugs and simultaneously build up a regression test suite to protect you from any possible regressions in the future. Isn’t that what you always wanted?
Let’s say I have a backlog item that my team is working on and it is now ready to be tested. I want to take a first shot at it and verify its intended behavior. For this, I launch the Microsoft Test Manager and go to Test->Do exploratory testing. This view shows the list of product backlog items that have the same area path and iteration path as that of the current test plan.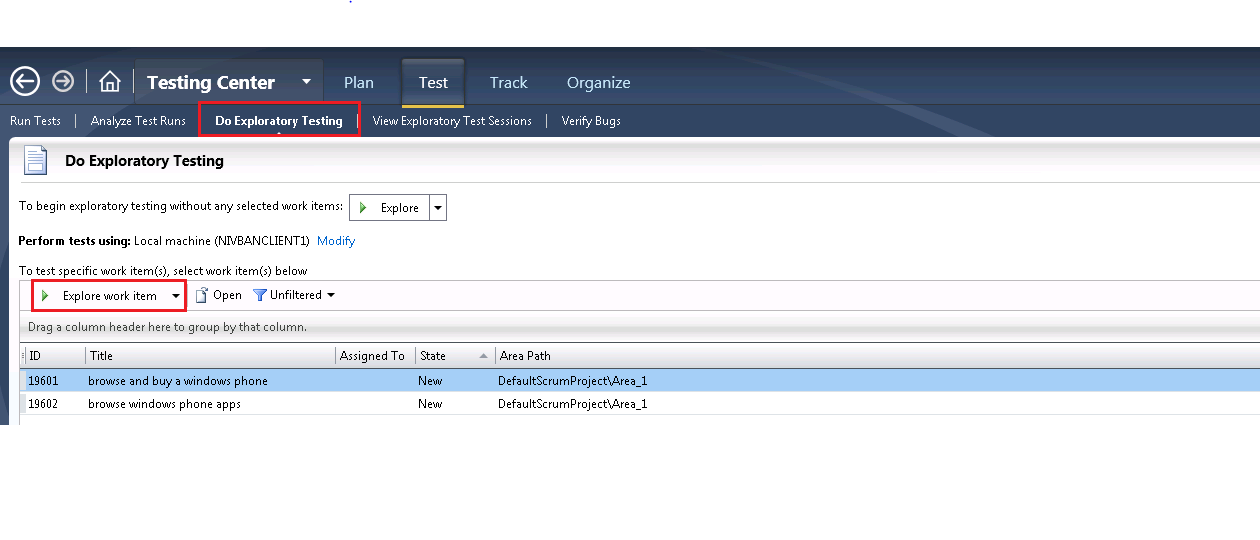
I could click on the ‘Explore’ button to do some undirected exploratory testing. But if I want to associate or scope my testing effort to a product backlog item, so as to get automatic traceability, I select my backlog item “browse and buy a windows phone” and click the ‘Explore work item’ button. This launches the exploratory testing window, in context of my selected backlog item.
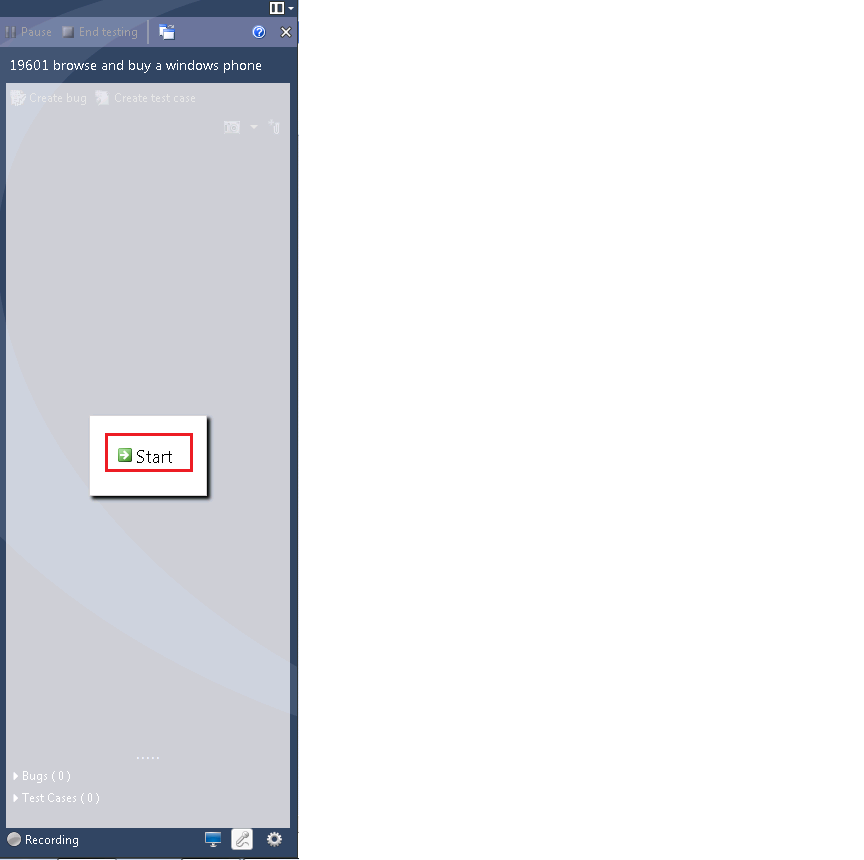
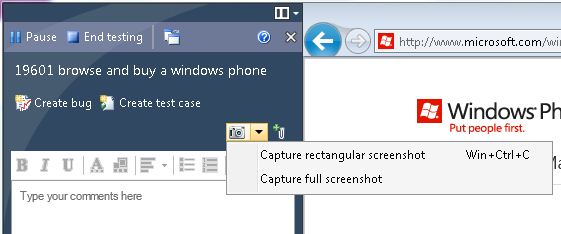
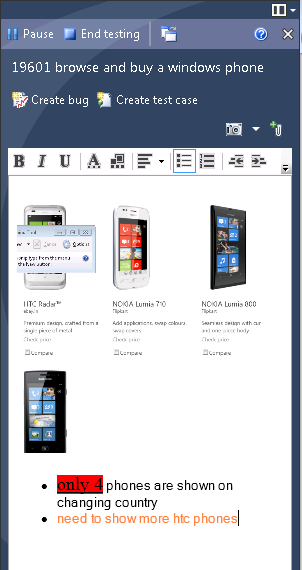
I hit ‘start’ and start testing my application, by performing actions based on the backlog item in context. I go to the windows phone website and start looking for some options for buying a windows phone. After a few actions I think that I have hit a bug because it is not showing me enough number of phone options. Before doing anything else I want to take a screenshot so that I don’t lose the repro. I take a screenshot by clicking on the camera icon in the toolbar and dragging and selecting the area that I want to capture. I also add rich text formatted comments along with it, as shown below.
I could also attach log files or any other files that may contain any useful information for identifying the bug, by clicking on the paper clip icon in the toolbar. Once I am done with all this, I click on the Create Bug’ button which launches the new bug work item form. And you know what, it has already prepopulated all the repro steps, comments, screenshots, attachments, video recording, etc. I just need to type a title and save the bug. Yay!!!
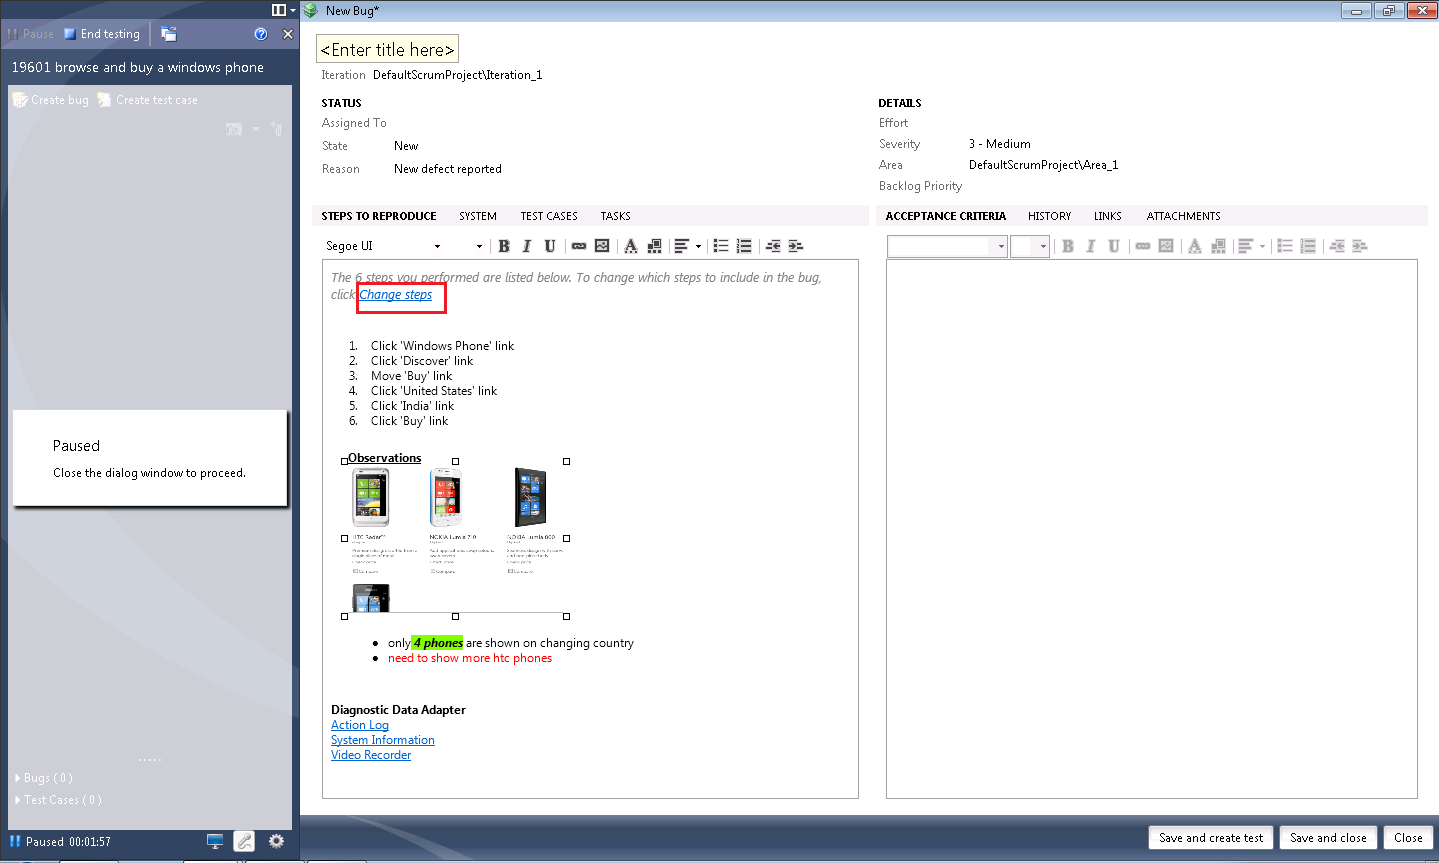
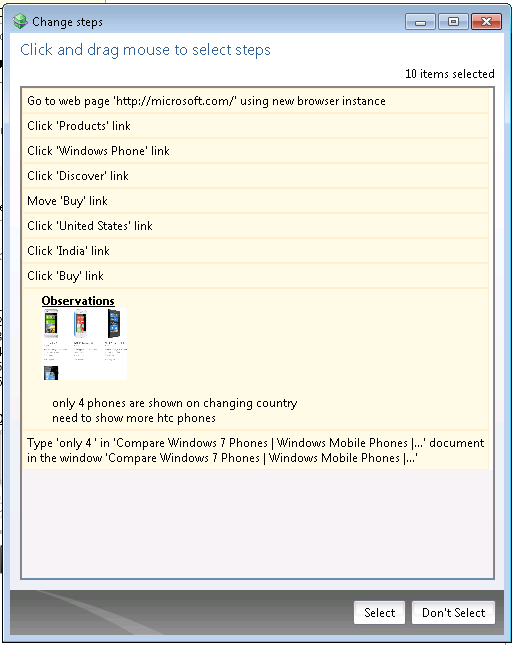
If I want to change the steps’ selection in the bug, I can click the ‘Change steps’ link that will launch the Change Steps dialog. Here I can select the exact set of steps that I want to show in my bug form and click on Select.
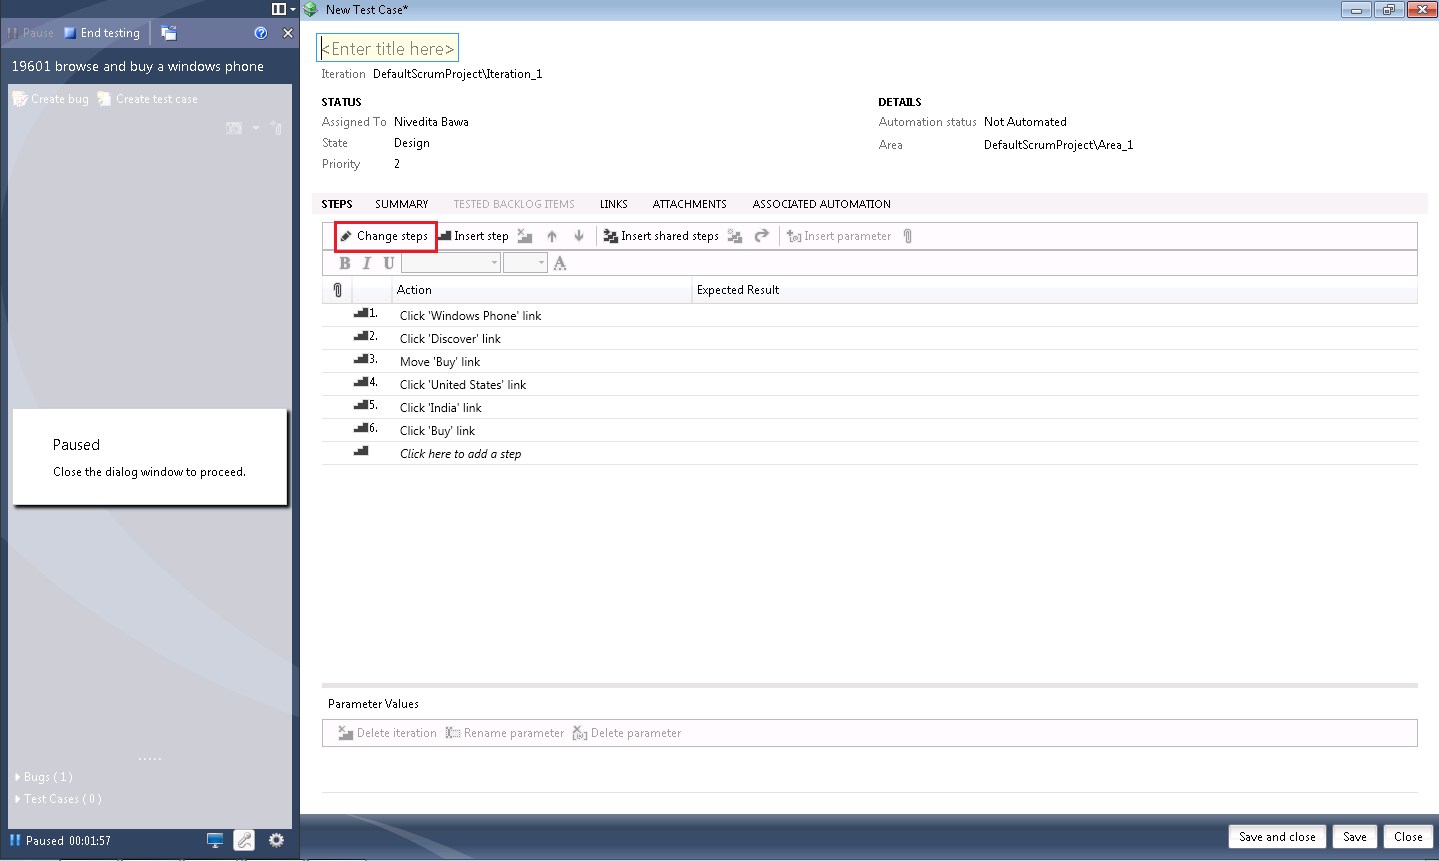
Once I have done ‘Save and Close’ on the bug, I get back to the exploratory testing window. I do some more actions and realize that my application is working fine. I come across an important case that compare option should be shown whenever I click on buy tab – I want to capture this in form of a test case so that it can be tested in future also. I hit the ‘Create test case’ button which launches a new test case work item form. Here also the test steps are already listed, I just need to add a title and then save the test case. I can also click on ‘Change steps’ to change the steps selection as I did for the bug form above.
Once I am done with my testing, I click on the ‘End testing’ button which takes me back to the test manager. Here it shows me a nice summary of my exploratory test session. It lists the bugs and test cases created, the screenshots, comments, attachments, and many other details. I could also link the bugs I created to existing test cases, or create new test cases from these bugs.
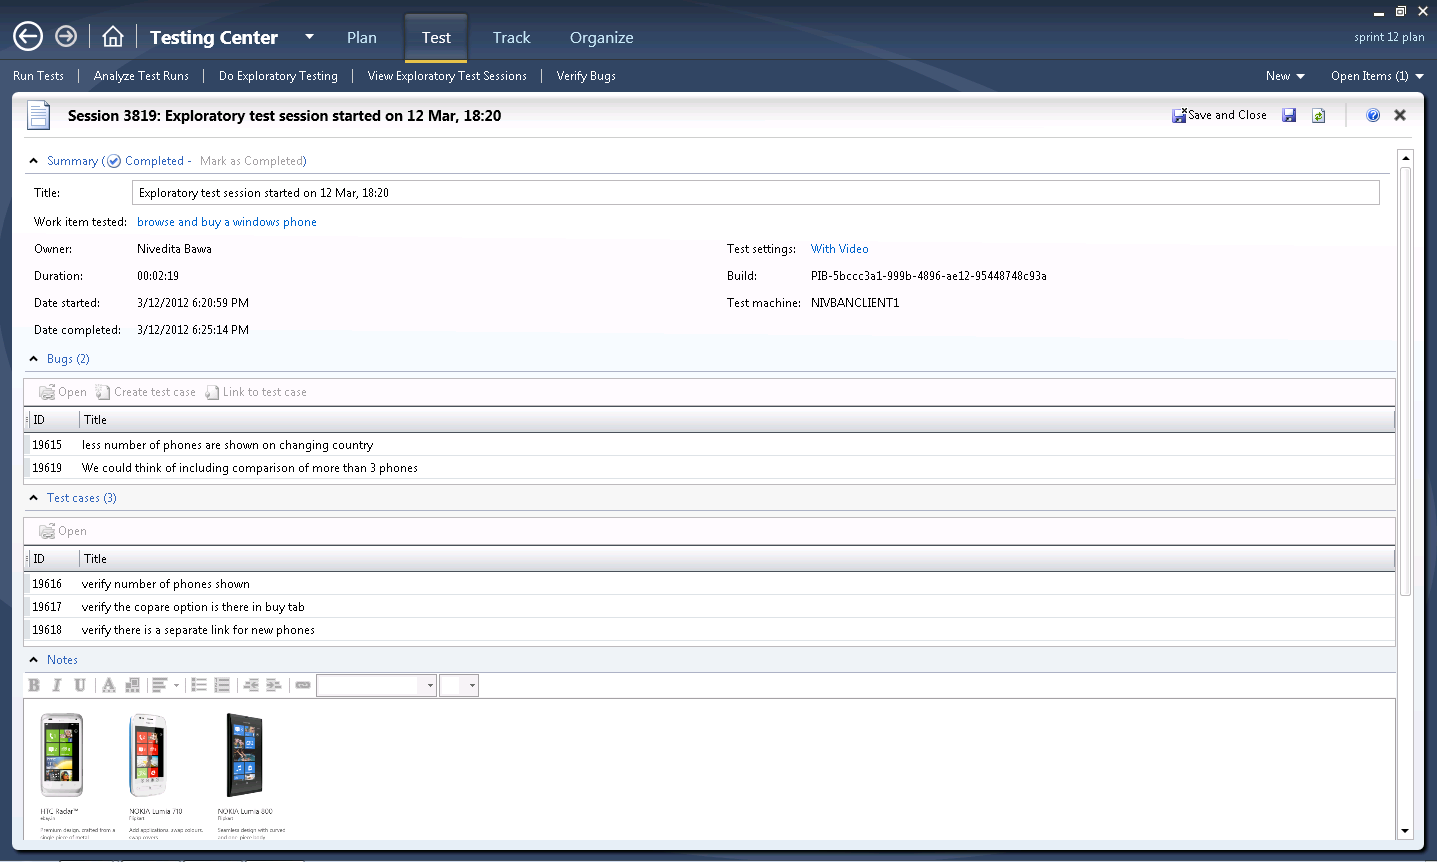
All these work items, i.e. the bugs and test cases that I created, are linked to the parent backlog item that I started with.
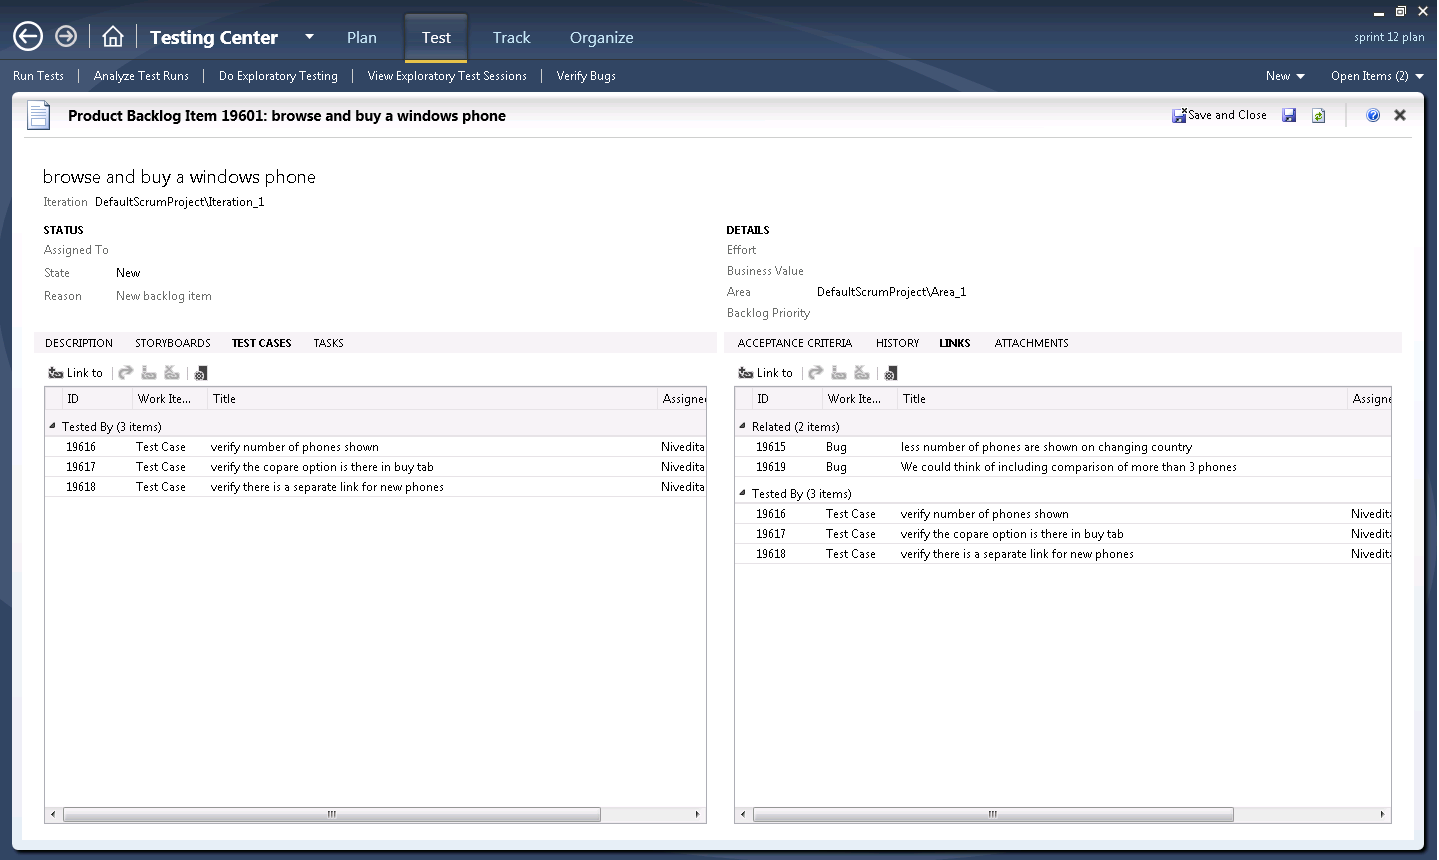
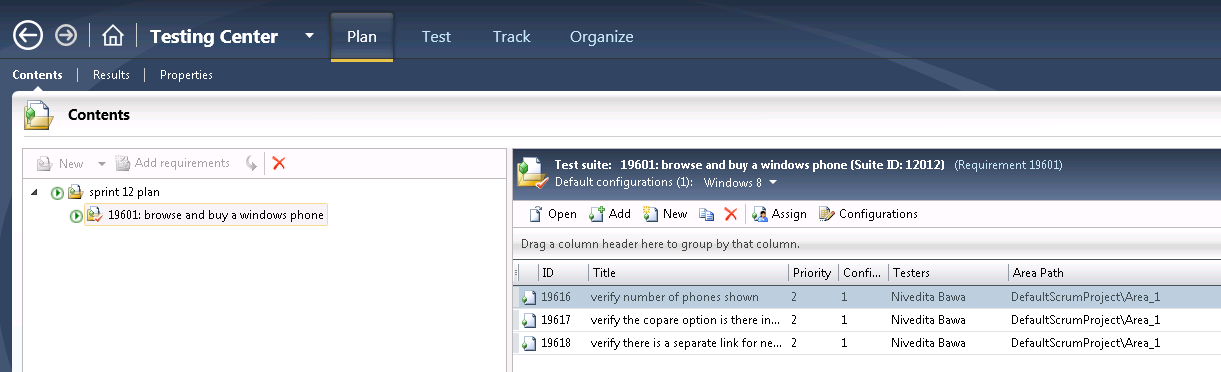
And now when I go back to my Plan, I see that the backlog item that I was exploring has been automatically added to Microsoft Test Manager as a requirement based suite along with the test cases that I created while exploring, already listed under the suite. So without any extra effort, I have already built up a regression test suite for the backlog item that I was testing.
So go ahead, Explore and Enjoy your testing!
0 comments