Deploying to On-Premises Environments with Visual Studio Team Services or Team Foundation Server
I hear this particular question frequently as a reason teams are concerned about adopting Visual Studio Team Services when their applications still run on-premises. The good news is that it is typically a quick walkthrough on how build & deployment pipelines work. I want to give a big thanks to Sachi Williamson from Northwest Cadence for the guest blog post today! — Ed Blankenship
Your company’s apps may not be hosted in the cloud yet for various reasons, such as their configuration, dependencies, or network requirements. That’s okay! What many people don’t know is that you can still take advantage of great tools like Visual Studio Team Services or Team Foundation Server to manage your deployments. You’re probably asking yourself, “how can a cloud SaaS service like Team Services be able to deploy to our on-premises environments?” That’s what we will explore today.
For the core service, your team has a choice to either use Visual Studio Team Services as a completely hosted SaaS service by Microsoft or you can run it on-premises by setting up Team Foundation Server (TFS). When you build and deploy your apps through Team Services or TFS, you use agents to run the build and deployment tasks. Team Services allows you to take advantage of hosted agents for running your build and deployment pipelines. The hosted agents are perfect for many scenarios including your automated build process. However, when you want to deploy on-premises, you will want to run the deployment steps from agents that have access to your on-premises environment. This alternative scenario is enabled through leveraging private agents.
How does an agent communicate with Team Services or TFS?
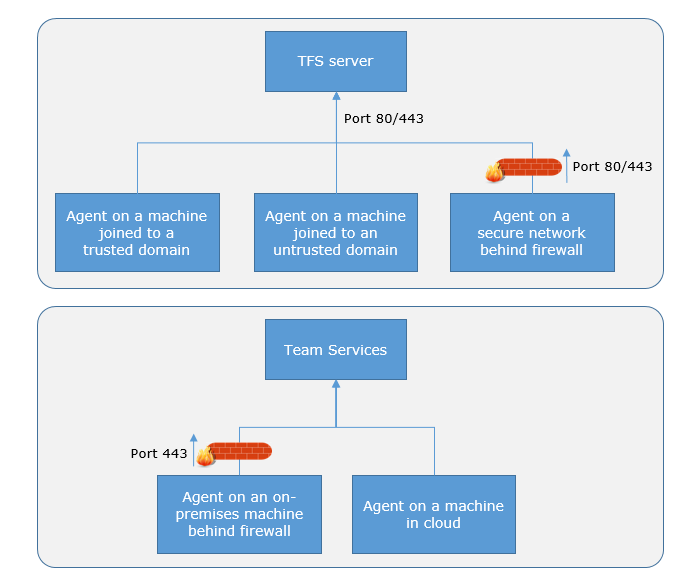
The agent communicates with Team Services or TFS to determine which pipeline tasks it needs to run in addition to reporting log entries and job status. This communication is always initiated by the agent. All the messages from the agent to Team Services or TFS happen over HTTP or HTTPS, depending on how you configure the agent. This polling model allows the agent to be configured in different topologies as shown below. In the Team Services example, you’ll notice we included an additional scenario where you are running a “private agent” in a cloud-hosted virtual machine as well.
How does an agent communicate with target servers for deployment?
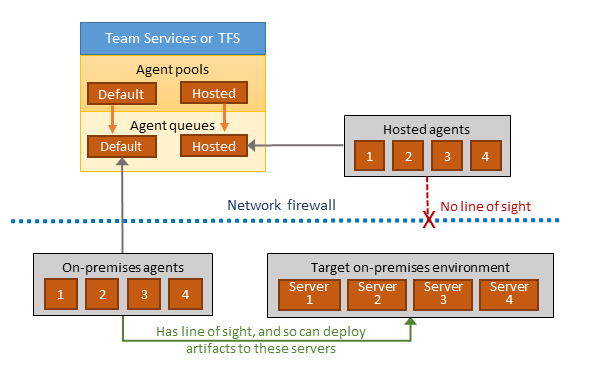
When you use the agent to deploy artifacts to a target set of servers, the agent must have “line of sight” connectivity to those servers. The hosted agents pool, by default, has connectivity to from the Azure cloud to anything else running in the Azure cloud or exposed to the public Internet. For example, you may have an Azure Website that a hosted agent is able to deploy to through endpoints exposed through the Azure App Service platform.
If your on-premises environments do not have connectivity to the hosted pool (which is typically the case because of firewalls), you will want to setup and configure a private agent on servers hosted in your on-premises network. The private agents need to have connectivity to the target on-premises environments where you want to deploy, and also have access to the Internet to connect to Team Services, as shown in the following diagram. If you are using Team Foundation Server, you will connect your private agent to your Team Foundation Server.
To read more on communication and deployment to target servers, check out this documentation.
How do I deploy from Team Services or TFS to on-premises environments?
Build and deployment agents can run on many platforms. There are a few walkthroughs available for setting up your agent on various operating systems:
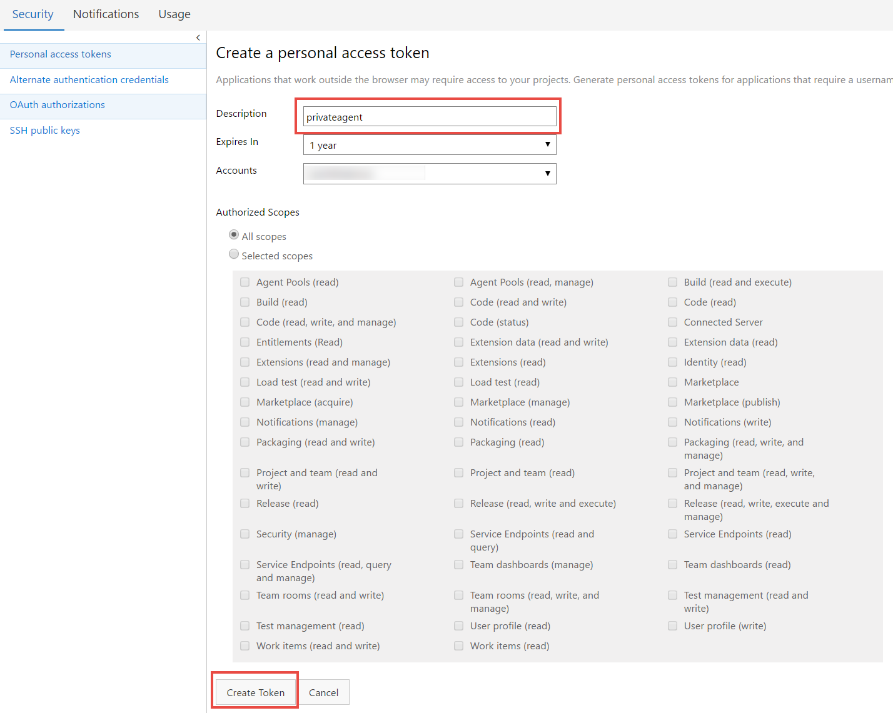
One step that you will need to take is to setup the ability for the agent to authenticate with your Team Services account or your Team Foundation Server. One approach for authenticating is creating a Personal Access Token (PAT).
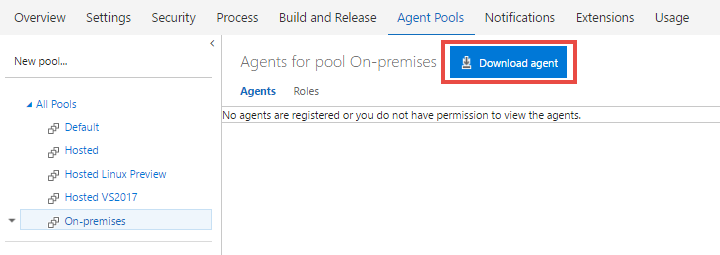
The next step for setting up your private agent is to download and install the agent software on the server you want to run the deployment tasks. Team Services and TFS allow you to group many agents into “pools” which you will use later when configuring the pipeline to decide which pool of agents to use. For this example, you can add your private agent to the “Default” pool or you can create a new “On-premises” pool.

Now you can start editing your release pipeline. In default pipelines, you will notice the “Run on agent” scope for your each of your environments. If you select it, you will see a “deployment queue” option to choose which pool of agents you want to run these deployment tasks on. Since we want to run these tasks against on-premises environments, we should select the “On-premises” agent pool that we created in the previous step.

You can now queue a new release. Once the release starts you’ll notice that it will choose a private agent from the on-premises pool and run any deployment steps on your on-premises network.
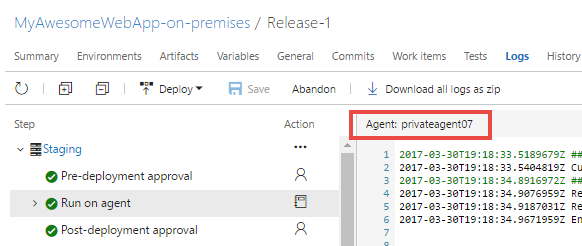
That’s release all there is to it! Whether your environments are on-premises or hosted in any cloud, Visual Studio Team Services and Team Foundation Server make it simple to deploy to any of your environments using private agents.

 Light
Light Dark
Dark
0 comments