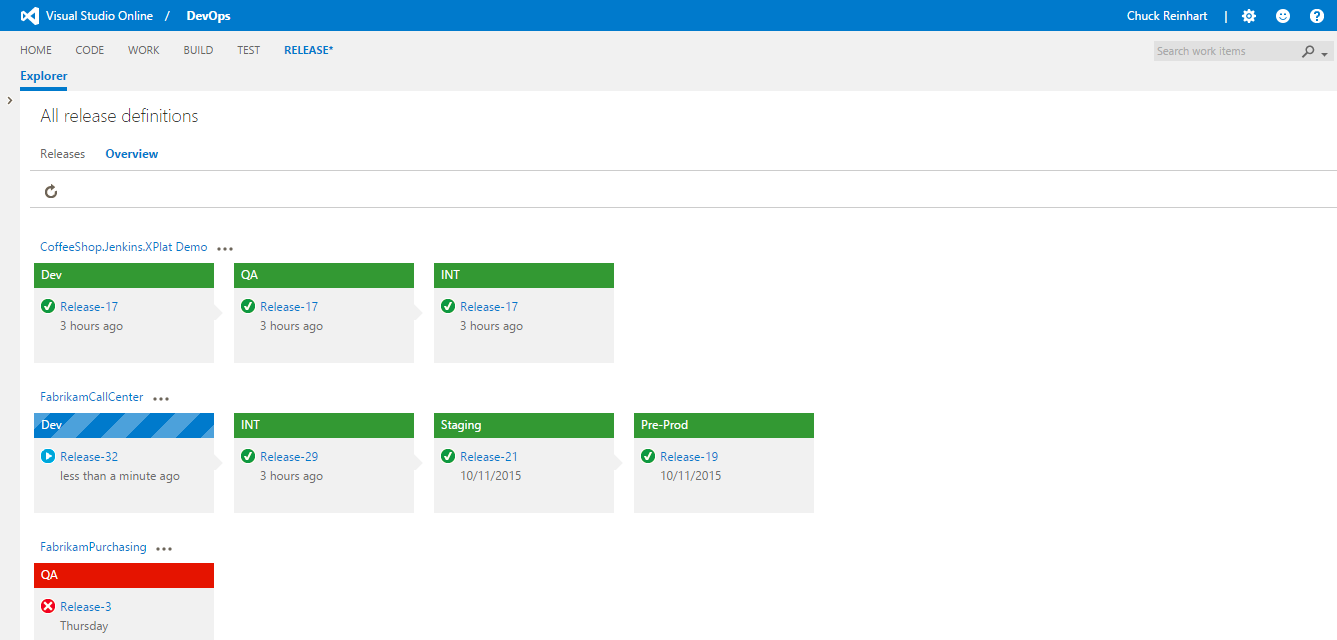
Today at Connect(), we announced the public preview of the new Release Management service in VSTS. This service helps you automate deployment of your application software to multiple environments all the way to production. You can deploy applications to your on-premises servers or to Azure and other cloud platforms. Using Release Management, you can easily setup, visualize, and track the progress of your deployments. You can answer questions such as ‘what’s new in each release?’ or ‘what is the latest release deployed in a particular environment?’
Here’s a quick walkthrough that will get you started with Release Management. This example shows you how to deploy a simple ASP.Net 4.5 website to Azure. You can use Release Management to deploy all of your (.net, Java, PHP, Node, …) apps to cloud or on-premises targets. For more details, refer to the documentation at https://aka.ms/rmpreview.
1. Code
1.1. Create a new ASP.Net 4.5 MVC project in Visual Studio (or choose one that you already have).
1.2. Check-in the project into your VS Team Services Git or TFVC repository.
2. Build
2.1. Connect to your team project in VS Team Services: https://{your_account}.visualstudio.com/DefaultCollection/{your_team_project}
2.2. In the BUILD hub, create a new build definition.
The following sample build definition uses a Visual Studio Build task to produce a zipped web package. It executes MSBuild step with the arguments:
/p:DeployOnBuild=true /p:WebPublishMethod=Package /p:PackageAsSingleFile=true /p:SkipInvalidConfigurations=true
The build definition also contains a Publish Build Artifacts task to create the artifact that Release Management can deploy.
2.3. Queue a new build and make sure that the artifacts are published.
3. Azure
3.1. Navigate to the services tab in your account: https://{your_account}.visualstudio.com/DefaultCollection/{your_team_project}/_admin/_services
3.2. Create a new Azure service endpoint.
Enter a name by which you will refer to the connection. For this example, use Certificate authentication. Download your publishsettings from this URL: https://manage.windowsazure.com/publishsettings. Enter the ID, subscription name, and certificate values from the file and paste them into the Add Azure Subscription dialog box.
<?xml version="1.0" encoding="utf-8"?>
<PublishData>
  <PublishProfile
    SchemaVersion="2.0"
    PublishMethod="AzureServiceManagementAPI">
    <Subscription
      ServiceManagementUrl="https://management.core.windows.net"
      Id="{Copy_and_Paste_into_Subscription_id_field}"
      Name="{Copy_and_paste_into_Subscription_Name_field}"

ManagementCertificate="{Copy_and_paste_into_Subscription_certificate_field}" />
  </PublishProfile>
</PublishData>
4. Release
4.1. In the RELEASE hub, create a new release definition. Choose Azure Website Deployment for the deployment template.
Rename the environment to Dev. You will notice that two tasks have been added to the Dev environment. The Azure Web App Deployment task should have selected the Azure service endpoint that you created in the previous section. Enter the name of the website, as one of the inputs to this task.
4.2. Link an artifact source to the release definition.
In the dialog that opens, set the Type to Build and select the build definition that you created earlier.
4.3.Setup the release to be automatically created when the build completes. In the Triggers tab of the release definition, specify that a new build will automatically trigger the creation of a new release.
4.4. Back in the BUILD hub, queue a new build. Once the build completes, a new release should automatically be created.
The Summary page of the release shows the environments in the release definition and the progress of the release for each one. It also shows the builds, work items, and commits that are part of that release.
4.6. You can browse to your newly deployed website using the URL http://{website-name}.azurewebsites.net.
What next?
- Explore the complete documentation of Release Management service.
- Explore the section on release walkthroughs for more examples on deploying apps.
- Track the section on release notes for exciting features that we roll out every few weeks.


0 comments