
[This post has been created in collaboration with Hasura Inc.]
[On this subject, please also make sure you watch the related Data Exposed episode]
Introduction
Hasura makes data access easy, by instantly composing a GraphQL API that is backed by databases and services so that the developer team (or API consumers) get productive immediately. The nature of GraphQL itself and Hasura’s dynamic approach makes integration and iteration easy.
Hasura’s event engine makes it possible to embrace cloud-native without having to worry about non-functional things scaling, reliability and delivery guarantees. Developers can easily build business logic that publishes and consumes events, that reacts to changes in data or gets scheduled based on time.
The Hasura GraphQL Engine is a blazing-fast GraphQL server that gives you instant, realtime GraphQL APIs over Azure SQL, with webhook triggers on database events, and remote schemas for business logic.
Hasura helps you build GraphQL apps backed by Azure SQL databases or incrementally move to GraphQL for existing applications using Azure SQL.

Figure 1 Hasura architectural diagram
The Hasura GraphQL Engine is open source. You can check out the complete repo here.
A complete application using Hasura and Azure SQL can be found on GitHub here.
In this guide, we will:
- Create and configure a new Hasura application
- Walk through how to integrate your Azure SQL database with Hasura
- Write a Vue 3 frontend application to consume your brand-new GraphQL API.
By the end of this walkthrough, you’ll understand the fundamentals of Hasura, have a fully functioning real-time GraphQL CRUD API, and maybe even learn a thing or two about Vue.
Requirements
- js
- npm/yarn
- Docker, or a Hasura Cloud account
- If not using Docker, an Azure SQL database is also required
Solution Setup:
Hasura
If using Docker:
- Run docker compose up -d to start the following services:
- Hasura, exposed on localhost:8070
- Postgres DB to use as Hasura’s metadata storage engine
- Azure SQL database to use for this tutorial
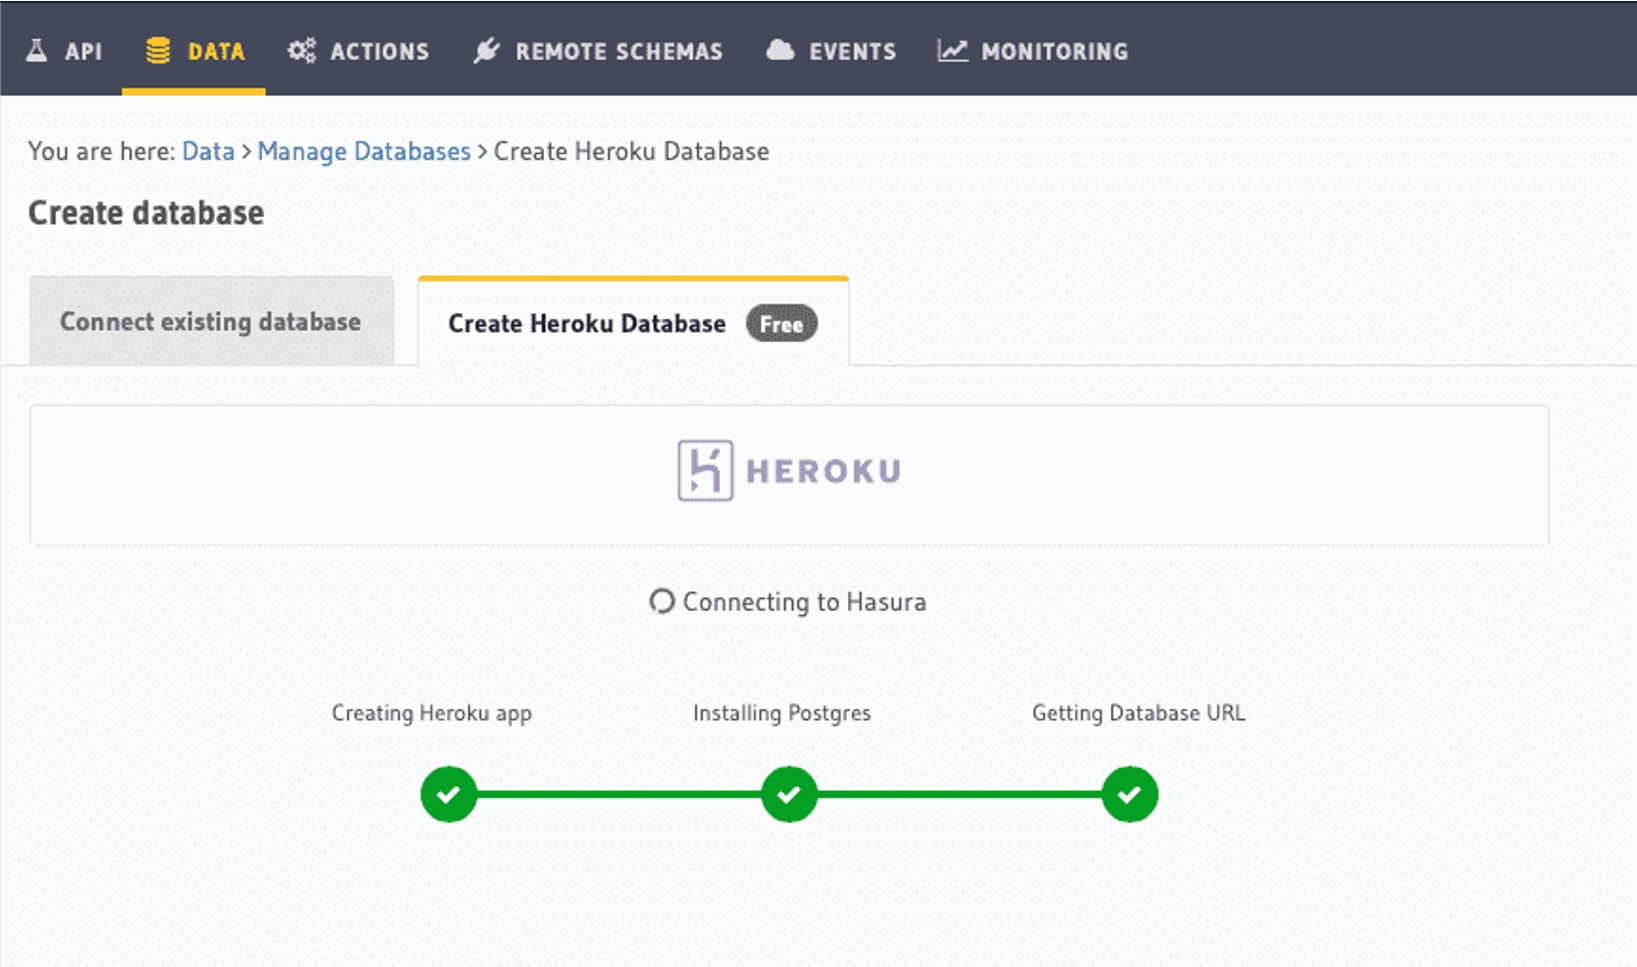
If using Hasura Cloud:
- Open your Cloud app, or launch a new one for this tutorial
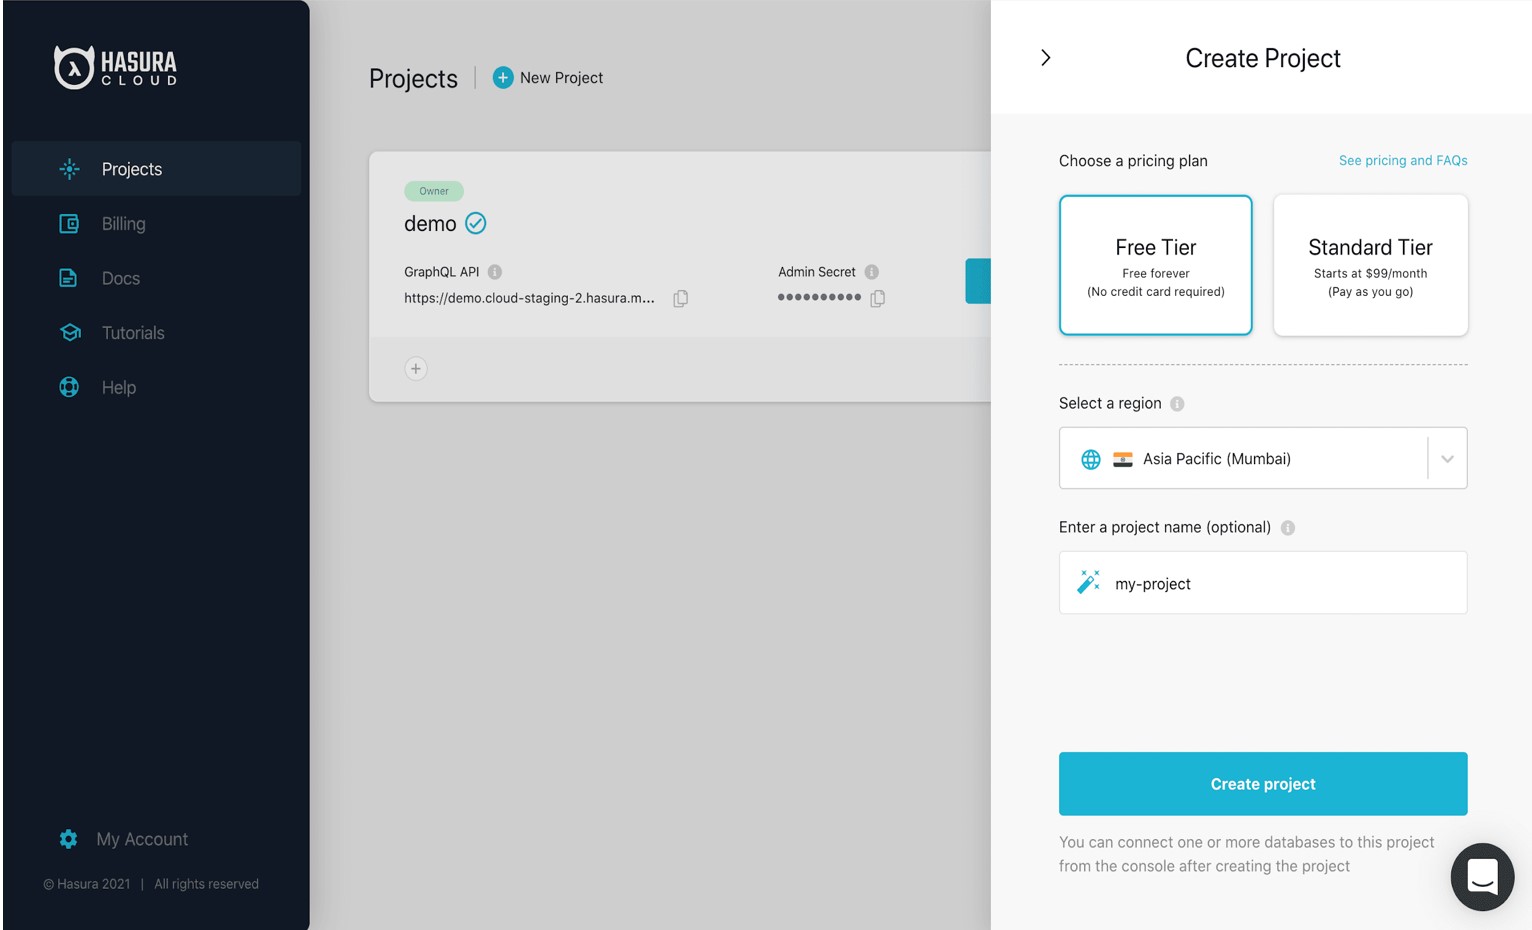
- If required, from the “Add Database” configuration panel use the “Heroku” tab to create & attach a free Heroku Postgres DB
Finally:
- Edit the .env file in this repo, and set VITE_HASURA_GRAPHQL_ENDPOINT to the endpoint of your Hasura application
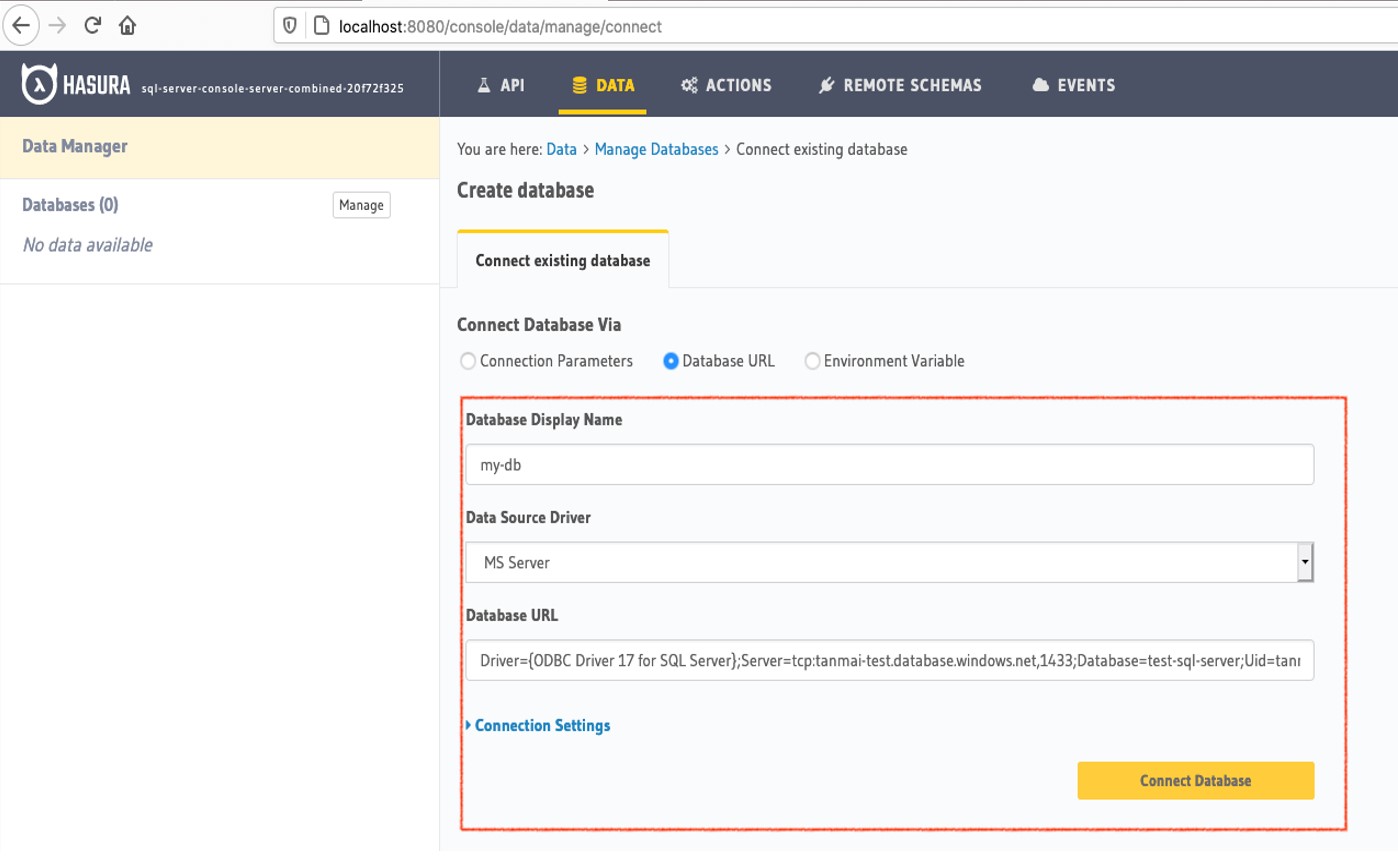
- Using the Hasura web console, navigate to “Data” -> “Connect Database”
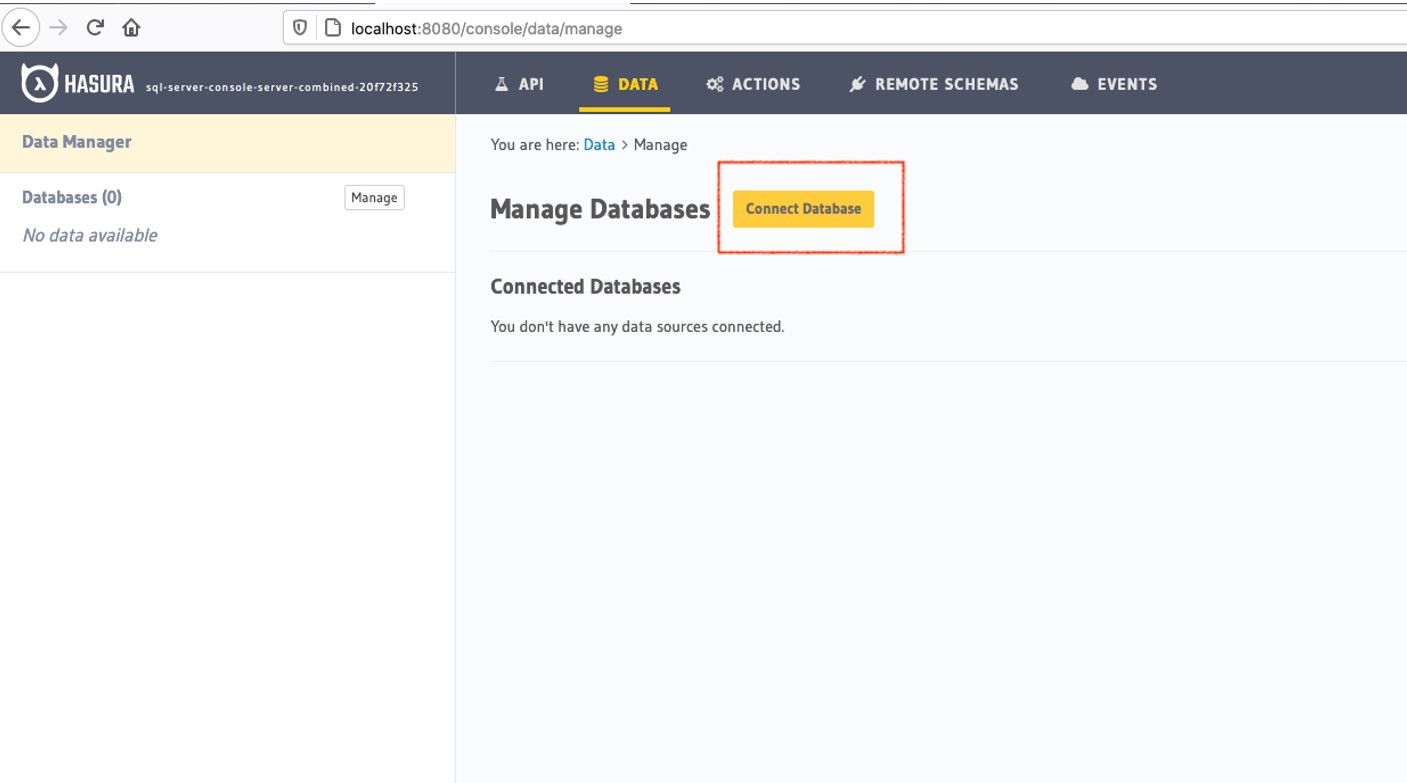
- Select “MS-SQL” as the Database type, and either:
- A) Set the connection string type to be Environment variable, and enter HASURA_MSSQL_DATABASE_URL if using Docker
- B) Enter the connection string to your existing Azure SQL database
Frontend
- Clone this repo
- Run yarn install or npm install
- Run yarn dev or npm run dev to start the Vue 3 + Vite development server
- Visit http://localhost:3000 to check that the application is running
Data Models
We need to add our todo data model to our application before we begin.
The easiest way to do this is via the Hasura web console.
There are two ways that you can create the table:
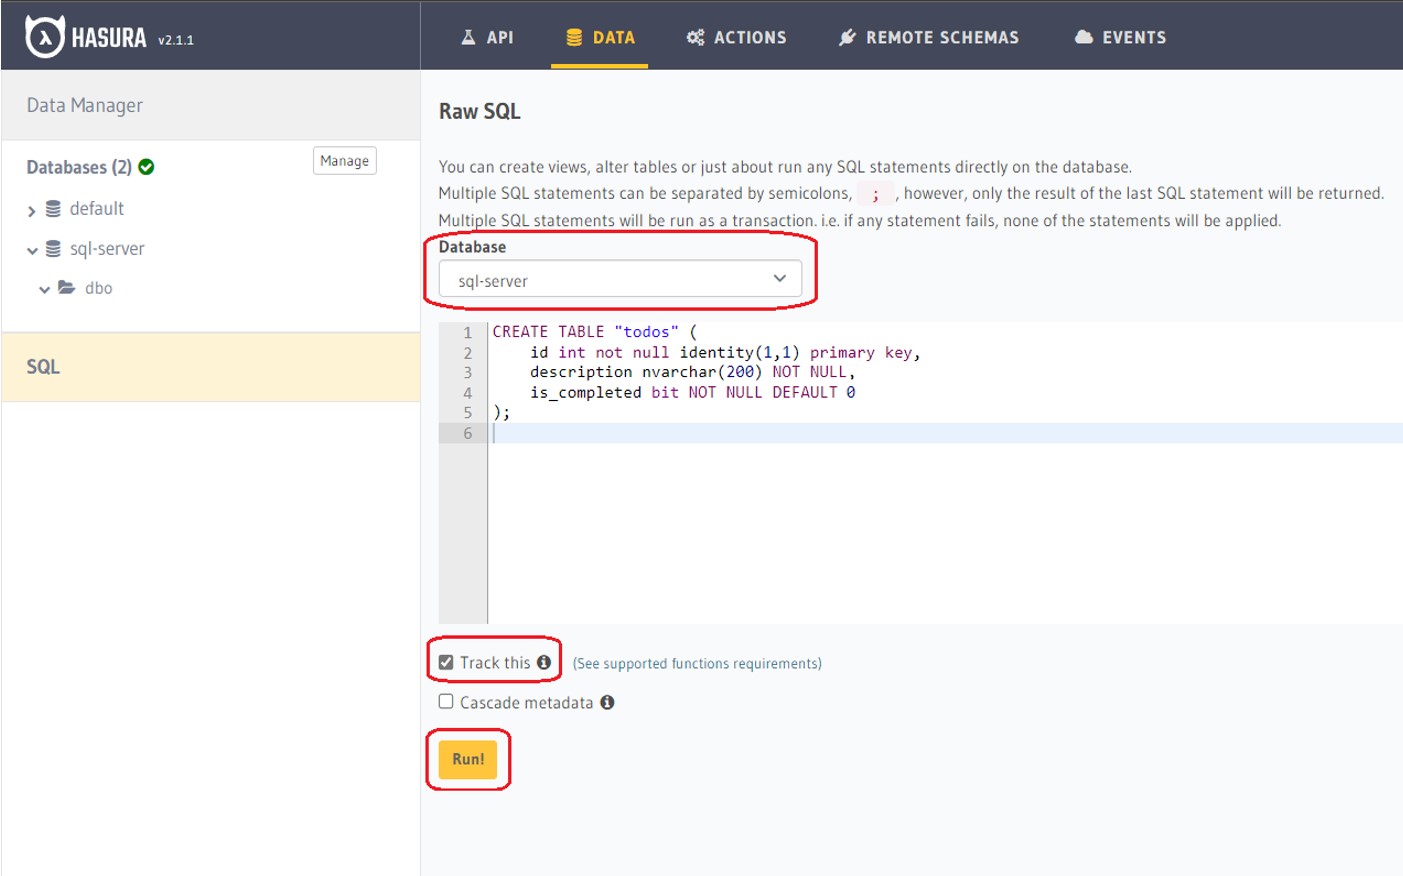
- By using the “Run SQL” page to execute the DDL statement:
CREATE TABLE "todo" (

    id int not null identity(1,1) primary key,

    description nvarchar(200) NOT NULL,

    is_completed bit NOT NULL DEFAULT 0

);
- By using the “Add table” page to graphically create our model:

After this, we can insert a record or few into the table, so that we have some data to test with and confirm our Vue application is working in a moment.
From the “Run SQL” table, execute the following:
INSERT INTO "todo"

    (description)

VALUES

    ('Learn Vue 3'),

    ('Be awesome');
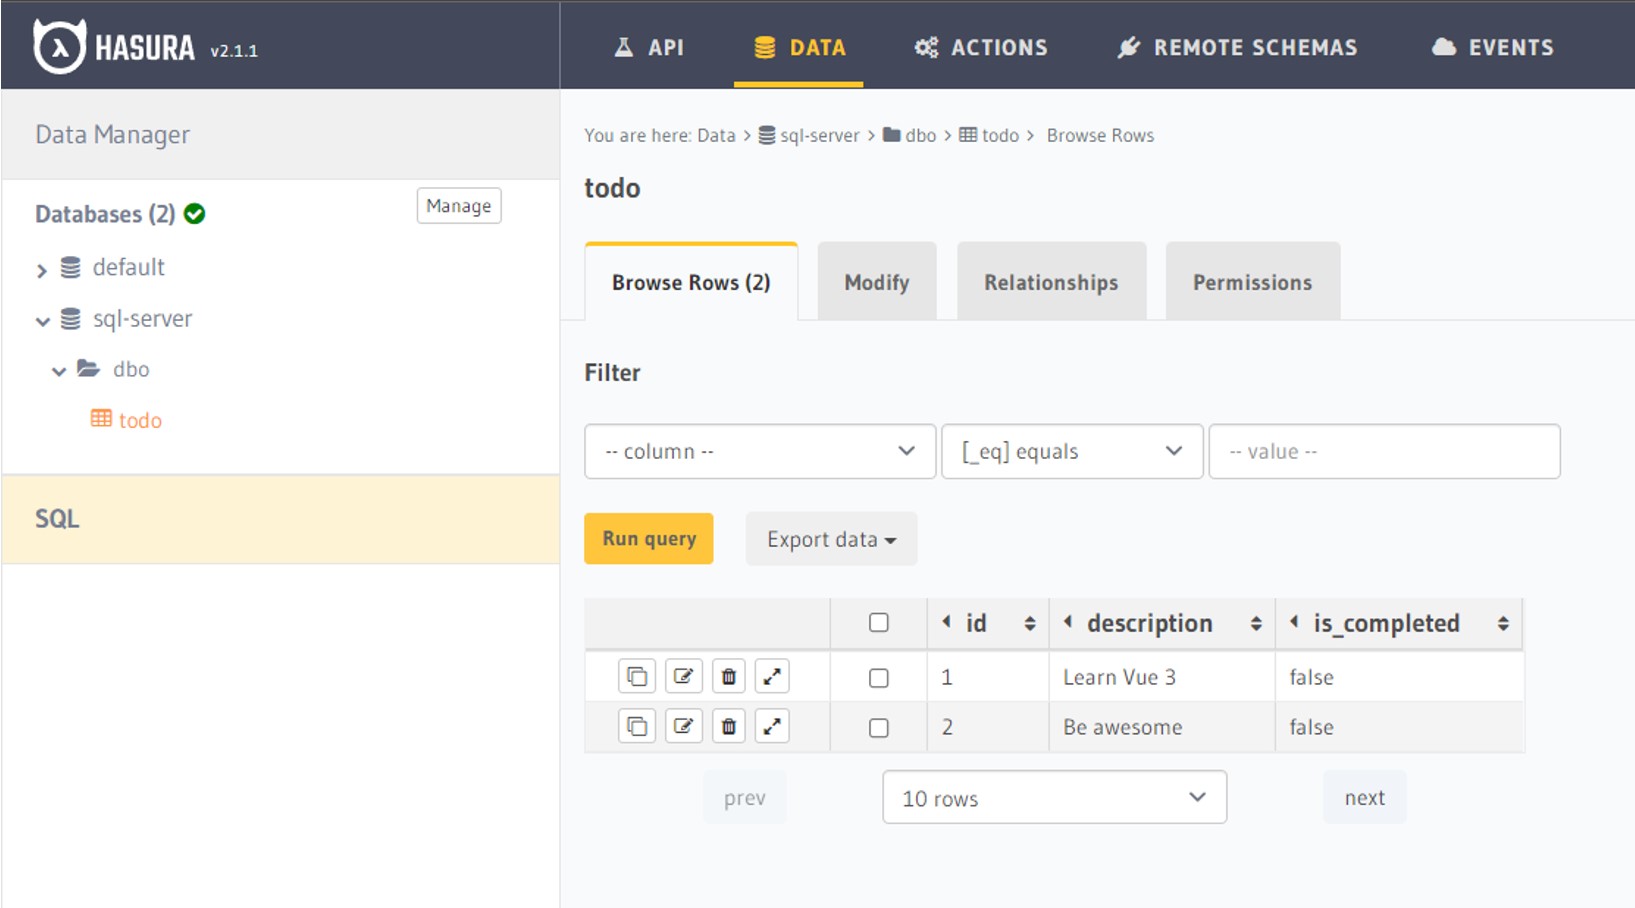
Checking the “Browse Rows” tab in our table, we should see the rows in todo now:
Try out GraphQL Queries
Once the table is tracked by Hasura, CRUD APIs are instantly created.
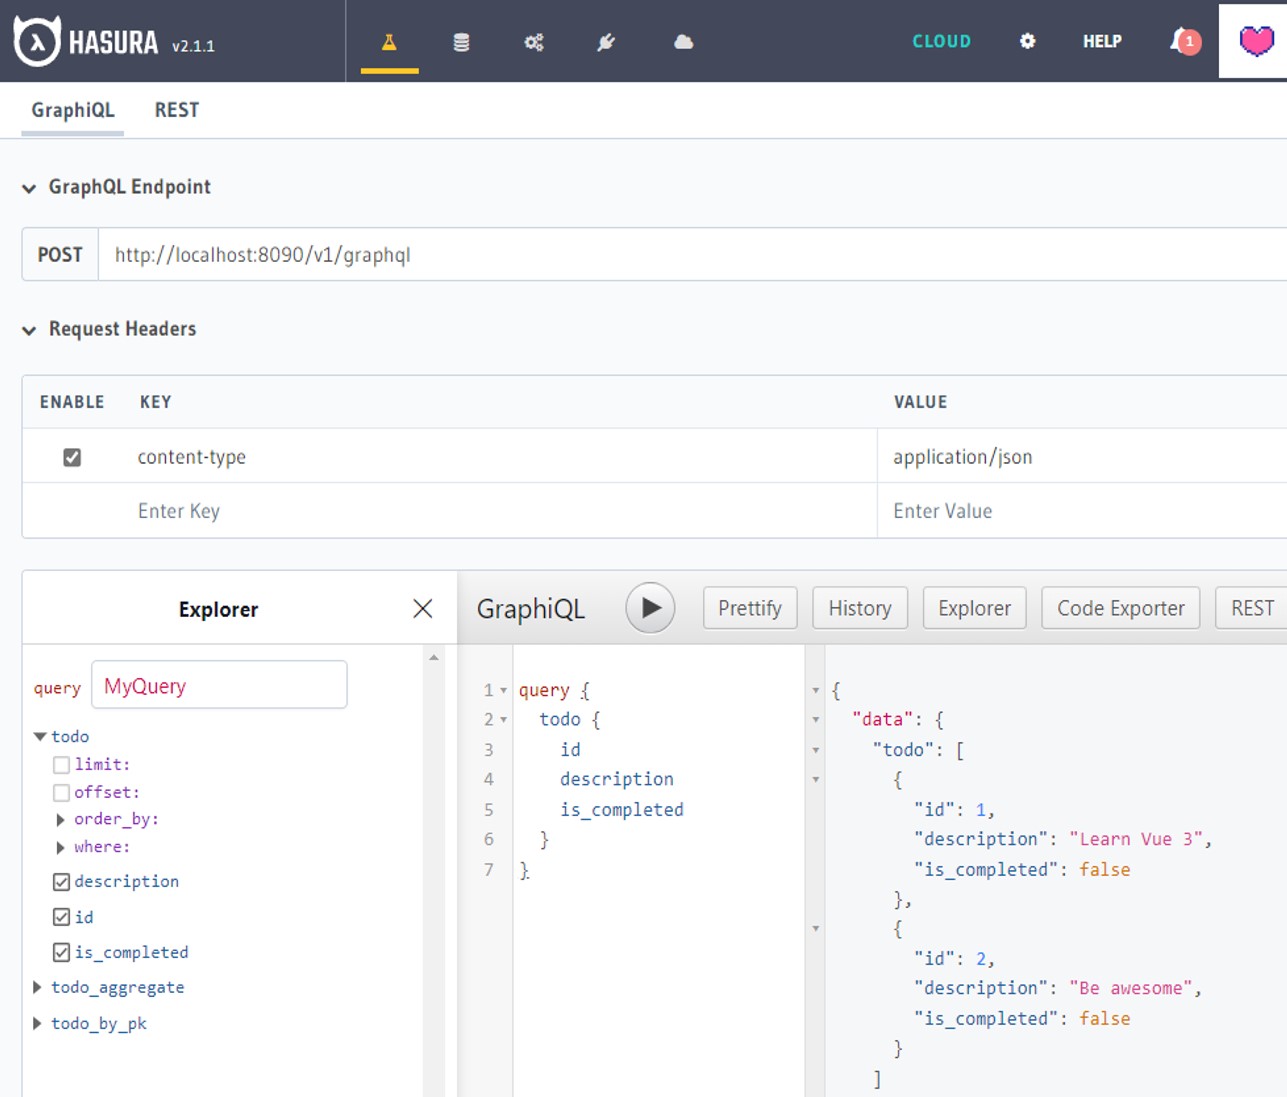
If we query from our GraphiQL Explorer page, we should see we now have a functioning GraphQL API to access these todos:
For example, try the following query:
```graphql

    query {

        todo {

            id

            description

            Is_completed

         }

     }

```
You can see the response with the same fields that were requested in the query.
Similarly, the APIs for inserting, updating and deleting data are also available as GraphQL Mutations.
Let’s try out a mutation to insert a todo:
```

    mutation insert_todo($description: String!) {

        insert_todo_one(object: {

            description: $description
        }) {

                id

                description

                is_completed
         }

    }

```
The “description” variable needs to be sent in the request for the mutation to succeed.
Finally, let us look at an example for a GraphQL Subscription.
```

    subscription fetchTodos {

        todos {

            id

            description

        }

    }

```
The above query will listen to changes in the database for the todos table. If a new row is available, it will return a response with all the todos at that point, including the new one.
Building our Vue App
We will walk through building a basic Vue 3 application that can Create/Read/Delete from these todos.
Reading Todos
Starting from a blank canvas, let’s add the code to be able to read and display our SQL Server todo rows.
Our App.vue looks like this:
<template>

    <img alt="Vue logo" src="./assets/logo.png" />

</template>

<script setup>

</script>
What we want to do is:
- Write a function that can query our GraphQL API for the todos
- When the page is created, initiate this request
- Store the todos in the component state on result
- Display the todos
To query our todos, we can use fetch():
export async function getTodos() {

    const req = await fetch(HASURA_GRAPHQL_ENDPOINT, {

        method: "POST",

        body: JSON.stringify({

            query: `

                query {

                    todo {

                        id

                        description

                        is_completed

                    }

                }

            `,

        }),

    })

    const res = await req.json()

    return res ? .data ? .todo

}
Integrating this into our App.vue, looks something like this:
<template>
    <img alt="Vue logo" src="./assets/logo.png" />
    <h1 v-if="state.todos.length == 0">
      No todos
    </h1>
    <section v-else>
        <div :key="todo.id" v-for="todo in state.todos">
            <p>ID: {{ todo.id }}</p>
            <input v-model="todo.description" />
            <input
                type="checkbox"
                v-model="todo.is_completed"
                :checked="todo.is_completed"
            />
        </div>
    </section>
</template>

<script setup>
import { onMounted, reactive } from "vue"

const state = reactive({
  todos: []
})

async function getAndSetTodos() {
    const todos = await getTodos()
    state.todos = todos
}

onMounted(async () => {
    getAndSetTodos()
})
</script>
After we save, Vite will hot-reload our app. Assuming all is well, our page should now look like this:
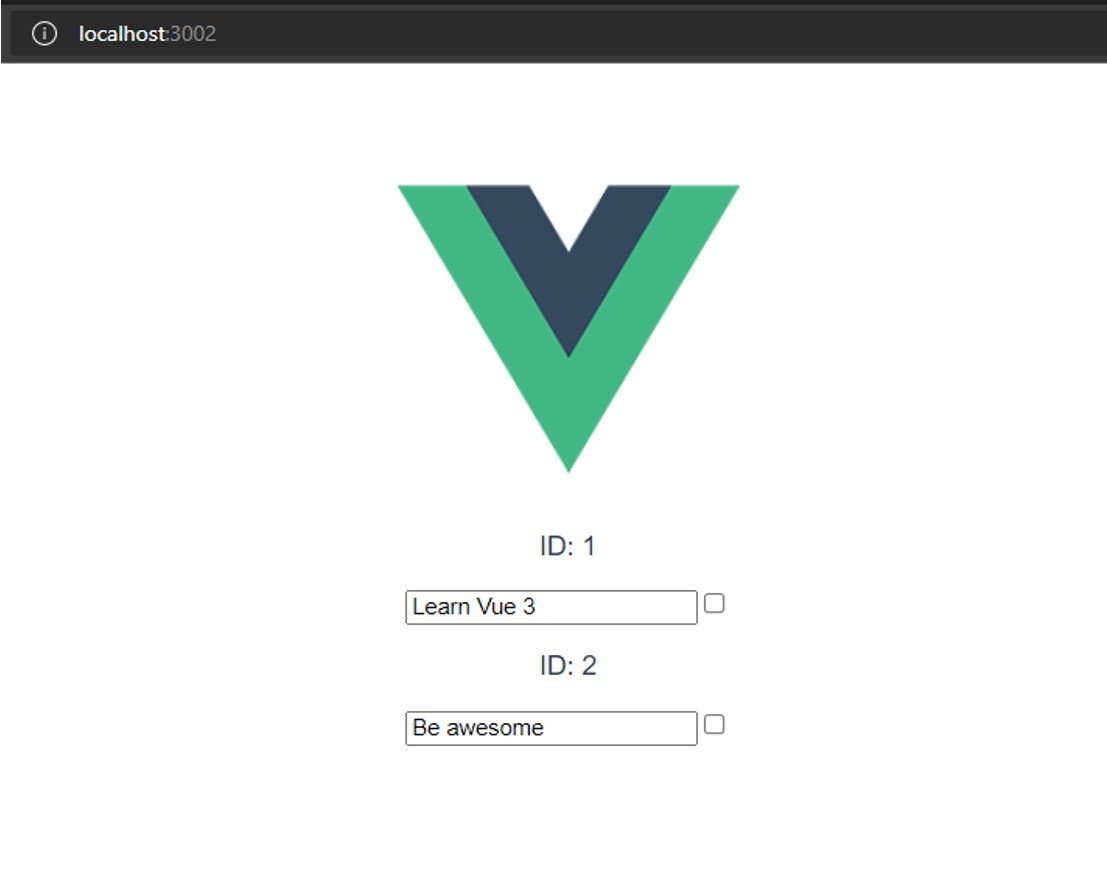
Success! We’ve already integrated data-access from our Azure SQL Database!
Delete Todo
The next step is to be able to update the todos we are able to read.
We have already wired up 2-way data binding to the fields of the todos being displayed. We just need to write a function that can receive a “todo” object and pass it along to Hasura to delete in the database.
We can do that like this:
export async function deleteTodoById(id) {
    const req = await fetch(HASURA_GRAPHQL_ENDPOINT, {
        method: "POST",
        body: JSON.stringify({
            query: `
              mutation DeleteTodoByPk($id: Int!) {
                delete_todo_by_pk(id: $id) {
                  id
                }
              }
            `,
            variables: {
                id,
            },
        }),
    })
    const res = await req.json()
    return res?.data?.delete_todo_by_pk
}

<template>
    <img alt="Vue logo" src="./assets/logo.png" />
    <h1 v-if="state.todos.length == 0">
      No todos
    </h1>
    <section v-else>
        <div :key="todo.id" v-for="todo in state.todos">
            <p>ID: {{ todo.id }}</p>
            <input v-model="todo.description" />
            <input
                type="checkbox"
                v-model="todo.is_completed"
                :checked="todo.is_completed"
            />
            <button @click="deleteTodoById(todo.id)">Delete</button>
        </div>
    </section>
</template>
If we press the “Delete” button on our of todos, we should see it disappear in the database.
Create Todo
Finally, let’s write some code to allow us to insert new todo items.
We will need the underlying GraphQL mutation function first:
export async function createTodo(description) {
    const req = await fetch(HASURA_GRAPHQL_ENDPOINT, {
        method: "POST",
        body: JSON.stringify({
            query: `
              mutation CreatTodo($description: String!) {
                insert_todo_one(object: {
                  description: $description
                }) {
                  id
                  description
                  is_completed
                }
              }
            `,
            variables: {
                description,
            },
        }),
    })
    const res = await req.json()
    return res?.data?.insert_todo_one
}
And now we need to wire up an input box and submit button to trigger the todo insert:
<template>
    <img alt="Vue logo" src="./assets/logo.png" />

    <p>Create New Todo</p>
    <label for="todo-description">
      Description
    </label>
    <input name="todo-description" v-model="state.newTodoDescription" />
    <button @click="createTodo(state.newTodoDescription).then(getAndSetTodos)">
      Create
    </button>

    <hr />

    <h1 v-if="state.todos.length == 0">
      No todos
    </h1>
    <section v-else>
        <div :key="todo.id" v-for="todo in state.todos">
            <p>ID: {{ todo.id }}</p>
            <input v-model="todo.description" />
            <input
                type="checkbox"
                v-model="todo.is_completed"
                :checked="todo.is_completed"
            />
            <button @click="deleteTodoById(todo.id)">Delete</button>
        </div>
    </section>
</template>

<script setup>
import { reactive, onMounted } from "vue"
import { getTodos, createTodo, deleteTodoById } from "./utils"

const state = reactive({
    newTodoDescription: "",
    todos: [],
})

async function getAndSetTodos() {
    const todos = await getTodos()
    state.todos = todos
}

onMounted(async () => {
    getAndSetTodos()
})
</script>
In summary
We learnt how to create a GraphQL backend using Hasura connected to Azure SQL. We started off by creating data models in Azure SQL, tracked them on Hasura for generating GraphQL APIs. Once the APIs were available, we were able to integrate them into a Vue.js app. This implementation could be replicated to any frontend framework of choice (like React.js / Angular) etc.
In the end, we get high performance, scalable GraphQL backend with Hasura and Azure SQL.
0 comments