


Announcing the new azd AI agent extension: Publish Microsoft Foundry agents directly from your development environment
If you’ve ever built an AI agent, you know the real challenge is more than writing the code, it’s the complex dance of provisioning resources, managing models, and securely deploying everything to the cloud. We thought, what if that entire workflow could be simplified?
That’s why our team has been working on a new extension for the Azure Developer CLI (azd), which we’re excited to announce at Ignite 2025. Our goal was to simplify the entire workflow. This new extension helps you build, provision, and publish AI agents on Microsoft Foundry, bridging the gap between local development and cloud deployment. It brings everything you need into your terminal and code editor, letting you go from an agent idea on your machine to a running, shareable agent in Azure with minimal friction.
With this extension, agents become a part of your toolchain. You get the power of Foundry’s advanced features (from multi-model reasoning to integrated evaluations) combined with the developer-first workflow of azd. This extension empowers you to rapidly iterate on AI agents locally and reliably push them to the cloud for at-scale use, all using a consistent set of tools.
What is the new azd AI agent extension?
The new azd ai agent extension adds agent-centric workflows directly into the Azure Developer CLI. It integrates Foundry projects, model deployments, and agent definitions leveraging the azd concepts, such as azd init and azd up. When paired with a template that includes Infrastructure as Code (IaC) or when you bring your own IaC, this extension automates the process of provisioning Azure resources, configuring model deployments, and publishing agents.
These new features handle three critical aspects of agent development:
- Project scaffolding: Initialize a new project with an agent-ready starter template that includes pre-configured IaC files you need to get started, then initializes agents from a manifest file.
- Resource provisioning: After you’ve initialized your IaC and agents, then the extension will provision and configure Foundry projects, deploy models with proper SKUs and capacity settings, and establish required connections.
- Agent deployment: Package your agent, push container images to Azure Container Registry, and deploy agents to Foundry where they become shareable, production-ready services.
The result? You can go from an empty folder to a deployed, callable agent endpoint in minutes instead of hours. Ready to see how?
Key features
The new azd ai agent extension provides several powerful features that accelerate your agent development:
-
Simplify agent project initialization: Use starter templates that include the necessary IaC to scaffold complete projects.
azdcreates the necessary directory structure, IaC files, and configuration so you can start building immediately. -
Declarative configuration: Define your entire agent stack—services, resources, and model deployments—in a declarative
azure.yamlfile. This approach makes your agent infrastructure version-controlled, repeatable, and easy to share across teams. -
Unified provisioning and deployment: Use the familiar
azd upcommand to provision infrastructure and deploy your agent.azdhandles the container builds, registry pushes, resource provisioning, and agent deployment automatically. -
Agent definition management: Pull agent definitions from GitHub repositories or local paths. The
azd ai agent initcommand analyzes the definition, updates your project configuration, and maps parameters to environment variables automatically. -
Secure by default:
azdhandles, with IaC files in templates, the boilerplate security configuration for you. It automatically configures your agent with a managed identity for secure access to Azure resources, following recommended practices without manual setup.
Getting started
Let’s walk through creating and deploying your first Foundry agent using the new AI agent features in azd.
Prerequisites
Before you begin, ensure you have:
- Azure Developer CLI (
azd) (version 1.21.3 or later) installed and authenticated (azd auth login). - The
azd ai agentextension installed (azd extension install azure.ai.agents); and, if you don’t have the extension installed, when you initialize the starter template or runazd ai agentthe extension is installed automatically. - An Azure subscription with permissions to create resource groups and Foundry resources. Sign up for a free account at azure.com/free if you don’t have one.
- Azure CLI (
az) installed for certain operations.
Initialize with a Foundry configuration template
This extension works with an azd template and is also able to connect to an existing project using azd ai agent init --project-id [resourceID].
In this post, we’ll walk through the approach of starting with a template. It’s a basic template for Foundry Agent Service to get started quickly.
- Basic Setup (
azd-ai-starter-basic): Optimized for speed and simplicity with all essential resources
Start by initializing a new project with the Basic Setup template. In an empty folder, run:
azd init -t Azure-Samples/azd-ai-starter-basicWhen prompted, provide an environment name for your agent project (for example, “my-agent-project”).
The azd init process:
- Clones the starter template files into your project
- Creates the directory structure with
infra/(IaC files) andsrc/folders - Generates an
azure.yamlconfiguration file - Sets up
.azure/<env>/.envfor environment-specific variables
Review your project structure
The initialized template includes these key files:
├── .azure/              # Environment-specific settings (.env)
├── infra/               # Bicep files for Azure infrastructure
└── azure.yaml           # Project configuration
Open the azure.yaml file to see how your agent project is configured:
# yaml-language-server: $schema=https://raw.githubusercontent.com/Azure/azure-dev/main/schemas/v1.0/azure.yaml.json
name: my-agent-project

infra:
  provider: bicep
  path: ./infra

requiredVersions:
  extensions:
    # the azd ai agent extension is required for this template
    "azure.ai.agents": latest
This declarative configuration defines your agent service and the Azure AI resources it needs, including model deployments. To read more about the azure.yaml schema, see the Azure Developer CLI documentation and azd environment variables that the agent relies on, such as AZURE_AI_ACCOUNT_NAME and AZURE_AI_PROJECT_NAME, see the azd environment variables documentation.
Initialize your agent definition
The starter template provides the project structure, but you need to add a specific agent definition. Agent definitions describe your agent’s behavior, tools, and capabilities. You can find example definitions in the Agent Framework repository.
For this walkthrough, use an agent definition manifest:
azd ai agent init -m <agent-definition-url>As an example, you can use the following URL for a simple calculator agent:
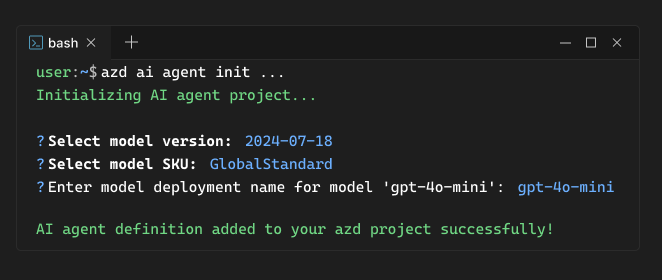
azd ai agent init -m https://github.com/azure-ai-foundry/foundry-samples/blob/main/samples/microsoft/hosted-agents/python/calculator-agent/agent.yamlHere’s what happens when you run azd ai agent init:
- Downloads the agent definition YAML file into your project’s
src/directory. - Analyzes the agent definition to understand its requirements.
- Updates
azure.yamlwith the corresponding services and configurations. - Maps agent parameters to environment variables.
After running azd ai agent init, review the updated azure.yaml and .env files to see how your agent is configured. The azure.yaml file looks like:
requiredVersions:
    extensions:
        azure.ai.agents: latest
        azure.ai.agents: latest
name: my-agent-project
services:
    CalculatorAgent:
        project: src/CalculatorAgent
        host: azure.ai.agent
        language: docker
        docker:
            remoteBuild: true
        config:
            container:
                resources:
                    cpu: "1"
                    memory: 2Gi
                scale:
                    maxReplicas: 3
                    minReplicas: 1
            deployments:
                - model:
                    format: OpenAI
                    name: gpt-4o-mini
                    version: "2024-07-18"
                  name: gpt-4o-mini
                  sku:
                    capacity: 10
                    name: GlobalStandard
Provision and deploy your agent
Now with your project is configured, you can deploy everything to Azure with one command:
azd upThis single command orchestrates the entire deployment workflow, from infrastructure to a live agent endpoint. Here’s what happens step-by-step:
- Provisions Infrastructure: Creates the Foundry account, project, and all necessary Azure resources defined in the Bicep files.
- Pre-provision hooks inspect the agents and their dependencies, models, and other resources, then populates environment variables so that Bicep knows what to provision, including:
AI_PROJECT_DEPLOYMENTS(JSON): Specification of the models to deploy.AI_PROJECT_CONNECTIONS(JSON): Specification of the connections to create.AI_PROJECT_DEPENDENT_RESOURCES(JSON): Specification of the dependent resources.ENABLE_HOSTED_AGENTS(boolean): Whether hosted agents need to be provisioned (with an ACR and CapHost).
- Deploys Models: Provisions the model deployments specified in
azure.yaml(for example, GPT-4o-mini with the configured SKU and capacity). - Builds & Pushes Container: If the agent has custom code,
azdpackages it into a container image and pushes it to your Azure Container Registry. - Publishes Agent: Creates an Agent Application in Foundry and deploys your agent as a live, callable service.
The entire process typically completes in 5-10 minutes for a new project. When azd up finishes, there are links in the terminal output to the agent playground portal and the agent endpoint.
The agent is now live and ready to use. From an empty folder to a running agent, all with just three commands:
azd init -t Azure-Samples/azd-ai-starter-basicazd ai agent init -manifest <agent-definition-url>azd up
Test your agent in Foundry
Now for the fun part—let’s make sure your agent is working.
- Follow the link in the terminal output. (Alternatively, open the Foundry portal and navigate to the project provisioned by
azdwhich is the project name was displayed in theazd upoutput). - Open the Agents section to see your deployed agent.
- Launch the agent in the playground and send a test query, for example: “Summarize your capabilities.”
If your agent responds successfully, congratulations! You’ve just deployed a working Foundry agent from your local development environment.
How it works: Under the hood
So, what’s happening behind the scenes when you run these azd commands? Let’s break down the how this transforms your local project into a cloud-native AI agent. The process follows a clear, logical flow from scaffolding to a secure, running service.
1. Project scaffolding and configuration
When you run azd init with a Foundry template, azd sets up a complete, well-structured project. The template includes:
- Bicep infrastructure files in the
infra/directory that define all the necessary Foundry resources, model deployments, and networking. - An
azure.yamlfile that provides a declarative map of your services, resources, and dependencies. - Environment configurations in
.azure/<env>/.envthat store subscription IDs, resource names, and endpoints. - An
agent.yamlfile in thesrc/directory that stores the environment variables the agent needs. For example:
kind: hosted
name: CalculatorAgent
description: This LangGraph agent can perform arithmetic calculations such as addition, subtraction, multiplication, and division.
metadata:
    authors:
        - migu
    example:
        - content: What is the size of France in square miles, divided by 27?
          role: user
    tags:
        - example
        - learning
protocols:
    - protocol: responses
      version: v1
environment_variables:
    - name: AZURE_OPENAI_ENDPOINT
      value: ${AZURE_OPENAI_ENDPOINT}
    - name: OPENAI_API_VERSION
      value: 2025-03-01-preview
Next, when you run azd ai agent init, the CLI:
- Fetches the agent definition from the URL or local path you provided.
- Parses the YAML to understand the agent’s requirements (models, tools, connections).
- Updates
azure.yamlto include the agent as a service. - Creates or updates the environment variables needed for the agent’s runtime.
2. Resource provisioning
The azd up command triggers all infrastructure provisioning through Azure Resource Manager. Based on your azure.yaml and Bicep files, azd:
- Compiles your Bicep templates into ARM templates.
- Creates the resource group in your specified Azure region.
- Provisions the Foundry account and project.
- Deploys the specified models to the project with your configured SKUs and capacity.
For example, if your azure.yaml specifies gpt-4o-mini with version 2024-07-18, azd creates that exact model deployment in your Foundry project. This declarative approach ensures consistency between environments, so your development, staging, and production deployments use identical configurations.
3. Container build and publishing
For agents with custom code (for custom tools, integrations, or business logic), azd handles the complete containerization workflow:
- Build: Packages your agent code into a Docker container image using the configuration from your project.
- Push: Authenticates to Azure Container Registry and pushes the image with a unique tag.
- Deploy: Creates an agent in the Foundry and a deployment that runs your container.
Your agent is deployed to the Foundry hosted agent service, which provides automatic scaling, managed compute, and integrated monitoring. The Agent Application becomes the stable, versionable interface for your agent, with a unique name and endpoint.
4. Identity and security
Finally, azd automatically configures secure access patterns with IaC so you don’t have to manage credentials manually:
- Managed Identity: Your agent uses the Foundry project’s system-assigned managed identity for authenticating to other Azure resources.
- Role Assignments: Required permissions are granted automatically (for example, giving your agent access to Azure AI services, storage, or databases) with the starter template.
- Endpoint Security: Agent endpoints use Azure AD authentication by default to ensure only authorized users or applications can call your agent.
These security configurations in the template follow Azure recommended practices and work out of the box, giving you a secure foundation from the start.
Use cases and scenarios
Now that you have a solid understanding of how these azd features work, let’s explore how you can use them to build different kinds of agents. For complete, ready-to-deploy examples, check out:
Building conversational AI assistants
Create intelligent customer service agents that understand context, access knowledge bases, and provide personalized responses. With azd, you can:
- Rapidly deploy multiple agent variations for A/B testing
- Integrate agents with Azure AI Search for retrieval-augmented generation
- Connect to business systems and APIs through custom tools
- Version and roll back agent deployments as you iterate
Data analysis and insights agents
Build agents that analyze data, generate visualizations, and provide insights. With azd, you can:
- Provision agents with access to Azure SQL Database or Cosmos DB.
- Deploy specialized models for quantitative analysis.
- Create agents that use code interpreter tools for calculations.
- Publish agents to help learn French.
Multi-agent orchestration
Develop systems where multiple specialized agents collaborate on complex tasks:
- Deploy a coordinator agent that routes requests to specialist agents
- Provision each agent with different model configurations for optimal performance
- Use the declarative
azure.yamlto define agent relationships and dependencies - Scale individual agents independently based on workload
Enterprise agent deployment
Standardize agent development and deployment across your organization:
- Create reusable agent blueprints that encode your organization’s best practices
- Publish agent templates to internal catalogs for teams to consume
- Enforce consistent security, compliance, and monitoring configurations
- Automate agent deployment in CI/CD pipelines using
azd provisionandazd deploy
Advanced configuration
Once you’re comfortable with the basic workflow, you can start customizing your deployments to meet more advanced requirements.
Customizing model deployments
Your azure.yaml file gives you full control over which models get deployed. To add or change a model, edit the file:
services:
    CalculatorAgent:
        project: src/CalculatorAgent
        host: azure.ai.agent
        language: docker
        docker:
            remoteBuild: true
        config:
            container:
                resources:
                    cpu: "1"
                    memory: 2Gi
                scale:
                    maxReplicas: 3
                    minReplicas: 1
            deployments:
                - model:
                    format: OpenAI
                    name: gpt-4o-mini
                    version: "2024-07-18"
                  name: gpt-4o-mini
                  sku:
                    capacity: 10
                    name: GlobalStandard
This configuration provisions multiple models, enabling your agent to use different models for different tasks (for example, a larger model for complex reasoning and a smaller one for simple queries). When you next run azd up, it automatically deploys the new model and update your project.
Managing environment variables
Key environment variables azd sets or uses:
| Variable | Purpose |
|---|---|
AZURE_SUBSCRIPTION_ID |
Target subscription for resources. |
AZURE_RESOURCE_GROUP |
Resource group hosting the AI project. |
AZURE_LOCATION |
Azure region (must support chosen models). |
AZURE_AI_PROJECT_ID |
The full Azure resource ID of your project. |
AZURE_AI_PROJECT_NAME |
Project hosting the agent. |
AZURE_AI_PROJECT_ENDPOINT |
Endpoint for agent management and runtime calls. |
AZURE_CONTAINER_REGISTRY_ENDPOINT |
Endpoint to build and push container images |
These variables are stored in .azure/<environment-name>/.env and can be customized for each of your environments (for example, dev, test, and prod).
Get started today
The new azd ai agent capabilities are available in public preview as of Microsoft Ignite 2025. While it’s an early release, it’s ready for you to try today, and we’re actively evolving these features based on your feedback.
Getting involved
To get started:
- Explore sample agents: Check out the Agent Framework repository for .NET agents and Python agents you can deploy with
azd ai agent init. - Join the community: Share your experiences and ask questions in the Azure Developer CLI GitHub discussions.
- Report issues and suggest features: We’re eager for your feedback! File issues or suggestions in the Azure/azure-dev repository (tag them with
ext-agents). - Review documentation: Visit the Foundry documentation for comprehensive guides on agent development.
Your feedback shapes these priorities, so we encourage you to share your ideas and use cases.
Start building intelligent agents today
We believe this new extension will change how you develop agents by letting you focus on what’s important: building intelligent solutions. We handled the complexity so you can get back to creating. With Foundry’s advanced capabilities and azd‘s developer-friendly workflow, you have everything you need to create, iterate, and deploy production-grade AI agents.
Install the Azure Developer CLI today and start building the next generation of AI agents.
Additional resources
- Azure Developer CLI documentation
- Foundry documentation
- Agent Framework repository (samples and tools)
- Azure Developer CLI GitHub repository
- AI Foundry starter template
Happy building!
0 comments