


IMPORTANT
Updated 4/29/2026 to sync with v1.0 release of Microsoft Agent Framework.You built an AI agent. It works locally. Now what?
Getting an agent from your laptop to a production endpoint on Microsoft Foundry usually means stitching together resource provisioning, model deployments, identity configuration, and connection wiring—and that doesn’t even cover monitoring or debugging.
What if you could go from a repo to a live agent you can invoke in two commands?
That workflow is exactly what azd ai agent provides. This post walks through the full end-to-end workflow: deploying an AI agent to Microsoft Foundry, invoking it remotely, running it locally for development, and monitoring it in real time—all from Visual Studio (VS) Code.
Prerequisites
Before you get started, make sure you have:
- VS Code installed
- Azure Developer CLI (
azd) installed - Git installed
- An Azure subscription with access to Microsoft Foundry. Confirm that your subscription has quota for the model you plan to deploy (for example, GPT-4o) in your target region.
Step 1: Clone a sample agent project
This walkthrough uses a sample Python-based hotel concierge agent. Clone the repo and open it in VS Code:
git clone https://github.com/puicchan/seattle-hotel-agent
cd seattle-hotel-agent
code .
Step 2: Authenticate and deploy
Open the integrated terminal in VS Code. To sign in to Azure, run:
azd auth loginThen initialize:
azd ai agent initWhen prompted:
- select “Use the code in the current directory”
- for protocols, keep the default: responses
- select “Deploy a new model from the catalog”
CAUTION
Make sure to deploy to a supported region (Region Availability).
And deploy:
azd upTwo commands—azd ai agent init and azd up—scaffold the infrastructure and deploy your agent. After deployment completes, azd prints a direct link to your agent in the Microsoft Foundry portal.
Under the hood
azd ai agent init generates a full infrastructure-as-code (IaC) definition in your repo:
infra/main.bicep—entry point that wires together all resources- A Foundry Resource (the top-level container for your AI resources)
- A Foundry Project under the hub (where your agent lives)
- Model deployment configuration (for example, GPT-4o)
- Managed identity with role-based access control role assignments so your agent can securely access the model and any connected data sources
azure.yaml—theazdservice map that ties your agent code to the Foundry hostagent.yaml—agent definition file with metadata about the agent and environment variables
azd up provisions all of these resources on Azure, then publishes your agent to Foundry. Behind the scenes, the command runs Bicep deployment, uploads your agent definition, and registers the agent endpoint. The Foundry link in the output points directly to the agent’s playground.
You own all of these artifacts. The generated Bicep is in your repo—inspect it, customize it, version-control it.
Step 3: Try it in the Foundry playground
To open your agent’s playground in the browser, click the Foundry link from the azd up output. You now have a live agent endpoint. Ask it a question—for example, “What suites are available at the downtown Seattle hotel?”—and see it respond in real time.
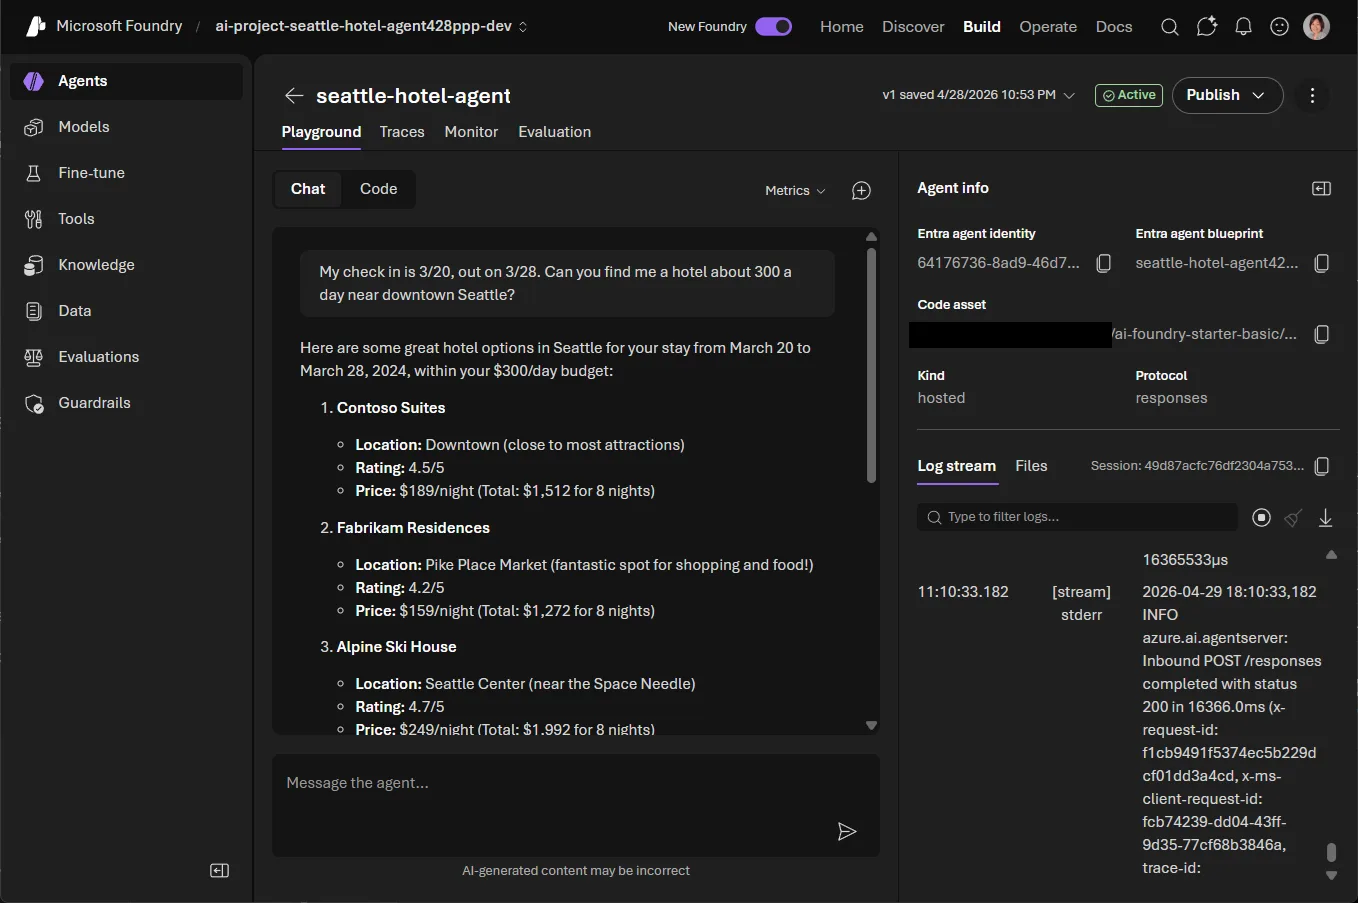
Your agent is deployed and serving traffic. You can interact with it directly from the terminal too.
Step 4: Invoke your agent from the terminal
Back in VS Code, run:
azd ai agent invokeThis command sends a prompt to your remote agent endpoint directly from the terminal. It preserves conversation context across turns, so you can have a multi-turn conversation.
Tip: By default,
azd ai agent invoketargets the remote endpoint. When a local agent is running (see Step 5), it automatically routes to the local instance instead.
Step 5: Run locally for development
When you iterate on your agent’s logic and want a faster feedback loop, run it locally:
azd ai agent runThis command starts the agent on your local machine. To test prompts against the local instance, pair the command with azd ai agent invoke. Edit your agent code, restart, and invoke again—no redeployment needed.
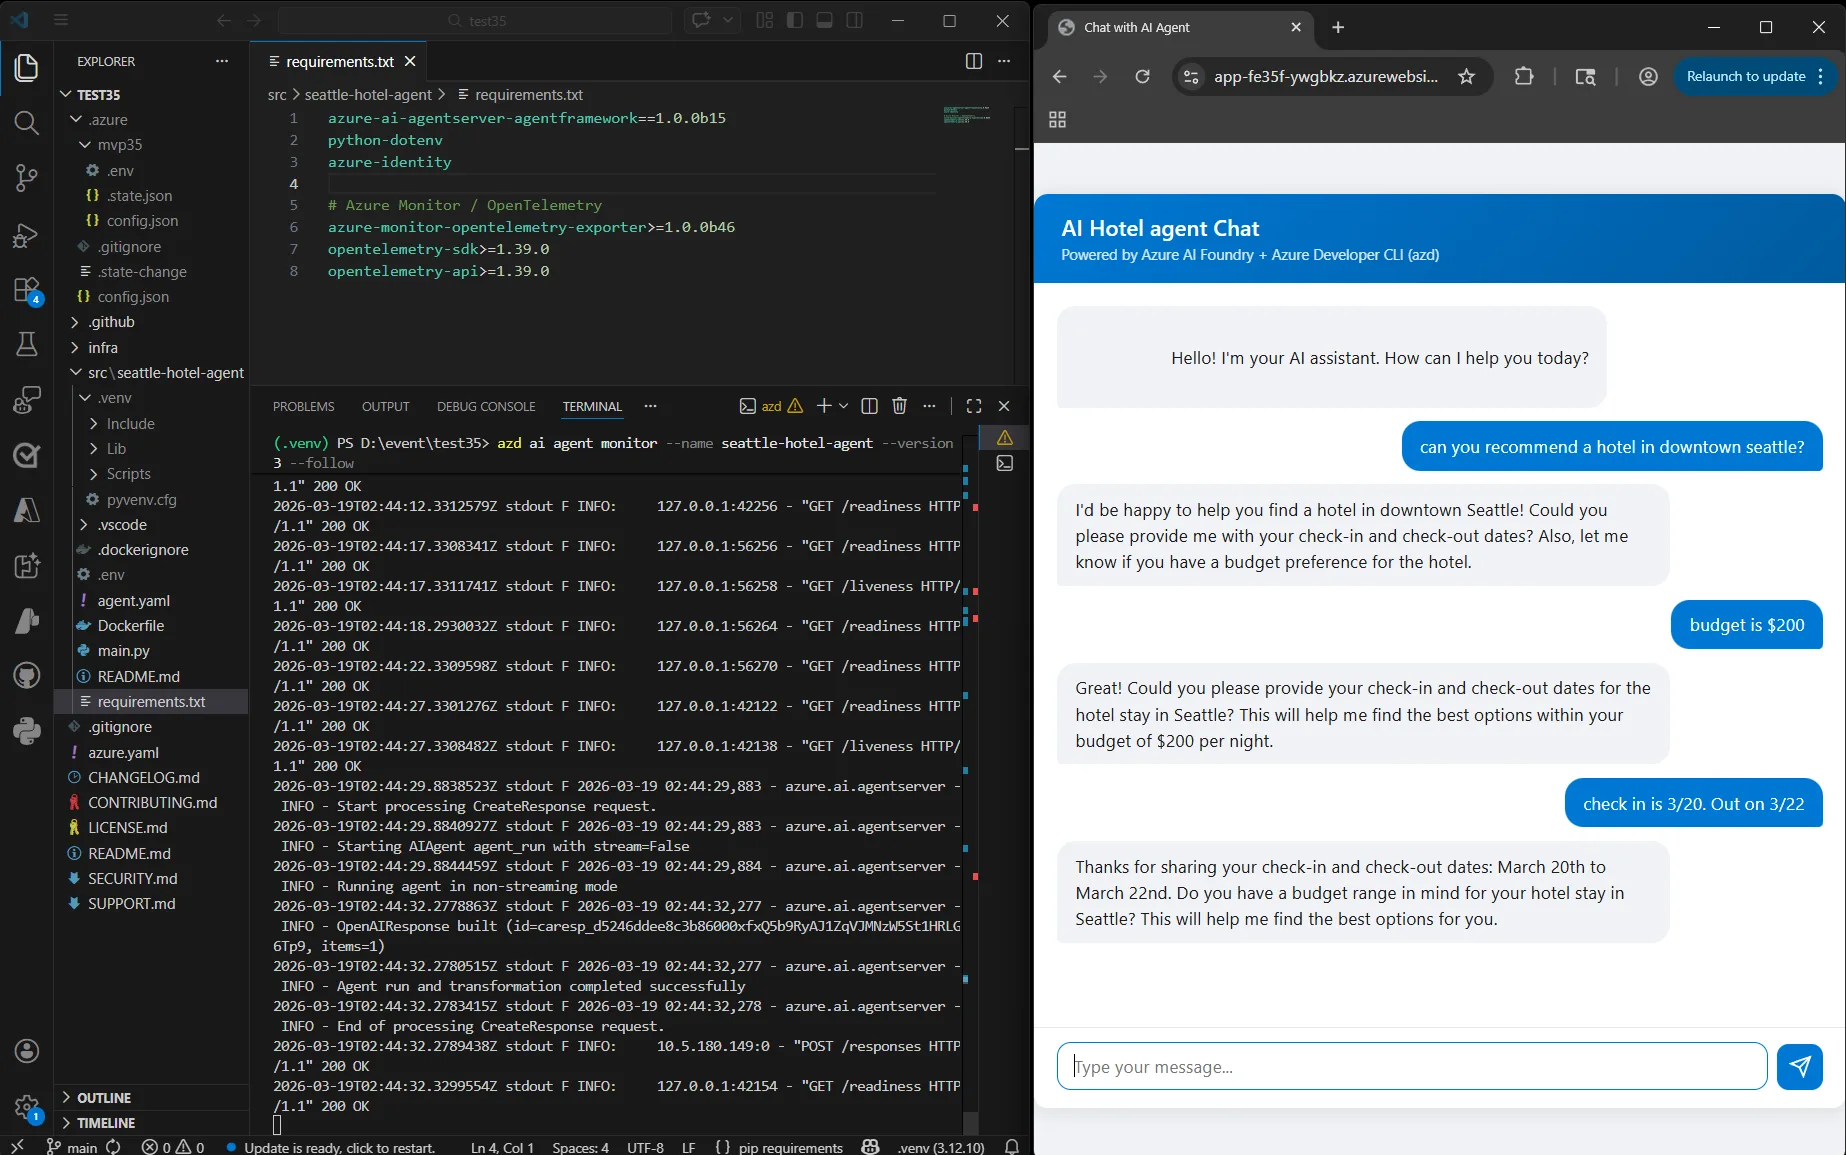
Step 6: Monitor in real time
One of the most powerful debugging features: real-time log streaming.
azd ai agent monitorBy default, this command prints the ~50 most recent log entries and exits. To stream logs continuously as requests come in, add --follow. If you have a frontend app or any client consuming your agent endpoint, you can watch every request and response flow through in real time—invaluable for troubleshooting issues in production.
Step 7: Check agent health
Want a quick status check?
azd ai agent showThis command tells you whether your published agent is healthy and running, along with key metadata about the deployment.
Step 8: Clean up resources
To delete all Azure resources created during this walkthrough, run:
azd downThis command removes the resource group and all provisioned resources so you avoid ongoing charges.
Bonus: Wire up a frontend chat app
Want to see your agent in action through a real UI? A separate, lightweight chat app is available to clone and point at your published agent. The chat app consumes the agent you deployed in the earlier steps, so make sure the agent is running first.
git clone https://github.com/puicchan/chat-app-foundry
cd chat-app-foundry
Set the environment variables that wire the app to your published agent. You can find these values in the azd up output from your agent deployment, or by running azd env get-values in the seattle-hotel-agent project directory:
azd env set AZURE_AI_AGENT_NAME "seattle-hotel-agent"
azd env set AZURE_AI_AGENT_VERSION "<version-number>"
azd env set AI_ACCOUNT_NAME "<your-ai-account-name>"
azd env set AI_ACCOUNT_RESOURCE_GROUP "<your-resource-group>"
azd env set AZURE_AI_PROJECT_ENDPOINT "<your-foundry-endpoint>"
azd env set AZURE_TENANT_ID "<your-azure-tenant-id>"
Then provision and deploy the chat app:
azd upOnce the app is running, open a second terminal and start streaming logs:
azd ai agent monitor --followNow ask a question in the chat UI and watch the log light up in real time. This setup is the best way to see the full loop: a user question in the browser, the request hitting your published agent on Foundry, and the log streaming back to your terminal—all visible at once.
The full command set at a glance
| Command | What it does |
|---|---|
azd ai agent init |
Scaffold a Foundry agent project with IaC |
azd up |
Provision Azure resources and deploy the agent |
azd ai agent invoke |
Send prompts to the remote or locally run agent |
azd ai agent run |
Run the agent locally for development |
azd ai agent monitor |
Stream real-time logs from the published agent |
azd ai agent show |
Check the health and status of the published agent |
azd down |
Delete all provisioned Azure resources |
What comes next
This workflow is the inner loop for AI agent development: build, deploy, test, monitor—all from the terminal. The same azd workflow plugs into your CI/CD pipeline. To deploy on every push to main, add azd up to a GitHub Actions workflow. To manage dev, staging, and production environments with the same commands, use azd env.
The azd ai agent commands are powered by an azd extension built by the Foundry team—an example of how partner teams can extend azd to support new hosts and workflows. The azd ai agent command set is actively evolving, with capabilities like local dev-test and live agent monitoring. The goal: the full agent lifecycle—from scaffolding to evaluation to production monitoring—lives in your terminal.
Get started
With a few commands you can scaffold, deploy, invoke, monitor, and tear down a Foundry agent—all from your terminal. To try it, install azd and run azd ai agent init in any agent project. The command automatically installs the azd ai agent extension, so there’s nothing extra to set up.
We’d love to hear how the experience works for you. File bugs or feature requests in the azure-dev repo on GitHub, and tag them with ai-agent so the team can triage quickly.
Resources:
- Azure Developer CLI documentation—full docs, install guides, and reference
- Sample agent repo—the hotel concierge agent used in this post
- Sample chat app repo—lightweight frontend for your published agent
- Microsoft Foundry—manage your agents in the portal
How can I use the azd deploy locally from my Mac (M4). The docker image cannot be build. Not sure how to resolve this issue.
Hi Robert, I just updated https://github.com/puicchan/seattle-hotel-agent so that it works with hosted agent (v1.0 release of Microsoft Agent Framework.) I will update the blog to call this out. Make sure you deploy to a supported region – refer to https://learn.microsoft.com/en-us/azure/foundry/agents/concepts/hosted-agents?branch=release-hosted-agents-vnext#region-availability for more details.
Hey Robert, it’s possible that the Docker image is targeting linux/amd64. Try to enable Rosetta in Docker Desktop: go to Docker Desktop → Settings → General → “Use Rosetta for x86_64/amd64 emulation on Apple Silicon” and enable it.
If that doesn’t work, would you share the specific error message from the Docker build? That would help narrow down the issue. You can also file an issue in the `/Azure/azure-dev` repo for the team to investigate.
Very good article with better step by step explanation, thank you for posting it .