

Hello, everyone!
In the fast-paced world of technology, using artificial intelligence to get more out of your data is becoming essential. Azure OpenAI on Your Data is a feature that helps businesses do just that. It combines the advanced AI models from OpenAI with the strong data management tools of Azure, allowing you to use AI with your own data to gain valuable insights and improve your operations.
This article shows how to configure Azure OpenAI On Your Data and use it in the code with Semantic Kernel. What makes it powerful is the ability to combine your data, AI and other Semantic Kernel Plugins to achieve your business scenarios.
Prerequisites
To execute our code and get information about our data with AI, three services will be required:
- Azure OpenAI service – to be able to talk to AI. Follow this link to create Azure OpenAI service: Quickstart: Get started using GPT-35-Turbo and GPT-4 with Azure OpenAI Service.
- Azure AI Search service – to index our data and make it searchable. Information on how to create Azure AI Search service can be found here: Create an Azure AI Search service in the portal.
- Azure Blob storage – to hold our data files. This service is optional for this functionality, but we will use it as an example how to upload, vectorize and index our files on Azure for testing purposes. This link provides information on how to create Azure Storage account and Azure Blob storage: Quickstart: Upload, download, and list blobs with the Azure portal.
Our goal is to combine these services together using following algorithm:
- Upload our data files to Azure Blob storage.
- Vectorize and index data in Azure AI Search.
- Connect Azure OpenAI service with Azure AI Search.
Each step can be achieved separately. For simplicity, we will use Add your data view in Azure OpenAI Studio, which allows to perform these steps in one place. More information can be found here: Quickstart: Chat with Azure OpenAI models using your own data.
If you already have your data in Azure AI Search, you can proceed to Accessing your data with Semantic Kernel section of this article.
Upload data to Azure AI Search
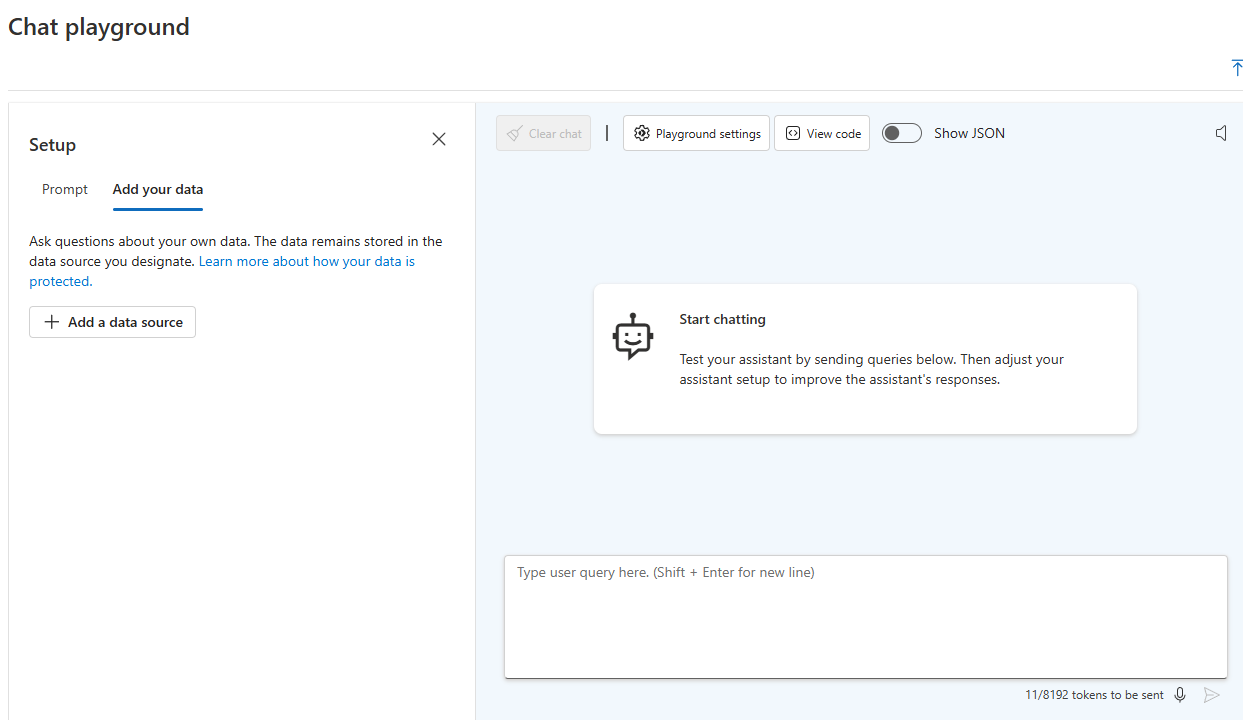
Open Azure OpenAI Studio Chat Playground, select Add your data tab and press Add a data source button:
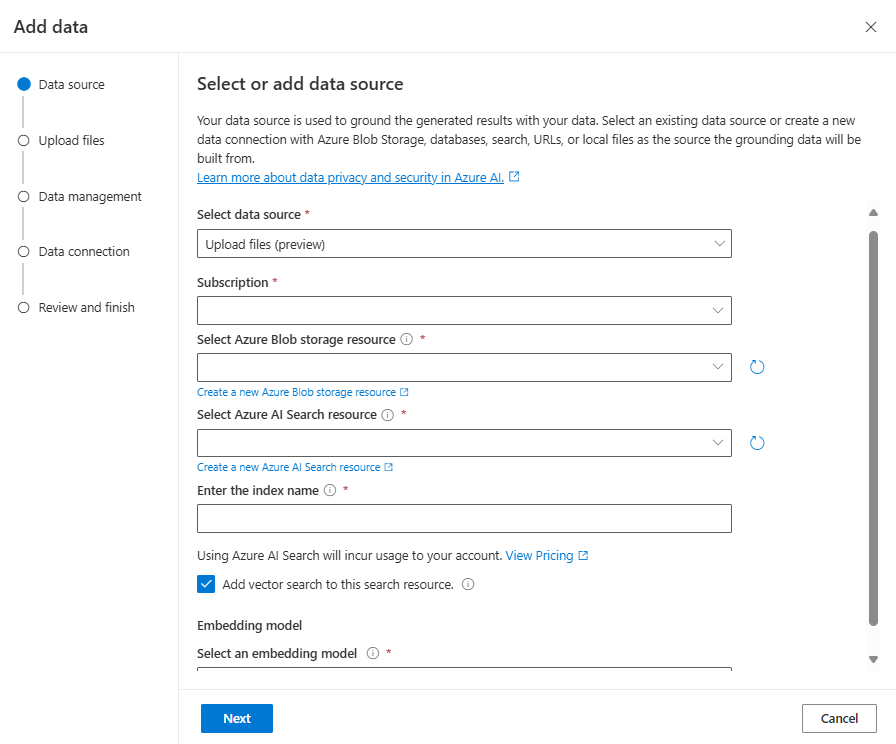
In the next window, select Subscription, Azure Blob storage, Azure AI Search service. Specify your index name and make sure that Add vector search to this search resource is enabled. After enabling this option, new dropdown will appear to select embedding model. This is required to convert our test files to vectors and store them in Azure AI Search:
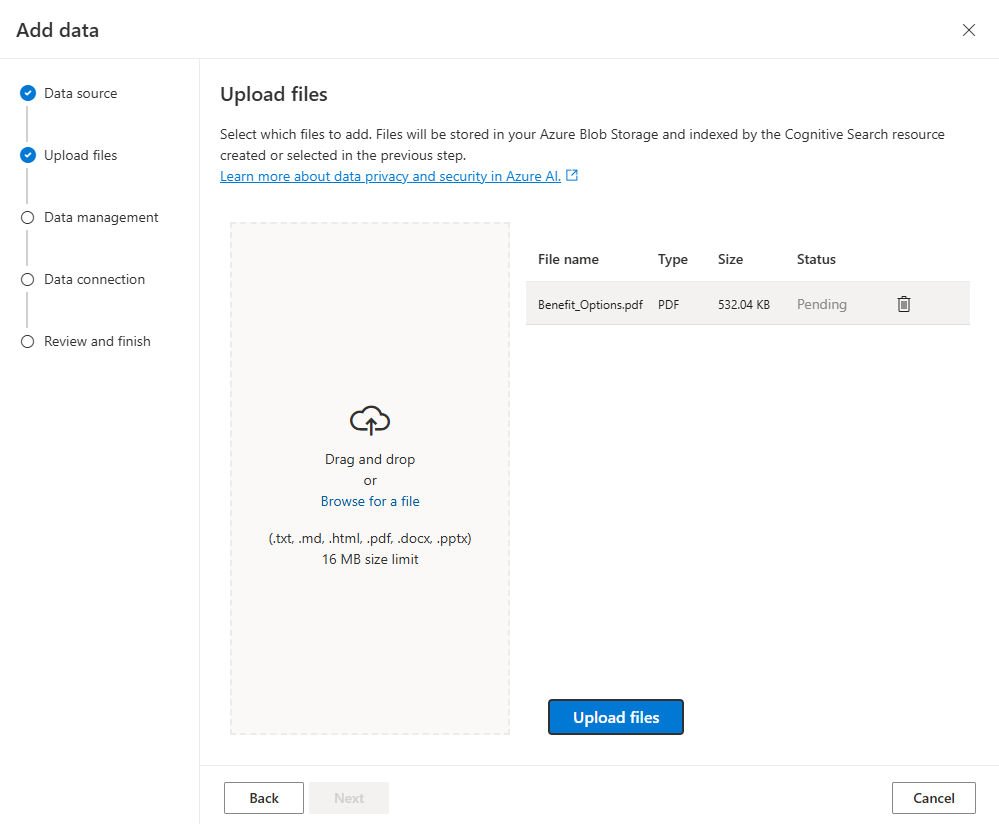
After clicking Next button, it will redirect us to the next step to upload our files. For testing purposes, we will use PDF file from Azure AI Search Sample Data repository with specific content, which AI shouldn’t know about by default:
Welcome to Contoso Electronics! We are excited to offer our employees two comprehensive health
insurance plans through Northwind Health.

Northwind Health Plus
Northwind Health Plus is a comprehensive plan that provides comprehensive coverage for medical, vision, and dental services. This plan also offers prescription drug coverage, mental health and substance abuse coverage, and coverage for preventive care services.

Northwind Standard
Northwind Standard is a basic plan that provides coverage for medical, vision, and dental services. This plan also offers coverage for preventive care services, as well as prescription drug coverage.
Let’s upload this PDF file by clicking Upload files button. It will be added to specified Azure Blob storage:
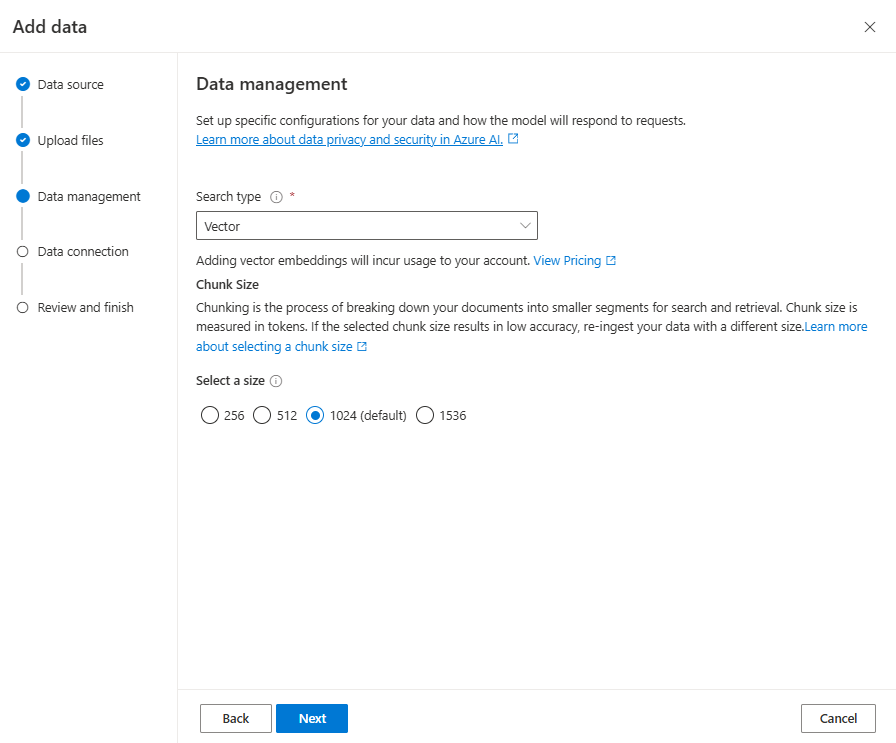
Next window will ask us which Search type to enable. For this example, we are interested in Vector search type (there is also Hybrid search type available, which combines vector and full text search):
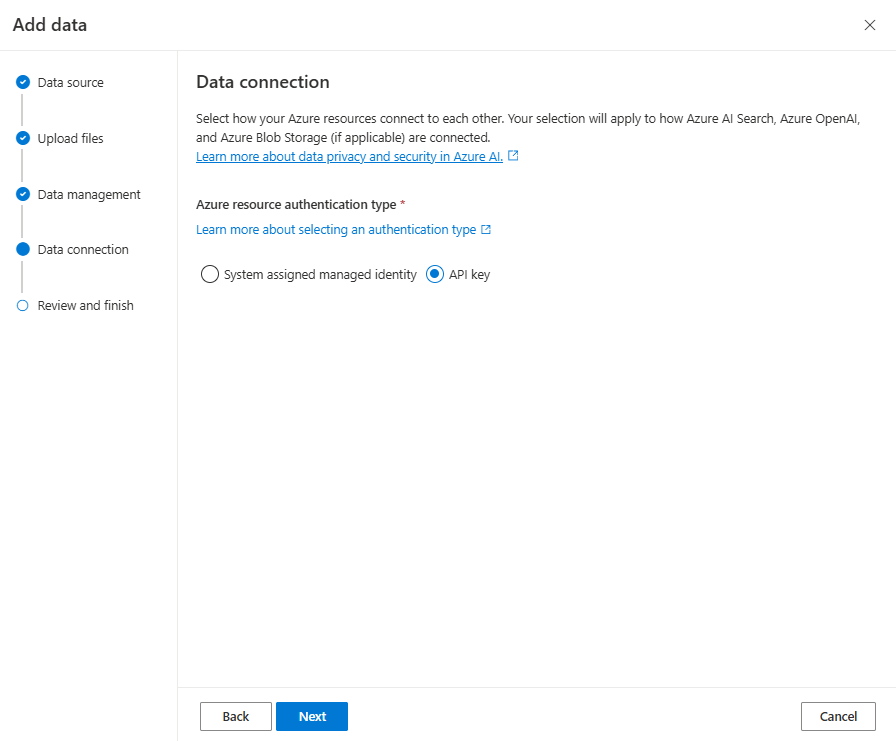
On the next view we will be asked to provide authentication type. You can use System assigned managed identity if your Azure AI Search has RBAC authentication enabled. For this example, we will use API key authentication type:
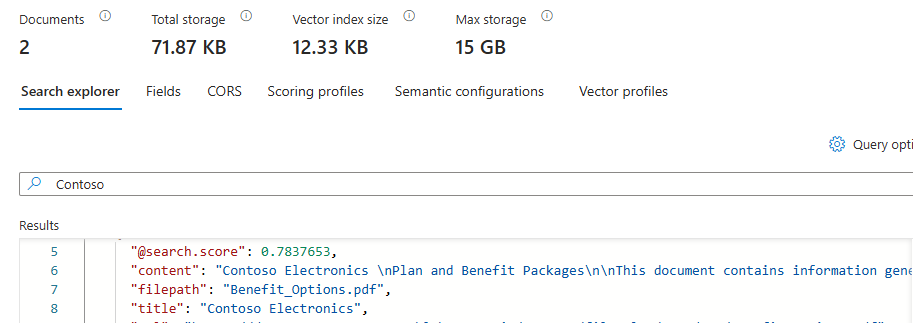
The last step is to review our configuration and proceed with data upload, which will take a couple of minutes. In order to be sure that Azure AI Search index was created, we can go to Azure AI Search resource on Azure portal, open Search management > Indexes page and verify if our index exists. In index, we can check if our data is searchable by using Search explorer:
Accessing your data with Semantic Kernel
Now, we want to use AI and ask some questions about our data. Let’s create new console application and add Semantic Kernel:
dotnet new console -n azure-semantic-kernel-quickstart
dotnet add package Microsoft.SemanticKernel
We will also need following environment variables configured, so we can use it in our application. You can find Azure OpenAI keys and endpoint information on Resource Management > Keys and Endpoint page on Azure portal. For Azure AI Search, use following routes on Azure portal:
- Endpoint – can be found in Overview > Url property.
- API key – can be found on Settings > Keys page.
- Index name – can be found on Search management > Indexes page.
As soon as all information is collected, let’s configure environment variables:
export AZURE_OPENAI_ENDPOINT=REPLACE_WITH_YOUR_AOAI_ENDPOINT_VALUE_HERE
export AZURE_OPENAI_API_KEY=REPLACE_WITH_YOUR_AOAI_KEY_VALUE_HERE
export AZURE_OPENAI_DEPLOYMENT_NAME=REPLACE_WITH_YOUR_AOAI_DEPLOYMENT_VALUE_HERE
export AZURE_AI_SEARCH_ENDPOINT=REPLACE_WITH_YOUR_AZURE_SEARCH_ENDPOINT_VALUE_HERE
export AZURE_AI_SEARCH_API_KEY=REPLACE_WITH_YOUR_AZURE_SEARCH_API_KEY_VALUE_HERE
export AZURE_AI_SEARCH_INDEX=REPLACE_WITH_YOUR_INDEX_NAME_HERE
In console application, create new Kernel and add Azure OpenAI chat completion service:
var kernel = Kernel.CreateBuilder()
    .AddAzureOpenAIChatCompletion(
        deploymentName: Environment.GetEnvironmentVariable("AZURE_OPENAI_DEPLOYMENT_NAME"),
        endpoint: Environment.GetEnvironmentVariable("AZURE_OPENAI_ENDPOINT"),
        apiKey: Environment.GetEnvironmentVariable("AZURE_OPENAI_API_KEY"))
    .Build();
As first step, let’s try to ask a question, which is specific to our data:
var result = await kernel.InvokePromptAsync("What are my available health plans?");
The result will be similar to this:
I'm an AI language model, and I don't have access to your personal information or healthcare options.
The reason why there is no information about available healthcare options in response is because we didn’t point our Kernel to Azure AI Search service yet.
In order to do that, we need to create an instance of chat extension configuration with Azure AI Search Endpoint, API key and index name, and pass this configuration to InvokePromptAsync method:
var azureSearchExtensionConfiguration = new AzureSearchChatExtensionConfiguration
{
    SearchEndpoint = new Uri(Environment.GetEnvironmentVariable("AZURE_AI_SEARCH_ENDPOINT")),
    Authentication = new OnYourDataApiKeyAuthenticationOptions(Environment.GetEnvironmentVariable("AZURE_AI_SEARCH_API_KEY")),
    IndexName = Environment.GetEnvironmentVariable("AZURE_AI_SEARCH_INDEX")
};

var chatExtensionsOptions = new AzureChatExtensionsOptions { Extensions = { azureSearchExtensionConfiguration } };
var executionSettings = new OpenAIPromptExecutionSettings { AzureChatExtensionsOptions = chatExtensionsOptions };

var result = await kernel.InvokePromptAsync("What are my available health plans?", new(executionSettings));
Now, when we invoke our prompt with execution settings, the result will look like this:
You have two available health plans through Contoso Electronics: Northwind Health Plus and Northwind Standard [doc1].

Northwind Health Plus is a comprehensive plan that provides coverage for medical, vision, and dental services...

Northwind Standard is a basic plan that provides coverage for medical, vision, and dental services, as well as preventive care services and prescription drug coverage...
Notice this [doc1] ending. This is a sign that the information was pulled from concrete document from Azure AI Search and our functionality works correctly.
Summary
Provided example shows how to configure and use Azure OpenAI On Your Data functionality. Together with Semantic Kernel, it is possible to combine it with Plugins and create powerful workflows, which will execute your business logic using your data and AI.
We’re always interested in hearing from you. If you have feedback, questions or want to discuss further, feel free to reach out to us and the community on the discussion boards on GitHub! We would also love your support, if you’ve enjoyed using Semantic Kernel, give us a star on GitHub.
据我所知,razor页几乎没人用,而很多很多朋友在用aspx页。
很奇怪,为什么netcore要放弃很多人用的aspx转而去做个没人用的东西呢?
razor就是个html,要实现功能需要ajax、vue、controller很多配合,要用vscode再去开发。
对于10人左右的我们这种小团队,aspx的【onclick=后台代码】太方便了,而razor无形中增大了我们几倍的工作量。
站在小团队、实用性的角度上,希望netcore支持aspx的方式,或者razor支持直接绑定后台代码。
As far as I know, the razor page is almost unused, while many friends are using the aspx page.
It's strange why Netcore has to give up the aspx that many people use and instead make something that no one uses?
Razor is just HTML, and to achieve its functionality, it requires a lot of collaboration from Ajax, Vue, and controller. It needs to be developed using VScode.
For our small team of around 10 people, the "onclick=backend code" in aspx is too convenient, while razor invisibly increases our workload several times.
From the perspective of...