
Adding the Microsoft Graph to Your Xamarin.Forms Mobile Apps
The Microsoft Graph provides a unified API endpoint for access to various services like mail, contacts, calendar, files, and more. To help make it as easy as possible to interact with the Microsoft Graph in your mobile apps, Microsoft released the Graph SDK, which wraps these APIs into an easy-to-use SDK.
In a previous blog post, we walked through building a mobile app that consumed the Microsoft Graph using HttpClient. Today, you’ll learn how to build a mobile app that interacts with the Microsoft Graph using the brand new Microsoft Graph SDK.
Step 1: Register App
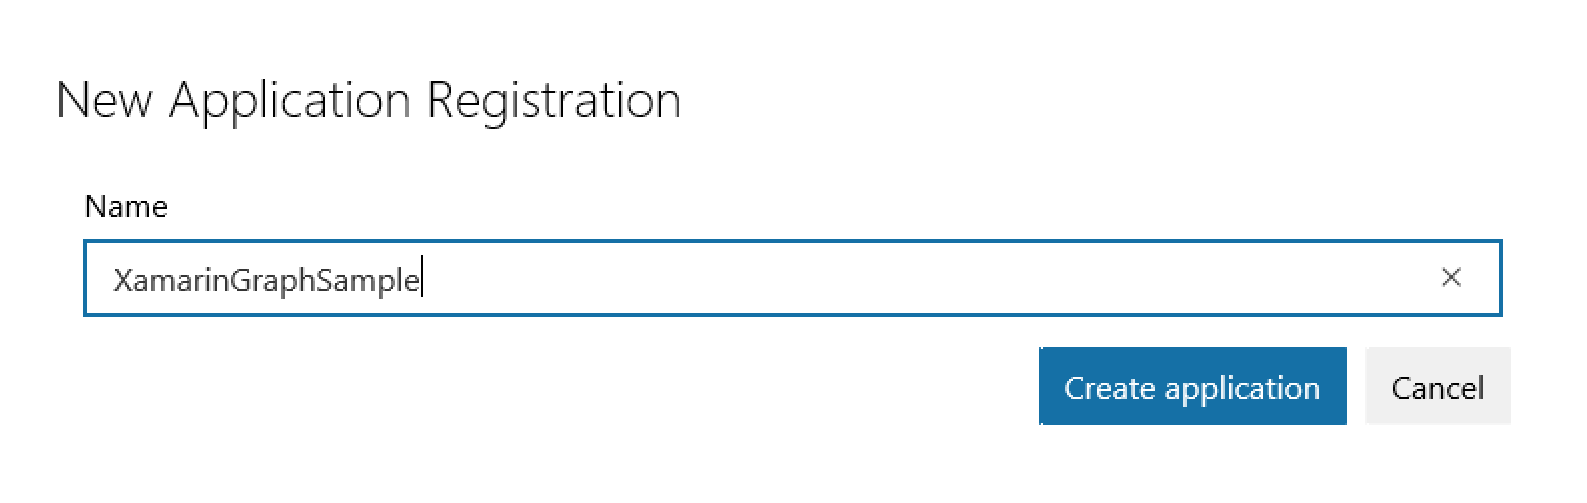
Previously, developers would need to register their mobile app on the Azure Portal. With the latest update, it’s now possible to register the app at https://apps.dev.microsoft.com. Click on Add an app on the page, give the app a name, and click Create application.
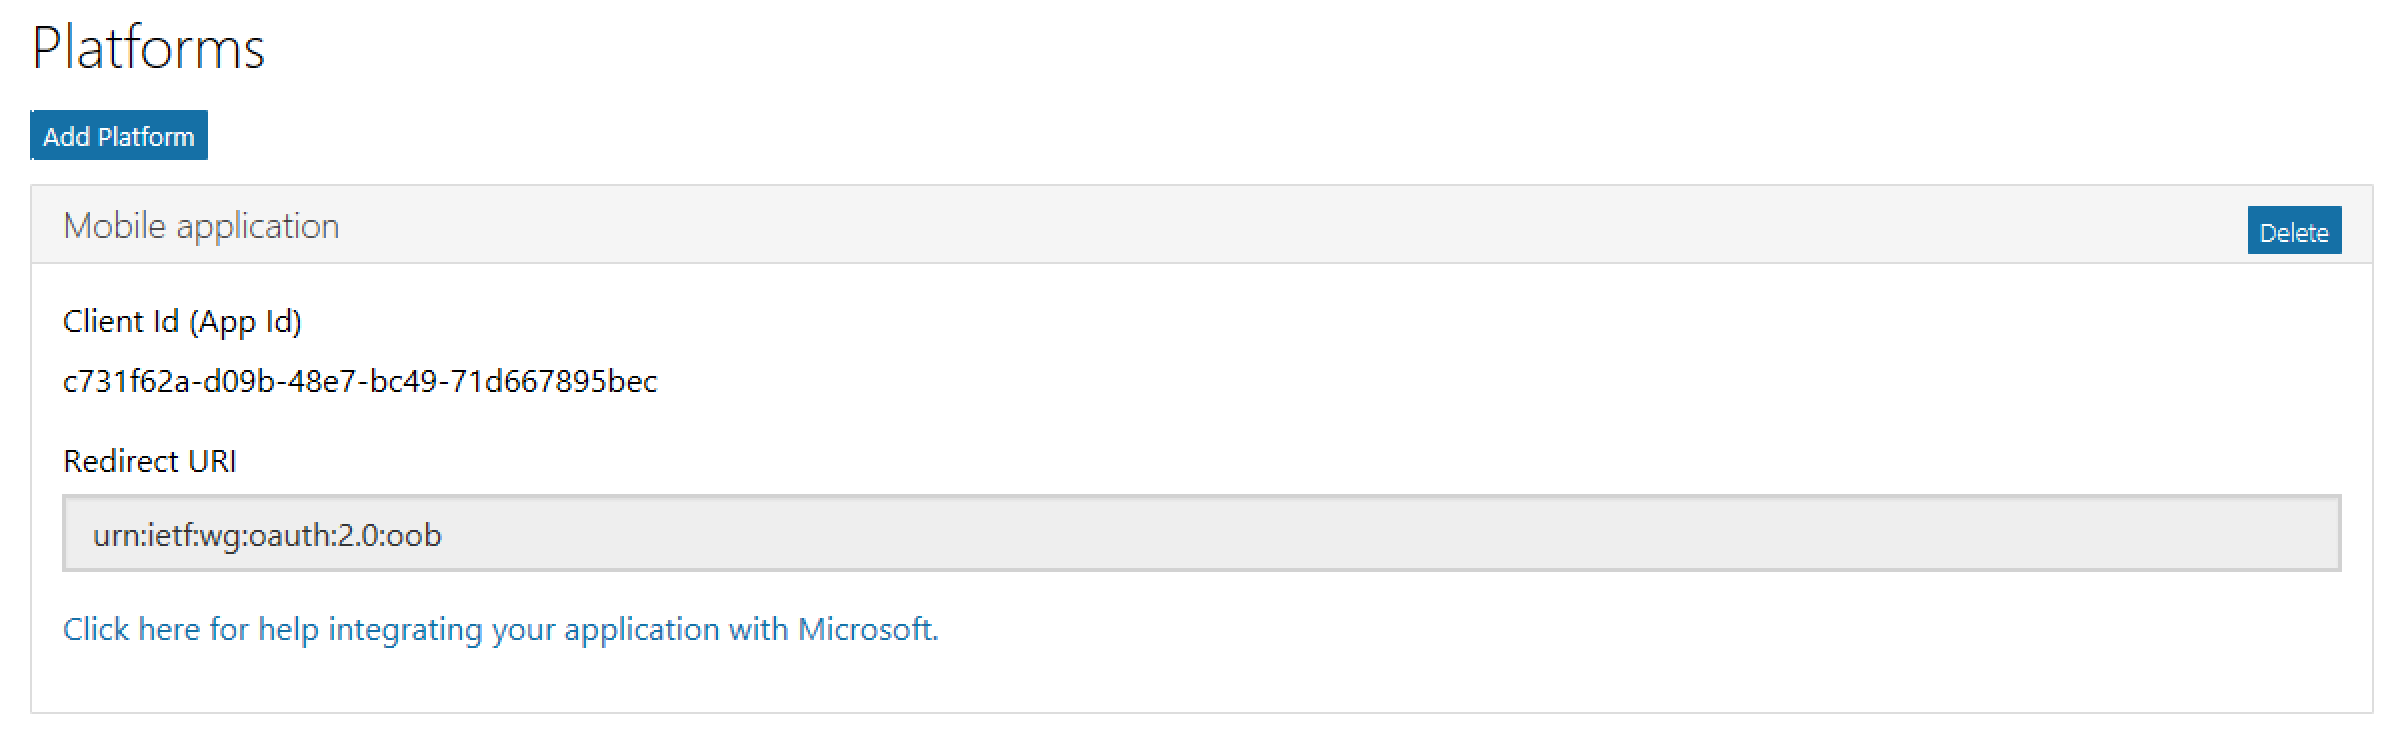
Once the app has been created, make a note of the App ID. It’s now time to request permissions for both our app and the user. In this sample, we’ll focus on the process of providing permissions to the user.
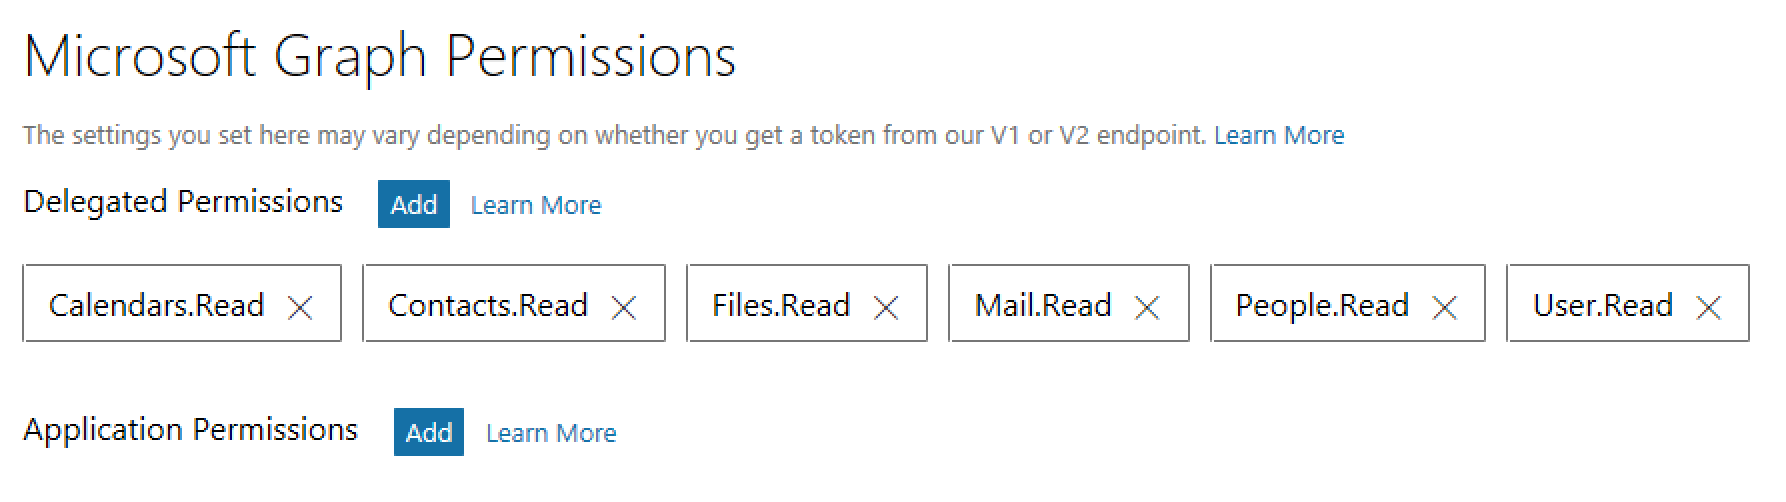
Once the application is created, it’s time to give it permissions. There can be permissions for the user as well as for the application. In this sample, we’ll be giving permissions to the user.
Step 2: Authenticate
To authenticate the user against Active Directory, we’ll be using the Microsoft Authentication Library (MSAL). Let’s start by declaring the required variables and scopes in our app’s App.cs file.
public static PublicClientApplication IdentityClientApp = null;
public static string ClientID = "3b1def2e-5b4e-413d-9a96-b8d8e9776029";
public static string[] Scopes = {
                        "https://graph.microsoft.com/Calendars.Read",
                        "https://graph.microsoft.com/Contacts.Read",
                        "https://graph.microsoft.com/User.Read"
                         };
public App()
{
   IdentityClientApp = new PublicClientApplication(ClientID);
   MainPage = new HomePage();
}
AuthenticationHelper.cs is a helper class which fetches the AccessToken behind the scene and authorizes the requests.
graphClient = new GraphServiceClient(
         "https://graph.microsoft.com/v1.0",
         new DelegateAuthenticationProvider(
         async (requestMessage) =>
         {
            var token = await GetTokenForUserAsync();
            requestMessage.Headers.Authorization = new AuthenticationHeaderValue("bearer", token);
          }));
return graphClient;
Step 3: Using the Graph API
Using the Graph SDK is pretty straight forward. The snippet of code below will fetch information about the user, which includes their calendar and contacts.
var graphClient = AuthenticationHelper.GetAuthenticatedClient();

var me = await graphClient.Me.Request().GetAsync();
UserName.Text = me.DisplayName;
UserRole.Text = me.JobTitle;
UserOffice.Text = me.OfficeLocation;

var calendar = await graphClient.Me.Calendar.Events.Request().GetAsync();
var evnt = calendar.FirstOrDefault();
EventsTitle.Text = evnt.Subject;
EventDate.Text = evnt.Start.DateTime.ToString();

var contacts = await graphClient.Me.Contacts.Request().GetAsync();
var contact = contacts.FirstOrDefault();
ContactName.Text = contact.DisplayName;
ContactEmail.Text = contact.EmailAddresses.FirstOrDefault().Address;
Remember, as each platform implements the authentication experience differently, using CustomRenderer IPlatformParameters can be passed separately.
The app will now display the details outlined above when it’s run.
Wrapping Up
The Microsoft Graph SDK makes it simple to consume Graph APIs in any .NET application, allowing us to add user data like mail, contacts, calendar, and files to our apps with a single unified API. You can find the fully functional sample used in this blog here and the SDK used is available here
 Light
Light Dark
Dark
0 comments