
Right-To-Left Localization in Xamarin.Forms
If you’re making apps that support right-to-left languages, we have great news for you: Xamarin.Forms 3.0 makes it easier than ever to flip layouts to match language direction!
We’ll use the TodoLocalized sample app to demonstrate preparing your app for right-to-left support. Let’s walk through implementing right-to-left using this new support.
Note: The TodoLocalized sample app uses the Multilingual App Toolkit (MAT) to generate machine-translated resource files for the static strings in the app. You don’t need to have this installed to work with the sample, but there is an extension available for Visual Studio 2017 if you want to give it a try. To prepare for this post, I created a new resource file for Arabic, a right-to-left language, and let MAT provide some translations. Full disclosure: I do not read or speak Arabic, so I do not claim that these translations are perfect.
Left-To-Right Layout
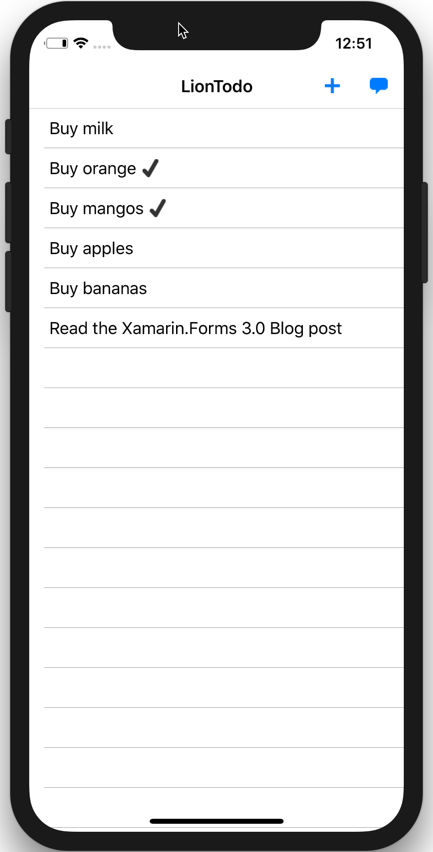
Let’s establish a left-to-right baseline so that we can see exactly what changes when we flip to right-to-left. With the language set to English and region set to United States, the app looks like this:
Starting Point: Right-to-Left
The todo items are aligned to the left, and the toolbar items are aligned to the right.
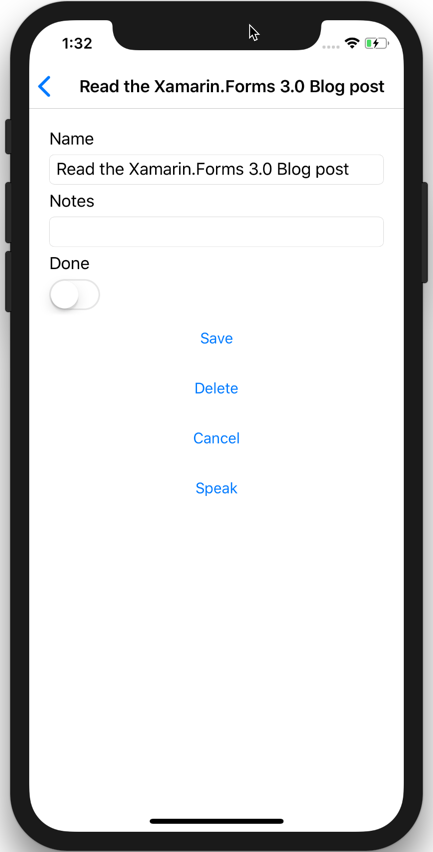
Starting Point: Detail Page
When we add an item, the back button is aligned to the left, the labels for the entries are aligned to the left, and the switch toggle is on the left when it is in the “off” position. Also, the cursor is on the left when we tap inside of an entry, and new text flows from left to right when we type.
Great! That’s exactly what we expect from a left-to-right application. Let’s get to the good part. First, some prerequisites.
Preparing for Right-to-Left
To switch an iOS device to use right-to-left layouts, you’ll need to pick a right-to-left language and right-to-left region in Settings > General > Language & Region. If you don’t happen to know how to read the language you’re about to pick, I recommend you pay close attention to the buttons you have to tap to get to the language settings. You might want to write down the text of each button and use a translator to find out what the text will be in the new language. Otherwise, you might find it a bit difficult to get your device back to your own language!
The same advice applies to UWP and Android, although you can use Android’s Force Right to Left developer option to preview right-to-left layouts without switching your language and region.
You also need to tell your application that it’s allowed to recognize a right-to-left layout. For iOS, add the right-to-left language in the CFBundleLocalizations section of your Info.plist, and make sure you’re targeting iOS 9+.
<key>CFBundleDevelopmentRegion</key>
<string>en</string>
<key>CFBundleLocalizations</key>
<array>
    <string>en</string>
    <string>ar</string>
</array>
For Android, add android:supportsRtl="true" to your application tag in your AndroidManifest.xml, and make sure your MinSDKVersion is 17+.
For UWP, add the Resource Language to your Package.appxmanifest.
<Resource Language="en" />
<Resource Language="ar" />
All of this is standard; if you were developing natively, you’d have to perform the same set up work. For more information on preparing your apps for localization, have a look at the stellar documentation available in the Xamarin Developer Guides.
What the Phone Operating System Does for Us
I’ve set my iPhone to Arabic language, Iraq region. Here’s what we get with just the localization files and language/region set:
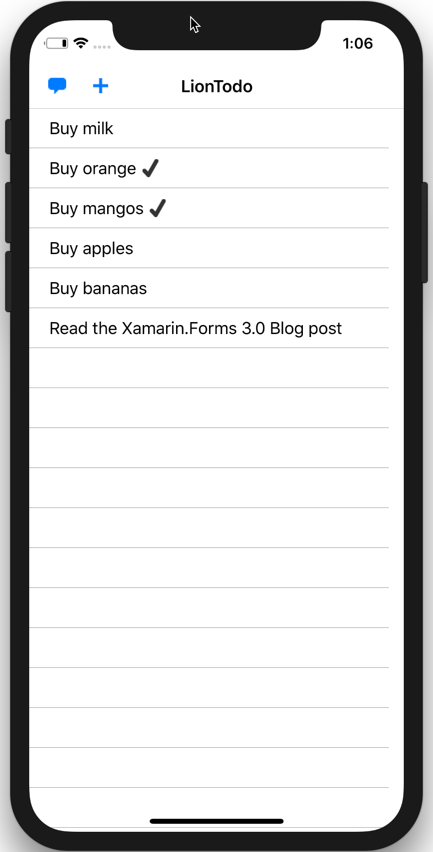
RTL Region Settings
The toolbar items have flipped to the left and swapped positions, but not much else has changed. Let’s look at the Add Item page.
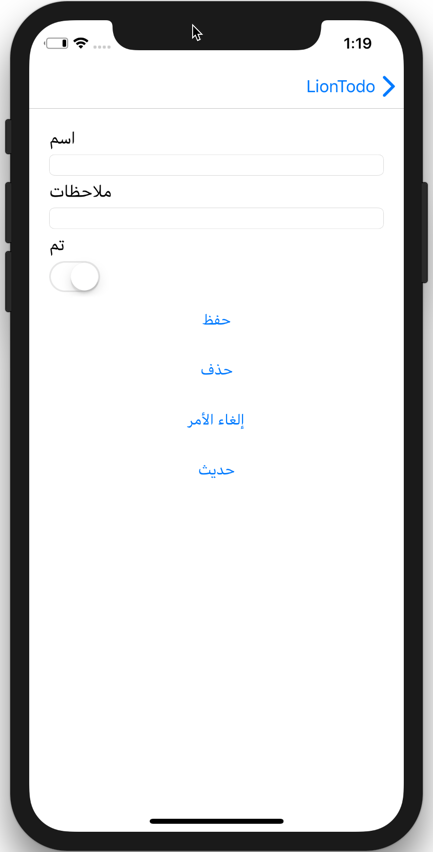
Here we see the result of the localization. The static text in the app is coming from my Arabic resource files, but the labels are still aligned to the left of the screen. The text in the entry is also still aligned to the left, although typing in it adds characters to the left now instead of to the right. The back button has moved to the right. And that’s it! The phone operating system will flip my navigation bar and text entry automatically, but everything else remains in the left-to-right layout.
If you’re feeling underwhelmed by what we’ve just seen, that’s understandable. Don’t worry—there’s more!
Introducing FlowDirection
Make sure you’re using the latest version of Xamarin.Forms. Go to each page of the application, where you’ll see there’s a new property on every VisualElement (e.g., ContentPage, DatePicker, etc.) called FlowDirection. If you set this property on a VisualElement, the value will be inherited by all of its children (unless they override it, which we’ll look at later). Let’s try it.
If you’re using XAML, add FlowDirection="{x:Static Device.FlowDirection}" directly in the main tag of your page. You can also set the same value using C#.
Device.FlowDirection is a helper that lets you know which direction the app should flow based on the device language and region. Since our language and region call for a right-to-left flow direction, the value is RightToLeft. Let’s see what this does:
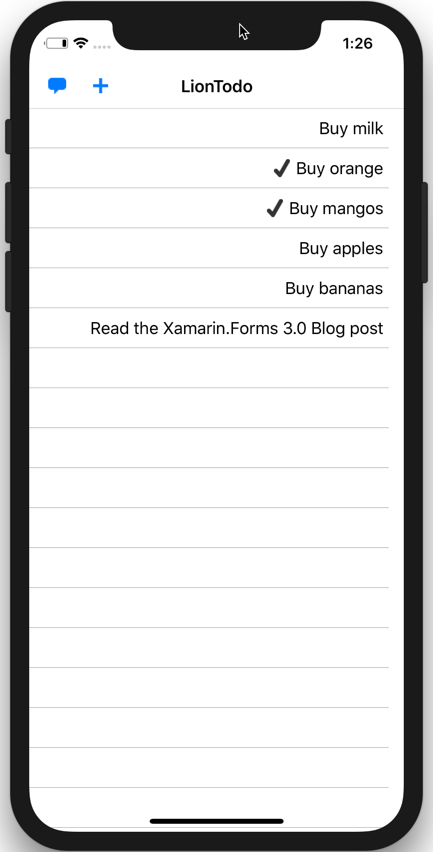
Now we’re talking! The list items are now aligned to the right. The checkmark indicating a done item has also moved to the left of the text, which makes sense. Let’s take a look at the Add Item page:
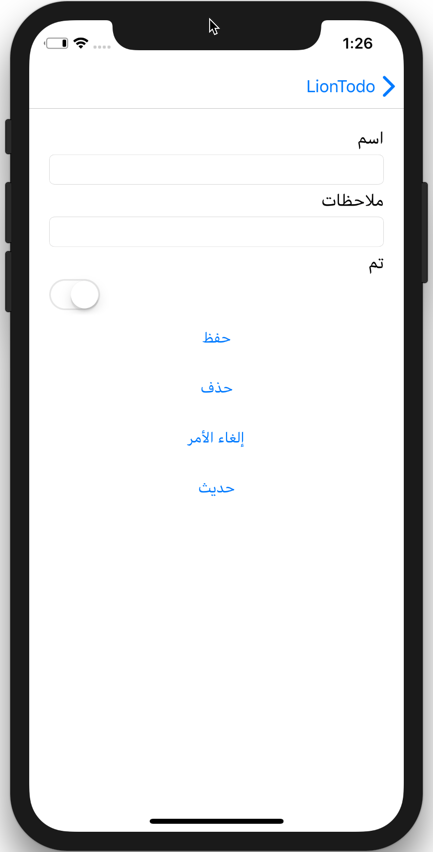
Now our labels are also aligned to the right. Tapping inside an entry shows the cursor starting at the right. Much better! If you’re paying close attention, you’ll also notice that the switch has flipped, too. The toggle is now on the right instead of on the left when it’s in the off position.
Let’s say you decide that you don’t want the switch to flip in right-to-left mode. No problem. Just set the FlowDirection property on the switch to LeftToRight. Done!
Update to Xamarin.Forms 3.0 Pre-Release Today!
As you can see, the addition of the FlowDirection property does a lot of the work needed to support right-to-left layouts, and it offers flexibility to customize layouts as you see fit. You can begin using FlowDirection today in our latest pre-release version, Xamarin.Forms 3.0, available on NuGet. Let us know if you have any suggestions to make the right-to-left story even better. In the meantime, keep building amazing apps!
 Light
Light Dark
Dark
0 comments