
Installing Xamarin Made Easy with Offline Installation
Mobile application development requires a successful installation of the correct development tools & SDKs. In the case of Xamarin, your tools will be Visual Studio 2015 and third-party SDKs. As Visual Studio allows any developer to build any kind of app for any platform, while providing features like IntelliSense, code refactoring, code navigation, debugging & testing in the same IDE, it has a considerable install size. Successful installation of Visual Studio takes time and depends on network connectivity. In this blog, we’ll cover how you can create your own offline installation media for Xamarin with Visual Studio 2015.
Step 0: Whitelist URLs
Before installing Visual Studio, it is important that the following URLs are whitelisted in your firewall/proxy. Failing to do this may result in some components failing to install.
- dl-ssl.google.com
- dl.google.com
- xamarin.com
- download.xamarin.com
- dl.xamarin.com
- log.xamarin.com
Step 1: Download Setup Files for Offline Installation
Visit the Visual Studio website, and navigate to the Downloads page. Download the relevant installer for Visual Studio Community, Professional or Enterprise. Once the installer download is complete, run it from the command prompt using the /layout switch:
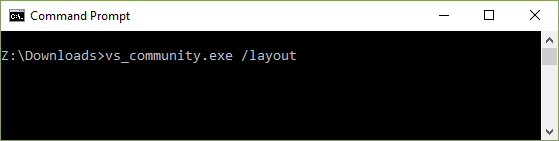
After executing this command Visual Studio installer will launch and ask you to confirm where to store install items.
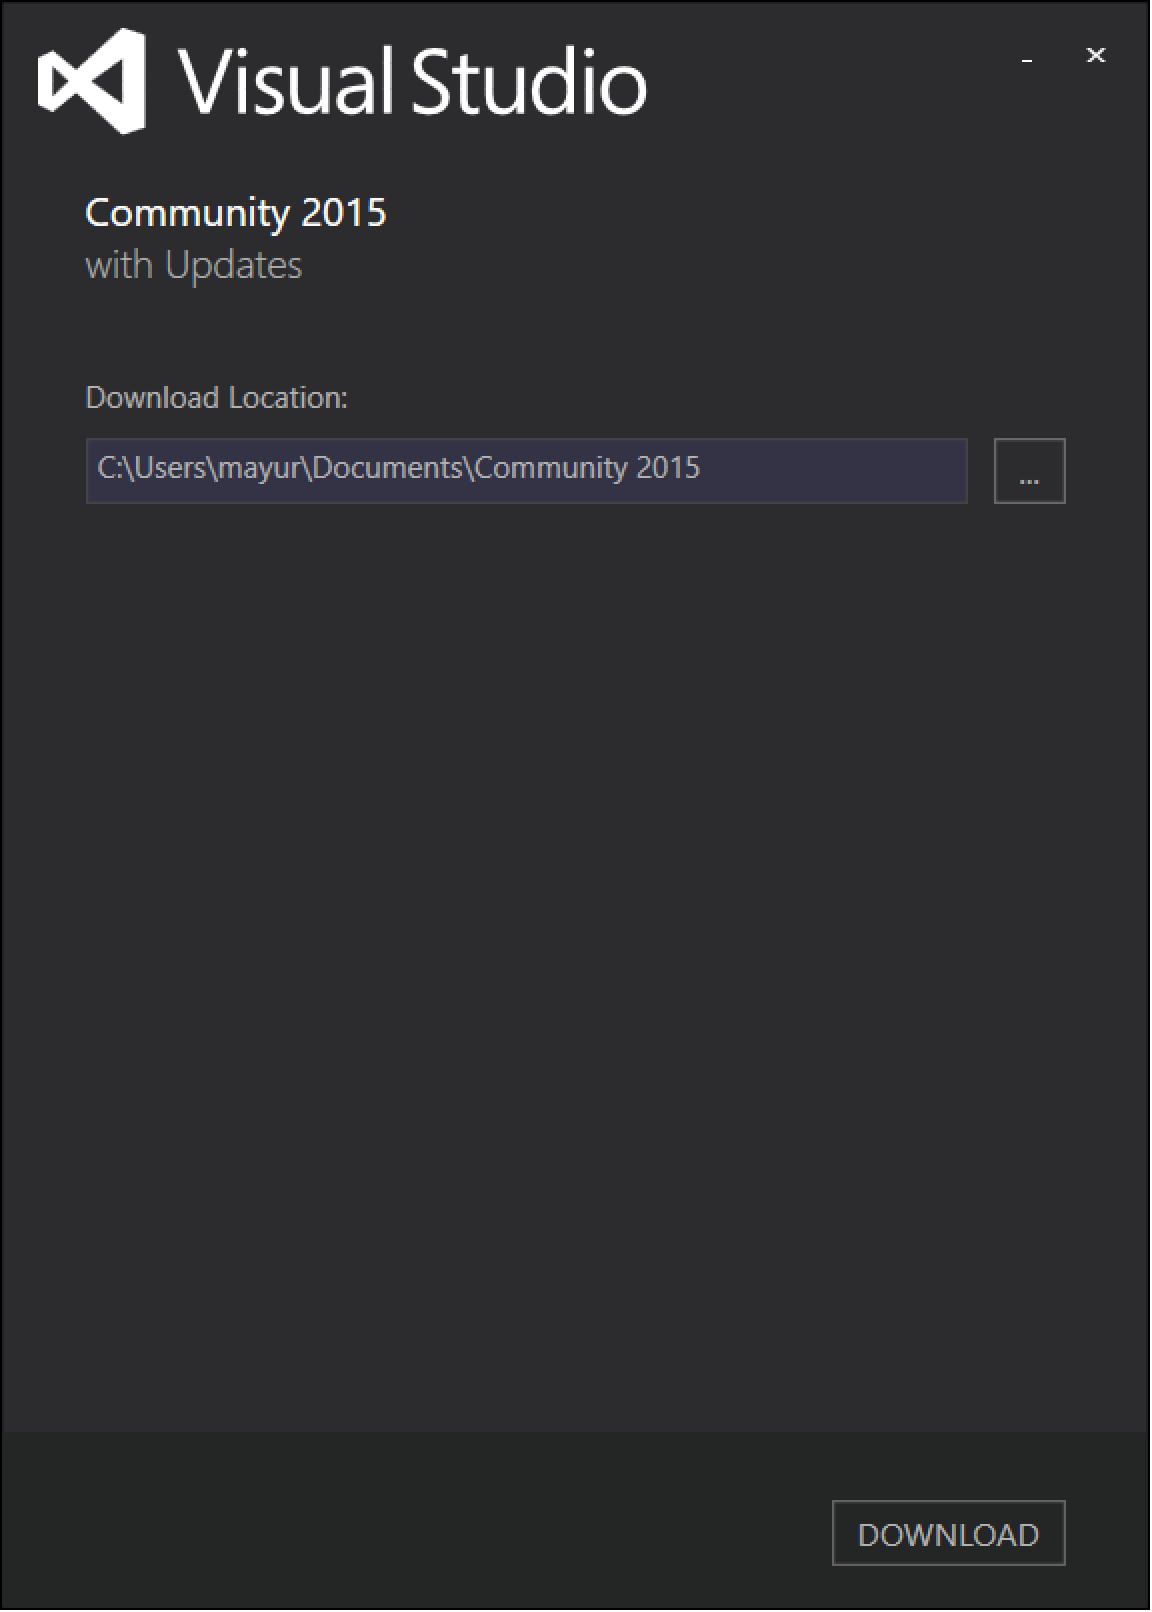
Note: The download size will be considerably large and, dependent on your bandwidth, will usually take quite some time to download. Ensure you have enough drive space available. Click on the ‘Download’ button and it will download all the required tools and SDKs to that location:
Step 2: Create Offline Installation Media & Install Visual Studio
Once the download is complete you can copy the contents to a USB drive or use any ISO creation tool to create your offline installation media. This will help to mount the ISO as and when required and run the setup by executing the installer. Start the Visual Studio installation from your new installation media and sit back until it completes.
Step 3: Check for Android Updates
Optionally, when the installation is complete, you can check for any Android SDK Updates. This can be done by launching Android SDK Manager from Visual Studio > Tools > Android > Android SDK Manager.
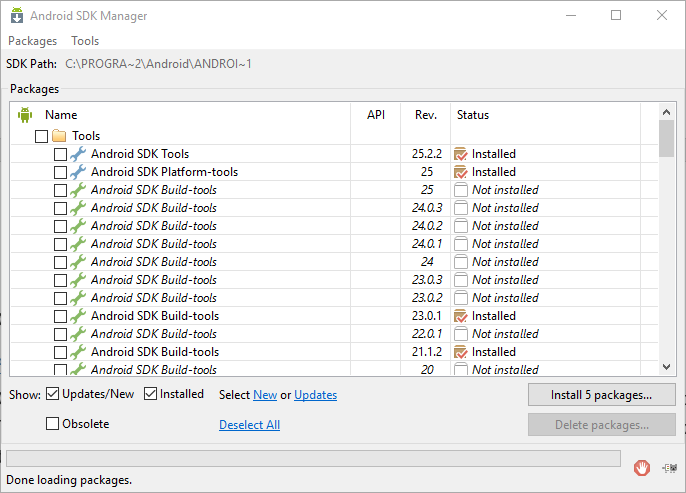
If there are any updates, select and install them.
Step 4: Verify Installation
At this point, you will be able to build Android and iOS applications using Visual Studio 2015. To verify that the install was successful you can create a new blank Android or iOS project with default the configuration and run it. The project should build and run on device or emulators without any issues.
Step 5: Resolving Errors when Building Xamarin.Forms Applications
When a Xamarin.Forms project is compiled for the first time (or when related NuGet packages are updated and a project is compiled) Visual Studio downloads associated Android Support Library packages. Visual Studio will not indicate the size or download progress for installing these packages. If these packages are corrupt because of an incomplete download then there will be errors during compilation:

If this happens then our guide on Resolving Library Installation Errors will help you resolve any issues.
Bonus Tip 1:
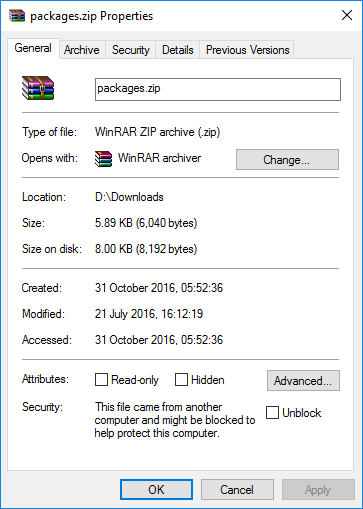
If code is downloaded from the internet or GitHub as zip file then it’s possible that the zip file is blocked from being extractable in Windows. If the zip was extracted and the solution is opened in Visual Studio then the build may fail. To avoid this you can unblock the zip files which were downloaded before extracting and opening the solution in Visual Studio. To do so you can right the zip and go to ‘Properties’. You will see an ‘Unblock’ checkbox toward the bottom of the dialogue:
Bonus Tip 2:
Depending on the Android API installed during installation the projects might either be targeting Android N (API 24) or Android M (API 23). By default, during the installation, Visual Studio installs JDK1.7. However, if the project is targeting API 24 then JDK1.8 is required. In case the project targeting API 24 is compiled with JDK1.7 and you will see an error like this: C:\Program Files (x86)\MSBuild\Xamarin\Android\Xamarin.Android.Common.targets(3,3): Error: java.lang.UnsupportedClassVersionError: com/android/dx/command/Main : Unsupported major.minor version 52.0
The Version 52.0 here is referring to the specific release of the JDK which in this case relates to JDK 8. Xamarin.Android 7.0 requires JDK 1.8 to use the Android Nougat (API 24) APIs. You can continue to use earlier versions of the JDK if targeting earlier Android API levels:
Additionally, a 64-bit version of the JDK is required to use custom controls in the Android designer.
The best option is to install the 64-bit version of JDK 1.8 since it is backward compatible with all the previous API levels and supports the new Android designer features.
More information on this can be found in our Android 7.0 Release Notes.
 Light
Light Dark
Dark
0 comments