
Debugging Xamarin Open Source Frameworks: Part 2 – Xamarin.iOS
This is the second part in a four-part series. In the first post, we covered building Xamarin.Forms from the source and then stepping into and debugging that code. In this post, we’ll explore the same principles for Xamarin.iOS. Parts 3 and 4 will discuss Xamarin.Android and Mono, respectively. It’s worth noting that as of 15.6, you do not have to do anything to step into the source code, as it is included in the distributed Xamarin.iOS SDK. Thus, this guide is more helpful for those who may want to make changes and test those changes, whether for themselves or to contribute to Xamarin.iOS.
Debugging in Xamarin.iOS
A Mac with Xcode installed will be used for this Xamarin.iOS and Xamarin.Mac build post. If you’re already building Xamarin.iOS apps, you may already have a setup. If not, Step 1 of this guide outlines how to install Xcode from the Mac App Store.
Getting Xamarin.iOS Source Code
There are a number of ways to get the Xamarin.iOS source code. The official Xamarin.iOS repository on GitHub is located in this Github repository. If yo’re already familiar with using GIT and GitHub, grab the source code using your preferred method and skip to the next section. If you don’t already have a Github account, create one here or clone the official Xamarin.iOS repository directly onto your computer.
Use your Github account to fork the Xamarin.iOS repository and then clone that fork to your computer by selecting the Fork button in the upper right-hand corner. This will create a new repository under your GitHub account.
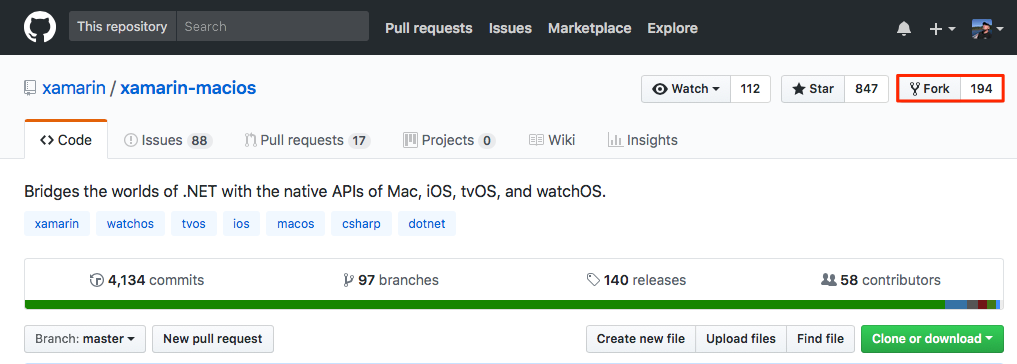
Whether you fork the repository or not, you can just select the Clone or download button, either in your fork or on the official Xamarin.iOS repo. Clicking the Clone or download button gives you two options:
- Open in Desktop: Will open the GitHub Desktop app on your Mac (get it here) and clone the repository to the directory on your Mac that you specify:
- Make commits
- Start pull requests
- Switch branches using the GitHub Desktop app, no command line necessary.
Note: only the master branch on GitHub will be downloaded. On the GitHub Desktop you can switch branches and then that branch will be downloaded onto your computer as well (this may take some time).
- Download ZIP: Will download the currently selected branch as a .zip file. When you unzip, you will note that this is not a GIT repository, so it is not ready to do commits, pull requests, switch branches, etc. If you only want to work with one specific branch, this may be the right option for you.
Once you have the source downloaded to your machine, use the instructions on the Xamarin-MaciOS wiki to build Xamarin.iOS. We recommend reading this entire section before continuing on.
Build and Install Xamarin.iOS
Xamarin.Mac resides in the same repository as Xamarin.iOS, hence the name Xamarin-MaciOS. By default, this means that they build at the same time. To build Xamarin.Mac from source, you will need a good code branch for Xamarin.Mac. The d15-6 branch we are using in this guide is a good candidate for both Xamarin.iOS and Xamarin.Mac, so we’ll use it for building both here.
This page of the Xamarin-MaciOS wiki shows what branches are in use for the currently released versions of Xamarin.iOS and Xamarin.Mac. In some cases, a different branch may be used for Xamarin.Mac than Xamarin.iOS. To disable building Xamarin.iOS or Xamarin.Mac, configure your build as discussed here.
Prerequisites
Review the prerequisites for Xamarin.iOS. Use Homebrew as a macOS package manager to get the needed dependencies.
When executing the make world command, the output will tell you if you have the right bits installed. You may need to download the required version of Xcode and then:
- Unzip it.
- Rename it.
- Move it to Mac’s application folder.
- Once moved, launch it to install the command line tools.
Note: Do not launch Xcode to move the XCode.app file, as this will confuse macOS. Only launch Xcode after it is renamed and moved to its final destination in Applications.
If you have an Apple developer account, you can get past versions of XCode here.
If still get an error when you have the correct version, it’s likely that the way your Xcode.app is named may be the issue. More info on this can be found in the Xcode section of the prerequisites. Create a symlink (symbolic link) that will point Xcode92.app to Xcode.app. Open Terminal and run the following command if the error message states to install Xcode 9.2, but you already have it installed:
sudo ln –s /Applications/Xcode92.app /Applications/Xcode.app
You may also have to select the Xcode92.app command line tools. Run the following command in Terminal:
sudo xcode-select -s /Applications/Xcode92.app/Contents/Developer
Look in Finder -> Applications folder. There you will see Xcode.app and Xcode92.app, but the latter is an alias (or symbolic link) to the former.
If you’re told you need a different version of Mono when you build, you can get it here.
Switch to the Latest Release</h3
Now, let's switch to the latest released branch of Xamarin.iOS, which is 15.6 with 15.7 in preview. Once the Xamarin.iOS source repository is cloned via Github Desktop you can switch to the d15-6 branch in the Github Desktop app:

Switching branches for a large repository can take a long time, so be patient and wait for d15-6 to show, as in the screenshot below.

Now you’re ready to build Xamarin.iOS from the source! Follow the instructions in the wiki page. If the build succeeded, you will see the following at the end of the output in Terminal:
Xamarin.iOS has not been installed on your system by 'make install'
In order to set the currently built Xamarin.iOS as your system version,
execute 'make install-system'.

Xamarin.Mac has not been installed on your system by 'make install'
In order to set the currently built Xamarin.Mac as your system version,
execute 'make install-system'.
Once make world completes successfully, install Xamarin.iOS:
make fix-install-permissions
make install-system
Congratulations, you have now successfully built and installed Xamarin.iOS from source code!
Debugging and Stepping into the Xamarin.iOS Source Code
Let’s create a Xamarin.iOS app project and step into some Xamarin.iOS framework source code. Before you can launch your app project to a device or simulator, you’ll need mlaunch (issue #3316). Follow these instructions to add mlaunch to your Xamarin.iOS build.
Now that we have everything set up, let’s debug some Xamarin.iOS!
- Open Visual Studio for Mac.
- Create a new iOS Single View App.
- Open the ViewController.cs file.
- Add the following code to the
FinishedLaunchingmethod after thebase.ViewDidLoad()line:var mystring = "Hello World"; var splitString = mystring.Split(' '); - Place a breakpoint on the
base.ViewDidLoad()line. - Run the project with debugging to a iOS simulator.
- When the program pauses, step into the code. You should be taken to the relevant Xamarin.iOS source code. Right-click on the tab for the Xamarin.iOS source code file that opens and select
Reveal in Finderso you can see that you are in the source code file from your Xamarin.iOS repository. - You can continue to step through the code and step into the
mystring.Split(' ')
Mono source code. You should see that you’re actually stepping into the Mono that is in your Xamarin.iOS repository.
You’re now stepping into and through the Xamarin.iOS source code.
Summary
Through this post, you now have the ability to use, build, and install Xamarin.iOS from source code onto your computer. Additionally, you have learned how to step into and through the Xamarin.iOS source code itself. As an added bonus, you also built Xamarin.Mac from source!
If you fixed a bug or made some improvement during this process that you would like to share, please contribute to Xamarin.iOS.
Enjoy this post? Discuss the details on the Xamarin Forums!
 Light
Light Dark
Dark
0 comments