
Using TensorFlow and Azure to Add Image Classification to Your Android Apps
TensorFlow is a well established, open source machine learning and deep learning framework that can be used to create and run a wide range of different models, usually using powerful machines in the cloud. In addition, TensorFlow also supports running models on mobile devices through the TensorFlow.Mobile library, taking advantage of the hardware acceleration available on modern phones to run models incredibly fast on low powered mobile devices.
In this post, we’ll discuss how to build an image classifier to identify different fruits using the Azure Custom Vision service, and create a simple Android app to use this model to classify images.
Getting Started
Creating ML models can be time consuming and require large data sets. To make it easier to create image classification models, Microsoft has created the Custom Vision Service, which uses a technique called transfer learning to allow you to train an image classifier using only a small number of images, instead of the thousands that traditionally would be required to train such a model. These models can be exported as TensorFlow models (or CoreML if you are on iOS) and used from inside an Android app.
Lets start by creating a project in the Custom Vision service. Make sure you select one of the compact domains, the compact domains create models that are small enough to be exported and used from a mobile device.
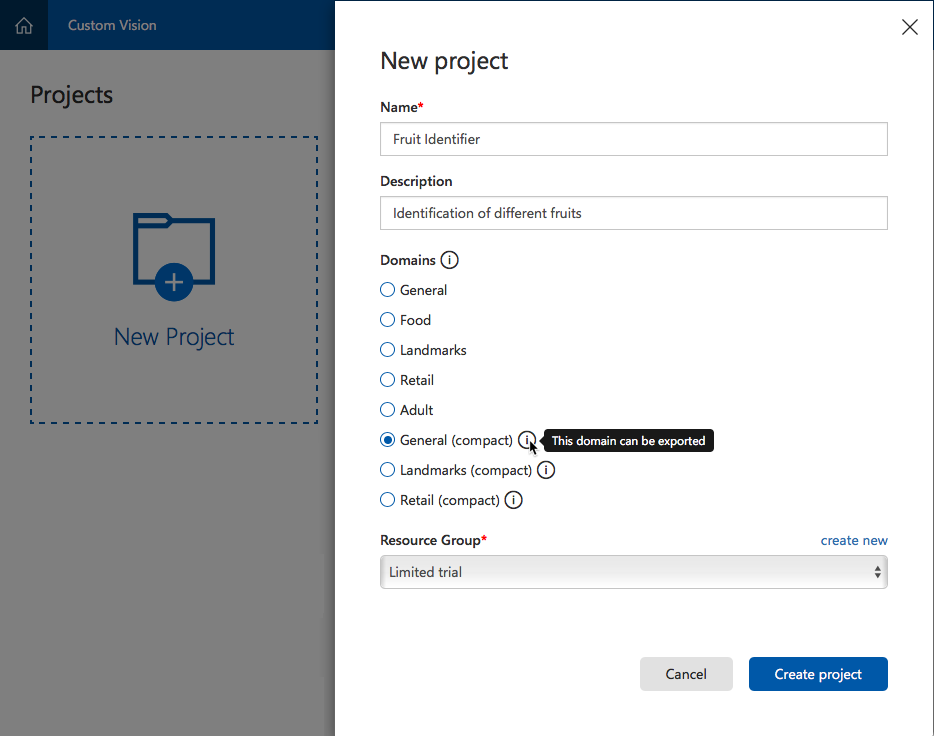
Image classifiers are trained by being given images with one or more tags, which are text labels that indicate what is in that image. For example, you might upload five pictures of oranges with the tag of orange, five pictures of bananas with the tag banana, and so on for different fruits.
To train your model, you will need at least five images for each tag you want to use, so the first step is to gather the data by photographing whatever fruit you have to hand. Next, click the Add Images button and upload the images of the first fruit, setting the appropriate tag. Repeat this for the rest of the fruits. Finally click the Train button on the top menu to train the model.

Once trained, click the Export button to export the model for use with TensorFlow.
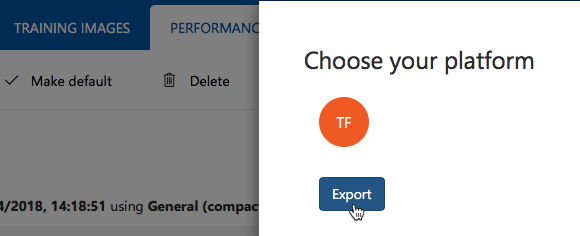
This will download a zip file containing two files: model.pb and labels.txt.
Adding the Model to Your Android App
Now that we have the model, it’s time to add it to an Android app project and use it to classify images.
Add the Model and TensorFlow.mobile to the Project
Create a new Android app by going to File -> New Project -> Android -> Single View App in Visual Studio. Add the model.pb and labels.txt files to the Assets folder, and make sure the build action is set to Android Asset.
TensorFlow.Mobile is available as a NuGet package that wraps the native Android libraries. Install the Xam.Android.Tensorflow package in your Android app.
Initializing the Model and Labels
To use the model, we need to create an instance of the TensorFlow interface using our model file. We also need to load the labels file; the model from TensorFlow doesn’t contain the actual tag values, so these come from the labels file.
    using using Org.Tensorflow.Contrib.Android;
    ...
    var assets = Application.Context.Assets;
    inferenceInterface = new TensorFlowInferenceInterface(assets, "model.pb");
    var sr = new StreamReader(assets.Open("labels.txt"));
    var labels = sr.ReadToEnd()
                   .Split('\n')
                   .Select(s => s.Trim())
                   .Where(s => !string.IsNullOrEmpty(s))
                   .ToList();
Recognizing Images
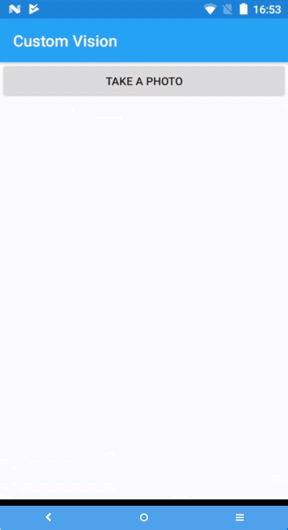
To recognize an image, first we need to capture one from somewhere. To use the camera, I’d recommend using the Xam.Plugin.Media NuGet package. This package has helpers to open the camera and extract the photo taken by the user.
Preparing the Input for the Model
Once you have a photo, it needs to be converted for the Custom Vision model. These models require the input to be of the correct size and format to work; they don’t understand images, as such, but instead understand binary data. For the models created by the Custom Vision service, you need the images to be 227×227 pixels in size, converted to an array of floating point values, one per red, green, and blue value for each pixel, with some model-specific adjustments to the color value. The following code converts an Android Bitmap to the correct format.
    var resizedBitmap = Bitmap.CreateScaledBitmap(bitmap, 227, 227, false)
                              .Copy(Bitmap.Config.Argb8888, false);
    var floatValues = new float[227 * 227 * 3];
    var intValues = new int[227 * 227];
    resizedBitmap.GetPixels(intValues, 0, 227, 0, 0, 227, 227);
    for (int i = 0; i > 8) & 0xFF) - 117);
        floatValues[i * 3 + 2] = (((val >> 16) & 0xFF) - 123);
    }
Running the Model
Now that we have our image in the right format, we can run the model against our data. Running the model involves feeding it named inputs, running it for named outputs, then retrieving the output you’re interested in by name. Each model can take multiple inputs and give multiple outputs, but in our case we only have one input and need one output. The following code shows this for our Custom Vision model.
    var outputs = new float[labels.Count];
    inferenceInterface.Feed("Placeholder", floatValues, 1, 227, 227, 3);
    inferenceInterface.Run(new[] { "loss" });
    inferenceInterface.Fetch("loss", outputs);
The outputs array is filled with floating point values, each one representing the confidence that the image matching a tag in the labels list at the same array position. For example, if you had three labels in the list in the following order:
- Apple
- Banana
- Mango
Then output[0] would be the confidence that the image is an apple, using values ranging from 0-1 with 1 representing 100%. output[1] would be the confidence that the image is a banana, and so on. You can then use the tag with the highest confidence as the most likely result.
Conclusion
It’s easy to get started building image classifiers using Azure, and access them from Xamarin.Android, using TensorFlow.Mobile. Head to GitHub to see the final sample code. Check out the documentation here to learn more about training your own Custom Vision models.
Discuss the post on the forums!
 Light
Light Dark
Dark
3 comments
for (int i = 0; i > 8) & 0xFF) – 117); floatValues[i * 3 + 2] = (((val >> 16) & 0xFF) – 123); }
this code is not valid giving error.
Check out the sample on Github. the code is below. I think its typing mistake here.
for (int i = 0; i < intValues.Length; ++i) { var val = intValues[i]; floatValues[i * 3 + 0] = ((val & 0xFF) – 104); floatValues[i * 3 + 1] = (((val >> 8) & 0xFF) – 117); floatValues[i * 3 + 2] = (((val >> 16) & 0xFF) – 123); }
I was try with my pdb and get this error:
{Java.Lang.RuntimeException: Failed to load model from 'model.pb' ---> Java.IO.IOException: Not a valid TensorFlow Graph serialization