
Get Started with Visual Studio for Mac
The first step is often the hardest. Do you find yourself with great ideas for the next awesome app, website, or game but you never get around to making that first leap into the unknown? Today, I’ll help you with that! In this blog post, I’m going to walk through how to get started with Visual Studio for Mac.
Visual Studio for Mac is a macOS-native .NET IDE that focuses on .NET Core, Xamarin, and Unity. It provides many of the same features as Visual Studio for Windows, such as a shared C#, XAML, and web editor. For more information on Visual Studio for Mac, see our documentation.
Installation
Before writing any code, you’ll first need to download Visual Studio for Mac from https://visualstudio.microsoft.com/vs/mac/. Once downloaded, click on the .dmg to launch it. Double-click the installer icon to mount it and start your install experience. Click Open if you’re prompted with security messages.
Once the installer launches, agree to the licensing terms by pressing Continue.
On the component selection screen, illustrated below, you can select the components you want to install. The component you need to install depends on the type of app that you want to create:
- .NET Core: Allows you to create .NET Core apps and libraries, ASP.NET Core Web apps, and Azure Functions.
- Android: Allows you to build native Xamarin or Xamarin.Forms apps targeting the Android platform. Selecting this will also install OpenJDK and the latest Android SDK, both of which are required for Android development.
- iOS: Allows you to build native Xamarin or Xamarin.Forms apps targeting iOS.
- macOS: Allows you to build native Xamarin.Mac apps.
Note that you’ll need to separately install Xcode if you want to develop for iOS or Mac. I recommend that you do this once Visual Studio for Mac has finished installing.

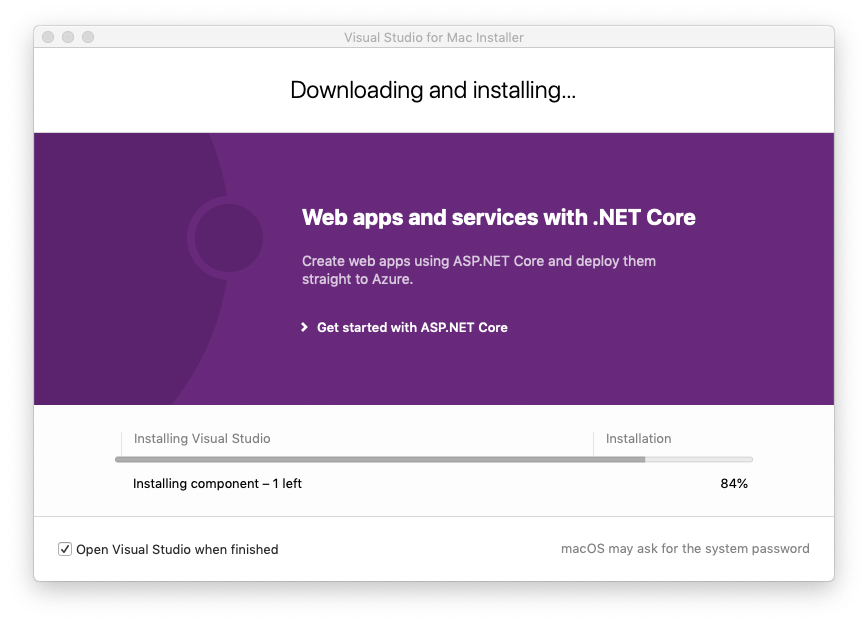
In this post, I want to create an Azure Function, so I want to select the .NET Core option. Once you click Install, the installation will take approximately 10 minutes depending on how many components you selected and your internet speed.
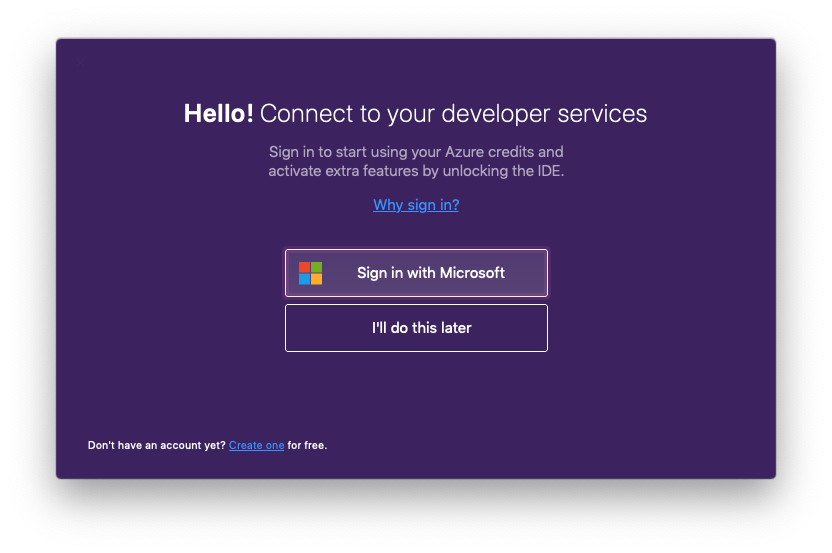
You’ll be prompted to log in with your Microsoft account if this is your first time launching Visual Studio for Mac. I’m going to log in now to activate my Enterprise license and make it easier to publish my Function to Azure.
if you don’t have an Azure or Microsoft account, you can get one totally free ! This also comes with over $200 free Azure credits to spend as you see fit.
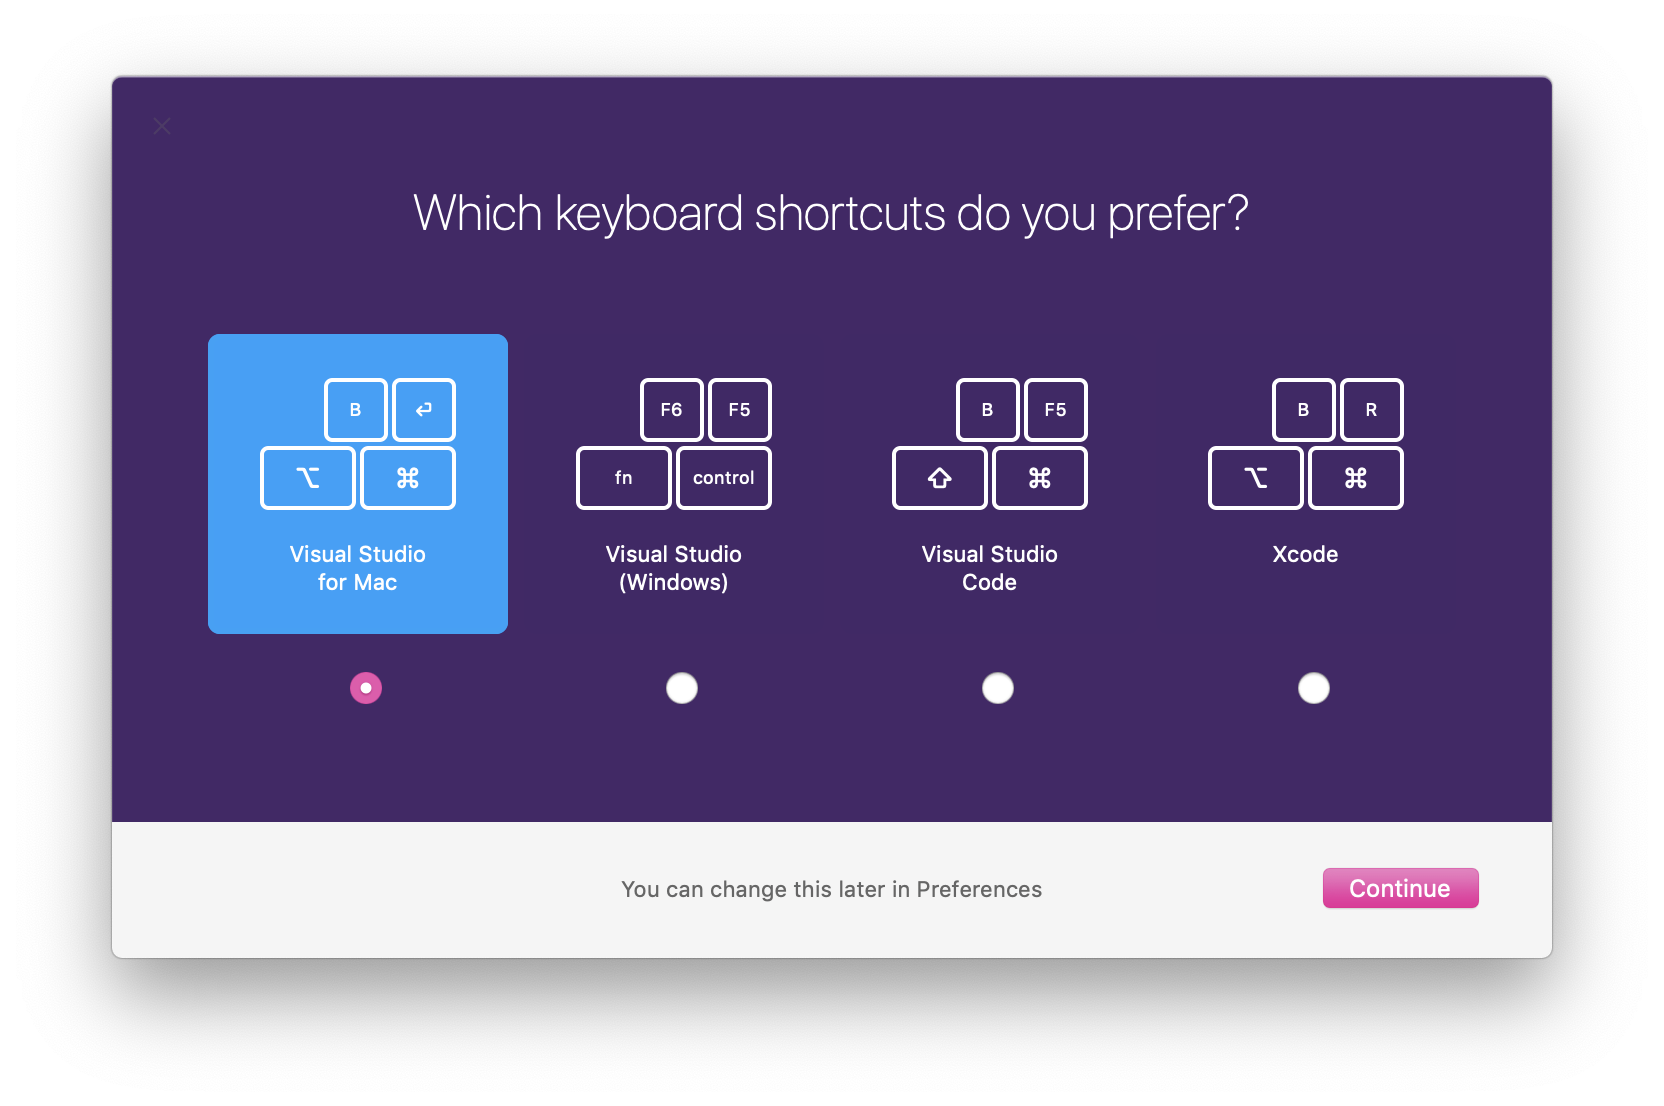
Next, you can configure the IDE to work in a way that works for you through keyboard shortcuts. I’m going to stick with Visual Studio for Mac shortcuts, but the bindings can be changed later through the Preferences menu item.
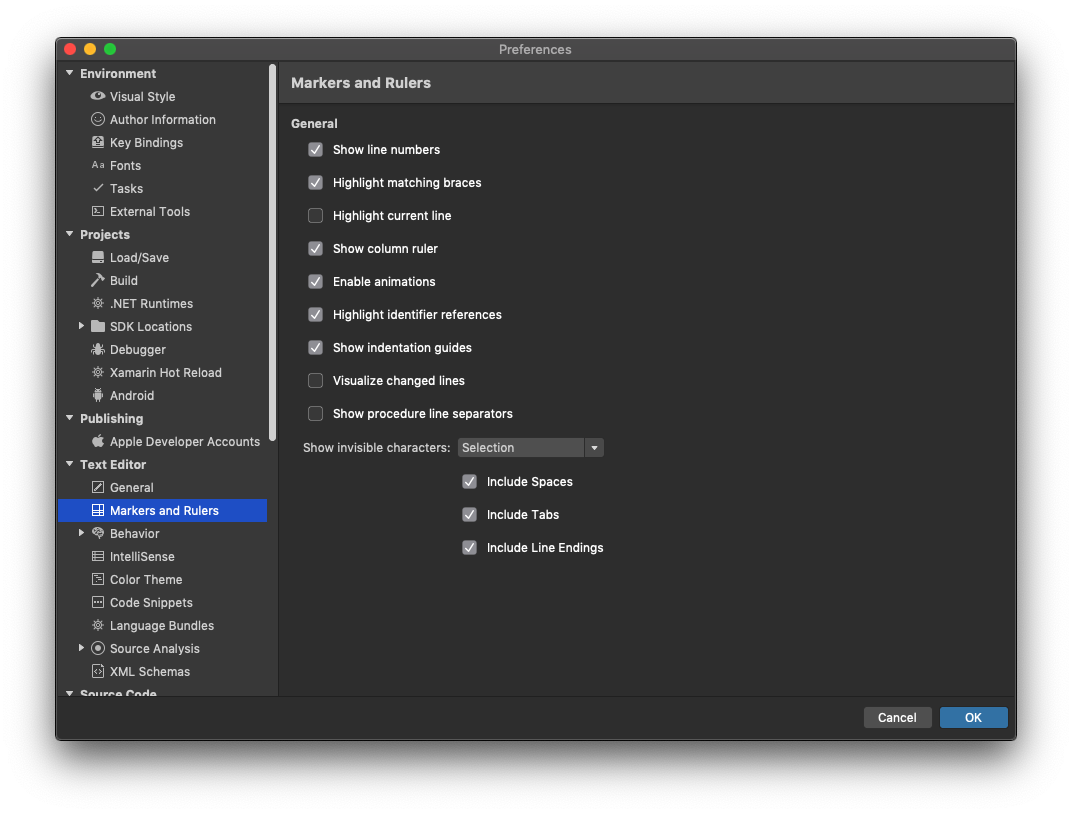
Visual Studio for Mac will then greet you with the Start Window. From here you can open an existing project from your machine, create a new project, or browse through a list of recent projects. However, before you go any further, you might want to make some changes so the IDE really works for you. This can all be done through the Preferences menu item (Visual Studio > Preferences), similar to Tools > Options in Visual Studio. Personally, I like to change to the dark theme and change my font to something bigger. I also like to show invisible characters on selection.
Create a new project
Now that you have the IDE configured in a way that works for you, you’re ready to start writing code! In the Start Window select New and then select Cloud > General > Azure Functions. In this example, I’m just using the HTTP Trigger, but you can use any template. For more information on other templates, see the Azure Functions documentation on docs.microsoft.com.
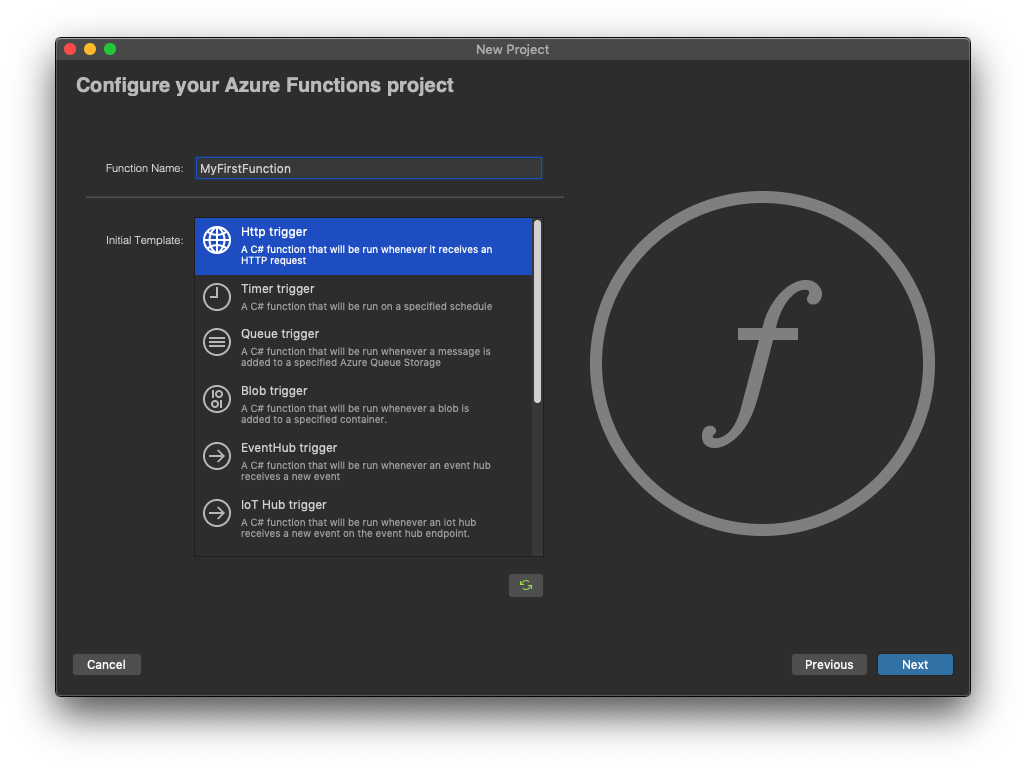
Name your project, press Next, set the Authorization level to Anonymous and click Next. If you want to use Git for version control, you can set that while creating the project. Click Create to open your project in Visual Studio for Mac:
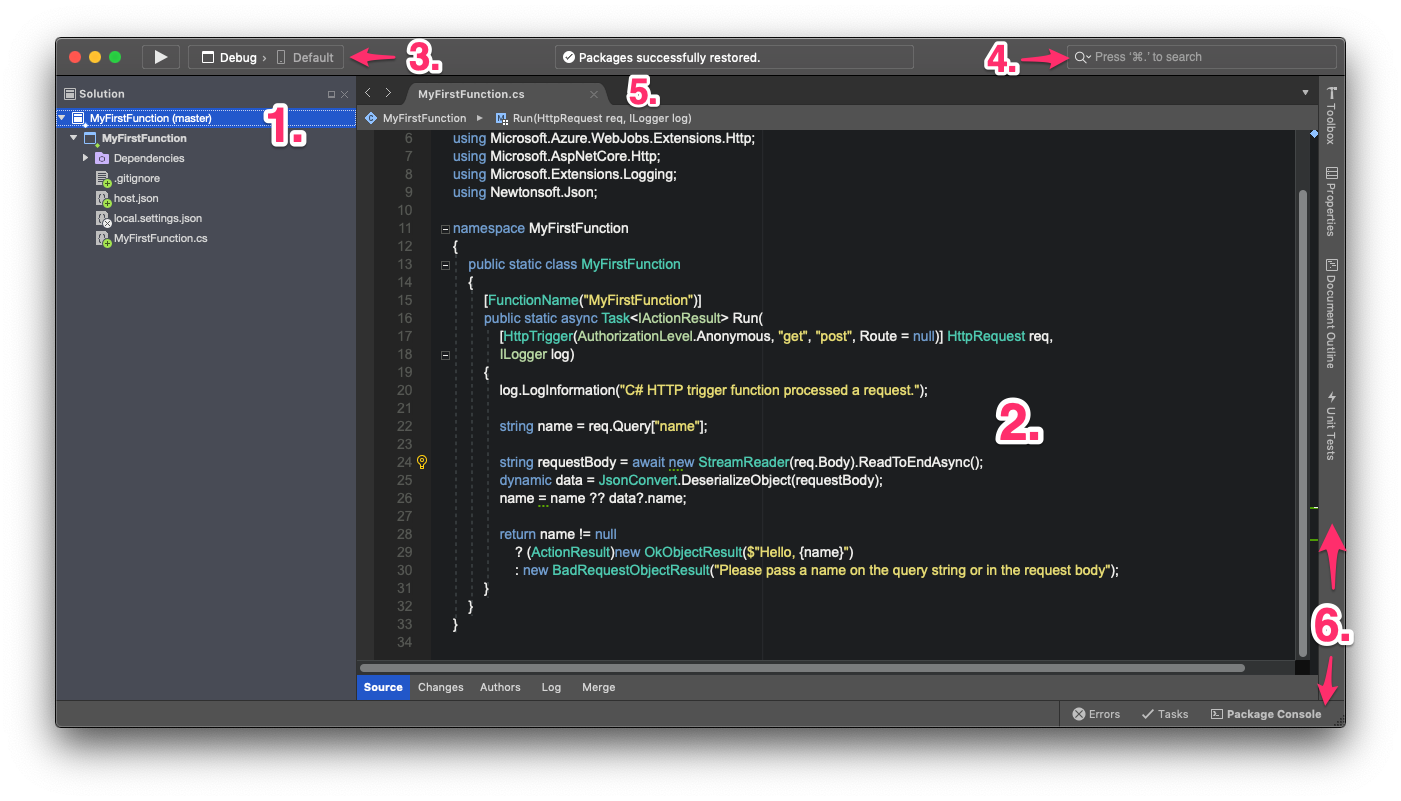
Your solution and project will be loaded and should look like the image above. The most important parts of the IDE are described below:
- Solution Pad – The solution pad organizes all the projects, files, and folders in a solution. You can right-click on any item here to see its context actions allowing you to do things such as add references and publish to azure.
- Code Editor – This is where you will likely spend most of your time. This editor shares the same code components with Visual Studio, but with a native macOS UI. For more information in the editor, see the Source Editor docs.
- Debug/Run Controls – You can use the dropdown menus to set your run configuration, including the device or platform that you want to deploy to. When you’re ready to go, press the triangular “Start” button.
- Search Box – Search within your project, commands, or for a NuGet package from here.
- Workspace – The workspace consists of a main document area (an editor, designer surface, or options file) surrounded by pads containing useful information for the task at hand.
- Additional Pads – Visual Studio for Mac Pads are analogous to Panes in Visual Studio – they’re used to show additional information, tools, and navigation aids. Depending on the type of task, different pads will be displayed automatically. For more information on using pads in your workspace, refer to the Customizing the IDE documentation.
You’re now ready to start writing some code and creating something great!
Going further
- Setting up a git repository.
- Resources on building ASP.NET Core apps using Visual Studio for Mac.
- Creating a Xamarin.Forms app.
- If you’re more familiar with Visual Studio, see our guide on some of the main differences.
- Make sure to keep up-to-date by updating.
Happy Developing! If you have any feedback or suggestions, please leave them in the comments below. You can also reach out to us on Twitter at @VisualStudioMac. For any issues that you run into when using Visual Studio for Mac, please Report a Problem.
 Light
Light Dark
Dark
1 comment
I want this – but for Linux! I am fed up with win10 spyware constantly running in the background searching my files, reporting my actions and text entry to apps, bloated footprint consuming 30GB of disk space, and worthless console, but the *IDE* is great. I have moved to running Windows in a VM because the OS is such garbage. Please give me the IDE on Linux!