
Convert a Semicolon-Delimited File to a CSV File
Summary: Learn how to convert easily a semicolon delimited file into a CSV file using Windows PowerShell.
![]() Hey, Scripting Guy! I have a problem at work, and I hope you can help. We have an application that writes one log file every four hours. These log files are formatted with semicolons, which makes them a pain to work with. My boss wants me to write a script to open each log file, search for all the semicolons, replace them with commas, save the file to a temporary file, delete the old file, and then rename the temporary file to a new format. He says I can use Windows PowerShell to do this. I have heard that Windows PowerShell is easy to use, but this sounds like a lot of work. In fact, it sounds pretty much like I would have to do the process in VBScript.
Hey, Scripting Guy! I have a problem at work, and I hope you can help. We have an application that writes one log file every four hours. These log files are formatted with semicolons, which makes them a pain to work with. My boss wants me to write a script to open each log file, search for all the semicolons, replace them with commas, save the file to a temporary file, delete the old file, and then rename the temporary file to a new format. He says I can use Windows PowerShell to do this. I have heard that Windows PowerShell is easy to use, but this sounds like a lot of work. In fact, it sounds pretty much like I would have to do the process in VBScript.
—BL
![]() Hello BL,
Hello BL,
Microsoft Scripting Guy Ed Wilson here. BL, you are right, that does sound like something one might do in VBScript. I hope your boss does not mind if you take a shortcut. In fact, we do not need to open and read the contents of the semicolon-separated file. Nor do we need to do a search-and-replace operation for the semicolon in order to replace it. We can do this because everything in Windows PowerShell is an object—even the result of an Import-CSV cmdlet.
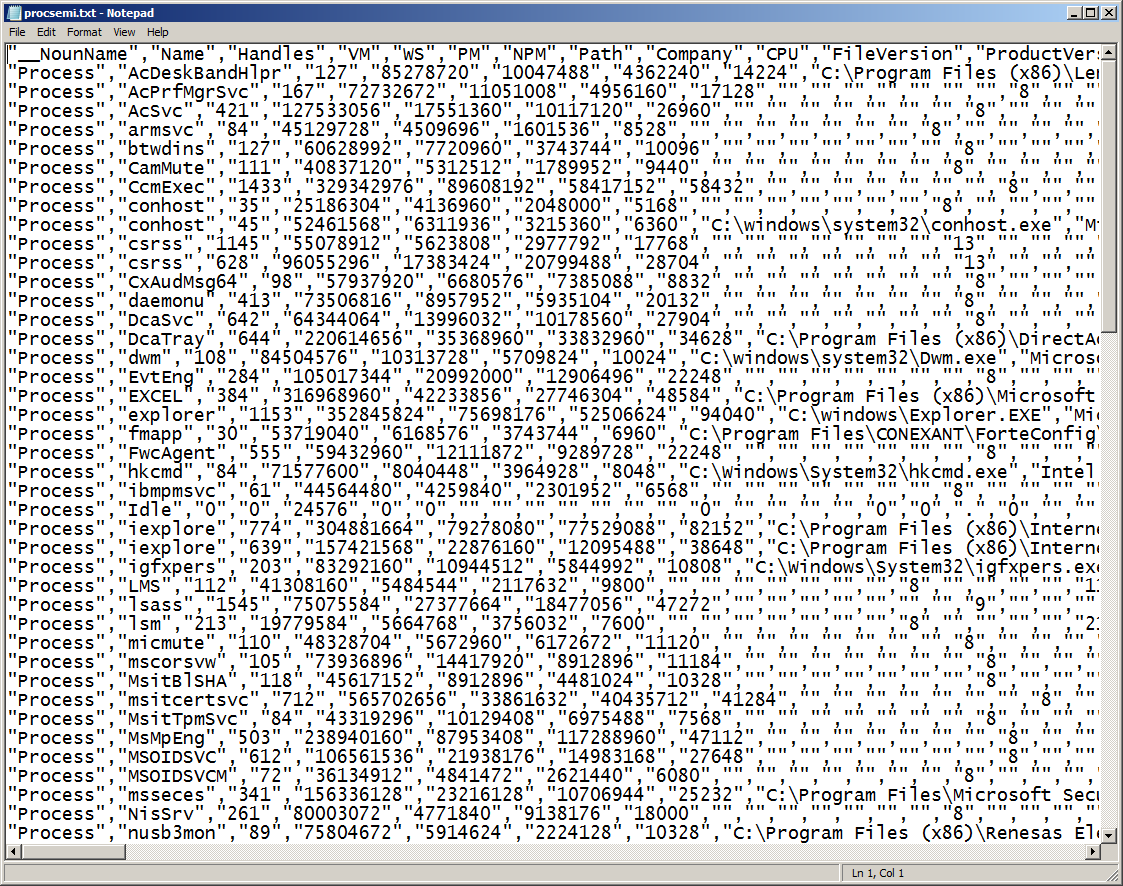
To emulate your problem, I used the Export-CSV cmdlet to export process information to a text file. In the export, I specified that I wanted to use a semicolon for the delimiter. The command I used is shown here:
Get-Process | Export-Csv -Path c:\fso\procSemi.txt -Delimiter ‘;’ –notype
The semicolon-separated file is shown in the following figure.

I can use the Import-CSV cmdlet to read a semicolon-separated file, but I must specify that the delimiter is a semicolon. If I do not specify the delimiter, the command runs, produces no errors, and does nothing but display the columns I choose. This is shown here:
PS C:\> Import-Csv -Path C:\fso\procSemi.txt | select name, handles
Name handles
When I use the delimiter parameter and specify the semicolon, the command works. The command is shown here:
Import-Csv -Path C:\fso\procSemi.txt -Delimiter ‘;’ | select name, handles
The command and associated output are shown in the following figure.

To convert from one separator to another separator, it is only necessary to pipe the results from the Import-CSV cmdlet to the Export-CSV cmdlet. When using the Import-CSV cmdlet, specify the semicolon as the delimiter. When using the Export-CSV cmdlet, specify the comma as the delimiter. The command to do this is shown here:
Import-Csv -Path C:\fso\procSemi.txt -Delimiter ‘;’ | Export-Csv -Path c:\fso\procCSV.csv -Delimiter ‘,’ -NoType
BL, you also had the requirement to delete the original text file, and to rename the newly created CSV file with the original text file’s name. This is easy to do with Windows PowerShell by using the Remove-Item cmdlet and the Rename-Item cmdlet. The use of these two cmdlets is shown here:
Remove-Item -Path C:\fso\procSemi.txt
Rename-Item -Path C:\fso\procCSV.csv -NewName procsemi.txt
Because you really want to impress your boss, this can all be accomplished on a single line. It is best to use aliases when attempting to create a single-line command because one-liners can get quite long, and it is best to conserve space. To find out aliases for the commands I used in today’s article, I use the Get-Alias cmdlet. But rather than having to type Get-Alias four different times, I can type a single command and retrieve all the aliases I used. This command and associated output are shown here:
PS C:\> Get-Alias -Definition Import-Csv, Export-Csv, Remove-Item, Rename-Item
CommandType Name Definition
Alias ipcsv Import-Csv
Alias epcsv Export-Csv
Alias del Remove-Item
Alias erase Remove-Item
Alias rd Remove-Item
Alias ri Remove-Item
Alias rm Remove-Item
Alias rmdir Remove-Item
Alias ren Rename-Item
Alias rni Rename-Item
I deleted my test file, so first I need to delete the newly renamed ProcSemi.txt file, and then recreate it. Here is the command I use from my history:
Get-Process | Export-Csv -Path c:\fso\procSemi.txt -Delimiter ‘;’ –notype
Now I need to recreate the import/export CSV command using aliases from my list above. The command shown here is a single command that imports the semicolon-separated file, exports it as a comma-separated file, deletes the original semicolon-separated file, and renames the comma-separated file to the name of the original file. This is a single logical command, and I did not include any line continuation commands:
ipcsv C:\fso\procSemi.txt -del ‘;’ | epcsv c:\fso\procCSV.csv -del ‘,’ -not; ri C:\fso\procSemi.txt ; rni c:\fso\proccsv.csv -new procsemi.txt
The newly created and renamed CSV file is shown in the following figure.
BL, that is all there is to converting the format of a delimited file. Join me tomorrow for more Windows PowerShell fun.
I invite you to follow me on Twitter and Facebook. If you have any questions, send email to me at scripter@microsoft.com, or post your questions on the Official Scripting Guys Forum. See you tomorrow. Until then, peace.
Ed Wilson, Microsoft Scripting Guy
 Light
Light Dark
Dark
0 comments