Build Your SharePoint Internet Presence with PowerShell
Summary: Learn about using Windows PowerShell to automate SharePoint.
Microsoft Scripting Guy, Ed Wilson, is here. Today we have a guest blog by Ryan Dennis.
Ryan Dennis is a senior SharePoint engineer for Information Control Corporation (ICC) in Columbus, Ohio. Ryan is a Microsoft Certified IT Professional (MCITP) and a Microsoft Virtual Technology Specialist (vTSP) in SharePoint 2010. An accomplished blogger and speaker, he has worked on SharePoint solutions in the public, non-profit, and private sectors. He focuses primarily on SharePoint architecture, automation, and middle-tier development leveraging out-of-the-box features. Ryan has worked on projects ranging from large-scale Intranet deployments to secure extranets as well as public-facing Internet site deployments. Ryan has a passion for automation, whether it is automating business processes through forms and workflow; or automating deployment, migration, and configuration using Windows PowerShell.
Ryan is one of the speakers for the Windows PowerShell Saturday event in Charlotte, North Carolina that takes place on September 15, 2012. Ryan will be speaking about using Windows PowerShell to manage SharePoint.
Blog: SHAREPOINTRYAN.COM
Twitter: https://twitter.com/SharePointRyan
Take it away Ryan…
SharePoint has been gaining a lot of traction as the web content management platform of choice for companies looking to upgrade their public-facing websites. One of the primary reasons behind this shift is that companies may already be using SharePoint for their intranet or extranet platforms, so they already have the skills, licenses, and so on to support that scenario.
There are a lot of pieces to the SharePoint for Internet sites puzzle, but some of the key pieces are related to branding, search engine optimization, and performance. That is, the site must have an elegant user interface, it should be easily crawled by search engines (such as Bing, Google, and Yahoo), and it must be optimized and cached in a way that yields solid performance.
By utilizing Windows PowerShell as an automation tool, SharePoint Internet site deployments can be automated essentially from start to finish, which can make builds, migrations and multifarm code promotion a breeze!
Using PowerShell to automate the website build
SharePoint 2010 shipped with over 500 Windows PowerShell cmdlets. Among these are cmdlets for creating web applications, content databases, site collections, and subsites. To develop a robust, elegant solution for quickly deploying complete sites, I have leaned on Windows PowerShell and XML as my two primary tools. Windows PowerShell gives us so many good cmdlets right out of the box, but the strength of Windows PowerShell is the ability to extend it by using scripts and advanced functions.
The code I am looking forward to sharing at Windows PowerShell Saturday 002 in Charlotte, North Carolina is the result of months of testing, enhancing, and more testing…and it is quite a beauty. This advanced function consists of over 700 lines of Windows PowerShell code, but I’ll break it down into a few chunks for the purposes of this post.
At a high-level, the code will do the following:
- Create one or more web applications
- Create a root site collection
- Configure BLOB and output caching
- Activate additional SharePoint features
- Create an enterprise search center site collection
- Configure search settings
- Create subsites
- Create pages
- Warm-up the site
- Launch the site in Internet Explorer when complete
Building the form dialog
One of my favorite things about Windows PowerShell is its ability to render Windows Forms by using what is essentially .NET code. For the purposes of my New-SPWebApplicationFromXml function, I launch a Windows Form to allow the user to select one or more web applications from their XML file. This will allow them to potentially create multiple web applications in one shot—a great use case for things like moving from a development environment to a staging or production environment. The code to get started with a form dialog is pretty much as simple as this:
[POWERSHELL CODE]
# Load Assemblies for System.Windows.Forms and System.Drawing #
[void] [System.Reflection.Assembly]::LoadWithPartialName(“System.Windows.Forms”)
[void] [System.Reflection.Assembly]::LoadWithPartialName(“System.Drawing”)
$objForm = New-Object System.Windows.Forms.Form
$objForm.Text = “SharePoint Web Application Deployment Wizard”
$objForm.Size = New-Object System.Drawing.Size(500,450)
$objForm.StartPosition = “CenterScreen”
$objForm.Icon = $Img
$objForm.FormBorderStyle = ‘FixedDialog’
[void] $objForm.ShowDialog()
[END POWERSHELL CODE]
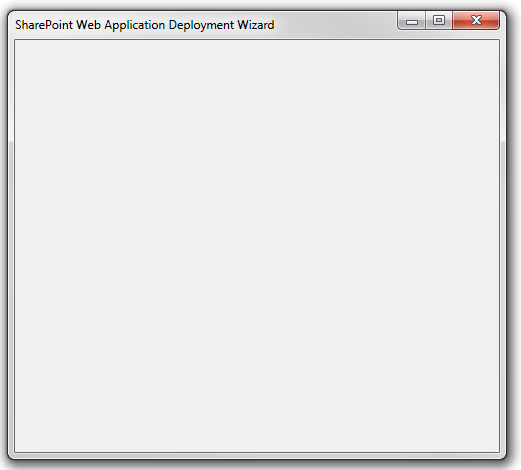
Running that code will give you this form:
That’s a pretty good start, and we can start to add other objects to the form to really make this thing sing—for example, a list box for selecting the web applications that we’ll grab from the XML file. For the full form, you’ll have to come to Windows PowerShell Saturday!
Getting the XML content
Possibly my favorite thing about Windows PowerShell is its ability to read and understand XML at a very high level. By storing the data that the script needs in XML, it allows the script to be very generic in that nothing is hard-coded, and it uses the XML file to perform its work. In addition, it prevents having to enter lots of parameters in the console.
Here is a snippet of my XML file that is used to create the web application:
[XML CODE]
<Name>Vandelay Industries</Name>
<AppPool>SharePoint – VandelayDemo</AppPool>
<AppPoolAccount>ISG1085\SpAppPool</AppPoolAccount>
<DBServer>ISG1085\SharePoint</DBServer>
<DBName>SP2010_Content_Vandelay_Demo</DBName>
<HostHeader>www.vandelay.com</HostHeader>
<InetpubPath>C:\inetpub\wwwroot\wss\VirtualDirectories</InetpubPath>
<Port>80</Port>
<Protocol>http</Protocol>
<ManagedPaths>
<ManagedPath Type=”explicit”>search</ManagedPath>
</ManagedPaths>
[END XML CODE]
You can see that in the XML, I’m providing all of the bits that we’ll need later to actually create the web application, content database, managed paths, and so on.
Using the ForEach object and SharePoint cmdlets to do the work
After we’ve provided the XML input parameter to the script, and we’ve used a nice form to select the web applications that we want to deploy. We can simply click the OK button in the form to run the script. The actual script uses a lot of ForEach looping to iterate through each selected web application, each site collection within the XML, each site within the XML, and each page within the XML.
Here is a snippet of the primary Windows PowerShell code that creates the web applications:
[POWERSHELL CODE]
if($AuthType -eq “Classic”){
try {
# Create the Web App #
New-SPWebApplication -Name $Name -ApplicationPool $ApplicationPool `
-ApplicationPoolAccount $ApplicationPoolAccount -DatabaseName $DatabaseName `
-DatabaseServer $DatabaseServer -HostHeader $HostHeader -Port $Port `
-Path $WebsitePath -Url $HostHeader -WarningAction SilentlyContinue | Out-Null
}
catch {throw “Unable to create the web application”}
}
[END POWERSHELL CODE]
In this code snippet, I use an if statement to run this code if the Authentication Type specified in the XML is Classic. Although claims-based authentication is the way going forward, in this example, I use Classic. I then use a try/catch block to create the web application by using the New-SPWebApplication cmdlet. I provide all of the parameters needed from variables that have been created already to grab the content from the XML file. I pipe my output to the Out-Null cmdlet to prevent the returned web application object from showing up in the console.
Putting it all together
Now that we’ve seen some of the things we can do, here are some screenshots to illustrate the flow of the advanced function:
[POWERSHELL SNIPPET]
PS>New-SPWebApplicationFromXml –XmlInput .\DemoSites.xml
[END SNIPPET]
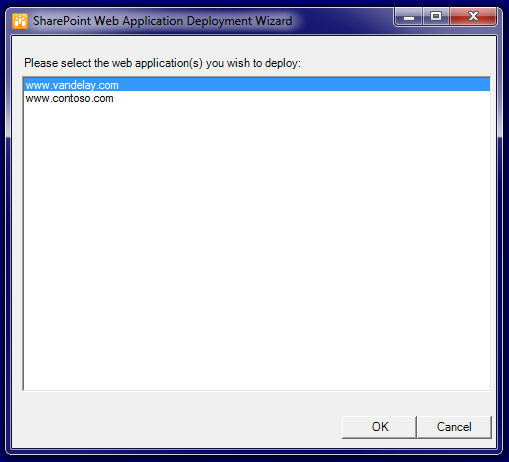
Running the previous line (after dot-sourcing the script file) will result in launching the form dialog and displaying all the web applications that exist in the XML file:
When we click OK, the script will start to run, and its progress will be constantly updated by using the built-in Write-Progress cmdlet as shown here.
In this post, we’ve looked at creating windows forms; leveraging XML as the input for scripts; and creating the web applications, site collections, sites, and pages by using Windows PowerShell. Although I didn’t show you all of the code, I hope that this has been informative, and if you come out to the second ever Windows PowerShell Saturday in Charlotte, NC on September 15, you’ll see the full story and hopefully leave with lots of great ideas about how to take Windows PowerShell to the next level!
~Ryan
I want to thank Ryan for taking the time to come to Charlotte, North Carolina to speak at Windows PowerShell Saturday. I also want to thank him for writing this most excellent blog. If you have questions about using Windows PowerShell and SharePoint, come to Windows PowerShell Saturday and ask Ryan.
Join me tomorrow for more cool Windows PowerShell stuff.
I invite you to follow me on Twitter and Facebook. If you have any questions, send email to me at scripter@microsoft.com, or post your questions on the Official Scripting Guys Forum. See you tomorrow. Until then, peace.
Ed Wilson, Microsoft Scripting Guy


 Light
Light Dark
Dark
0 comments