
Using Azure DevOps to Deploy Web Applications to Virtual Machines
App Dev Manager Jafar Jaffery explores how to use Azure DevOps to deploy apps to Virtual Machines.
Overview
In this post, I will cover a basic end-to-end example of deploying an ASP.NET MVC web application from source code to Production using Azure DevOps. The web app will be hosted within Windows Virtual Machines (VMs). While it’s worth mentioning that hosting web applications using Azure PaaS offerings or via containers would be the preferred route for a variety of reasons, VMs are still widely used in many organizations. With that scenario in mind, this post is geared to helping you get started with streamlining your release process. As a note, much of this process translates easily to using Azure PaaS offerings.
CI/CD Pipeline
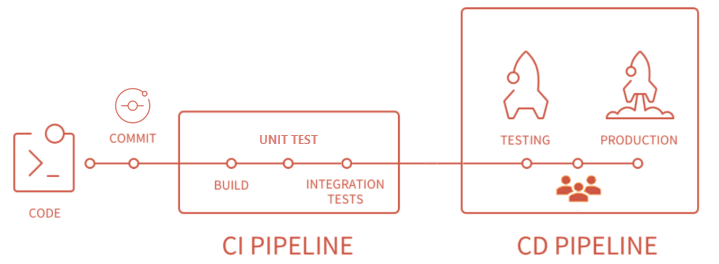
The diagram below outlines the CI/CD (Continuous Integration/Continuous Delivery) pipeline we’ll be setting up. The CI/CD pipeline is a practice used by DevOps teams for delivering code changes more frequently and reliably. This enables agile teams to shorten cycle times, improve quality, and deliver value faster. The pipeline below is not intended to be fully comprehensive (e.g., no UI testing, security scanning, load testing, etc.), but has the core components needed to get started. The only prerequisites needed here are your VMs, and an Azure DevOps account (or alternatively, using Azure DevOps Server, previously known as Team Foundation Server).
Continuous Integration – Code / Build / CI Trigger
Follow these steps to setup the build:
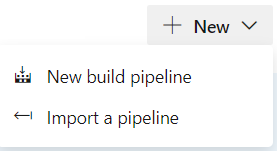
- Go to Pipelines >> Builds >> New build pipeline
- Select your Project / Repo / Default Branch
- Select the ASP.NET template
- Save the build
Once setup, the build should something like this:
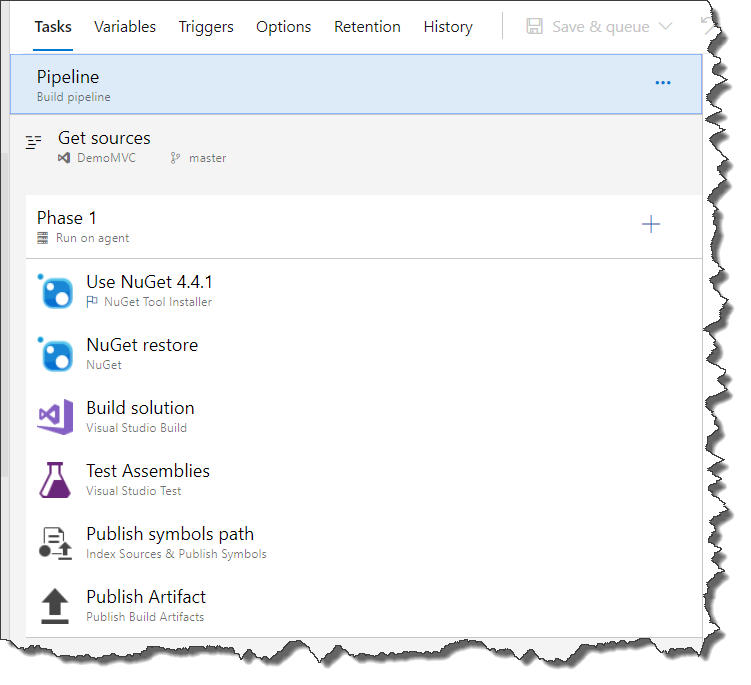 |
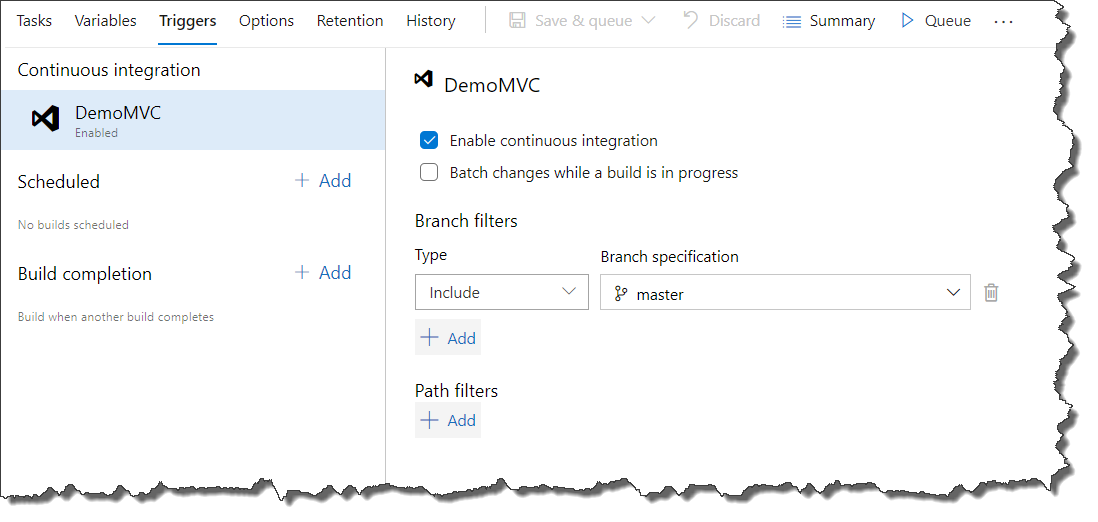
To enable the CI part of the pipeline, go to the Triggers tab in the build, and check the box for “Enable continuous integration”. The build will now be triggered whenever any code changes are committed to the repository for the branch specified. As a good general practice, you should have your CI/CD commits done using Pull Requests in conjunction with a branching strategy.
Continuous Delivery
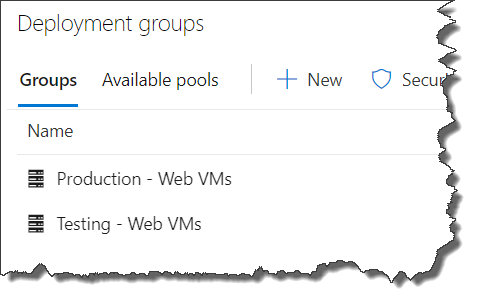
Deployment Groups
A deployment group is a logical set of deployment target machines that have agents installed on each one. Deployment groups represent the physical environments; for example, “Dev”, “Test”, “UAT”, and “Production”. To setup a deployment group, follow these steps. Once setup, this can be used within the release.
Release
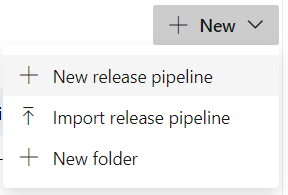
A release pipeline takes in the artifact created from the build and releases it through the various stages or environments. To create a new release pipeline, go to Pipelines >> Releases >> New release pipeline.
From here, select the “IIS website deployment” template as this will get the basic tasks in place
Once completed using the steps outlined below, the release pipeline should look like this:
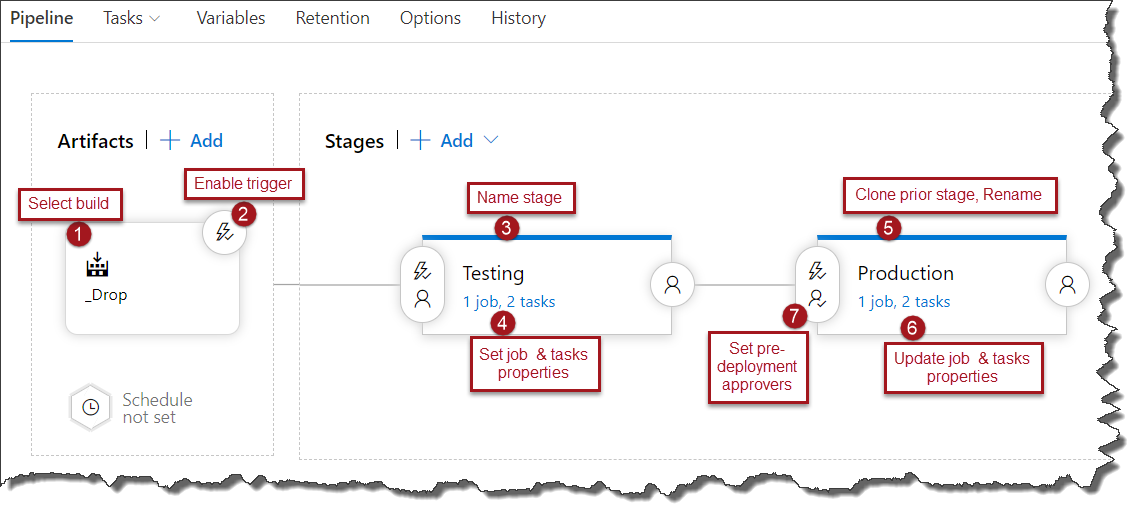
Follow the steps shown in the diagram above:
- Select the source build pipeline. This is build we created earlier.
- Enable the continuous deployment trigger.
- Name the stage to your first environment, which in our case is “Testing”.
- Set the properties for the “Testing” deployment job & IIS tasks for that job.
- Clone the Testing task:
 Then change the name of the stage to your second environment, which in our case is “Production”.
 - Set the properties for the “Production” deployment job & IIS tasks for that job.
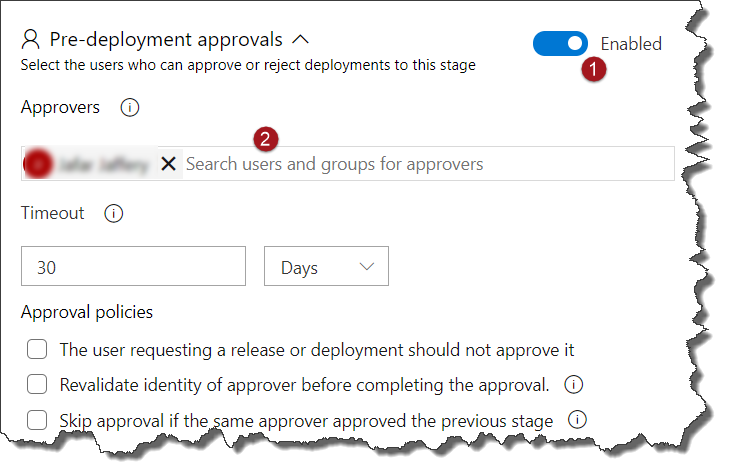
- Set the pre-deployment approvers for “Production” as follows:
Variable Substitution for Environment-Specific Values
The final piece of the picture here is to ensure that we have the correct config values for each environment we deploy to. To do this, we’ll use variable substitution, which is a built-in feature of Azure DevOps that facilitates substituting your environment-specific values without having to use any specialized tokes in your config files or resorting to creating/maintaining transform files for each environment. In order to deploy the same package across multiple environments, you can use XML variable substitution. In case your project has any JSON config files, you can also use JSON variable substitution.
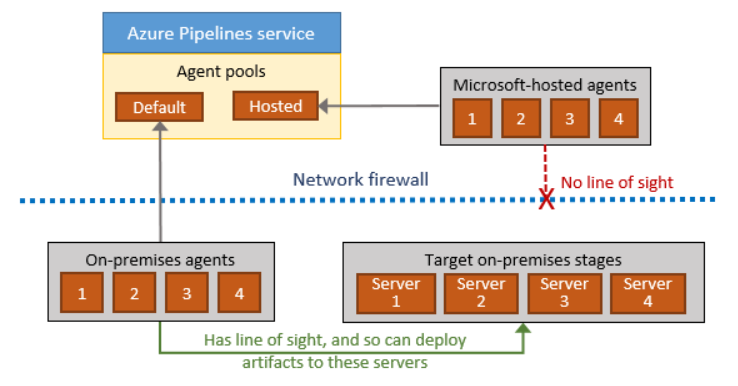
On-Premise VM Considerations
For the purposes of this setup, VMs can be host in Azure or On-Premise. For VMs hosted in Azure, you can use hosted agents in Azure DevOps. In case the VMs are hosted on-premise, you’ll have to setup self-hosted agents to provide Azure DevOps visibility to the VMs, as shown in the diagram below. You can get more information on agents in the MS Docs here.
Conclusion
As I’ve demonstrated here, Azure DevOps offers a robust & easy to set-up platform for your Pipelines. When you use this in unison with the other out-of-box components (Boards, Repos, Test Plans, Artifacts) along with the rich library of marketplace extensions (SonarQube, Docker, Chef, Jenkins, WhiteSource, Slack, Teams, Octopus, etc.), you get a complete DevOps setup. You can get more information on these Azure DevOps components here: https://azure.microsoft.com/en-us/services/devops/.
 Light
Light Dark
Dark
0 comments